UnderCoverFab Tummy Tuck
5 posters
Page 1 of 1
 UnderCoverFab Tummy Tuck
Spent the (gorgeous) day under the Jeep Friday.
I started around noon and ended around 6pm, and in that time got everything done while only making one phone call to Matt at UCF. No need for a huge step by step write-up for this as many exist, but a quick walk-through won't hurt for anyone interested in buying the system. Because of my NP231 TC I am able to do a LoPro mount and Ultra-High Clearance skid without a body lift or MML. Surprisingly, this is correct. Even after raising the drivetrain today I am completely vibe free to 60mph - didn't test it further than that - and it drives nicely. There certainly are a few more noticeable idle vibrations through the bushing in the LoPro mount, and it was a little jerkier sitting at red lights than I remember the OEM being.
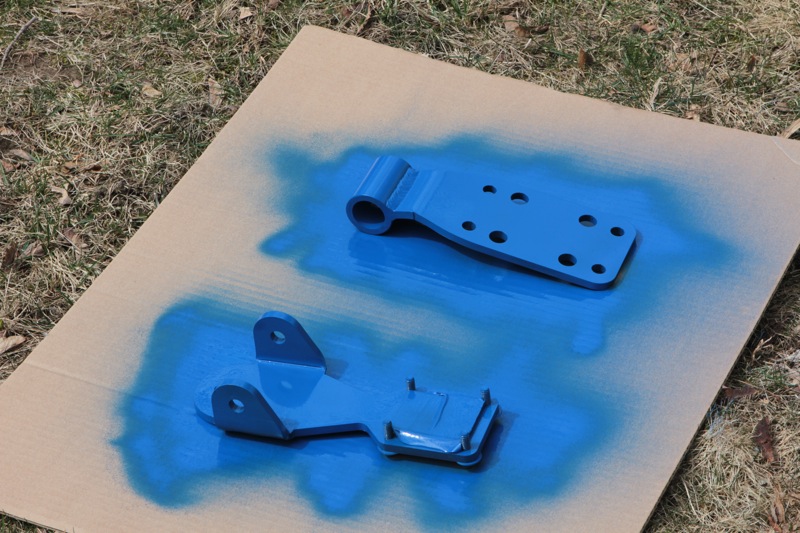
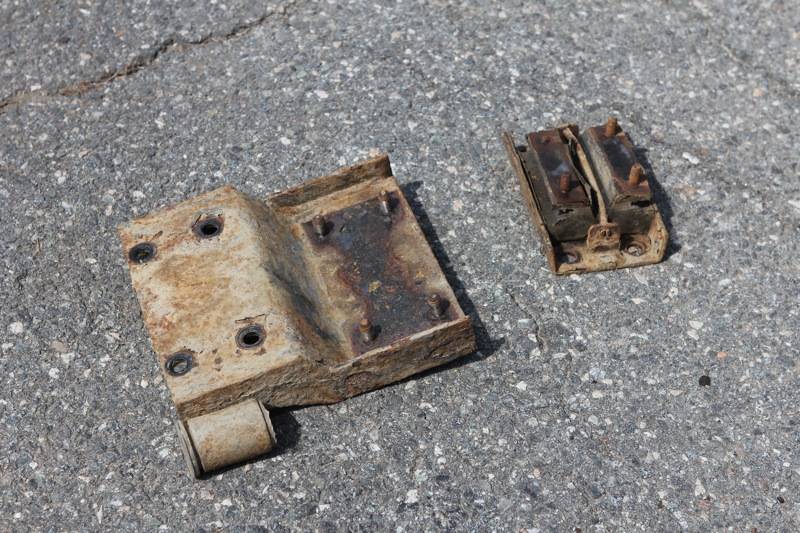
After measuring my "before" height to the frame rail, I went ahead and dropped the stock skid. From there it's a matter of removing the tranny skid plate bushing from the transmission mount. Mine sure had seen better days. Once that was down, removing the entire transmission mount. I was truly surprised that the bolts holding it into the transmission housing came out with only a little effort, considering they probably haven't moved since the factory installed them. At that point the LoPro mount had been disassembled and was being painted, unfortunately I only found Blue Rustoleum after painting the frame sections last week, so the LoPro is Royal Blue… one of a kind!
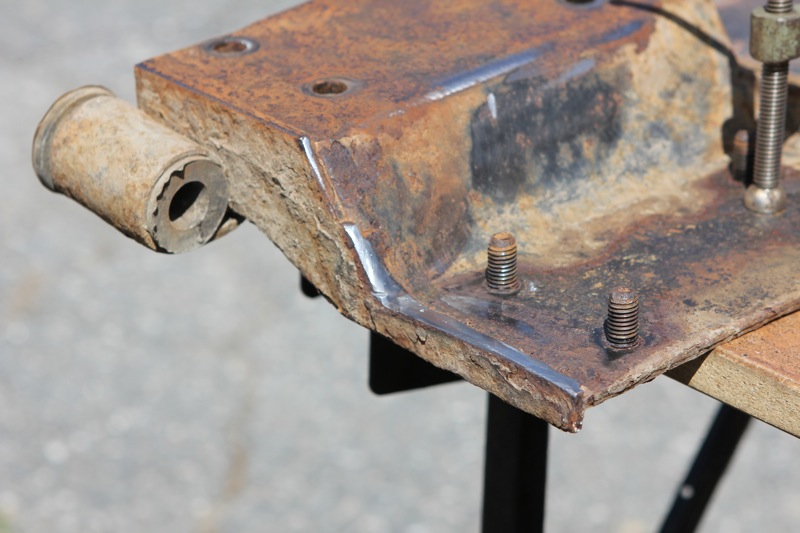
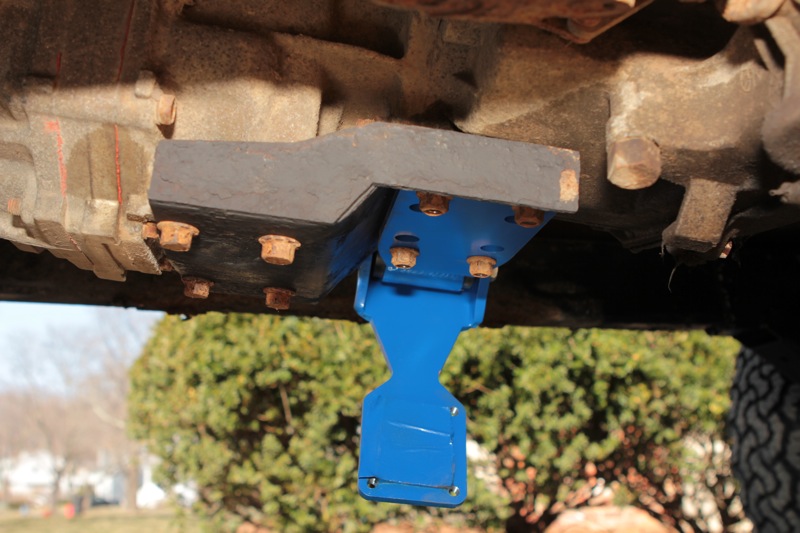
It requires some modifying of the OEM tranny mount in order for the LoPro to sit correctly. I took a grinder to the passenger side of the mount and removed a 1/2" tall lip that existed on both sides. By removing this the LoPro is able to be flush across the transmission mount. A flapper disc smoothed it out, and I went over the metal with some paint to clean it up. From there, it was installation time! Took a few tries to get things buttoned up (i.e. the transfer case skid bolts into the frame rails appropriately) but once that was done I was able to finagle the Catalytic Converter back into place without much issue. Unfortunately the Walker muffler I bought in December is too large to fit now, so I'll have to see about buying a (much) smaller muffler. For now it's simply LOUD and just has a turndown at the end of the Cat.
<b>Before Height to Skid-</b> 16 3/4"
<b>After Height to Skid-</b> 19"
I'll look at the engine skid when I get back from Chicago and San Francisco, which I fly out for today. Just wanted to get this done before I left. Thumbs up so far… I didn't paint it yet, but I think with it being aluminum I've got a little while before I have to.
Photos (thankfully the iPhone photo kick is now over!!! Back to quality dSLR ones)
How it comes from UCF:

Bracketry for Engine Skid & LoPro:

16 3/4"

Comparison (don't mind my neighbor's f'd up house)

Disassembled and painted:
Tranny mount & bushing:
Trimming the Transmission mount:

Ground Smooth:
Painted and bolted up:
Fitting to place:
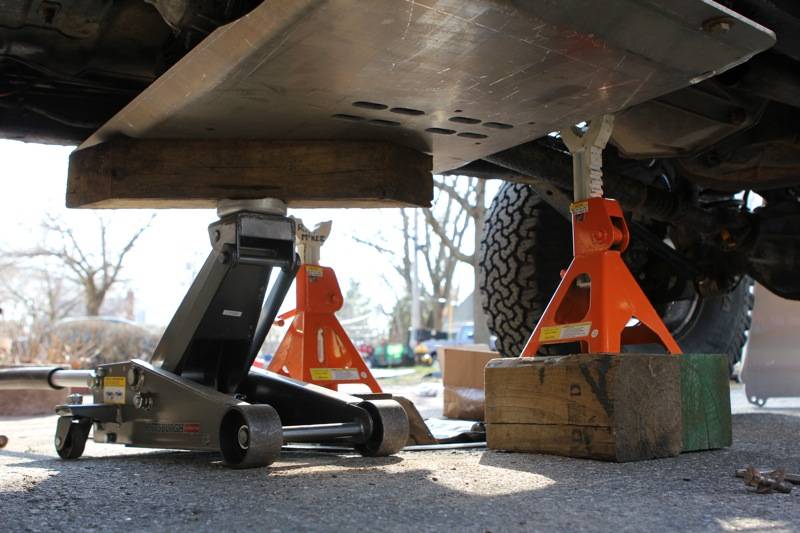
Before:
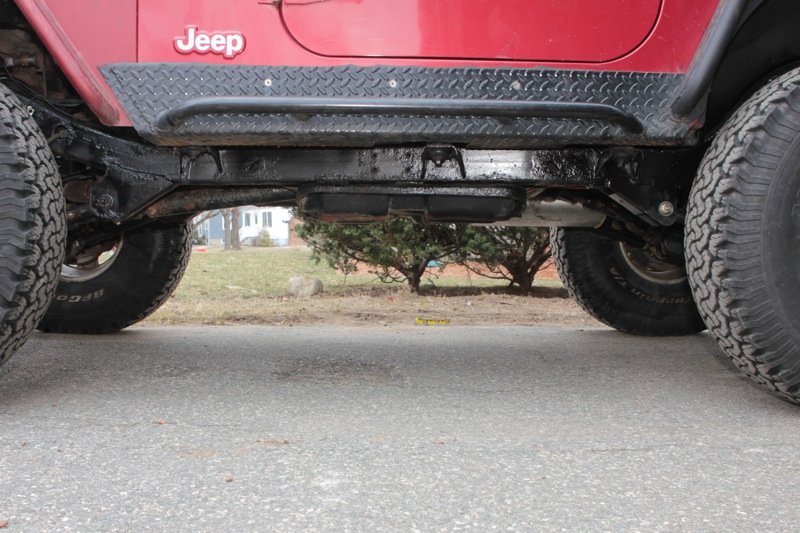
After:
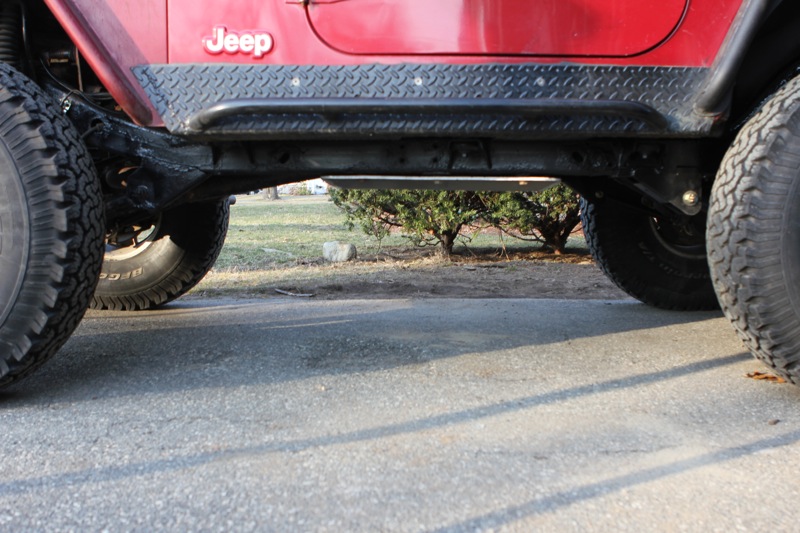
I started around noon and ended around 6pm, and in that time got everything done while only making one phone call to Matt at UCF. No need for a huge step by step write-up for this as many exist, but a quick walk-through won't hurt for anyone interested in buying the system. Because of my NP231 TC I am able to do a LoPro mount and Ultra-High Clearance skid without a body lift or MML. Surprisingly, this is correct. Even after raising the drivetrain today I am completely vibe free to 60mph - didn't test it further than that - and it drives nicely. There certainly are a few more noticeable idle vibrations through the bushing in the LoPro mount, and it was a little jerkier sitting at red lights than I remember the OEM being.
After measuring my "before" height to the frame rail, I went ahead and dropped the stock skid. From there it's a matter of removing the tranny skid plate bushing from the transmission mount. Mine sure had seen better days. Once that was down, removing the entire transmission mount. I was truly surprised that the bolts holding it into the transmission housing came out with only a little effort, considering they probably haven't moved since the factory installed them. At that point the LoPro mount had been disassembled and was being painted, unfortunately I only found Blue Rustoleum after painting the frame sections last week, so the LoPro is Royal Blue… one of a kind!
It requires some modifying of the OEM tranny mount in order for the LoPro to sit correctly. I took a grinder to the passenger side of the mount and removed a 1/2" tall lip that existed on both sides. By removing this the LoPro is able to be flush across the transmission mount. A flapper disc smoothed it out, and I went over the metal with some paint to clean it up. From there, it was installation time! Took a few tries to get things buttoned up (i.e. the transfer case skid bolts into the frame rails appropriately) but once that was done I was able to finagle the Catalytic Converter back into place without much issue. Unfortunately the Walker muffler I bought in December is too large to fit now, so I'll have to see about buying a (much) smaller muffler. For now it's simply LOUD and just has a turndown at the end of the Cat.
<b>Before Height to Skid-</b> 16 3/4"
<b>After Height to Skid-</b> 19"
I'll look at the engine skid when I get back from Chicago and San Francisco, which I fly out for today. Just wanted to get this done before I left. Thumbs up so far… I didn't paint it yet, but I think with it being aluminum I've got a little while before I have to.
Photos (thankfully the iPhone photo kick is now over!!! Back to quality dSLR ones)
How it comes from UCF:

Bracketry for Engine Skid & LoPro:

16 3/4"

Comparison (don't mind my neighbor's f'd up house)

Disassembled and painted:

Tranny mount & bushing:

Trimming the Transmission mount:

Ground Smooth:

Painted and bolted up:

Fitting to place:

Before:

After:

 Re: UnderCoverFab Tummy Tuck
Nice work dude! Bet it feels good!
I did the same over this weekend, got my Under Armor crossmember installed and driveshaft/control arms on. Just need to do the Novak before buttoning up the skids!
I also had to cut the exhaust off right after the cat, man is it loud!
I did the same over this weekend, got my Under Armor crossmember installed and driveshaft/control arms on. Just need to do the Novak before buttoning up the skids!
I also had to cut the exhaust off right after the cat, man is it loud!
Last edited by janesy on 4/8/2013, 9:04 am; edited 1 time in total

janesy- Rausch Creek
- Posts : 330
Join date : 2012-04-03
Age : 38
Location : Beverly, MA
 Re: UnderCoverFab Tummy Tuck
How did the UA go in?

dongalonga- Rubicon Trail
- Posts : 1047
Join date : 2012-03-20
Age : 40
Location : Lowell, MA
 Re: UnderCoverFab Tummy Tuck
Ryan, is that skid made from aluminum,looks like it is. I like aluminum, it is so much lighter and is very strong. Good to see that you did not use body lift.
Great job, I hope to get that set up eventually.
Great job, I hope to get that set up eventually.
Last edited by Mark on 4/8/2013, 9:14 am; edited 1 time in total

Mark- Rubicon Trail
- Posts : 1300
Join date : 2011-12-10
Location : Haverhill, MA
 Re: UnderCoverFab Tummy Tuck
dongalonga wrote:How did the UA go in?
Not going to lie, it was kinda a bitch. The crossmember I had to pull several times to trim slightly and the trans mount needed the holes slotted, because it didn't line up. Which I have read on a few threads. But I also suspect I had some clearance issues with the Rubi Tcase and auto trans since they are so big.
Its basically done. Just need to bolt up skids but want to get the Novak on first. Up to 75mph and no vibes, so I'd call that a success!

Sorry to hijack Ryan.

janesy- Rausch Creek
- Posts : 330
Join date : 2012-04-03
Age : 38
Location : Beverly, MA
 Re: UnderCoverFab Tummy Tuck
Sounds like a blast! Ryan yours came out really nice too.

dongalonga- Rubicon Trail
- Posts : 1047
Join date : 2012-03-20
Age : 40
Location : Lowell, MA
 Re: UnderCoverFab Tummy Tuck
Ryan,, check rear drive shaft angle at rear u joint as we did previously, it may have changed and you may have to lengthen rear uppers.

Mark- Rubicon Trail
- Posts : 1300
Join date : 2011-12-10
Location : Haverhill, MA
 Re: UnderCoverFab Tummy Tuck
Mark wrote:Ryan,, check rear drive shaft angle at rear u joint as we did previously, it may have changed and you may have to lengthen rear uppers.
It's currently up at Steve's getting a 4WD alignment, thoroughly enough that all 8 control arms will be measured, adjusted, and set appropriately for the correct angles all around. And yes, it's 1/4" aluminum!
Nick- are you painting yours?
 Re: UnderCoverFab Tummy Tuck
Ryan M wrote:
Nick- are you painting yours?
Shaun had already painted all the steel pieces black and not sure if it was the final color or just primer, but the aluminum parts were a tanish color, so I painted them black as well.
For you, if you want to leave it raw, put atleast a clear coat over it, so there is no corrosion.

janesy- Rausch Creek
- Posts : 330
Join date : 2012-04-03
Age : 38
Location : Beverly, MA
 Re: UnderCoverFab Tummy Tuck
Looks awesome Ryan! For a tiny muffler, you can get this one.
http://www.ebay.com/itm/FULL-BOAR-Flow-Deflector-1-chamber-RACE-muffler-2-5-/400147485295#vi-content
http://www.ebay.com/itm/FULL-BOAR-Flow-Deflector-1-chamber-RACE-muffler-2-5-/400147485295#vi-content

saxmanclay- Mall Crawler
- Posts : 79
Join date : 2011-12-10
Age : 36
Location : Hanson
Page 1 of 1
Permissions in this forum:
You cannot reply to topics in this forum|
|
|

 Home
Home