Tacocat is a palindrome
+3
Rob Cote
dongalonga
Tonellin
7 posters
Page 3 of 3
Page 3 of 3 •  1, 2, 3
Mark- Rubicon Trail
- Posts : 1300
Join date : 2011-12-10
Location : Haverhill, MA
 Re: Tacocat is a palindrome
So I'm definitely keeping 4WD...
Does that make it a post-runner?
Does that make it a post-runner?

Rob Cote- Moab Dessert
- Posts : 673
Join date : 2012-07-11
Age : 36
Location : Ipswich, MA
 Re: Tacocat is a palindrome
I posted this on a different forum, so some of it may read a little weird. But I didn't feel like typing it all again.
The truck has about 180,000 miles at the time of the lift. The suspension was probably not original? But I don't really know. It was tired, but not 180k-miles-tired. The rear leafs were curved down on flat ground with no load in the bed. I had previously replaced the tires with what I had read was the largest size that would fit on stock suspension without rubbing. The front tires rubbed. I had removed the front mud flaps so the tires wouldn't rub on the bolt heads that hold them in, but it didn't entirely eliminate the issue. On the highway, bumps and bridge expansion joints were sketchy. The truck had a tendency to drift half a lane over bumps at speed. It was also very....squishy, for lack of a more descriptive word. The shocks weren't totally spent; they did dampen the bumps, just not as much as I wanted.
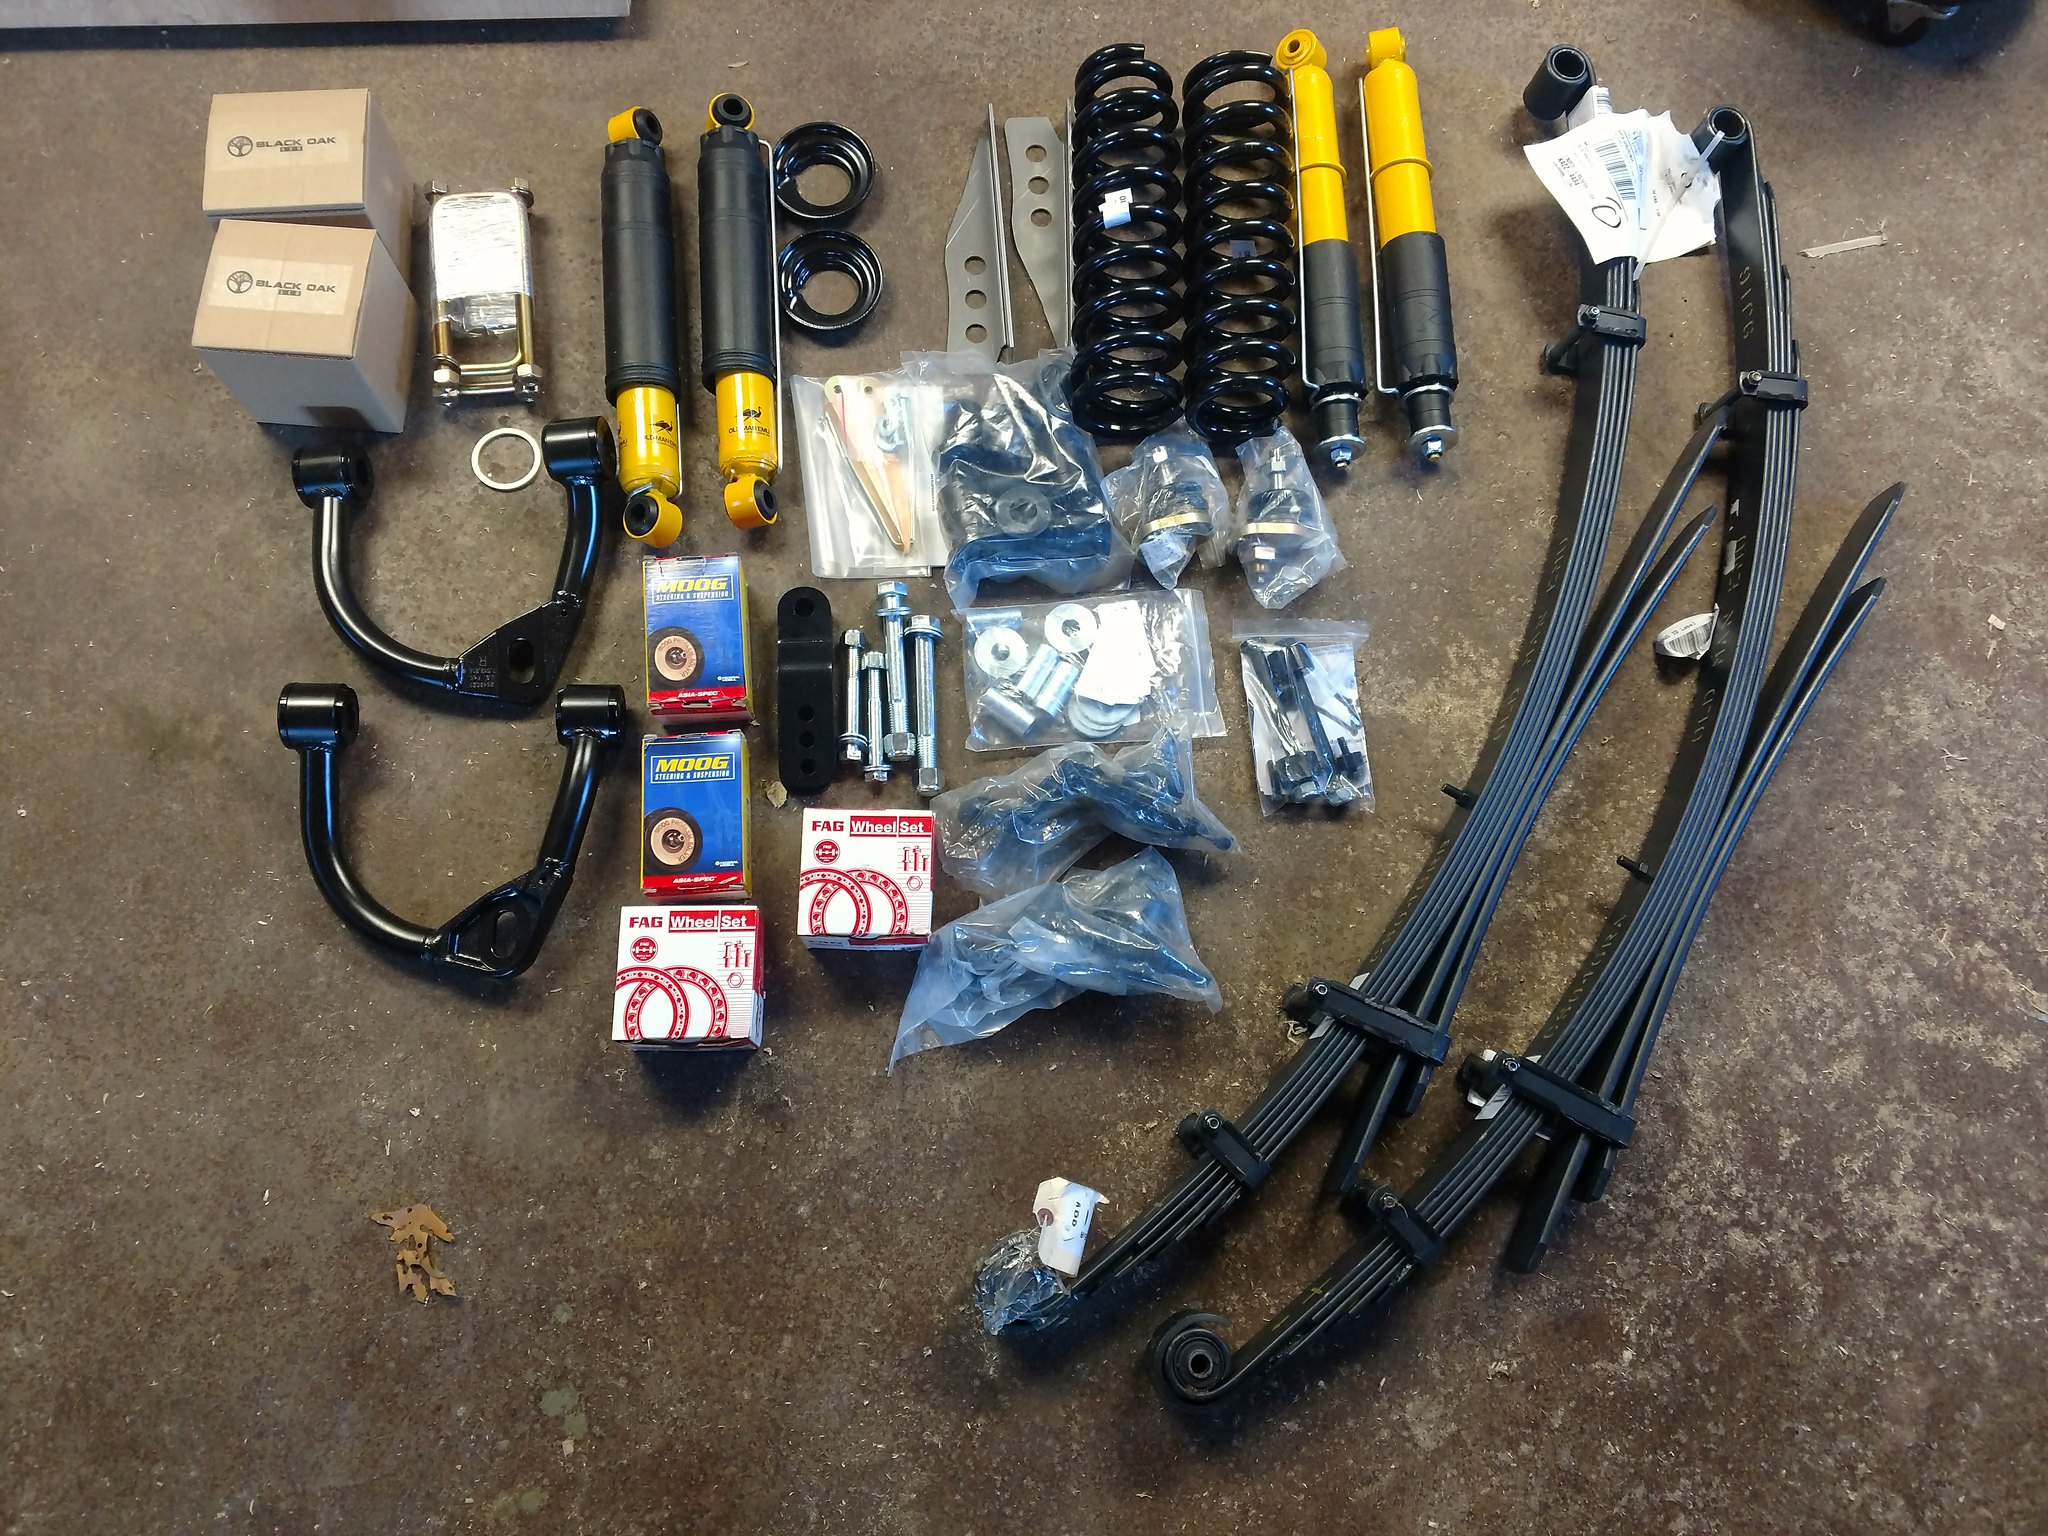
So I pieced together a kit. I sourced parts from all over; Toytec, Amazon, Rock Auto, Toyotapartsdeal.com, Autozone, and Home Depot. Home Depot was just some consumables stuff; primer and a wire wheel. Initially, I just wanted it to be a bit taller, and to have better shocks. There's a few ways to do this. Since the rear leafs were so old, and some are prone to breaking, I ruled out spacers and Add-A-Leaf kits as viable options. I decided I'd replace the entire leaf packs with Dakar leaf packs from Old Man Emu. Here's how UPS delivered them :laugh::
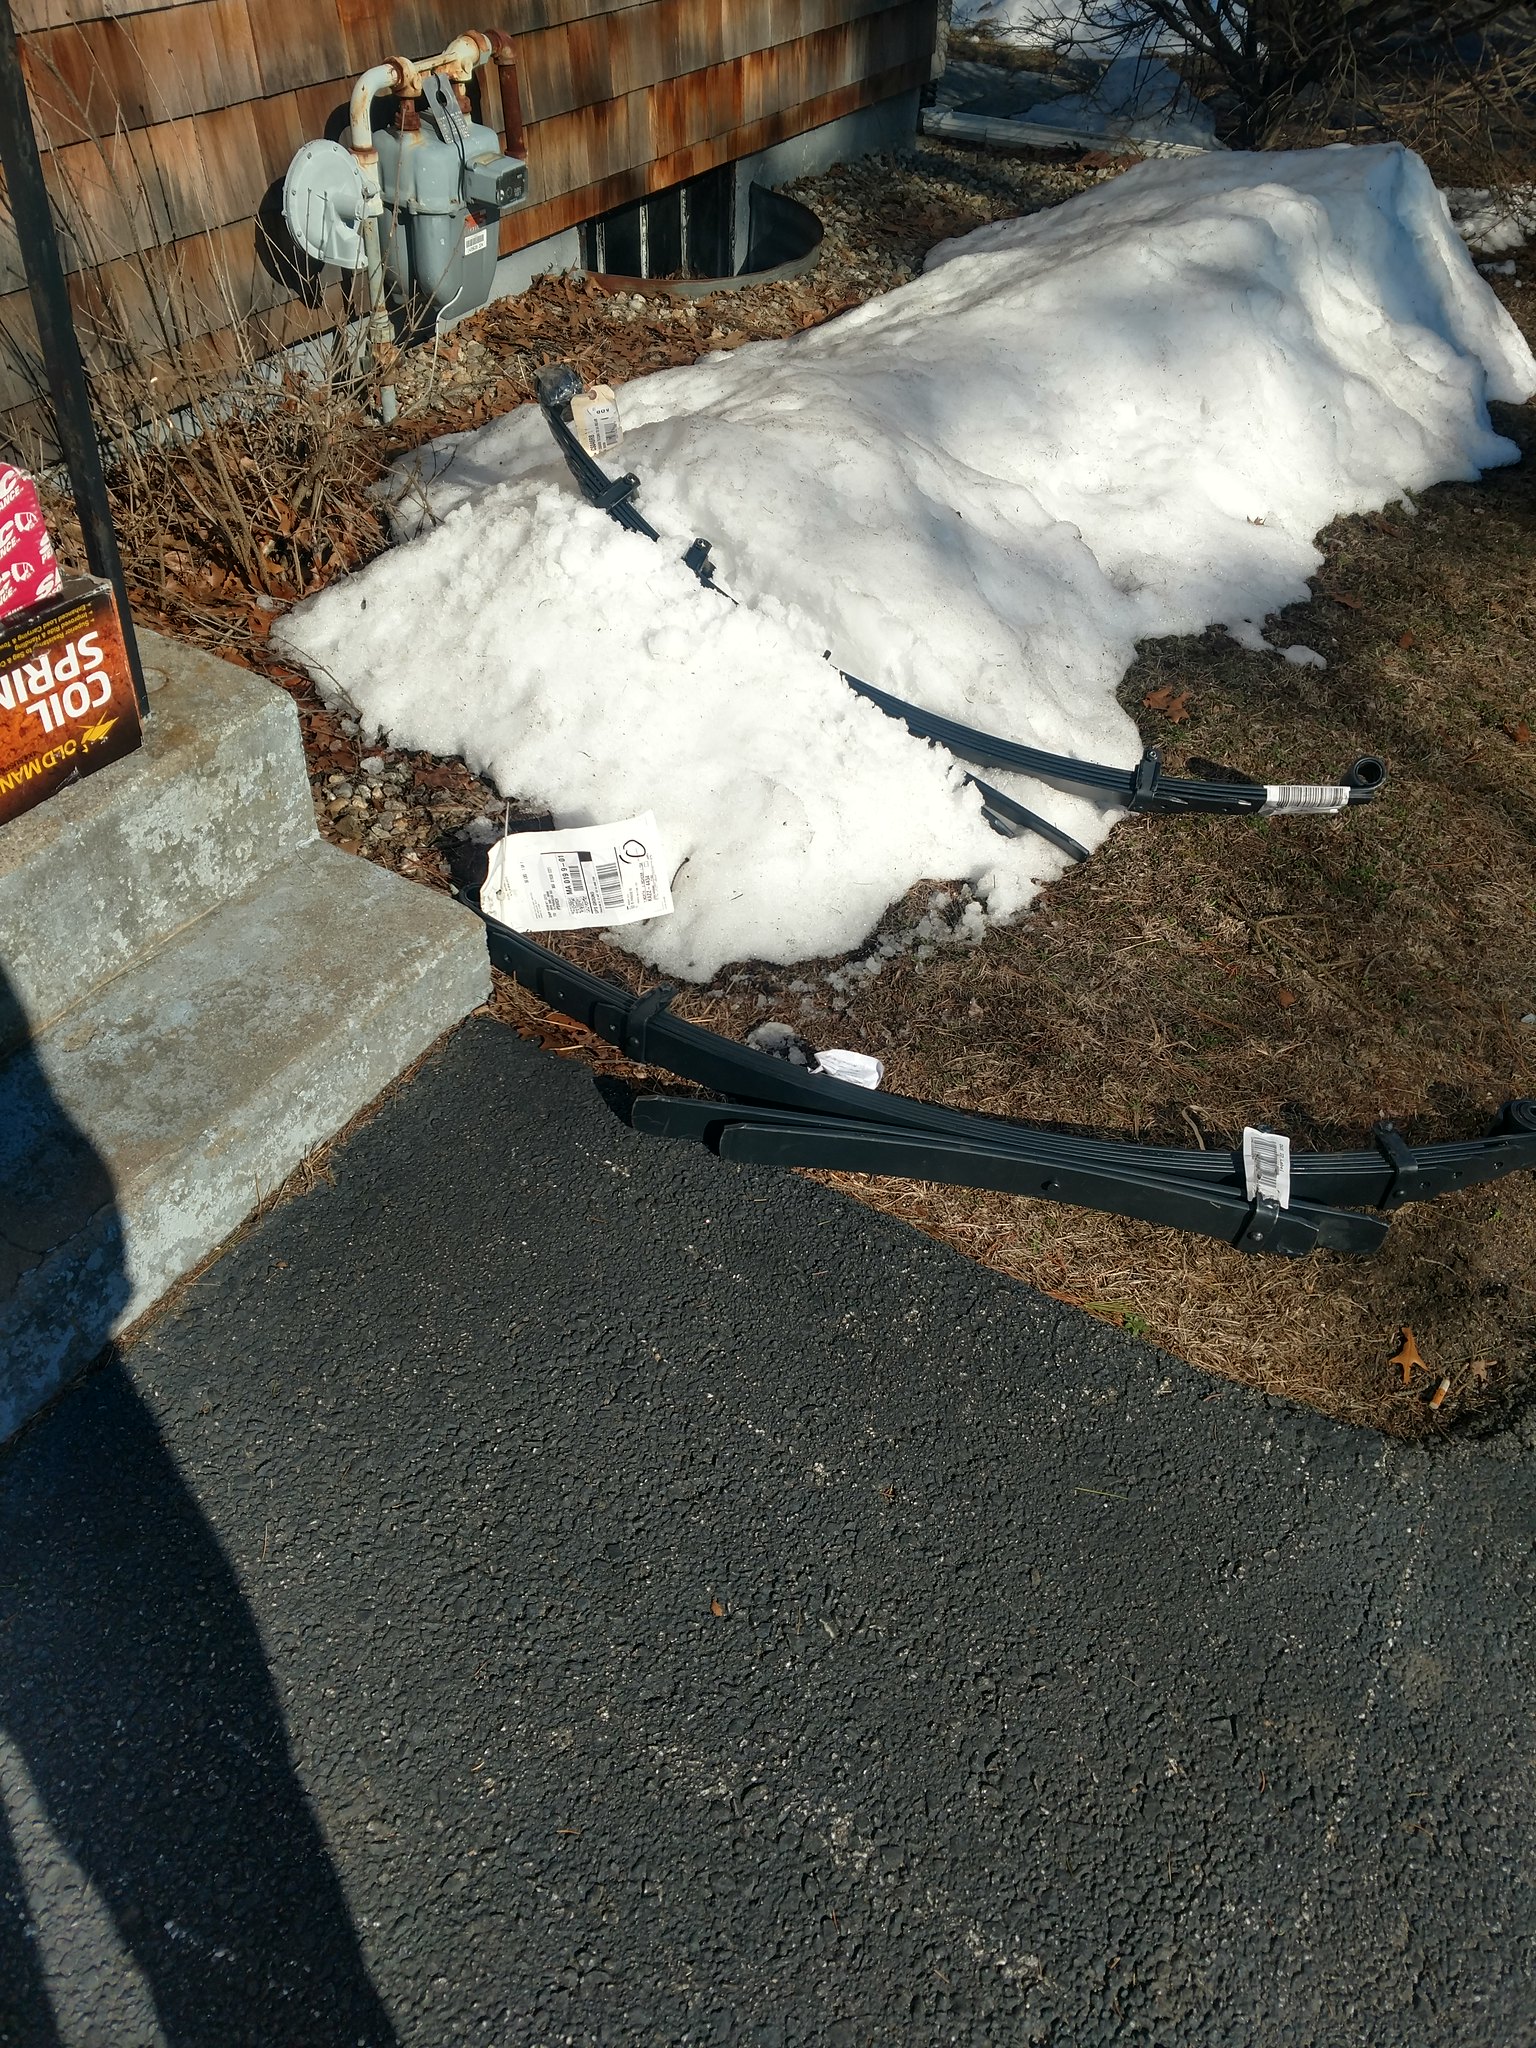
This required longer U-bolts to be ordered. And I'd read great reviews of Old Man Emu with regard to their front springs as well as their shocks, so I went with them for all 4 corners. That was the basic plan. As I started shopping (and again later, after I started working), the "lift kit" grew in scope. I figured that the leaf shackles might be a pain to remove (or possibly require cutting), so I wanted to have new ones on hand in case. There was a set of shackles that were 3-position-adjustable and incorporated ~1" lift for cheap, so I ordered those. That required bushings; I decided to go with polyurethane and deal with the squeaking. Well that pretty much rounded out everything in the rear end. The front saw a lot more scope creep...
See, when you put a lift in these trucks, it's pretty common to run into alignment issues if you retain the stock upper control arms. I wanted to have adjustment there to get it dialed in proper because I intended to do this right. I found a pretty awesome set from SPC that I added to my shopping list. These include poly bushings and upper ball joints.
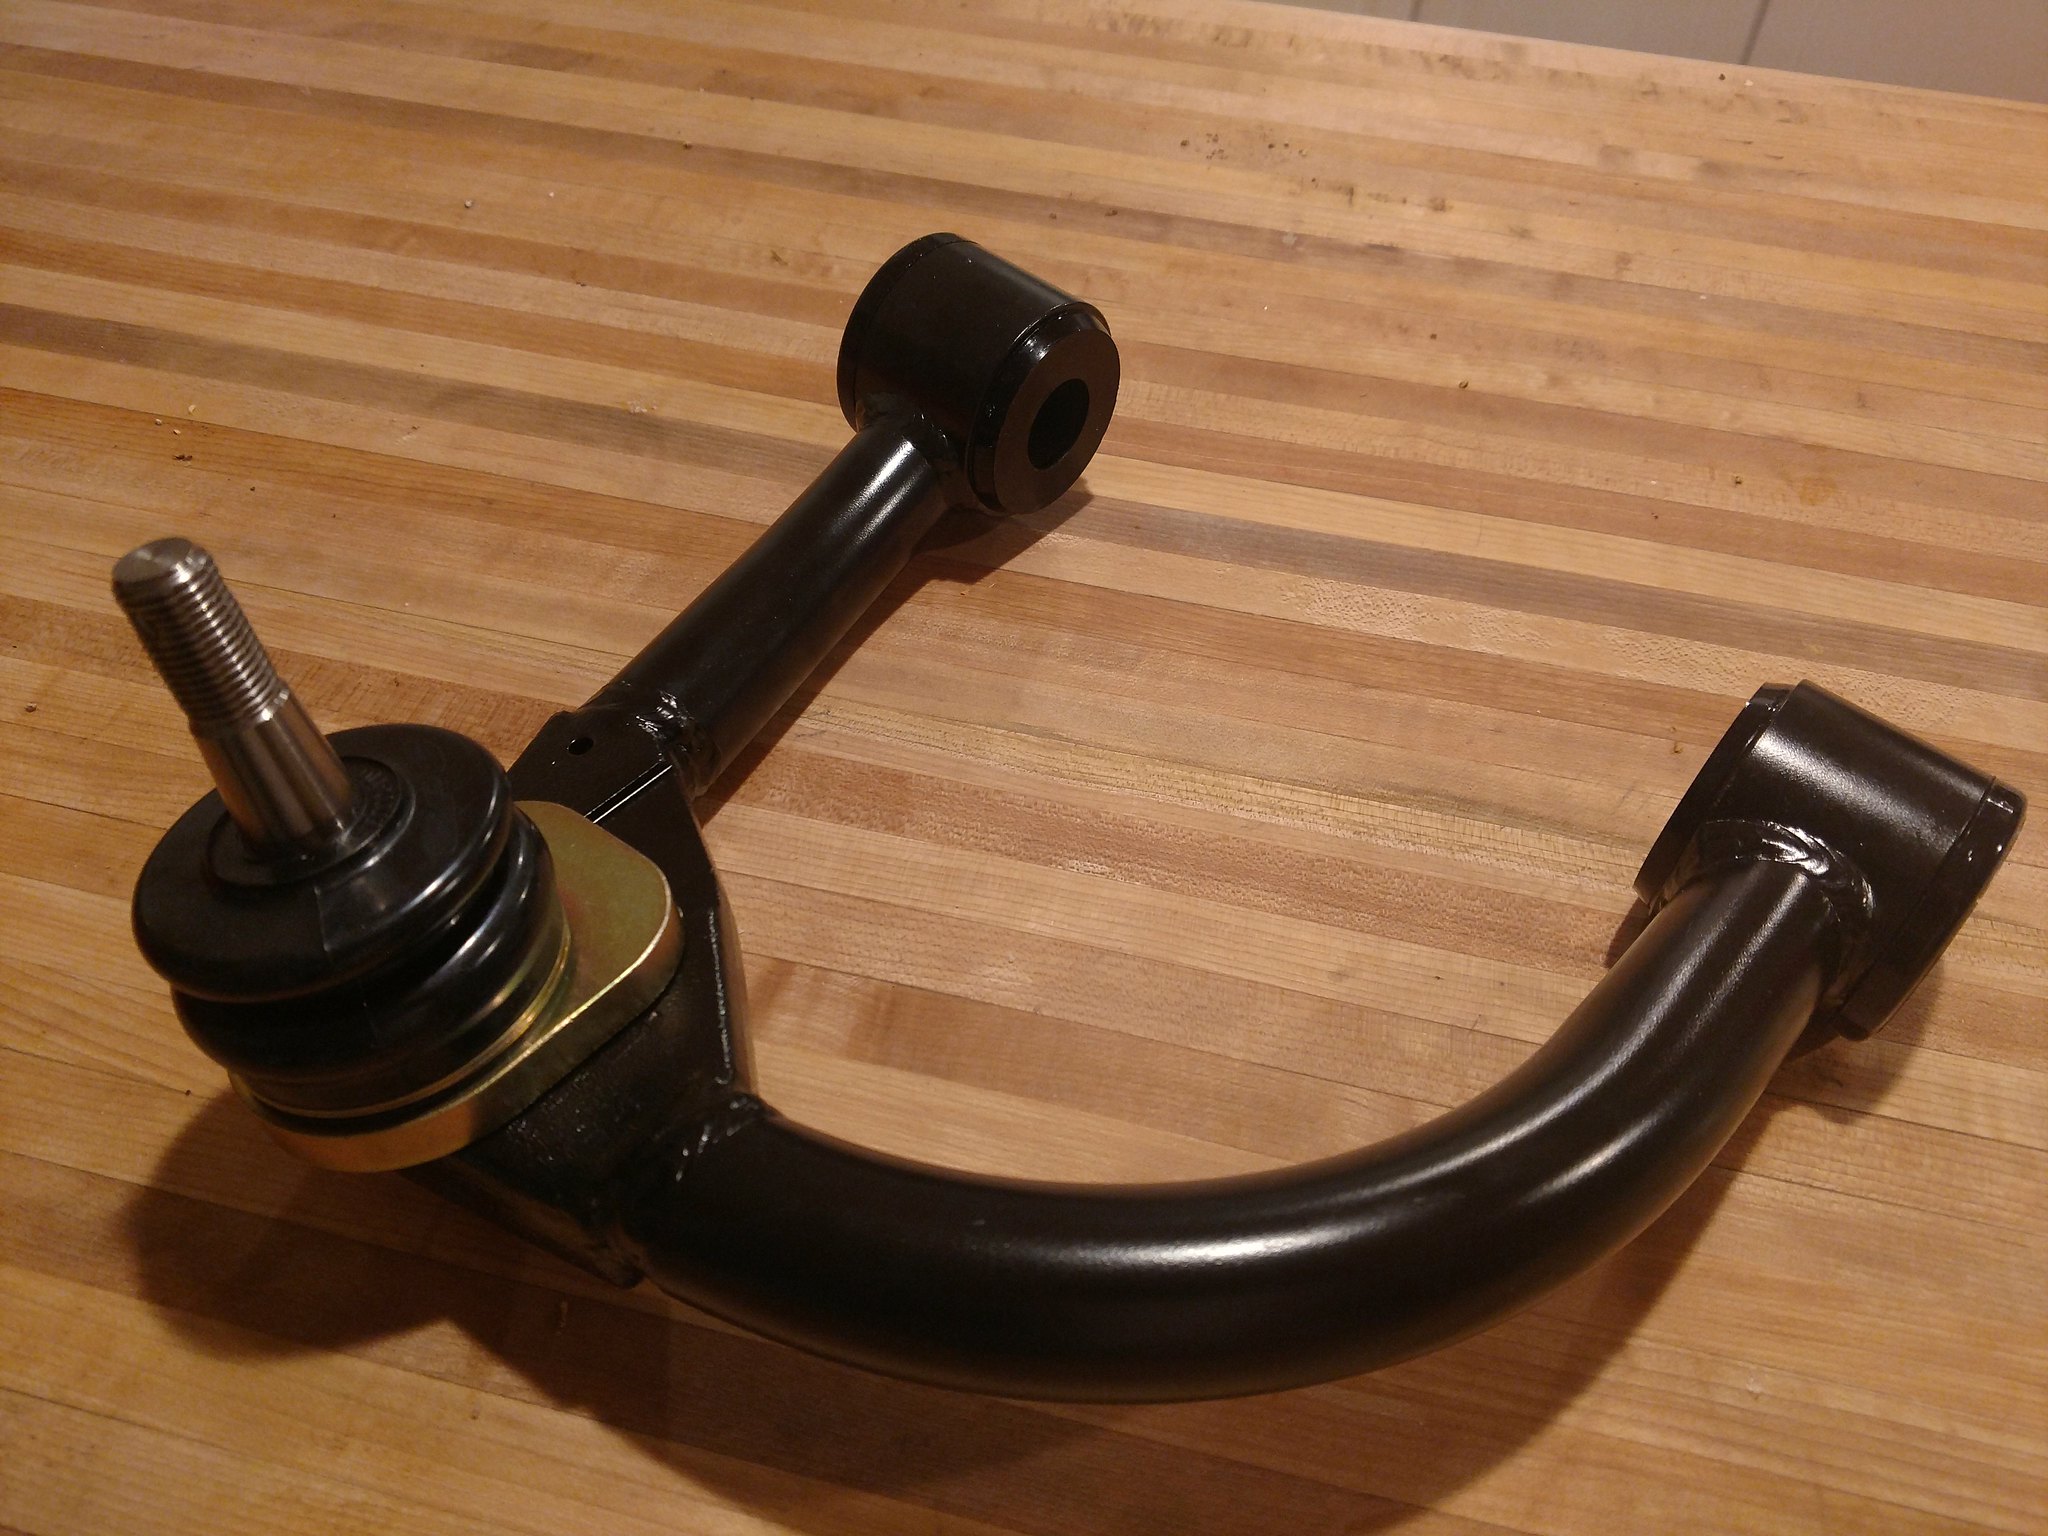
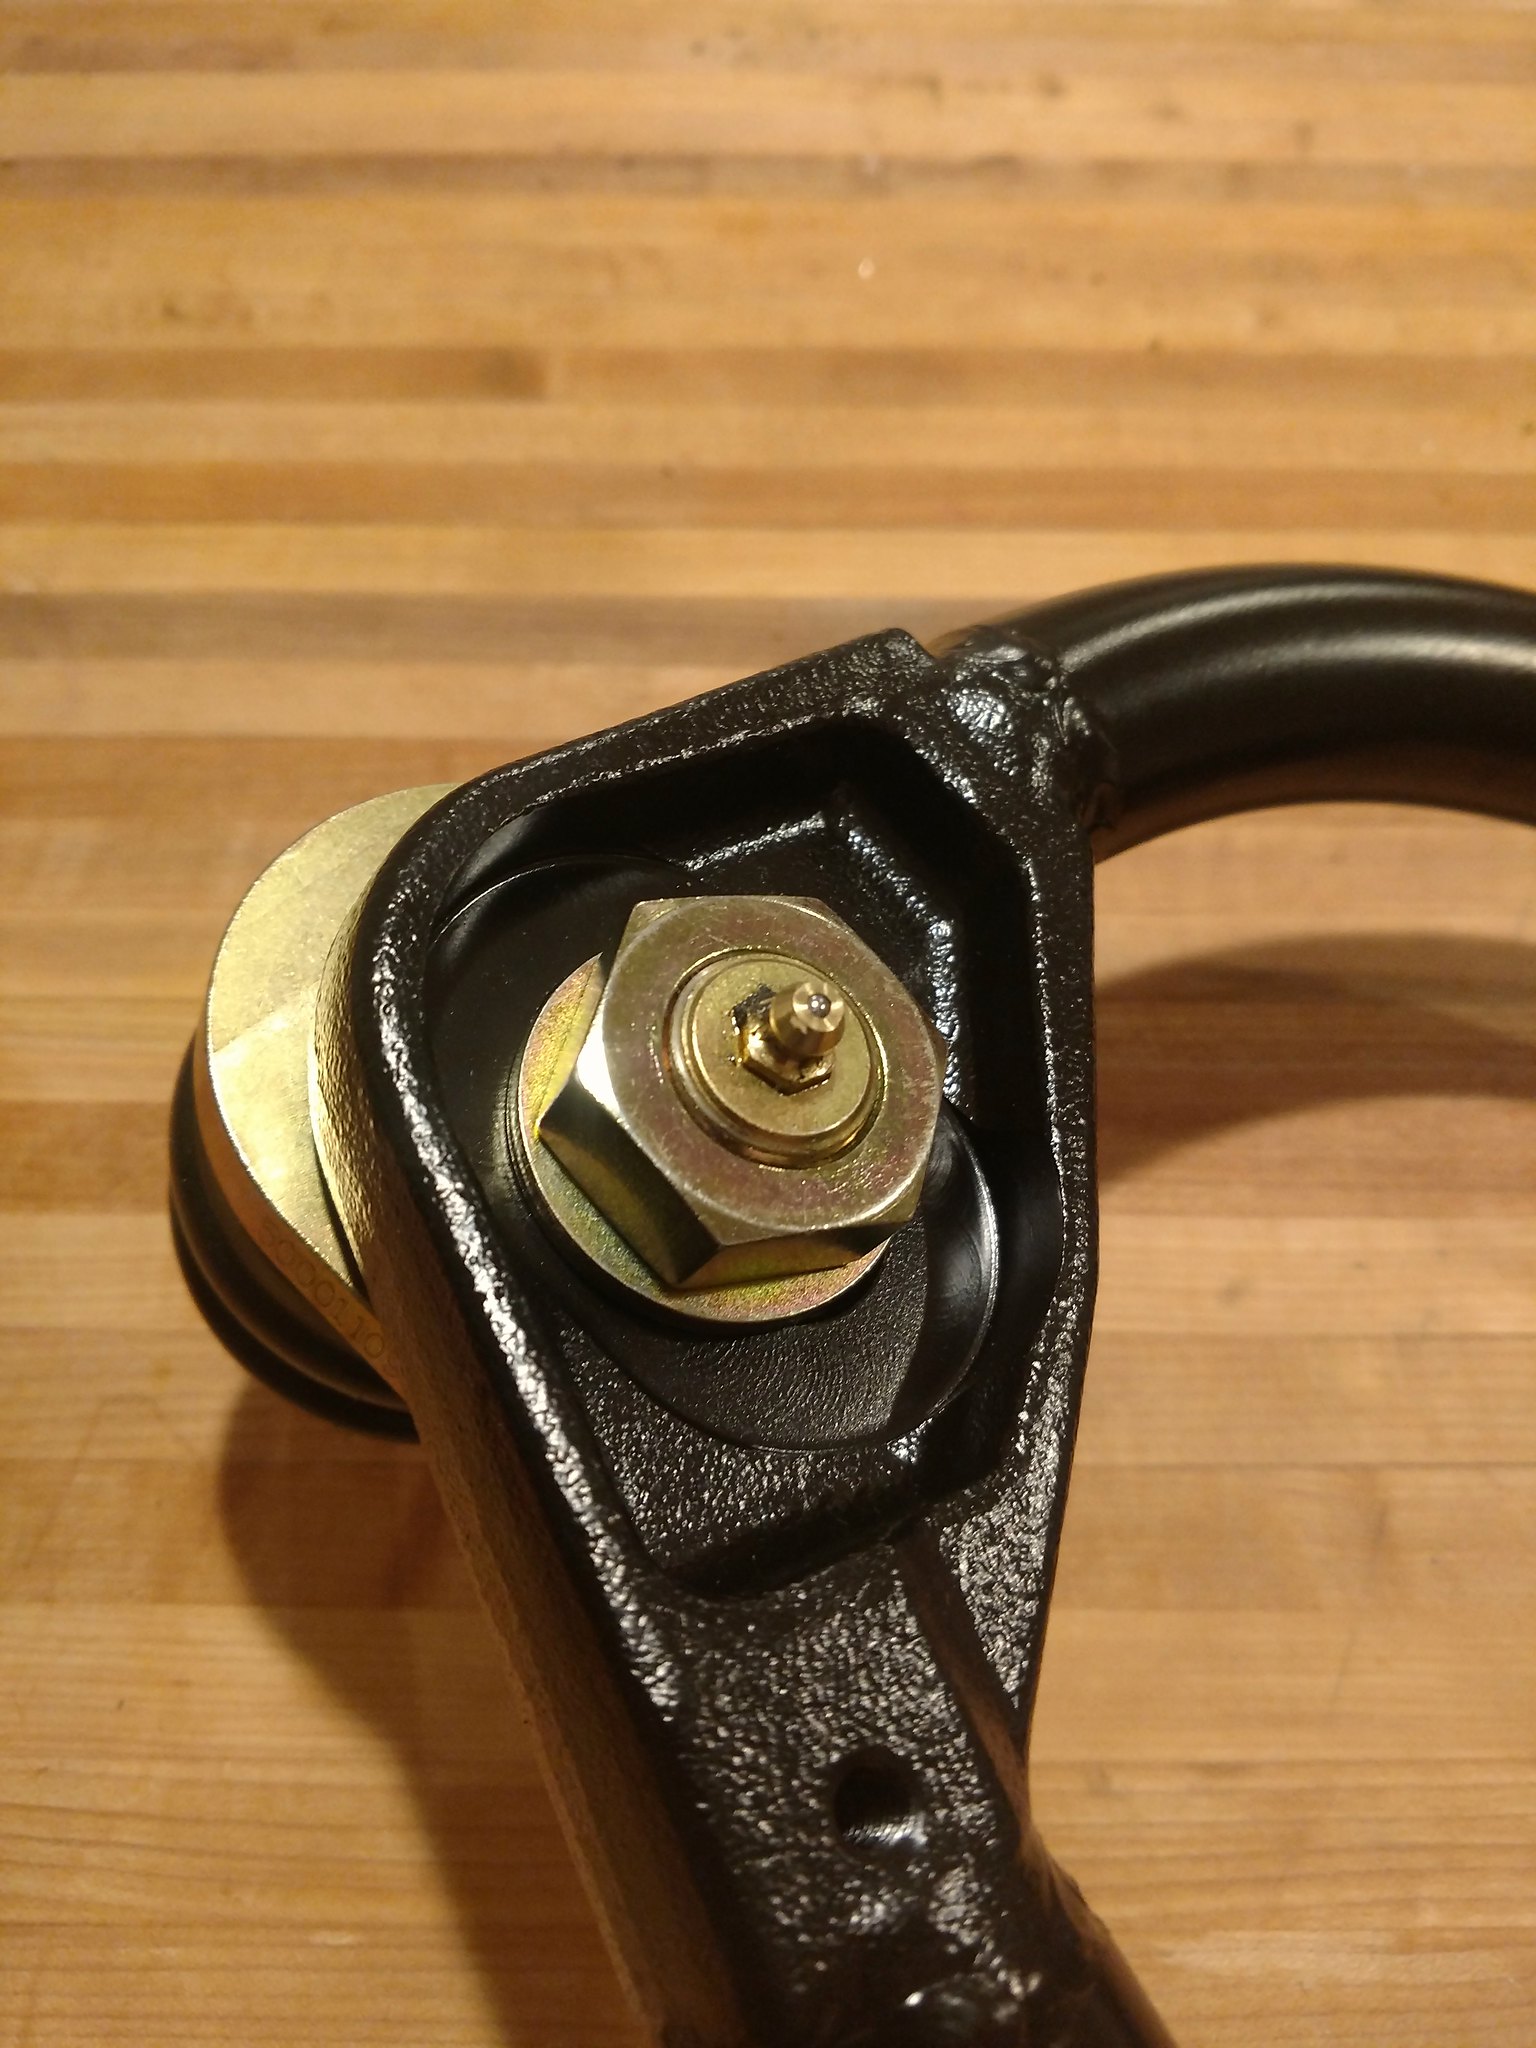
Well, since the upper ball joints would be replaced, and the lowers were reasonably cheap, it felt weird NOT doing them, so those got added. Then I figured if it was all going to be apart anyways I'd be a fool not to do the wheel bearings. Besides, the passenger's side one was making noise already. I found a set of weld-on gussets to help beef up the steering knuckles for cheap, too, so I figured what the hell, right? Besides, although they are forged parts, the design of the knuckles seems to have a questionable area near the upper ball joint. It probably wouldn't break, but it would be catastrophic if it ever did. The gussets give me some peace of mind. I don't intend to baby the truck. To help preserve the front CV joints and boots, it is recommended to lower the front differential, so I ordered spacers and hardware for that. Old Man Emu also makes an exhaust drop bracket for the exhaust pipe end near the leafs. I've read mixed reviews on this part; some say it works, some say it's a waste. Again, I'm trying to do everything "right", and it's about ten bucks, so I opted to give it a shot. I also ordered a 5mm spacer for the driver's side front coil spring. This is supposed to help level the truck side-to-side, to compensate for driver and fuel weight. I also noted that the driver's side sat a little low before beginning the work. "Lastly", I threw in lower control arm bushings because what the ****, everything else will be new. All told, this is what I set to work with:
So I got to work on documentation. Keep in mind that this truck has probably spent its whole life in New England. The pictures that follow show some pretty gruesome imagery of rust. I was aware of the state things were in before I set out, and I attempted to abate it wherever possible, to the best of my ability, while I was in there. This also meant that I set aside a few weeks to accomplish the work. First I documented the height of the truck. I marked each wheel arch with a line on tape to get a consistent before/after measurement. I also marked the ground and my tripod to try to get similar before/after photos, for comparison. I think I'll post those at the end for easier visualization.
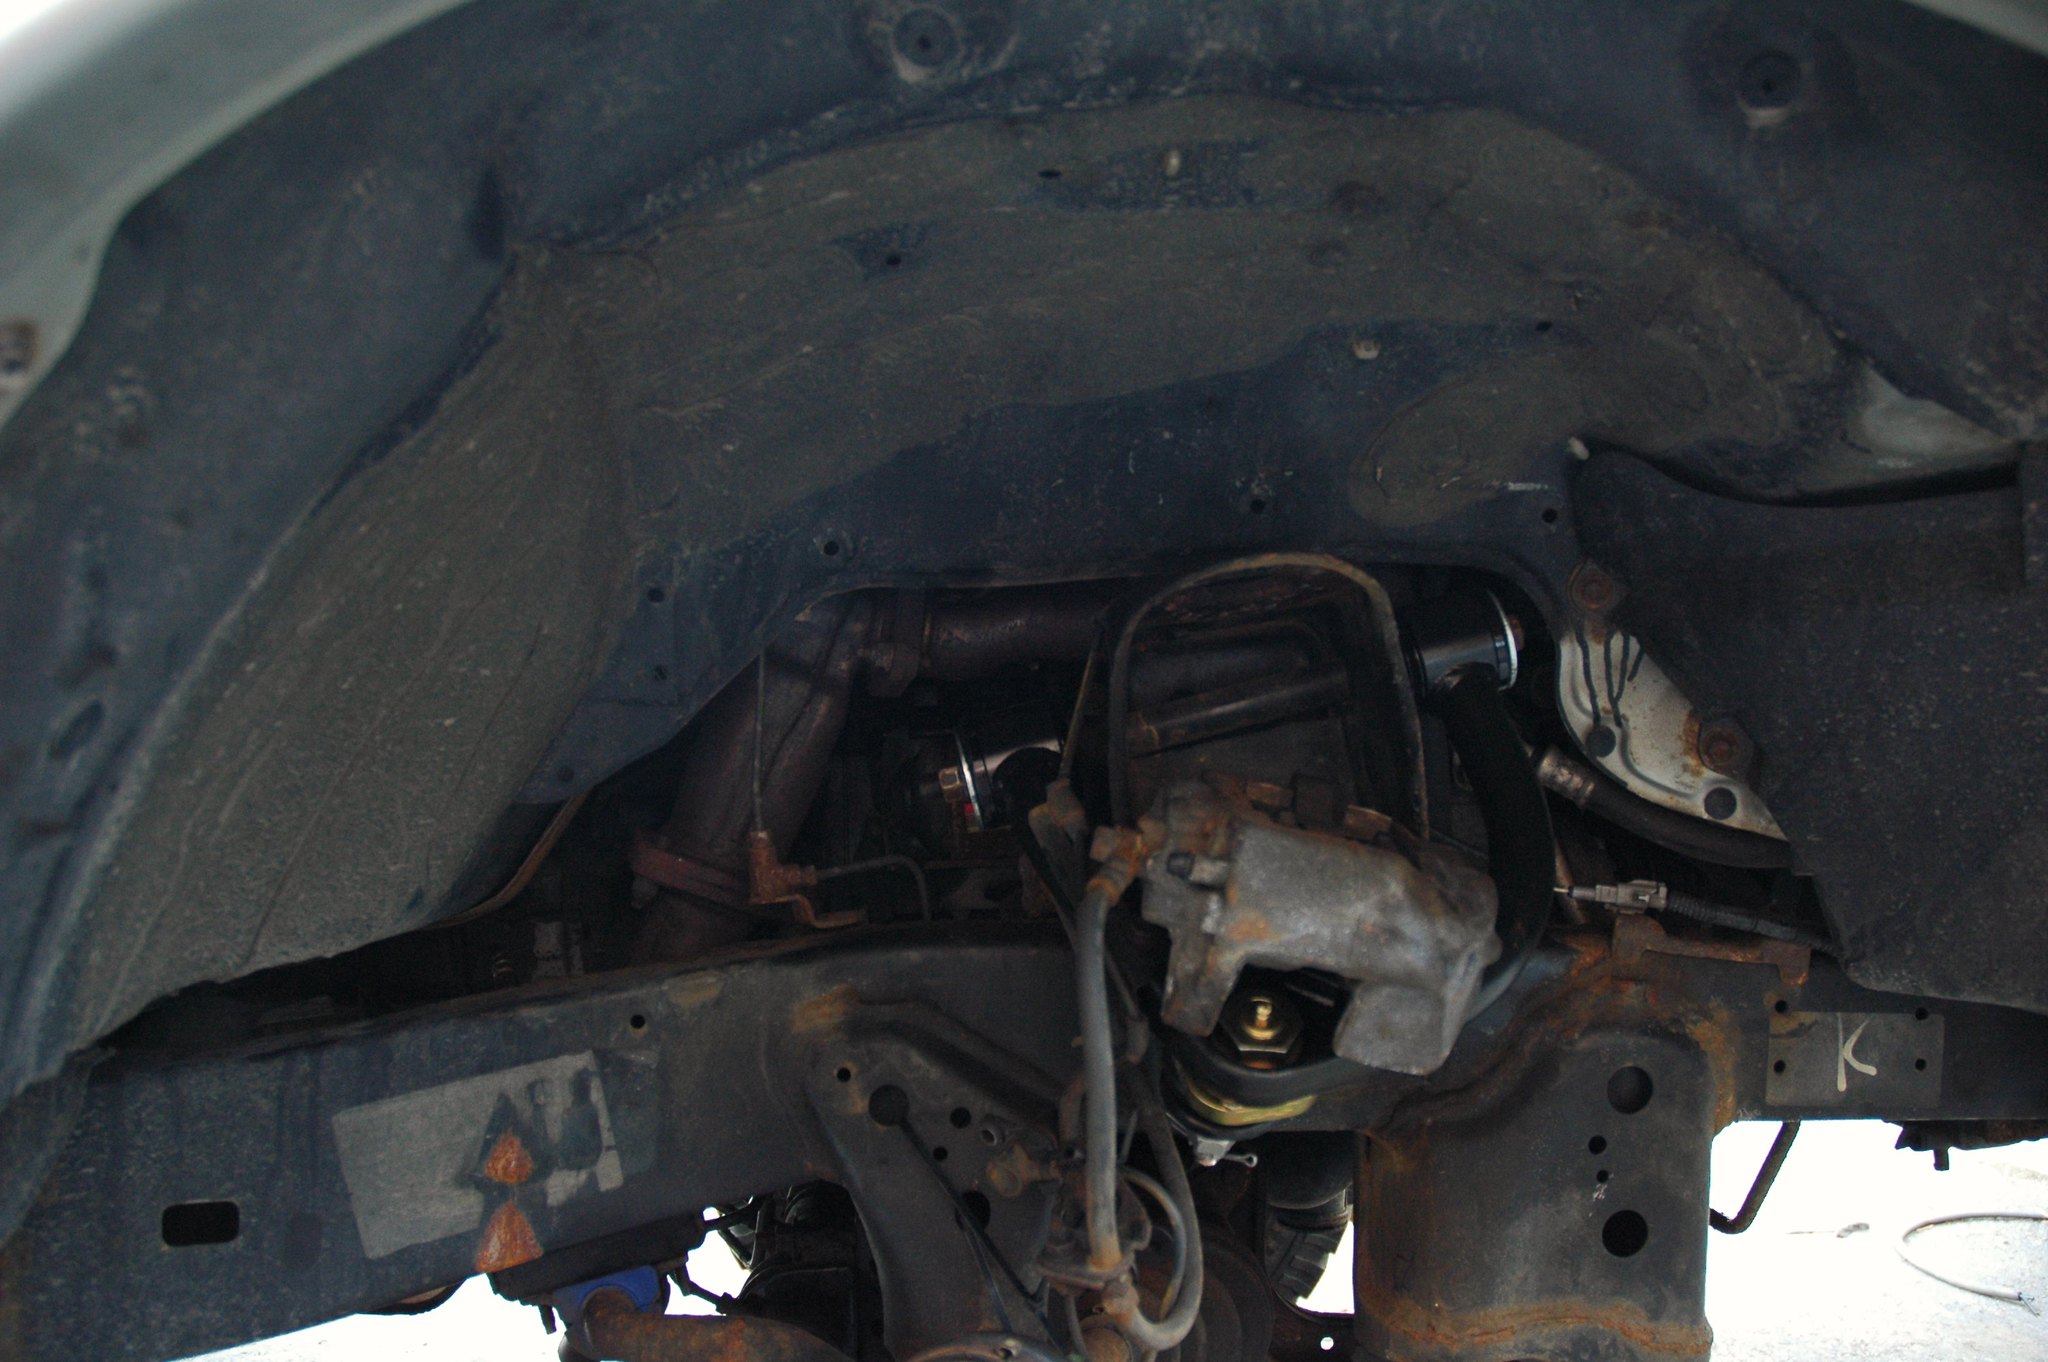
Here's what I was up against when the wheels came off and the truck went up into the air:
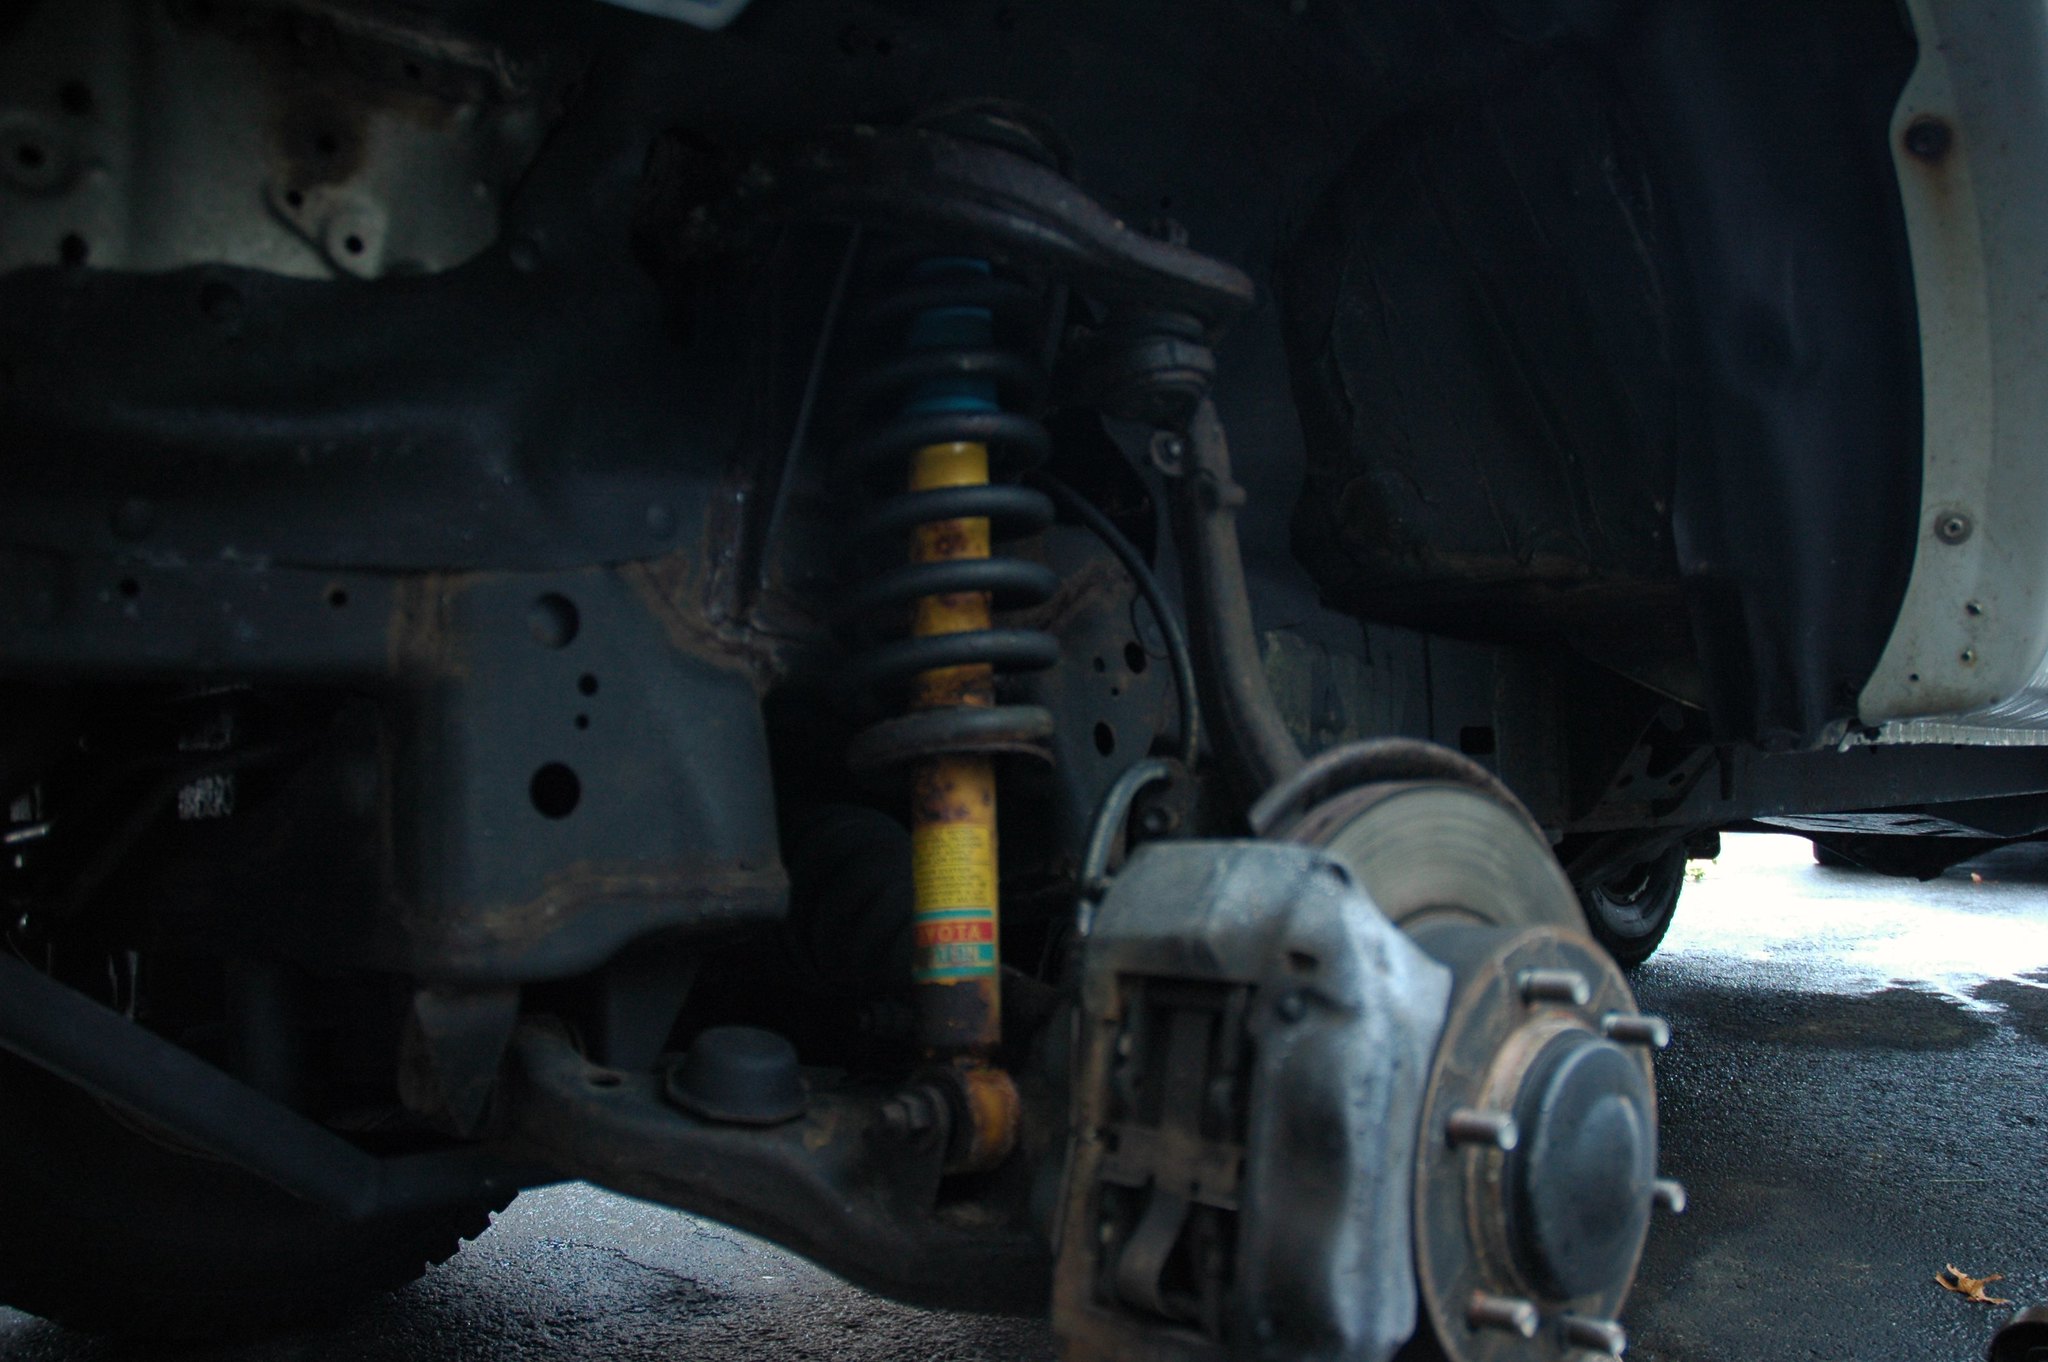
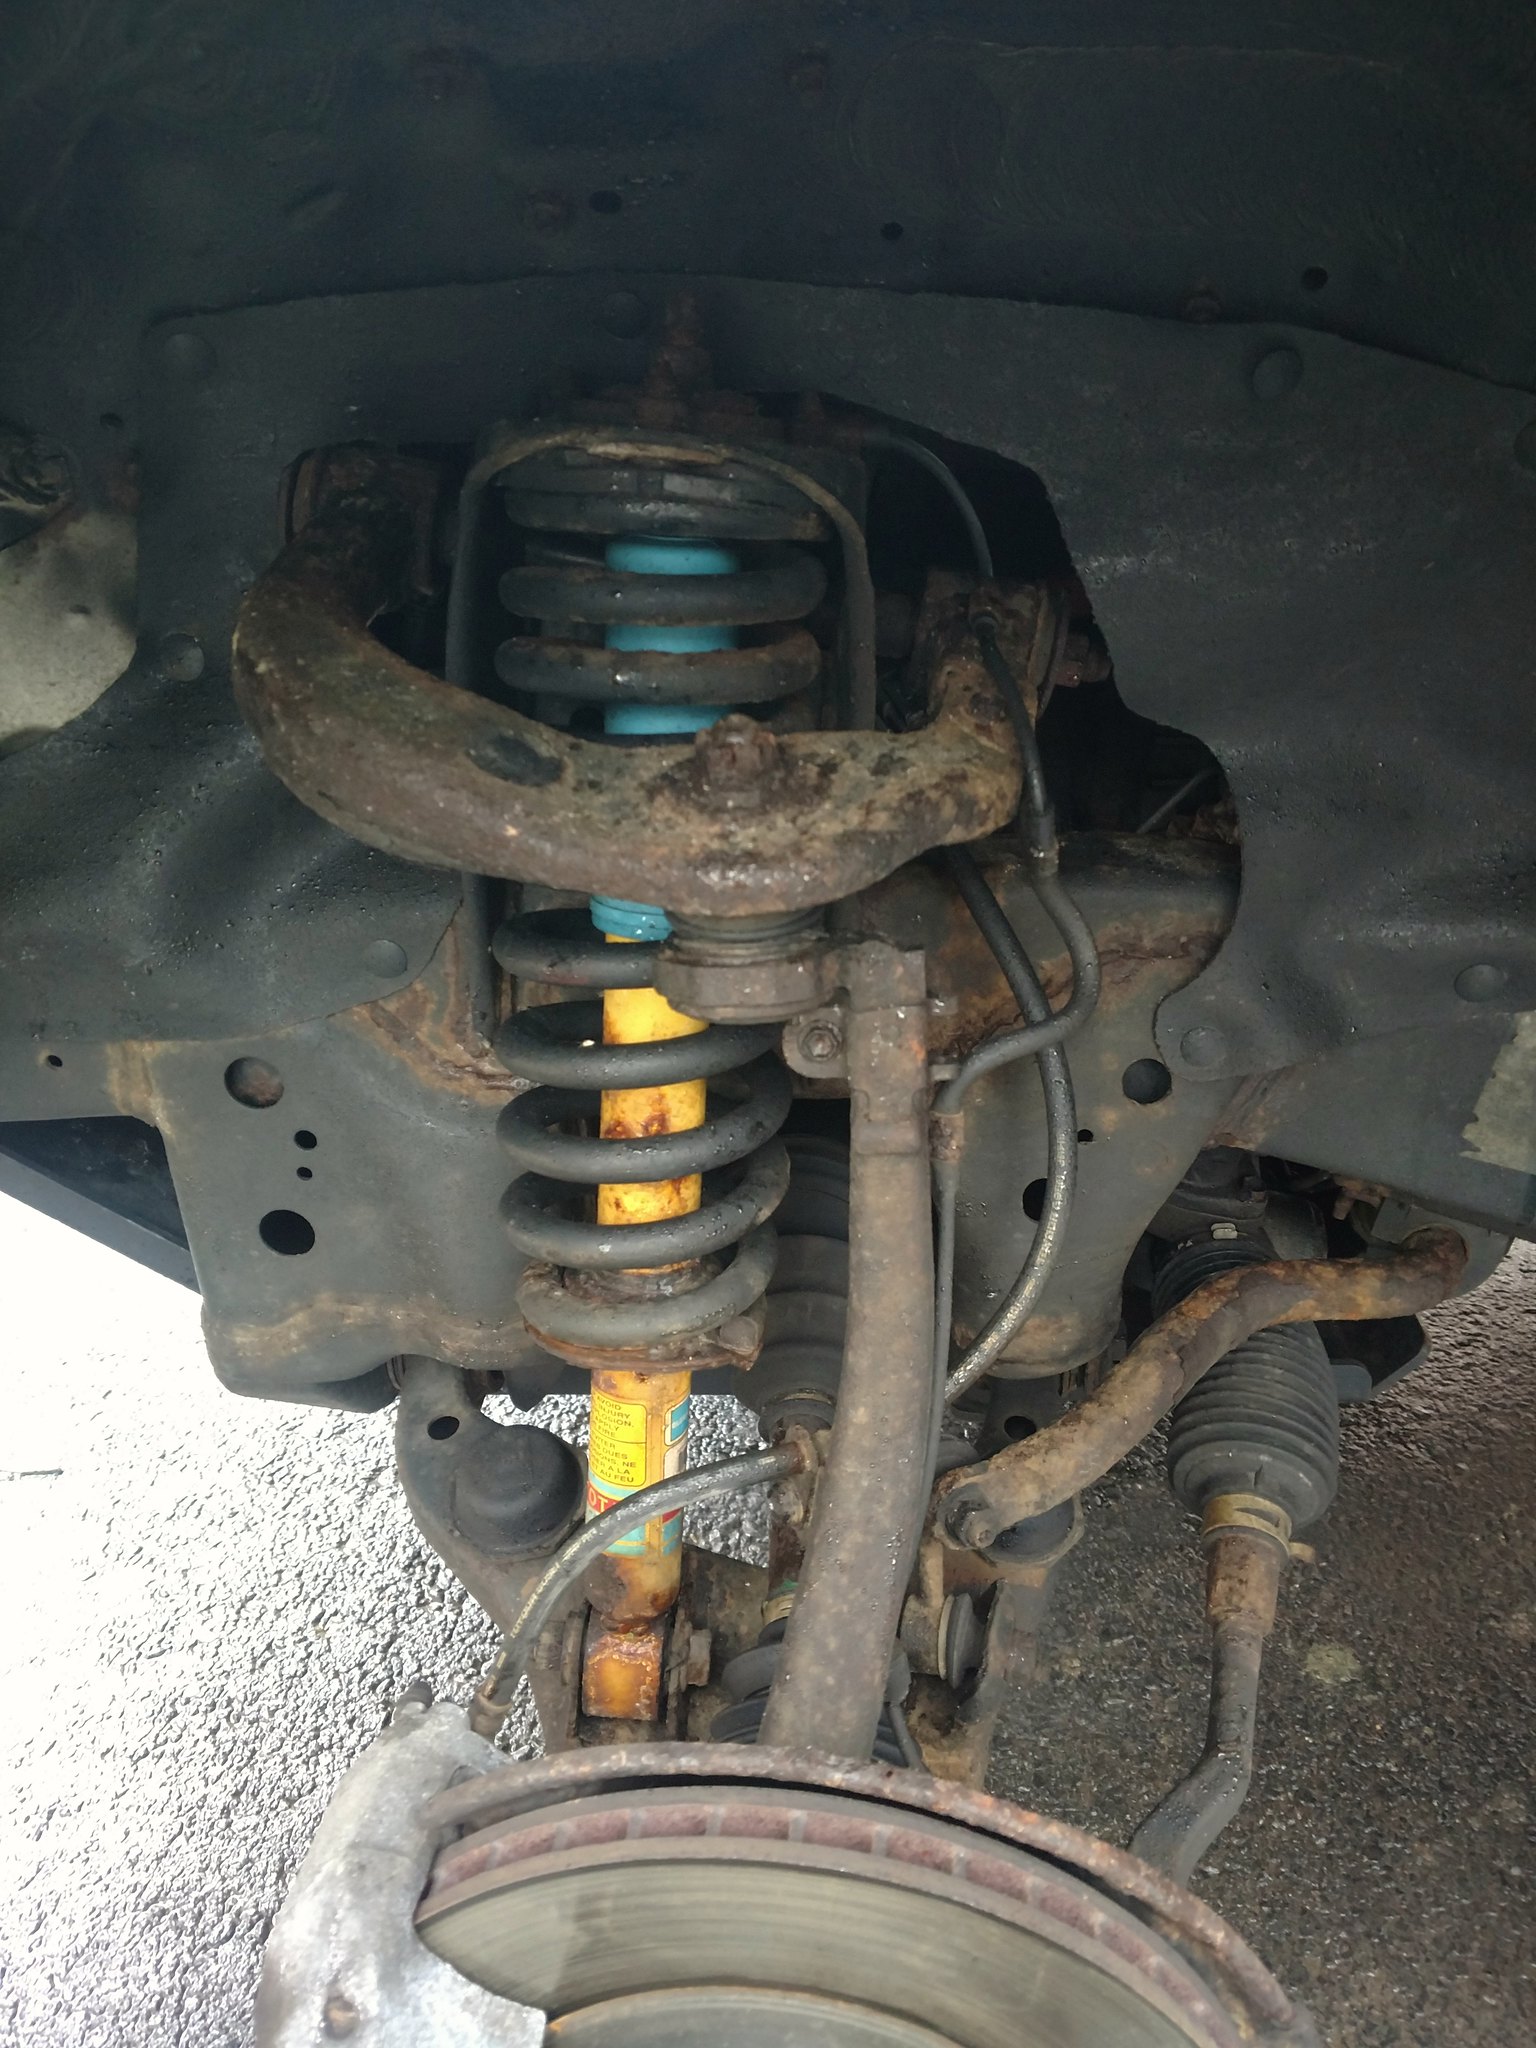
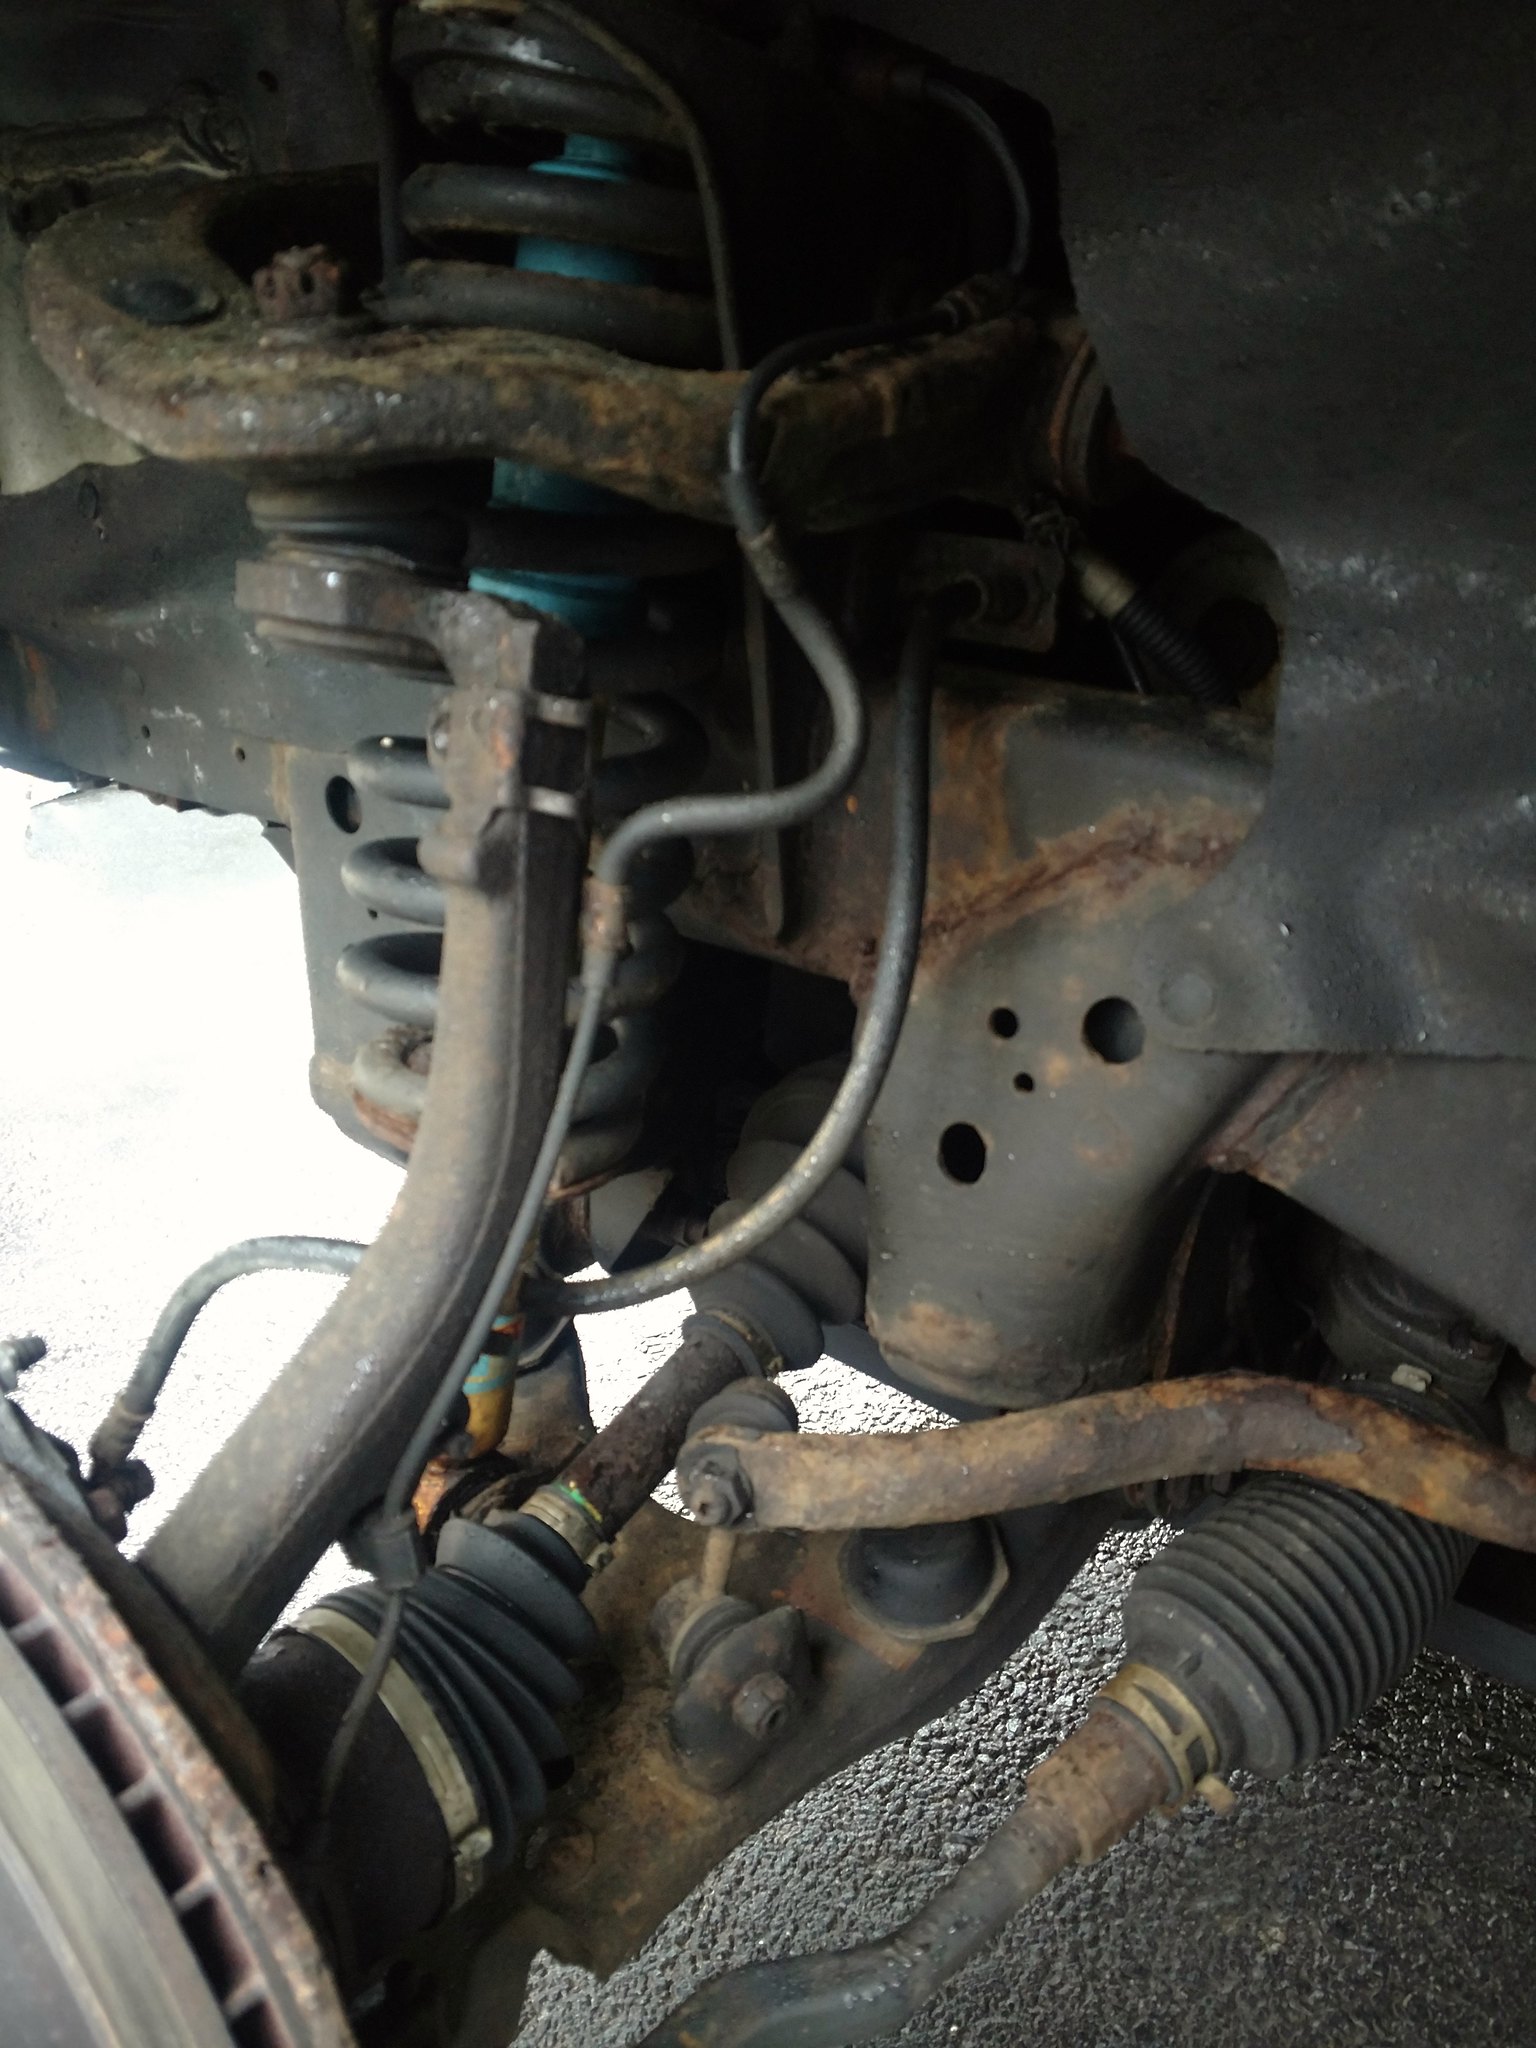
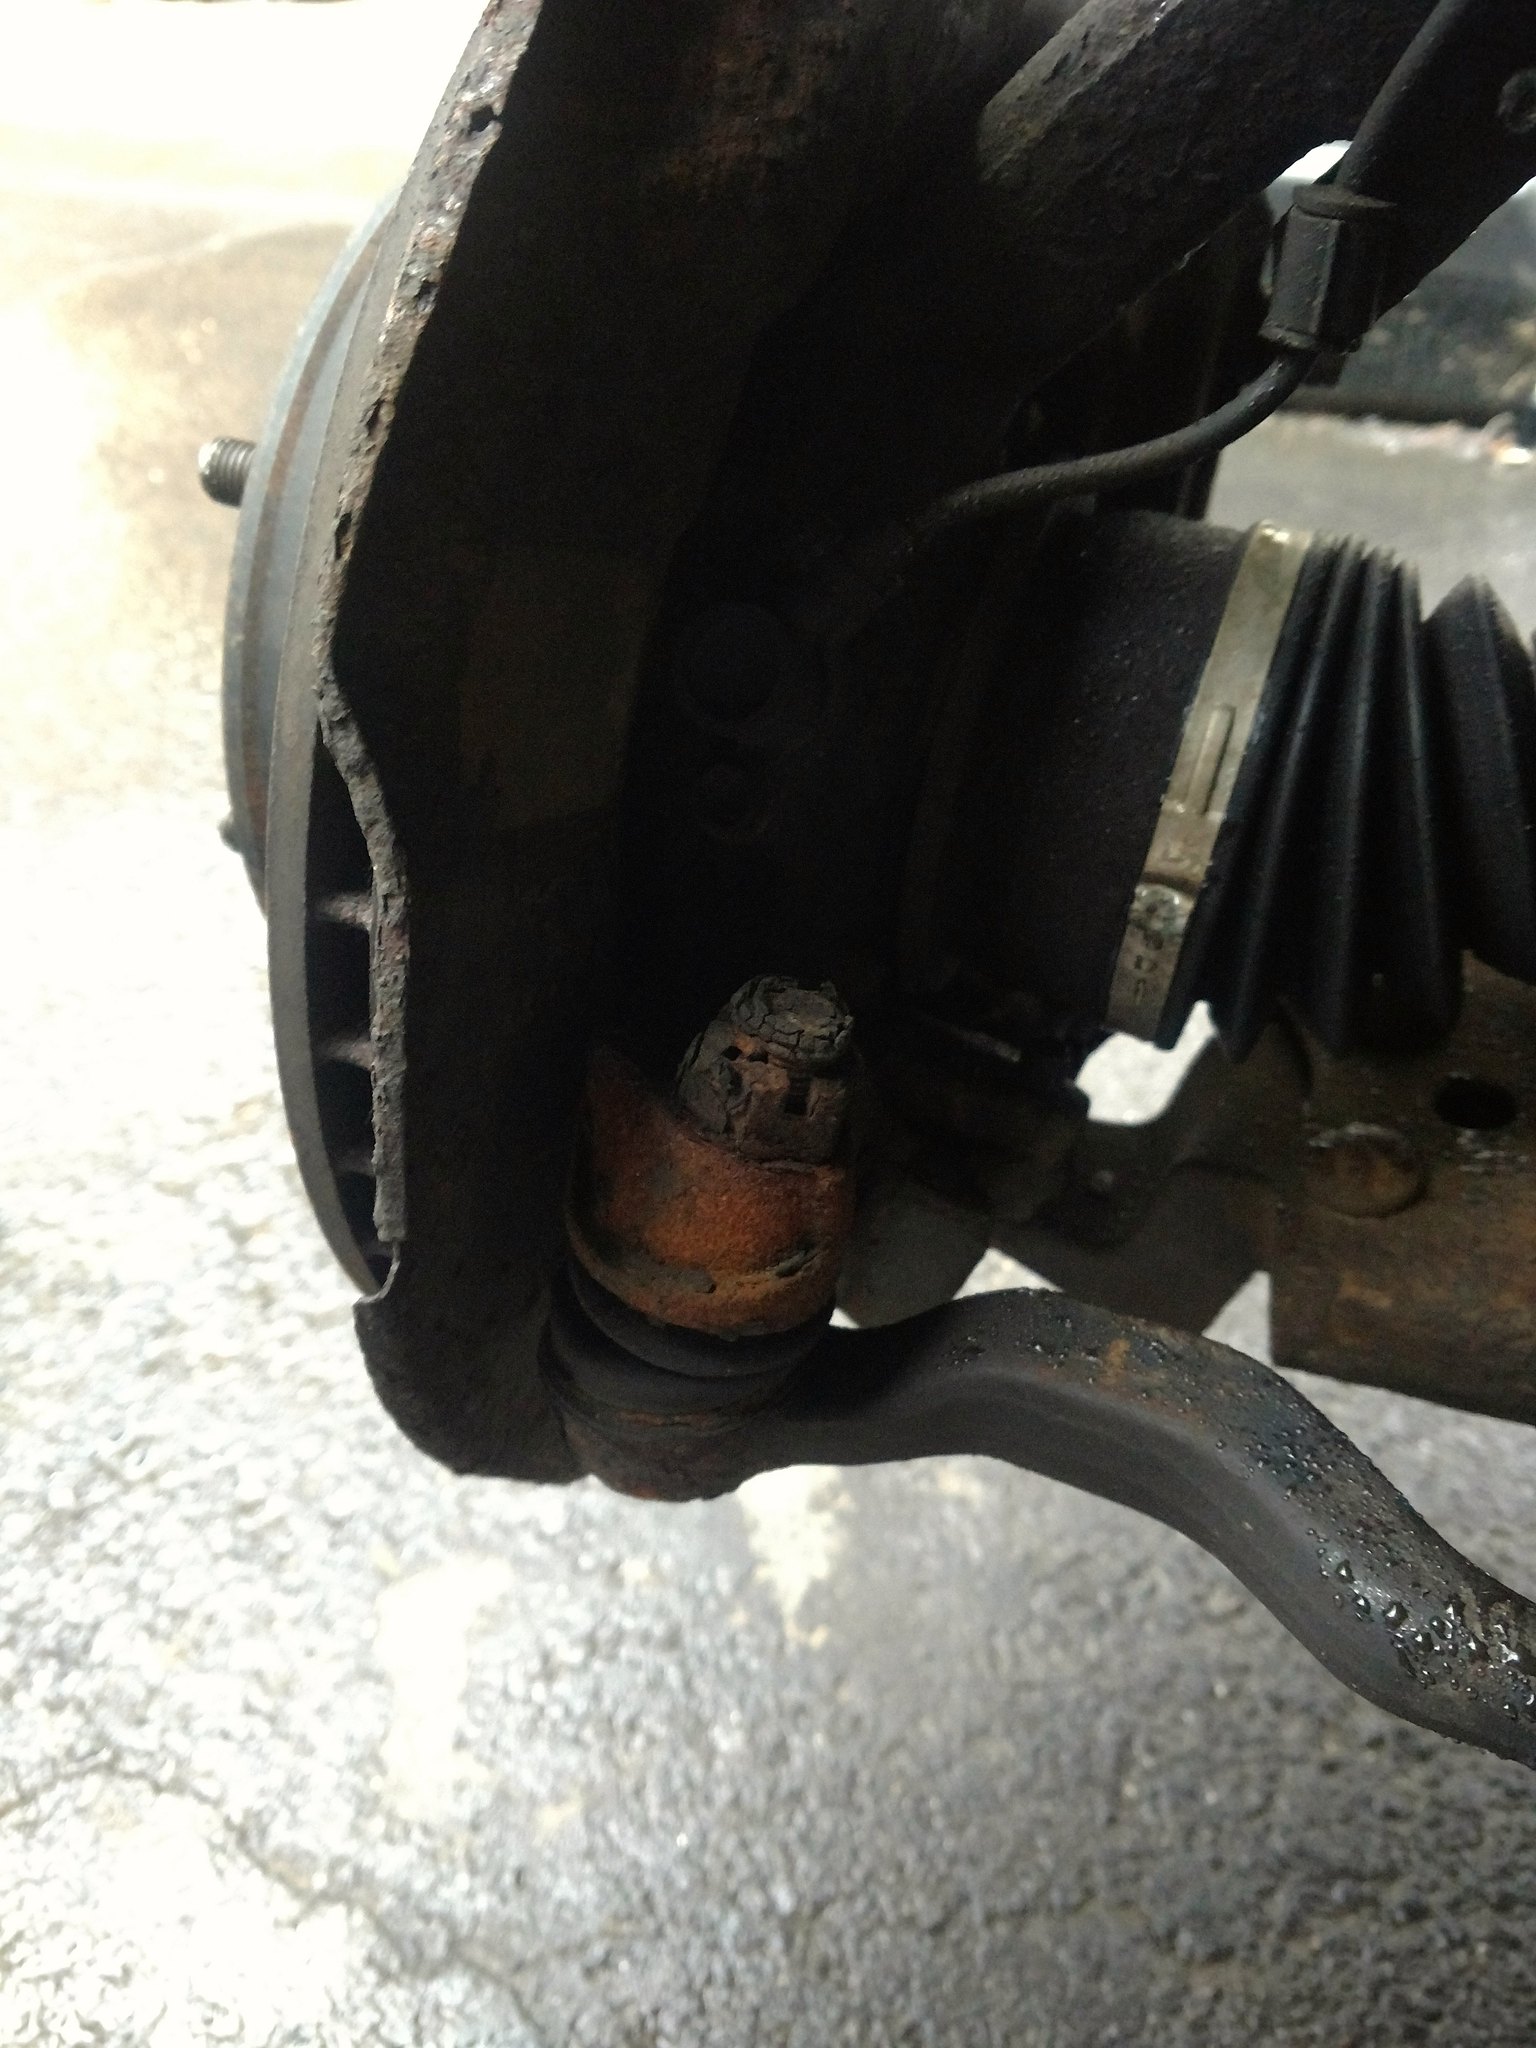
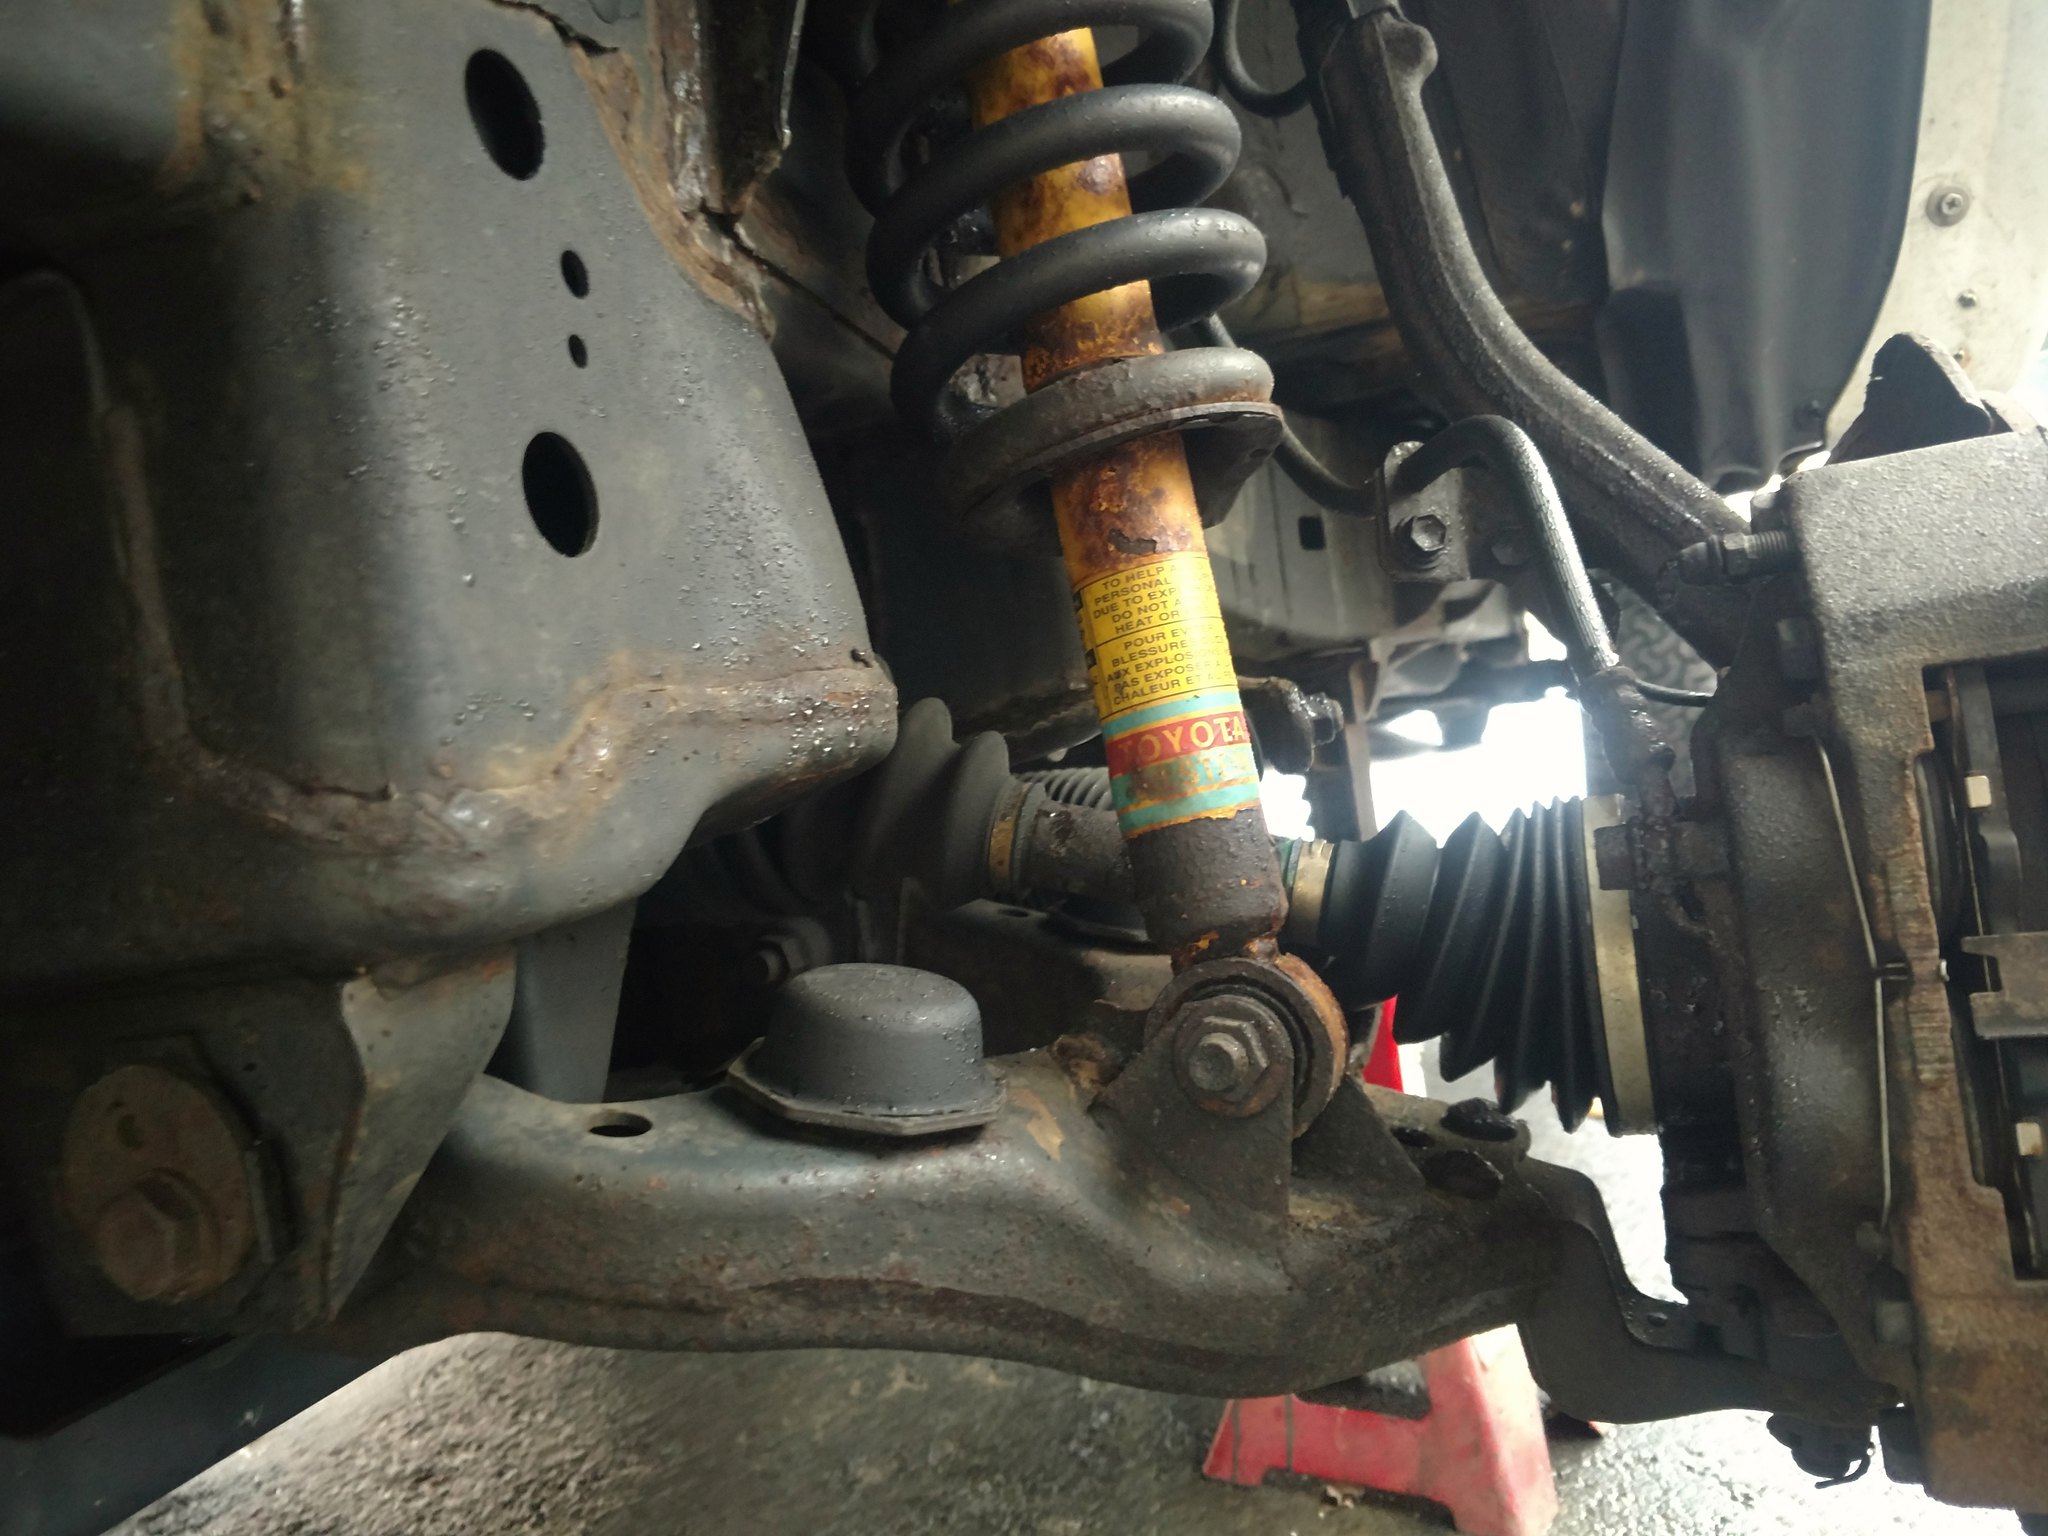
****ing gory. But the important bits are solid. The frame in this truck was replaced under the infamous recall. It's in great shape. I took the first "real" part off (the dust cap) and was shocked:
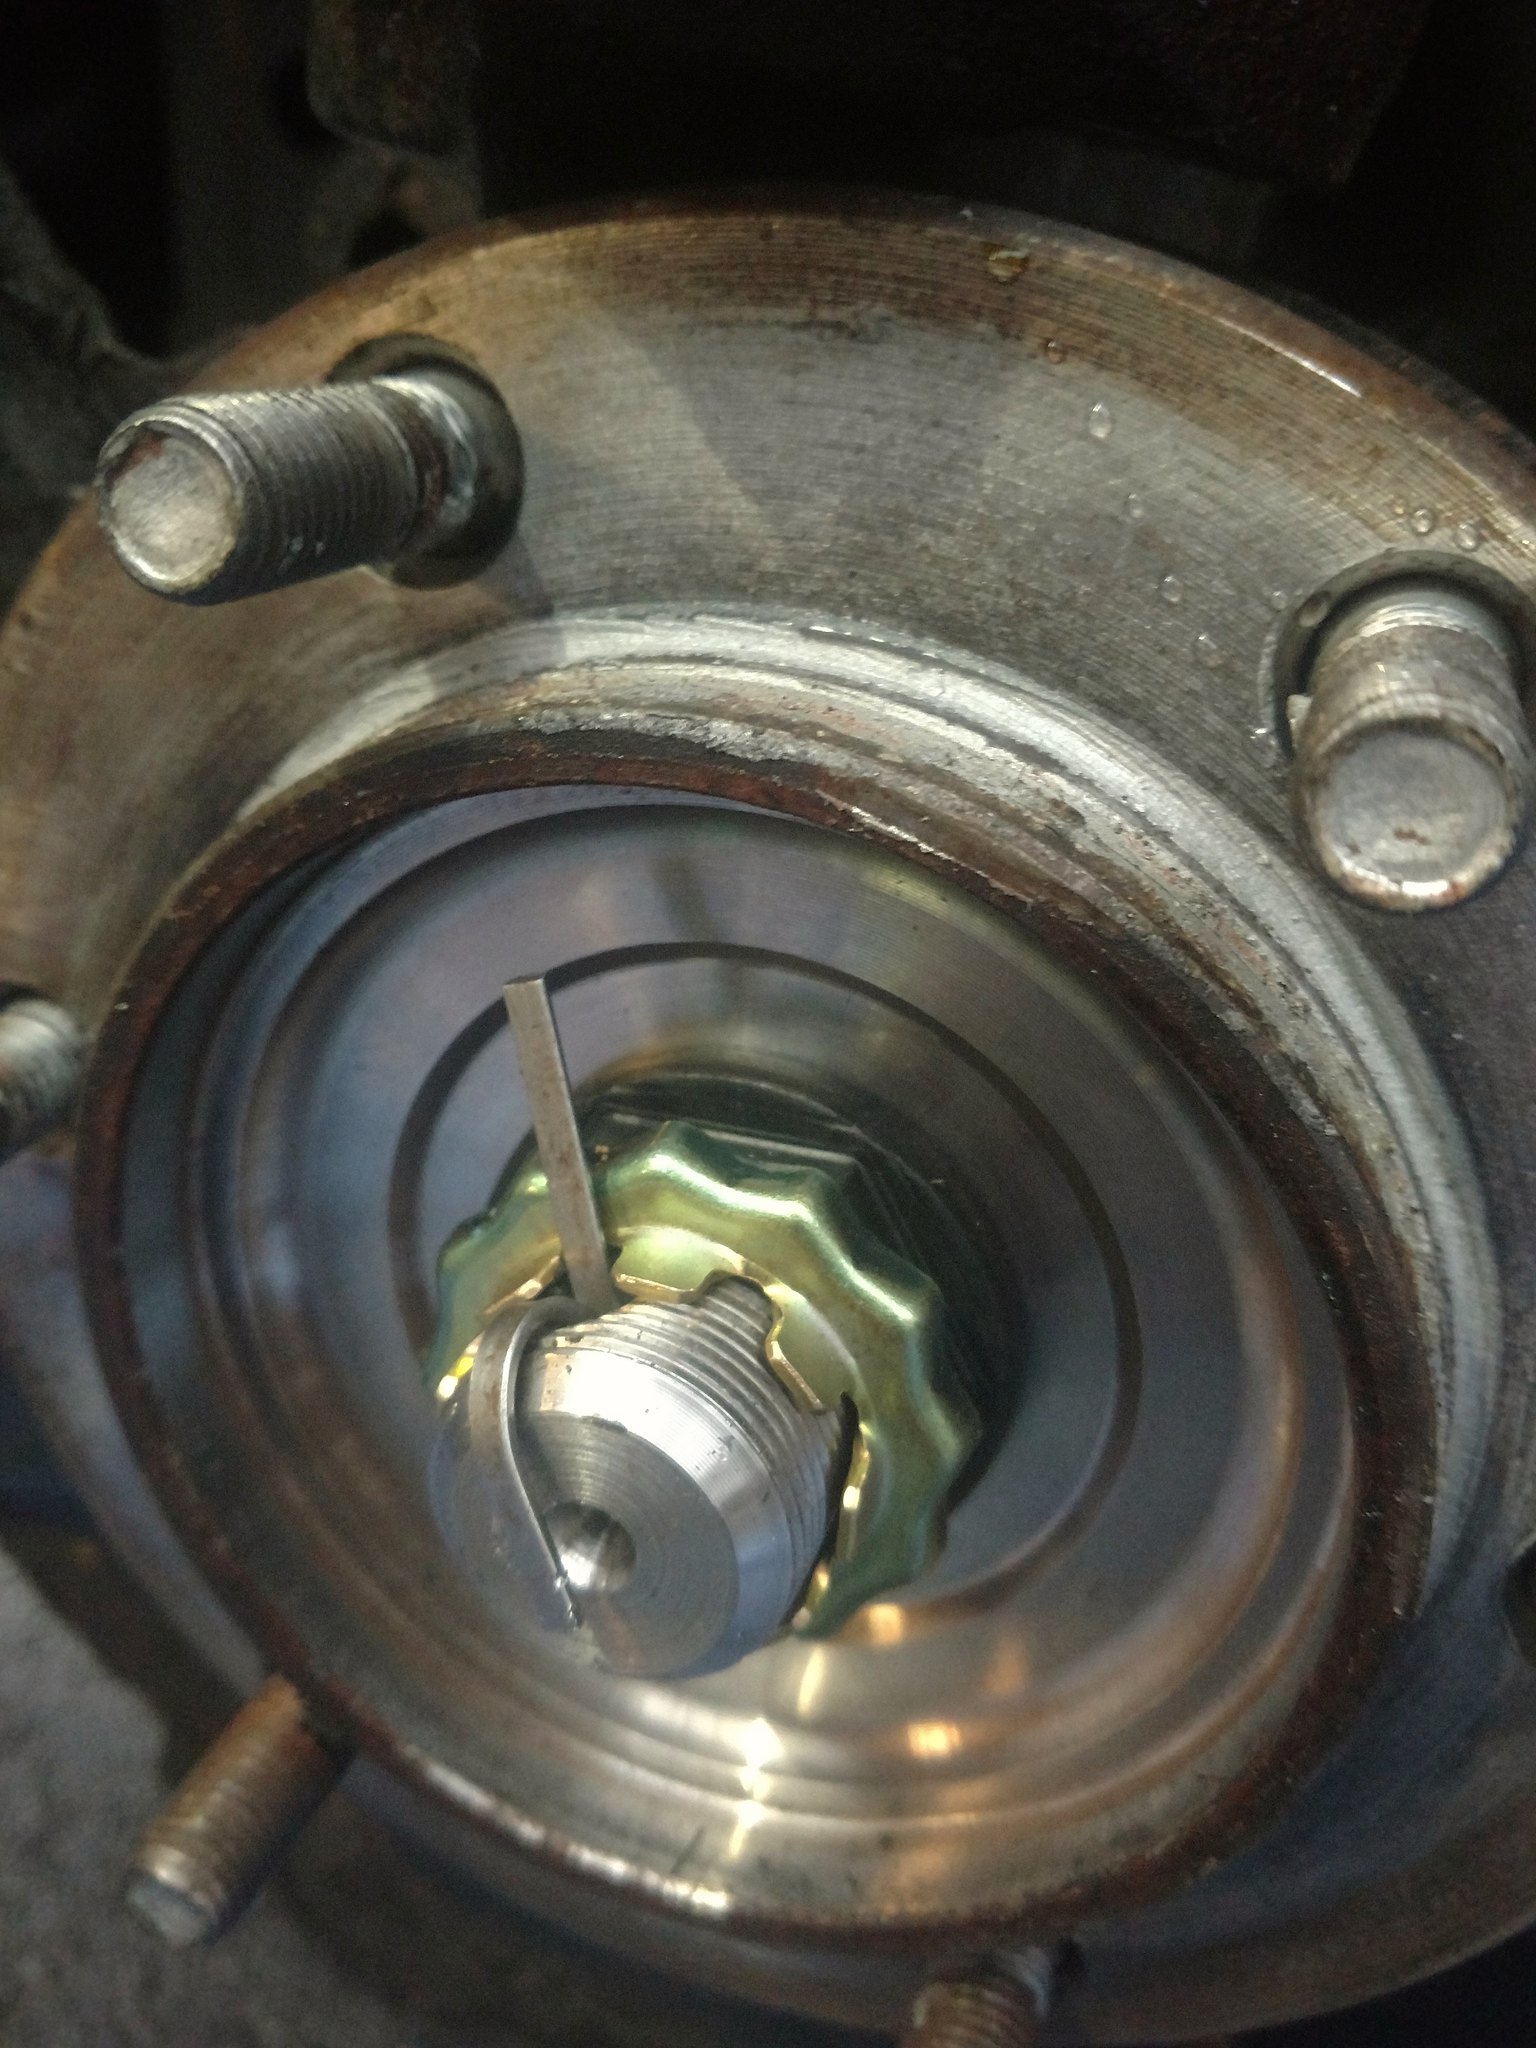
It was so clean! I have never wrenched outside of New England. Sometimes I get really frustrated. I start to think that I have no idea wtf I am doing, even after 20+ years, because it takes for.ev.er. to get anything done. Rust is a serious issue; I feel so sorry for local mechanics. I couldn't do this full time; no way. I worked this project evenings and some weekends after my "real job". I could do maybe a couple hours a night. Working outside because the trailer is inside the garage, and it's not weather-ready yet.
So, I've done a lot of reading about various penetrating lubricants at this point, of course. I always have a few cans of PB Blaster in the garage. Before this project, though, I have always had a suspicion that it doesn't do anything to battle rust. I wanted to put it to some sort of test. I understand this is not at all scientific, and the results should be taken heavily salted. But I figured, knowing what I was up against, it would be a perfect opportunity to really be diligent about using it, and give it a fair try. I also have read that a 50/50 blend of acetone and ATF is supposed to be the holy grail of penetrant, better even than Kroil. So I made a batch of that too. I wanted to put them head to head and see if there was any truth to it.
After a few days, maybe a week, I got "everything" out:
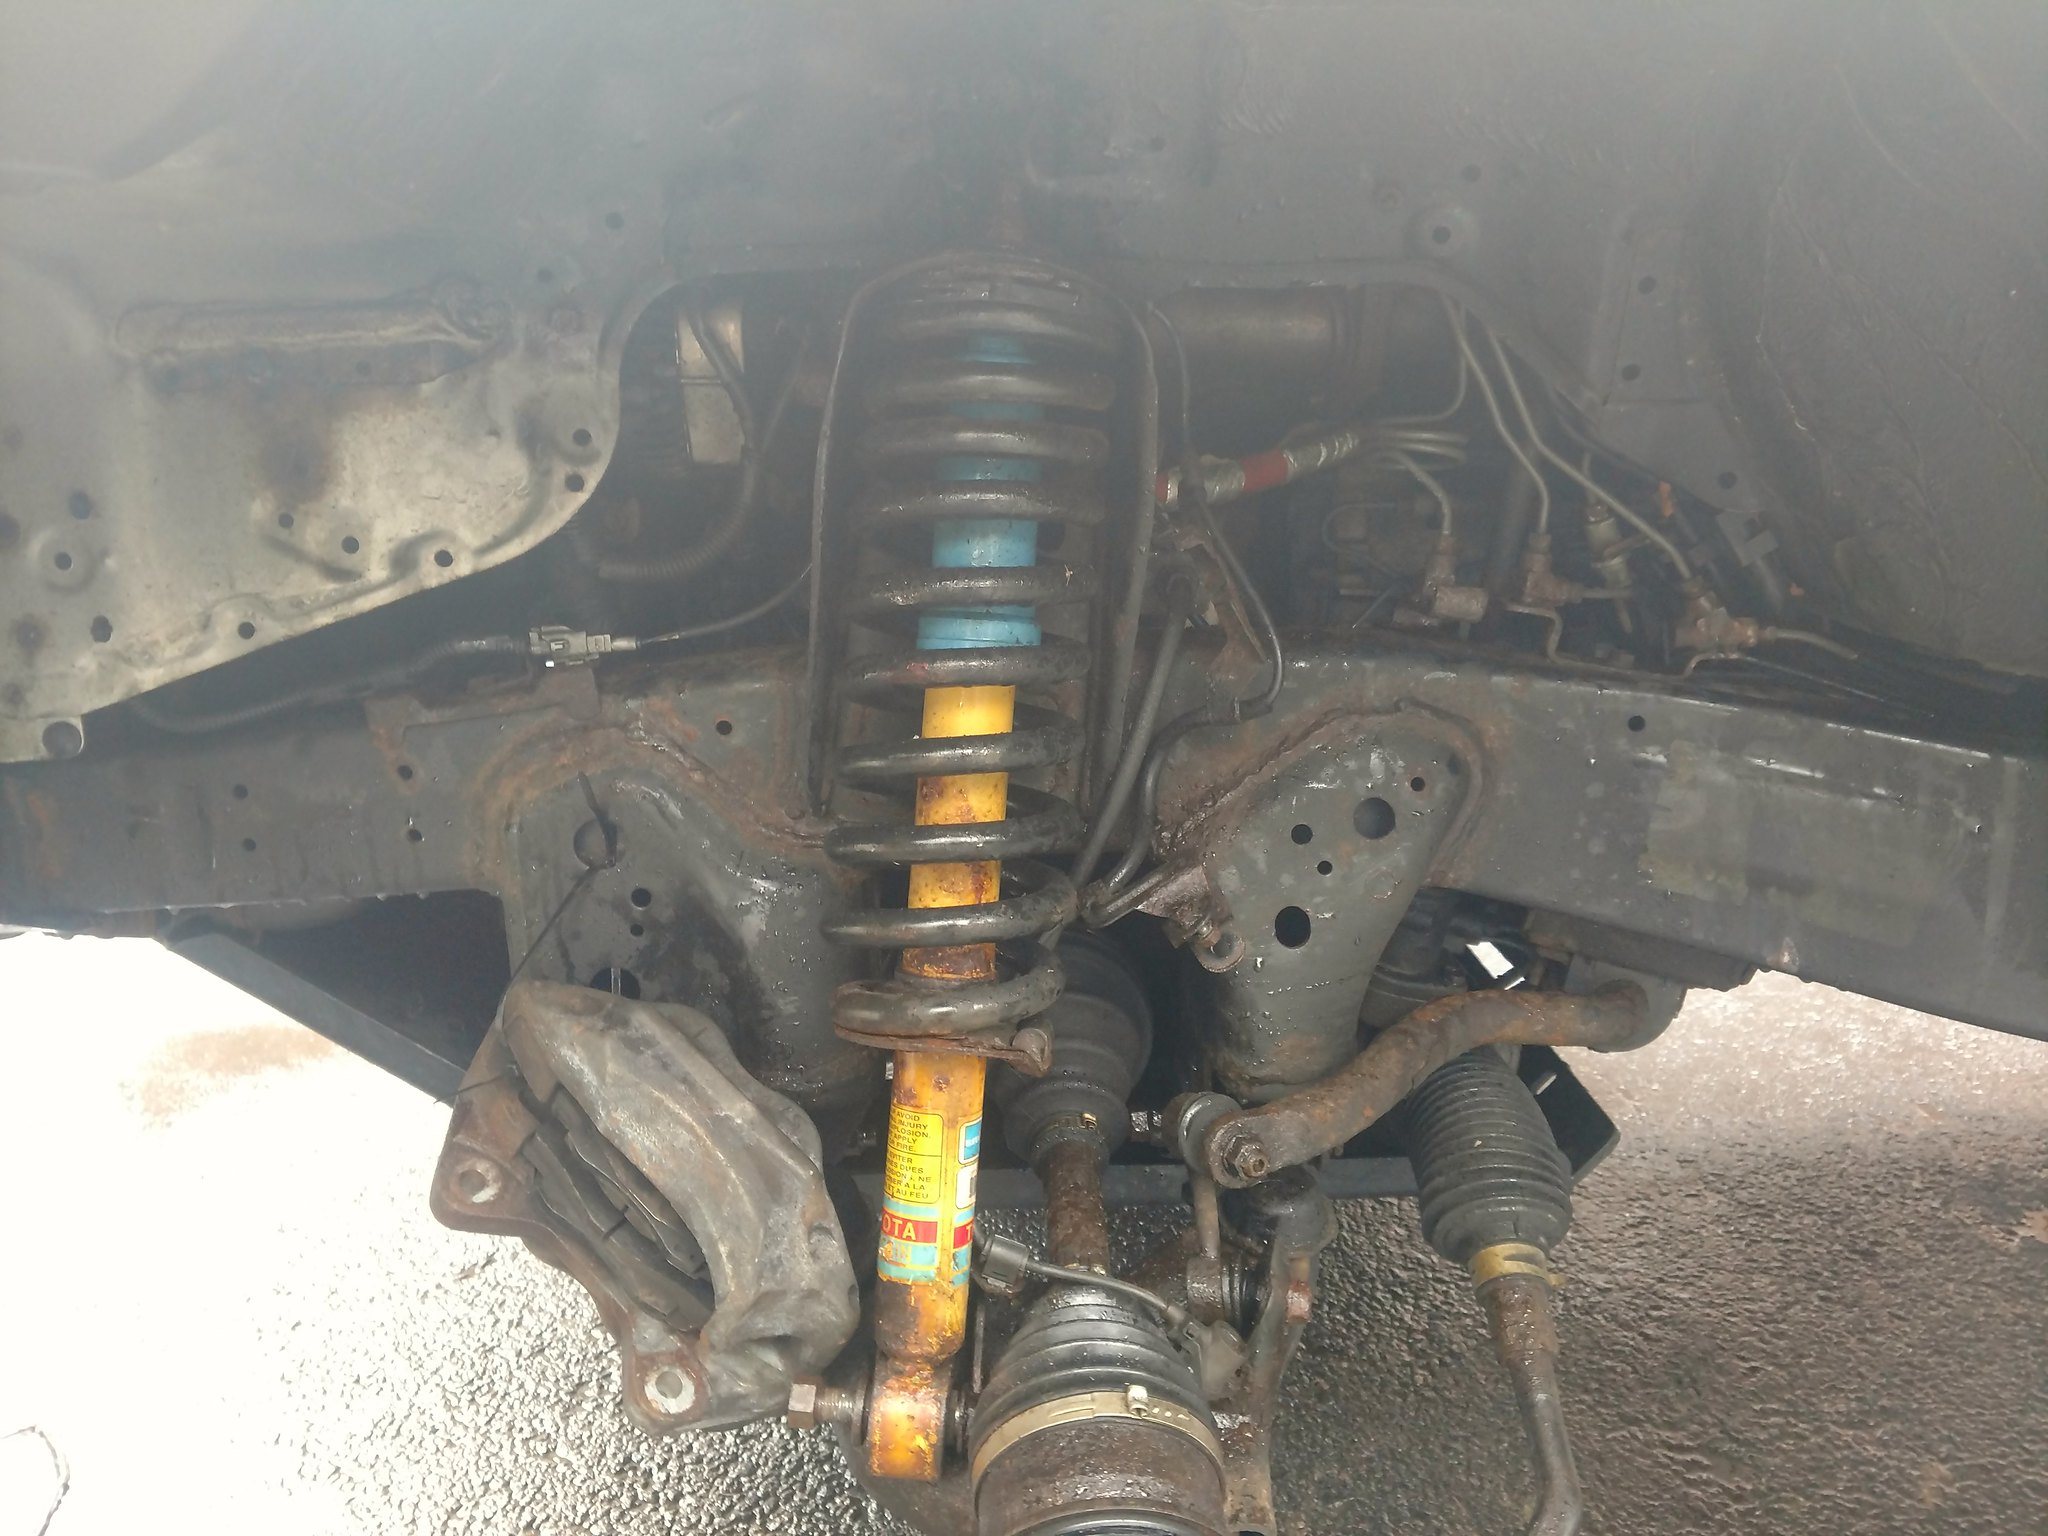
I say "everything", because it was about this stage that I learned it is very common for the lower control arm hardware to seize in these trucks. This renders them essentially un-adjustable. Well that's a problem. It's also a problem because I wanted to take them out to clean them up a bit and they were just in the way of putting the new stuff in. Also, the top spring mount nuts were being difficult. Access is hard to show, but it's not that great:
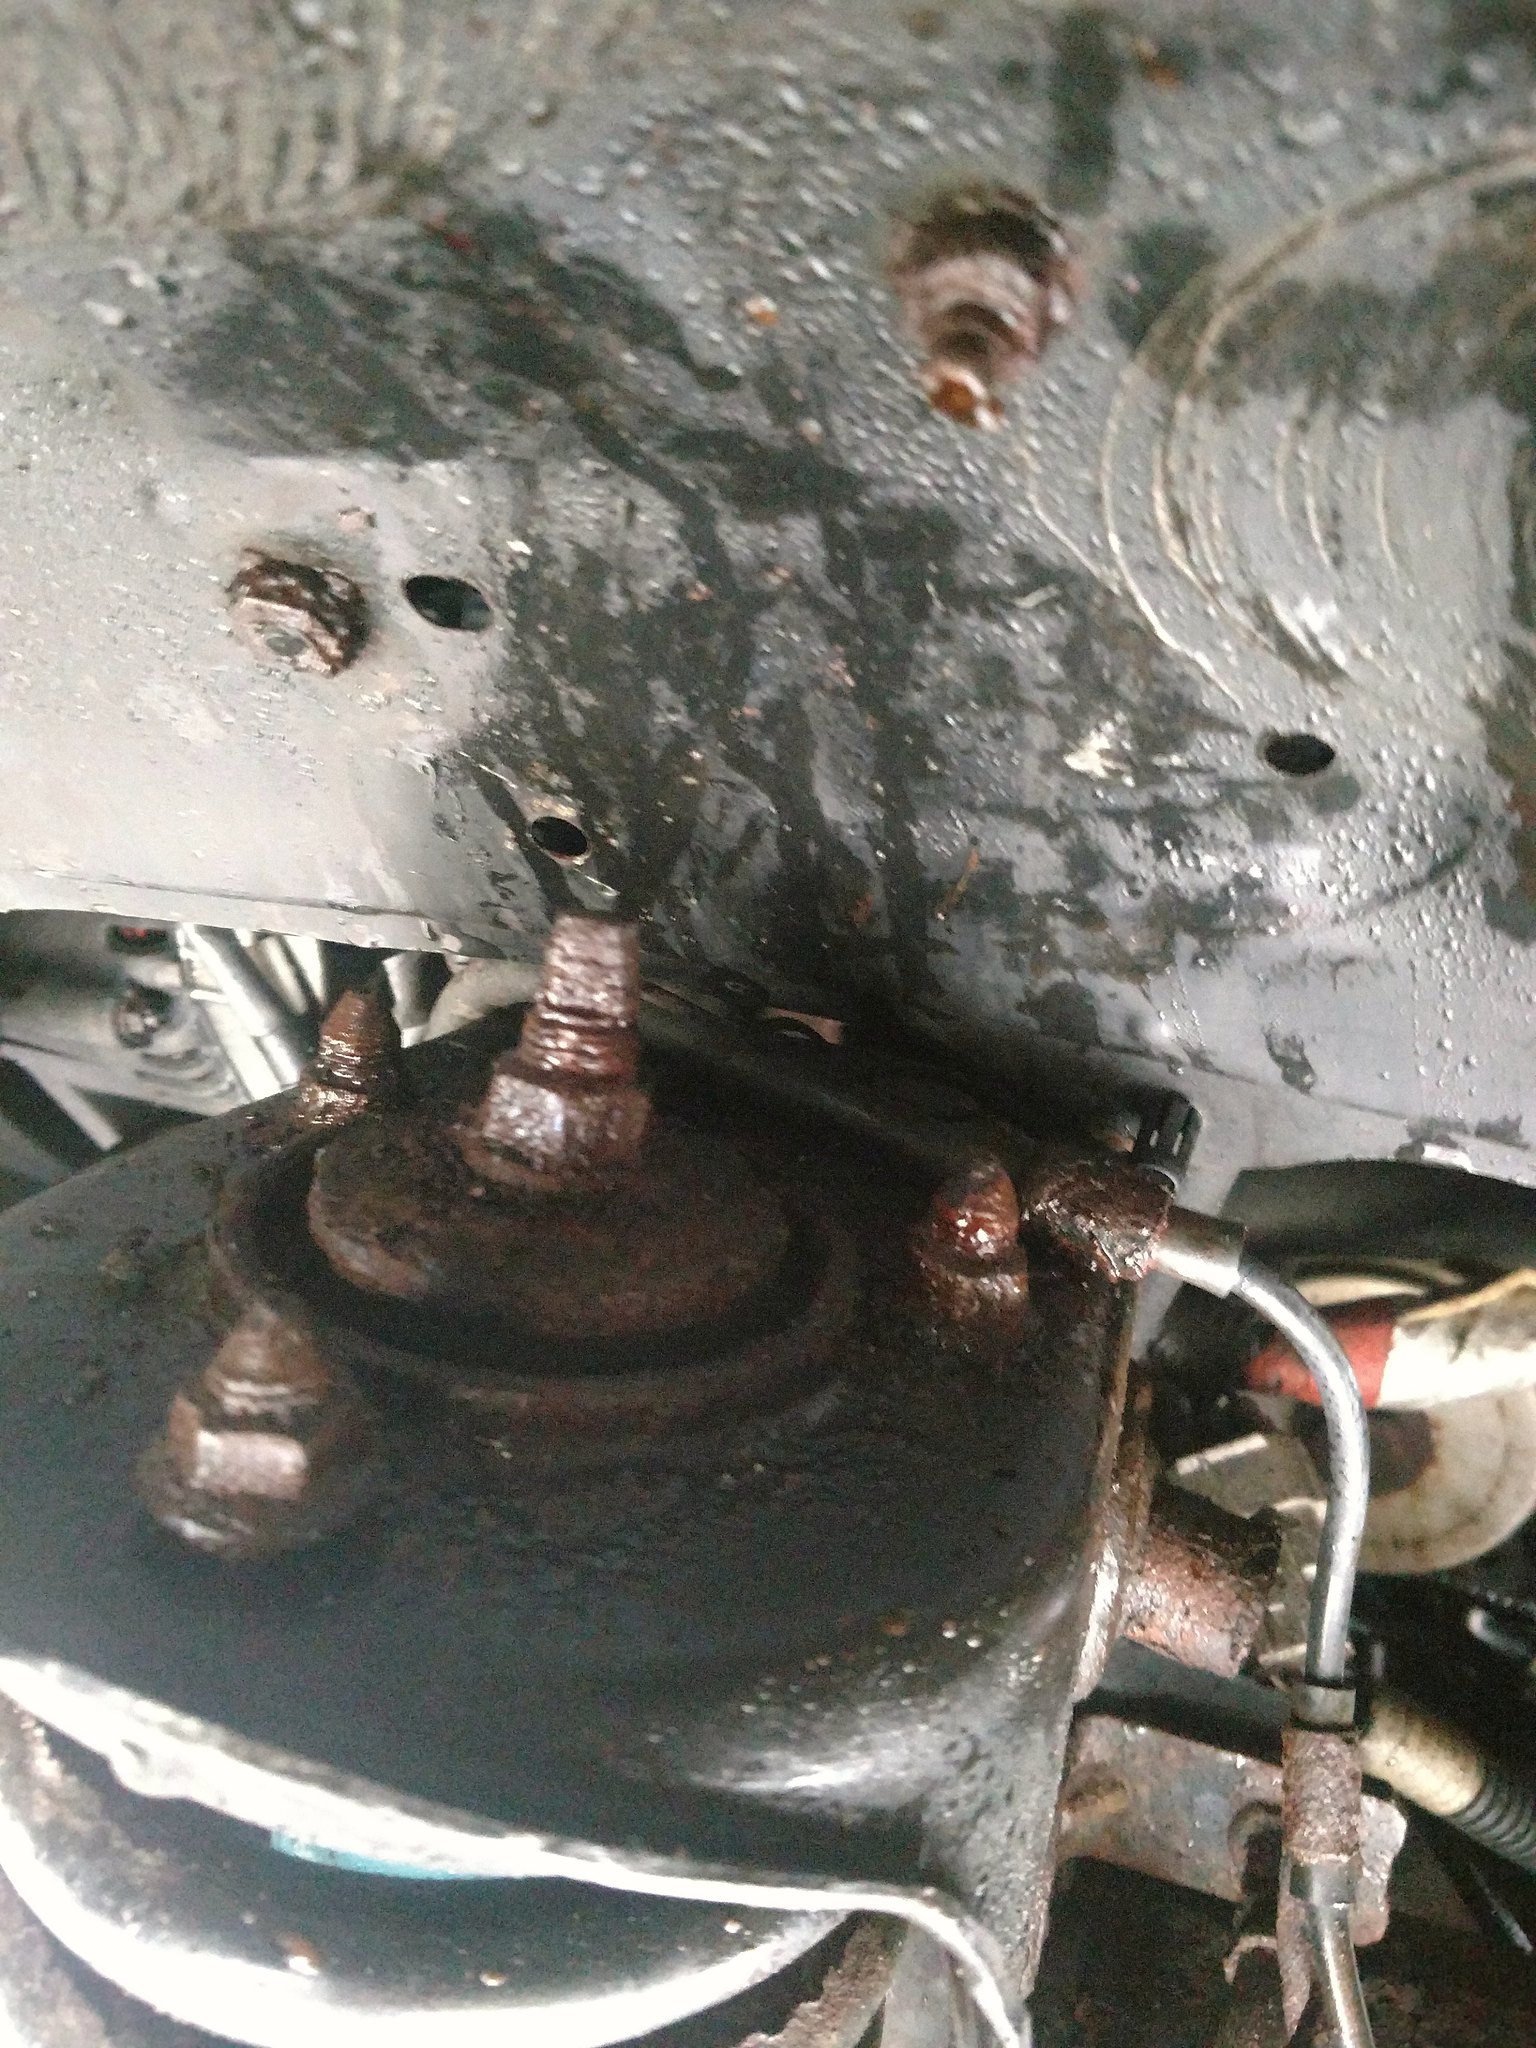
The height is the issue; you can't really get a deep well socket on there. And my ratcheting wrenches are too "fat" to fit between the nut and the center "ring" thing. Anyway. Perfect application for PB blast and the 50/50 acetone/ATF mix. I put one product on one nut, and the other on a second. The third got both. If I remember correctly, these received the application at least a few days before attempting to remove them. Based on my research, most people recommend letting hardware soak overnight, at minimum, and longer seems generally accepted as better. When I finally got the nuts off, the threads of the studs were all dry. Neither product, nor the mixture of both, worked. Apparently rust is impenetrable. That said, I still wanted to give each a fair shake, like I said. I had up to this point used either and/or both on every threaded fastener. I continued to use them after as well. Every single bolt or nut came apart dry. Like I said before, I understand that the results are not really quantitative, there was no control, etc. etc. I did not apply the scientific method. But my anecdotal evidence shows that rust is impenetrable.
Anyway, frustrated, I continued. Thoughtfully, Toyota put a hex socket in the ends of the sway bar end link studs. That's great because the rust makes them round, and useless. As such, these had to be cut off:
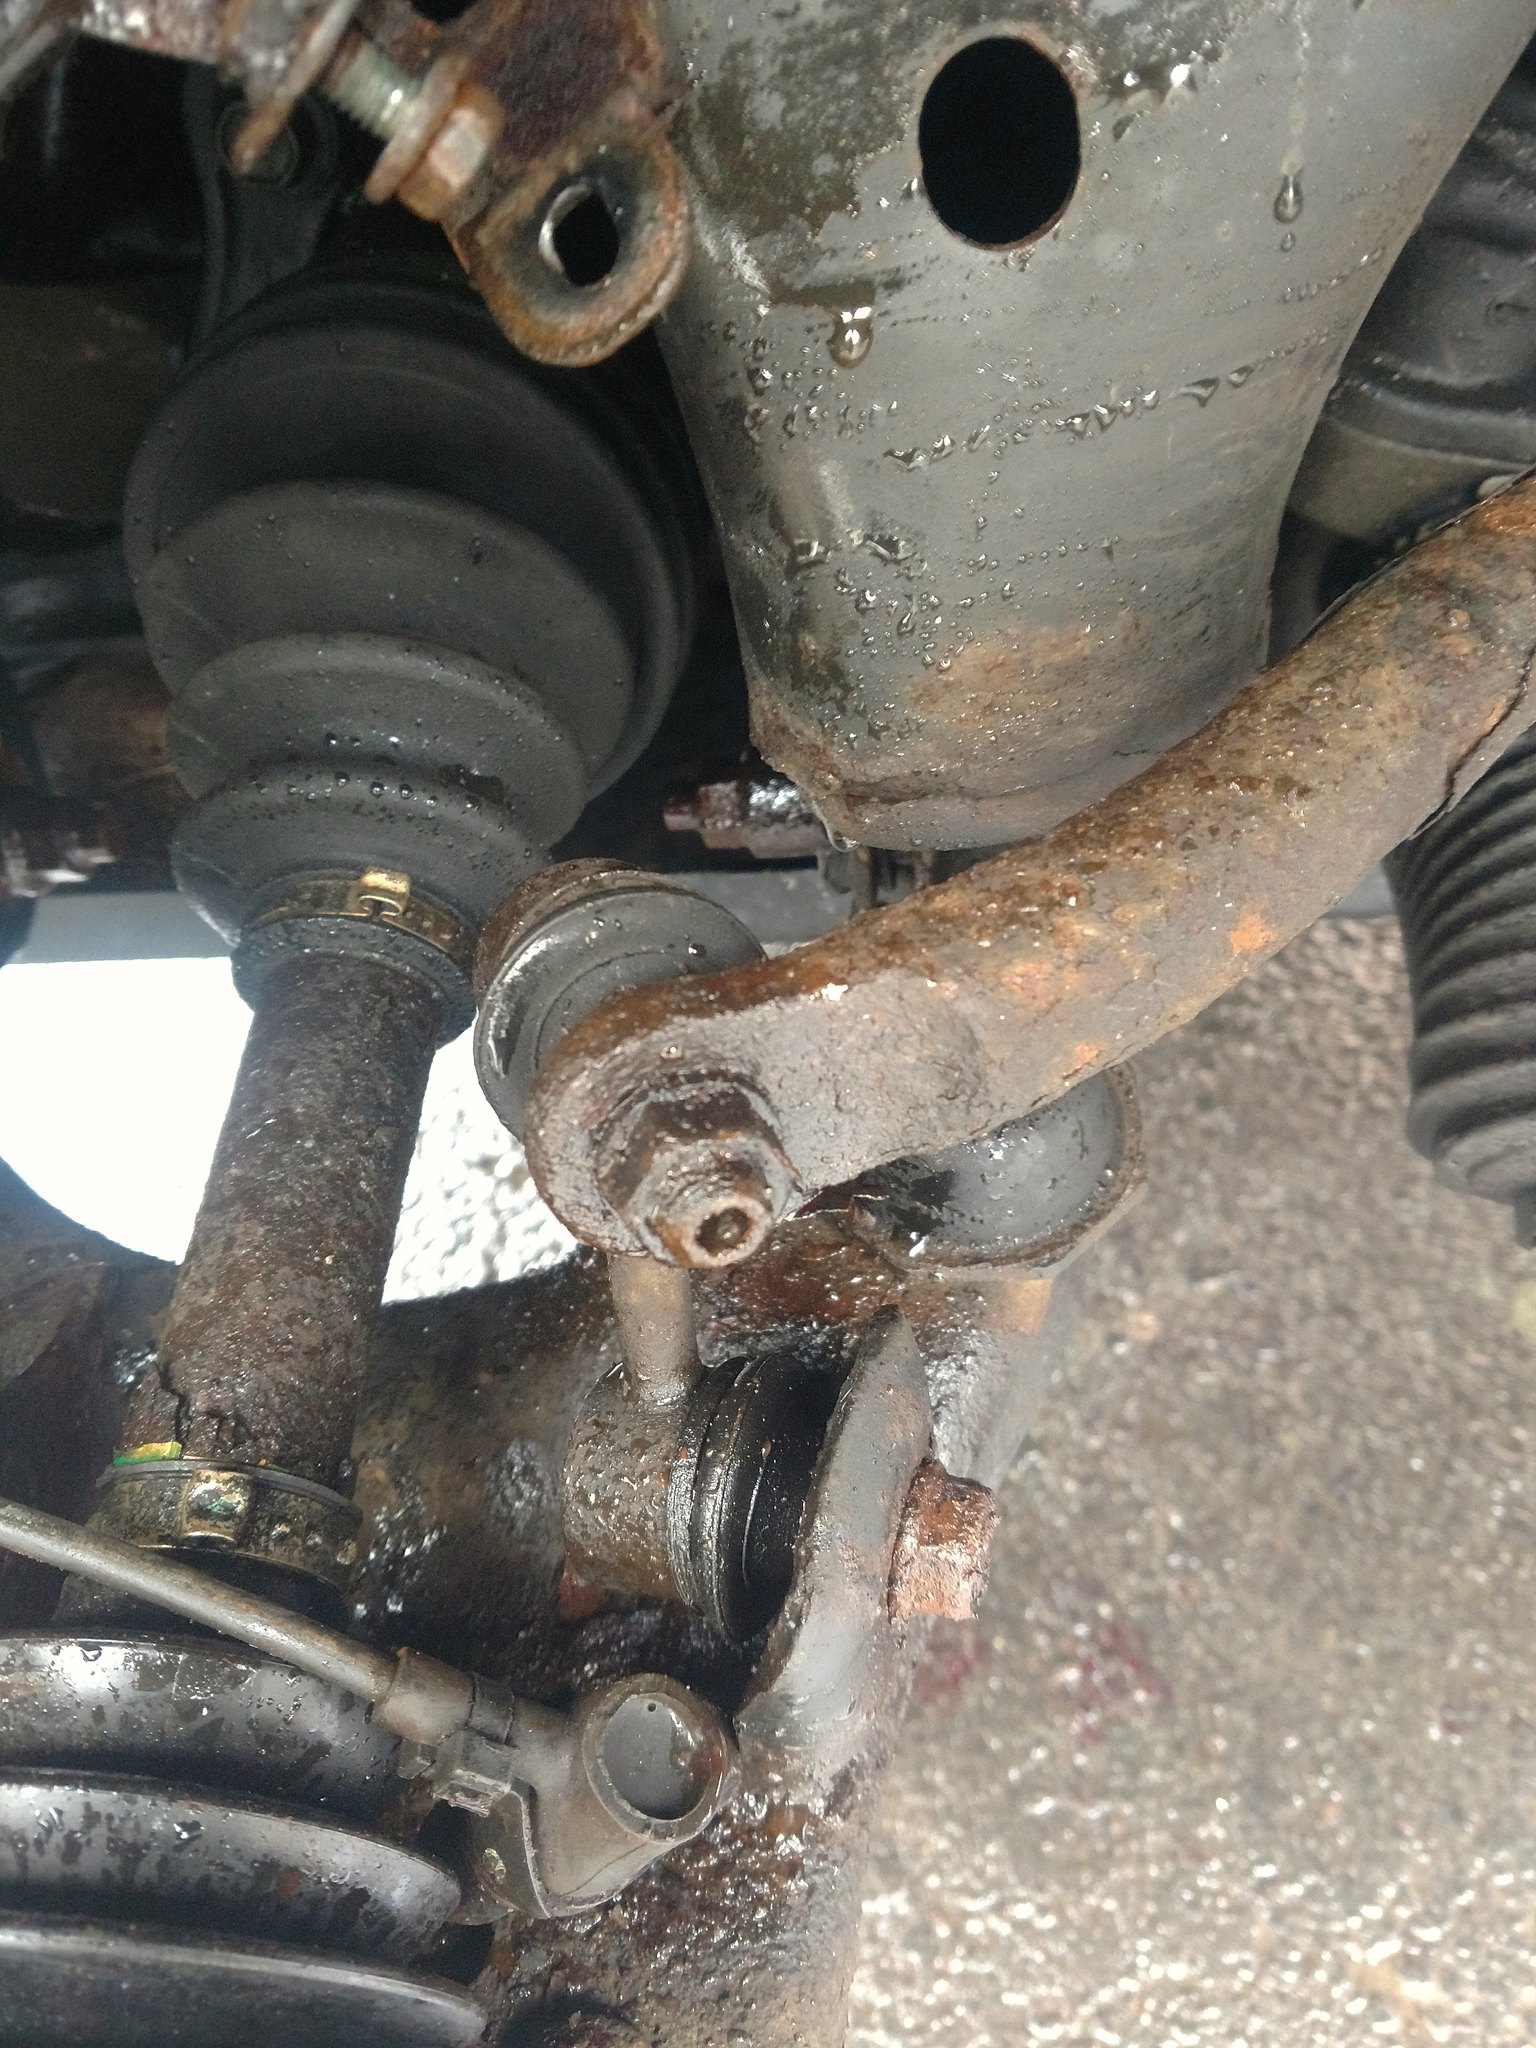
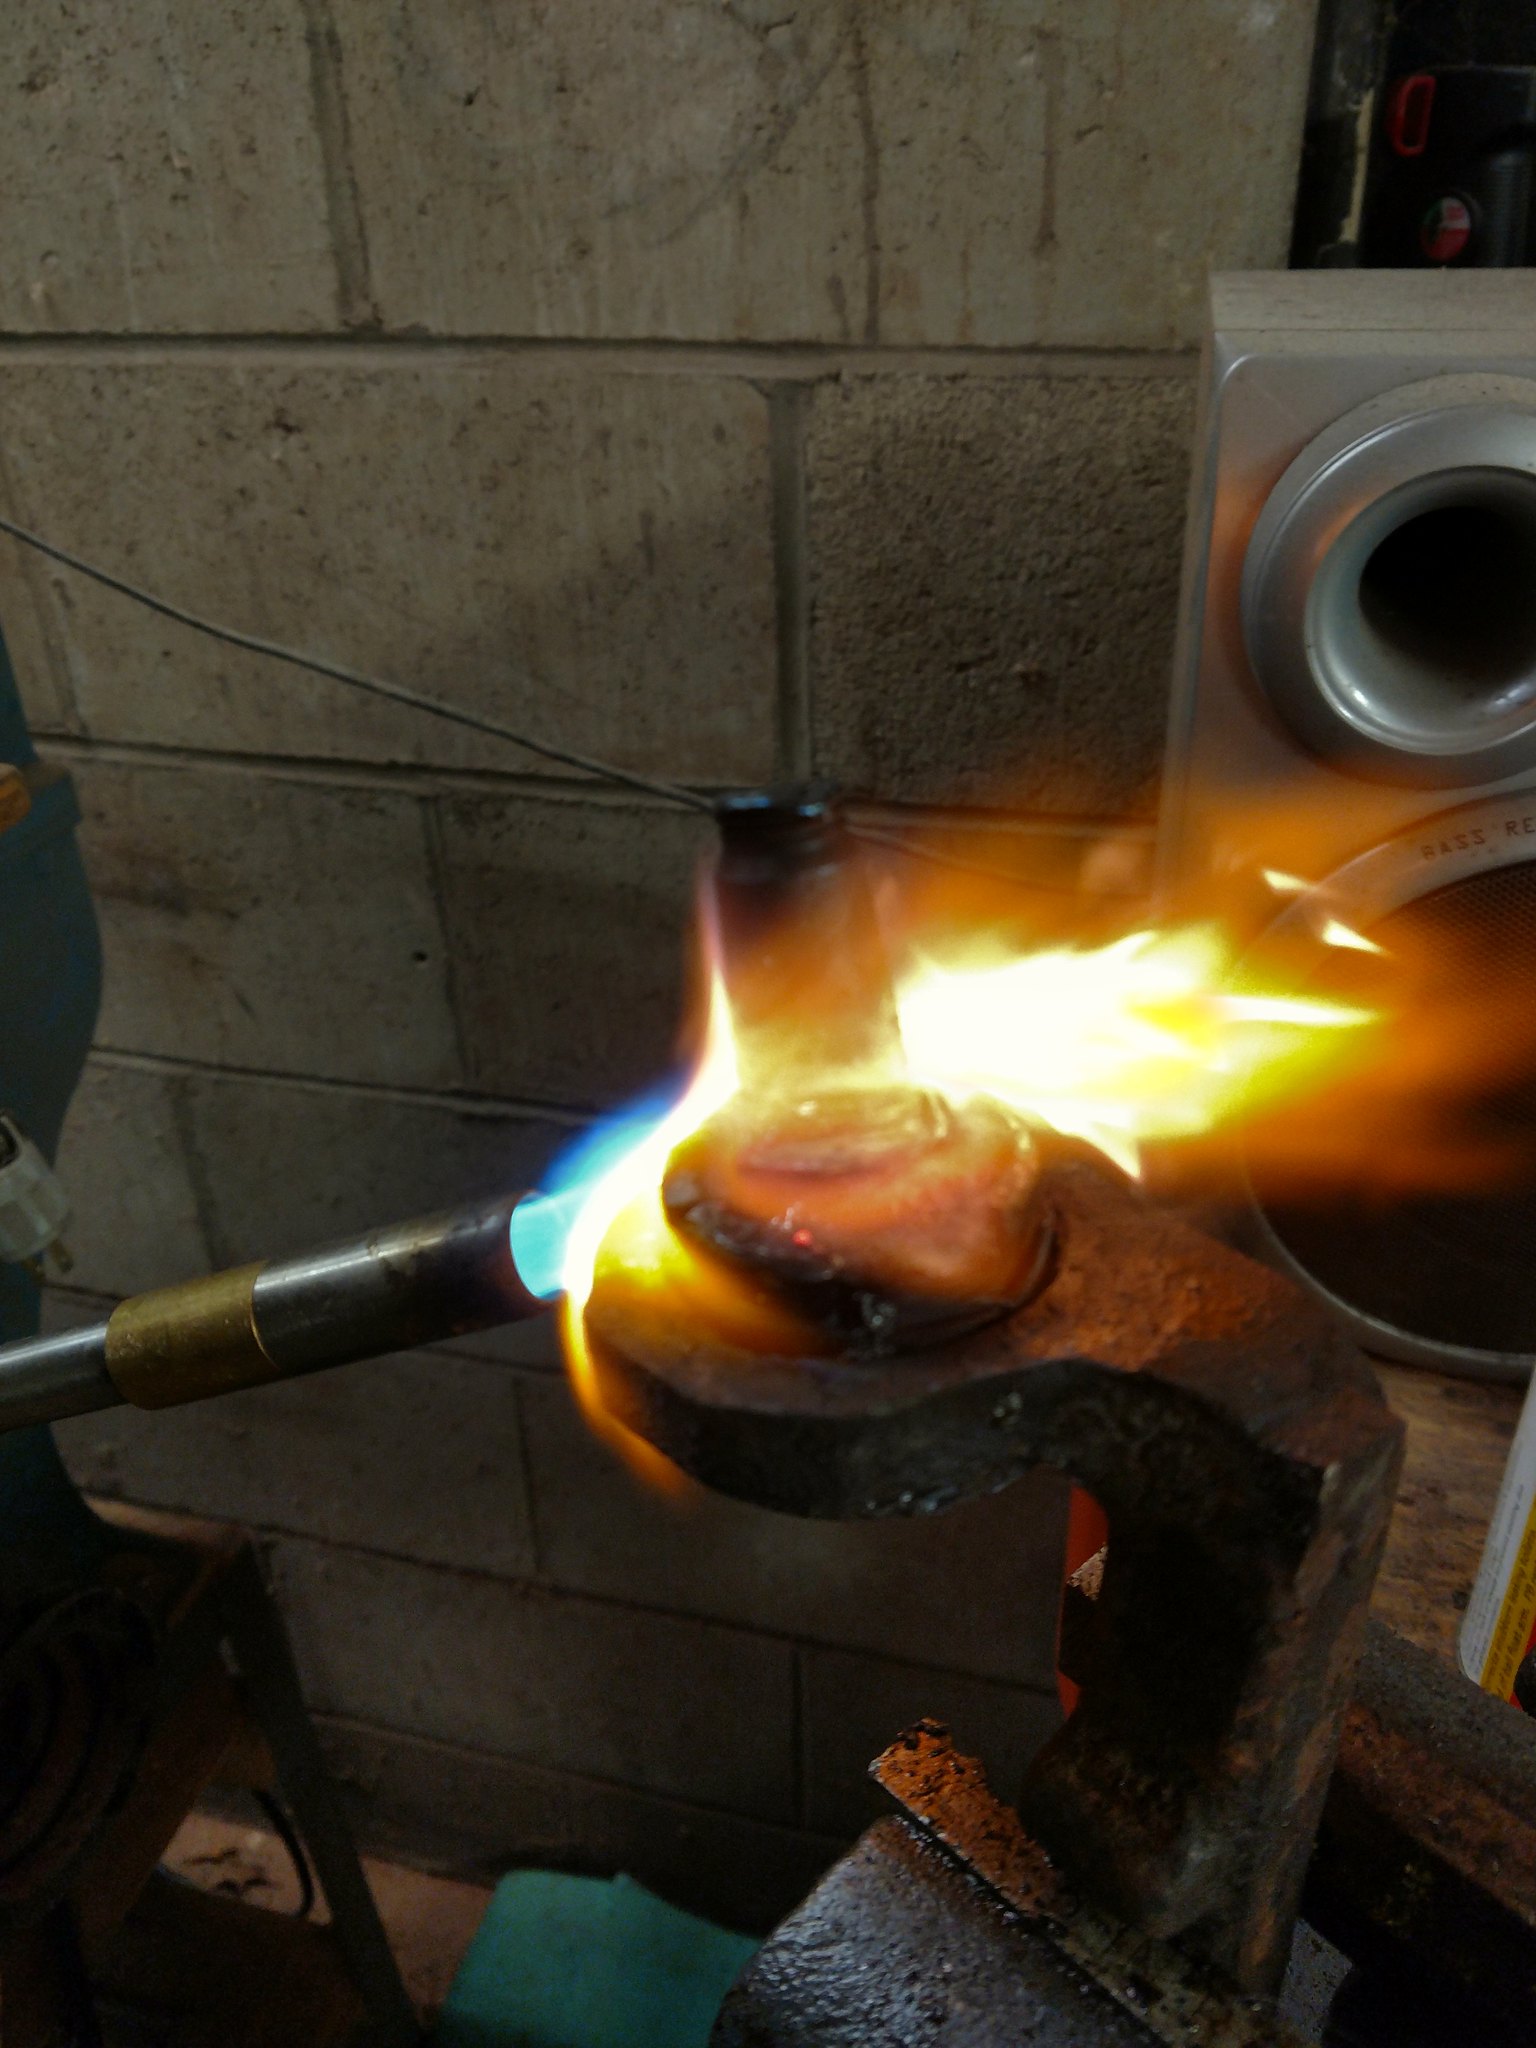
So I added those to the list. So, previously I showed that the upper control arms and spindles were out. I wasn't reusing the upper control arms, which was great, but I needed to separate them. This was an epic battle for the ages. I knew this would be tough going in, so I had a ball joint press on hand. Brilliant, right? What a joke, that thing was useless. It's functionally a glorified C-clamp. Well, I actually "opened" the C from cranking on it too hard. It was very slight, but still noticeable. I bathed it in penetrating lubricant. I torched it innumerable times:
I smashed it with a sledge hammer so much that I bent the forging:
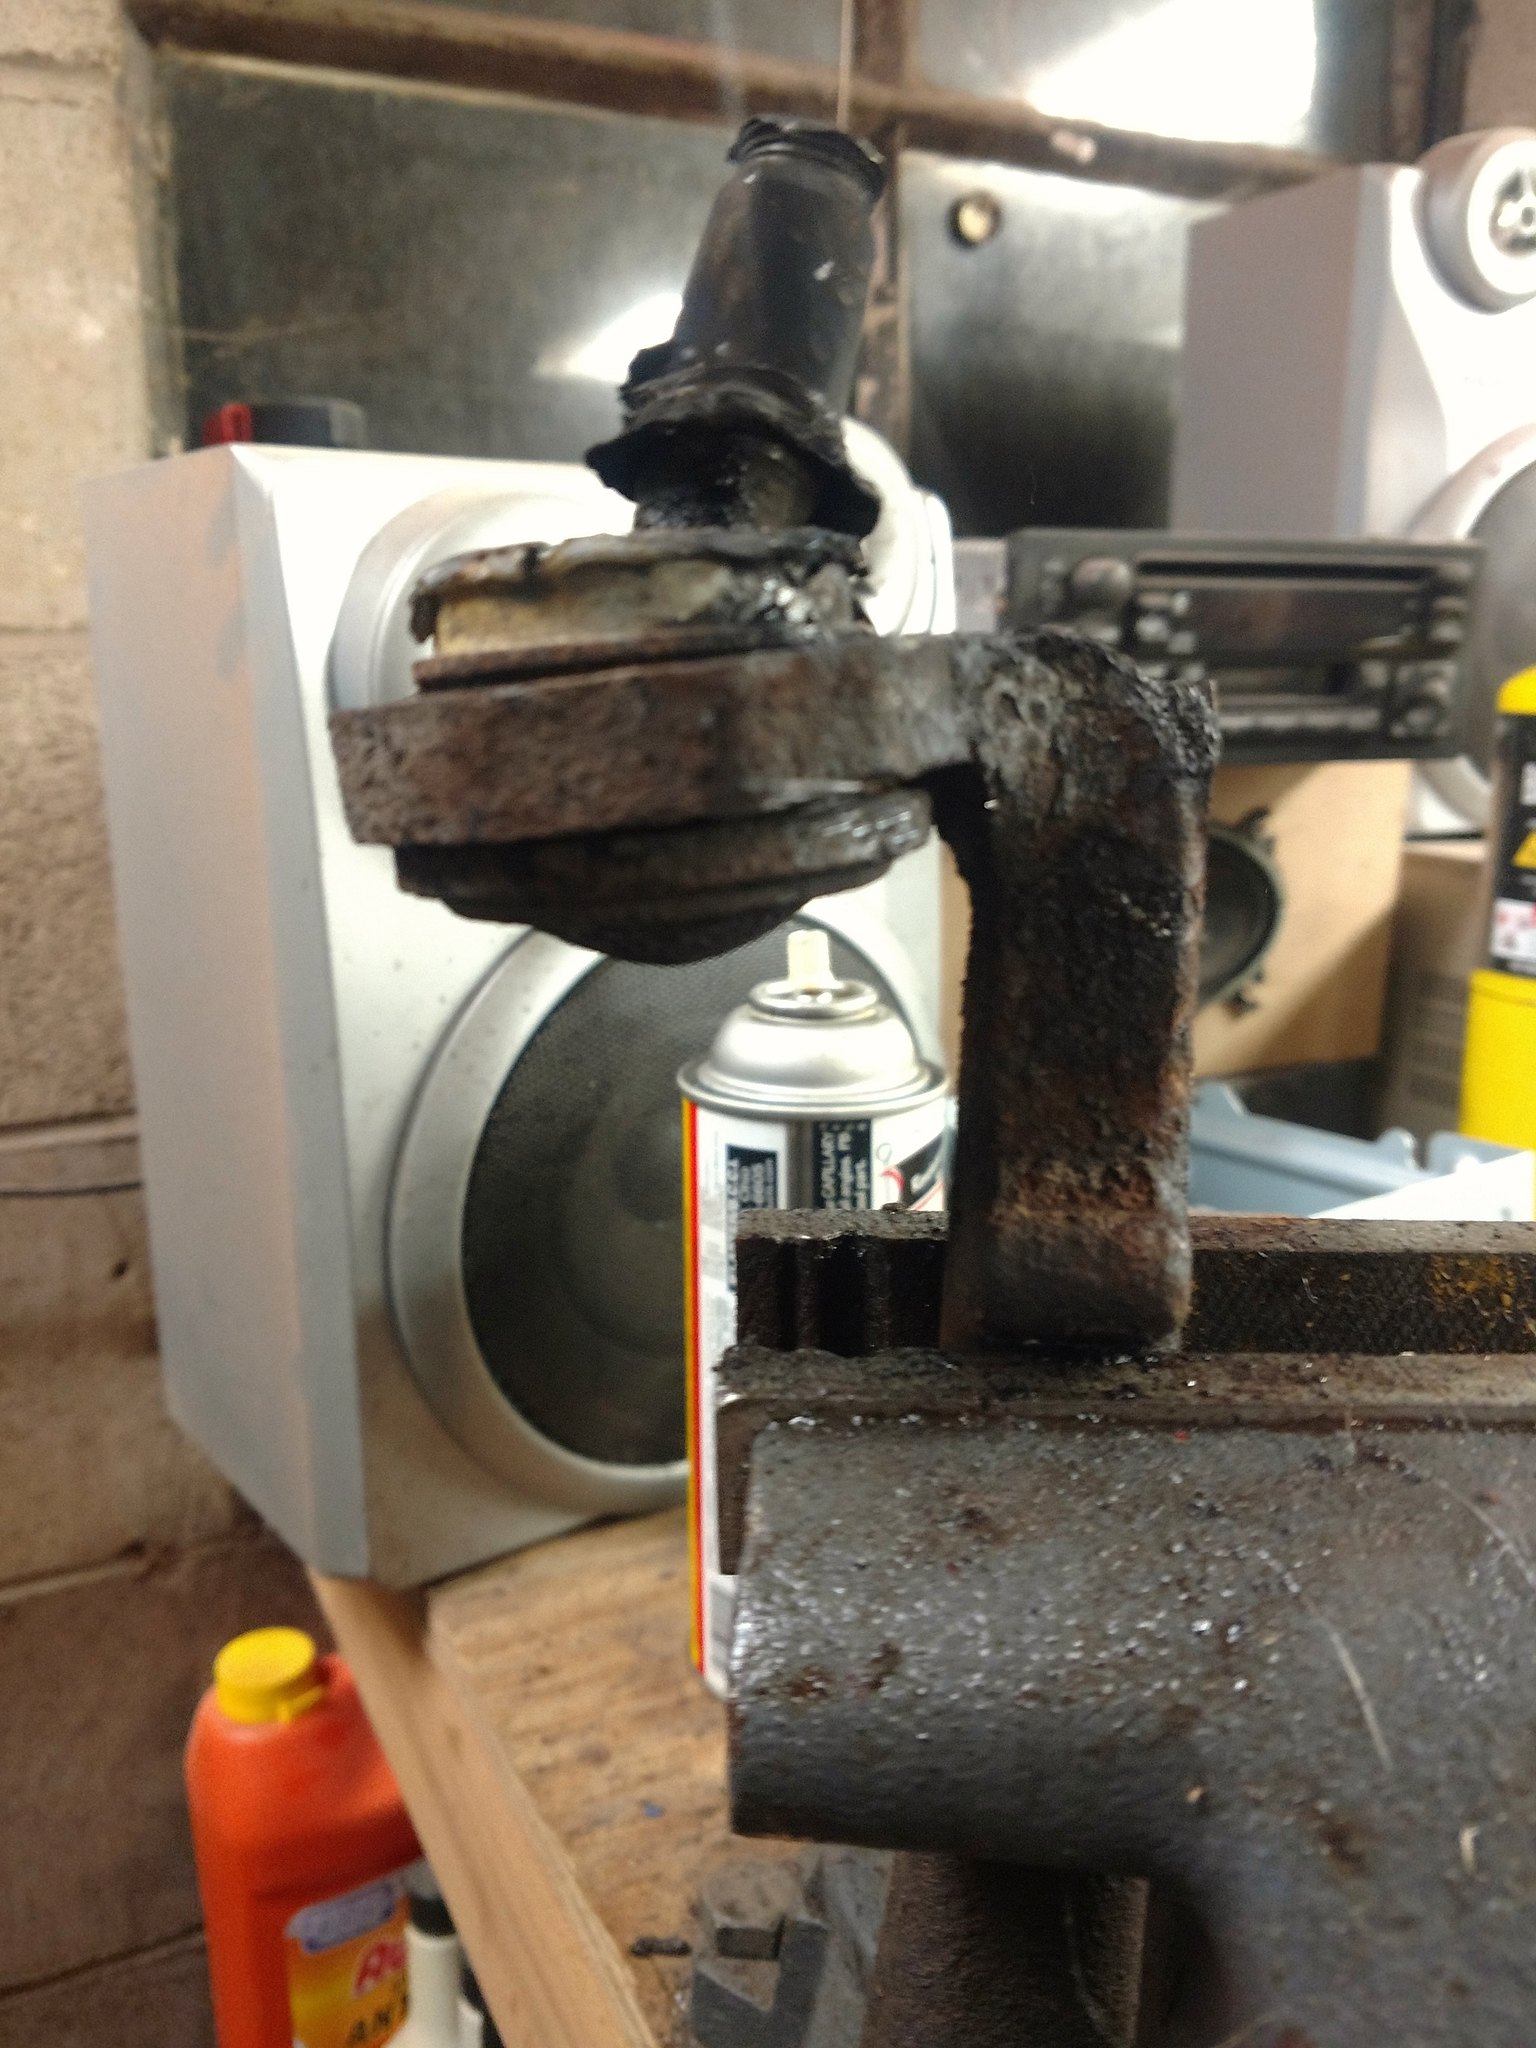
But as you can see there, the ball joint actually began moving. I was so happy I did a ****ing jig on the work bench. Many more sledgehammer swings and success:
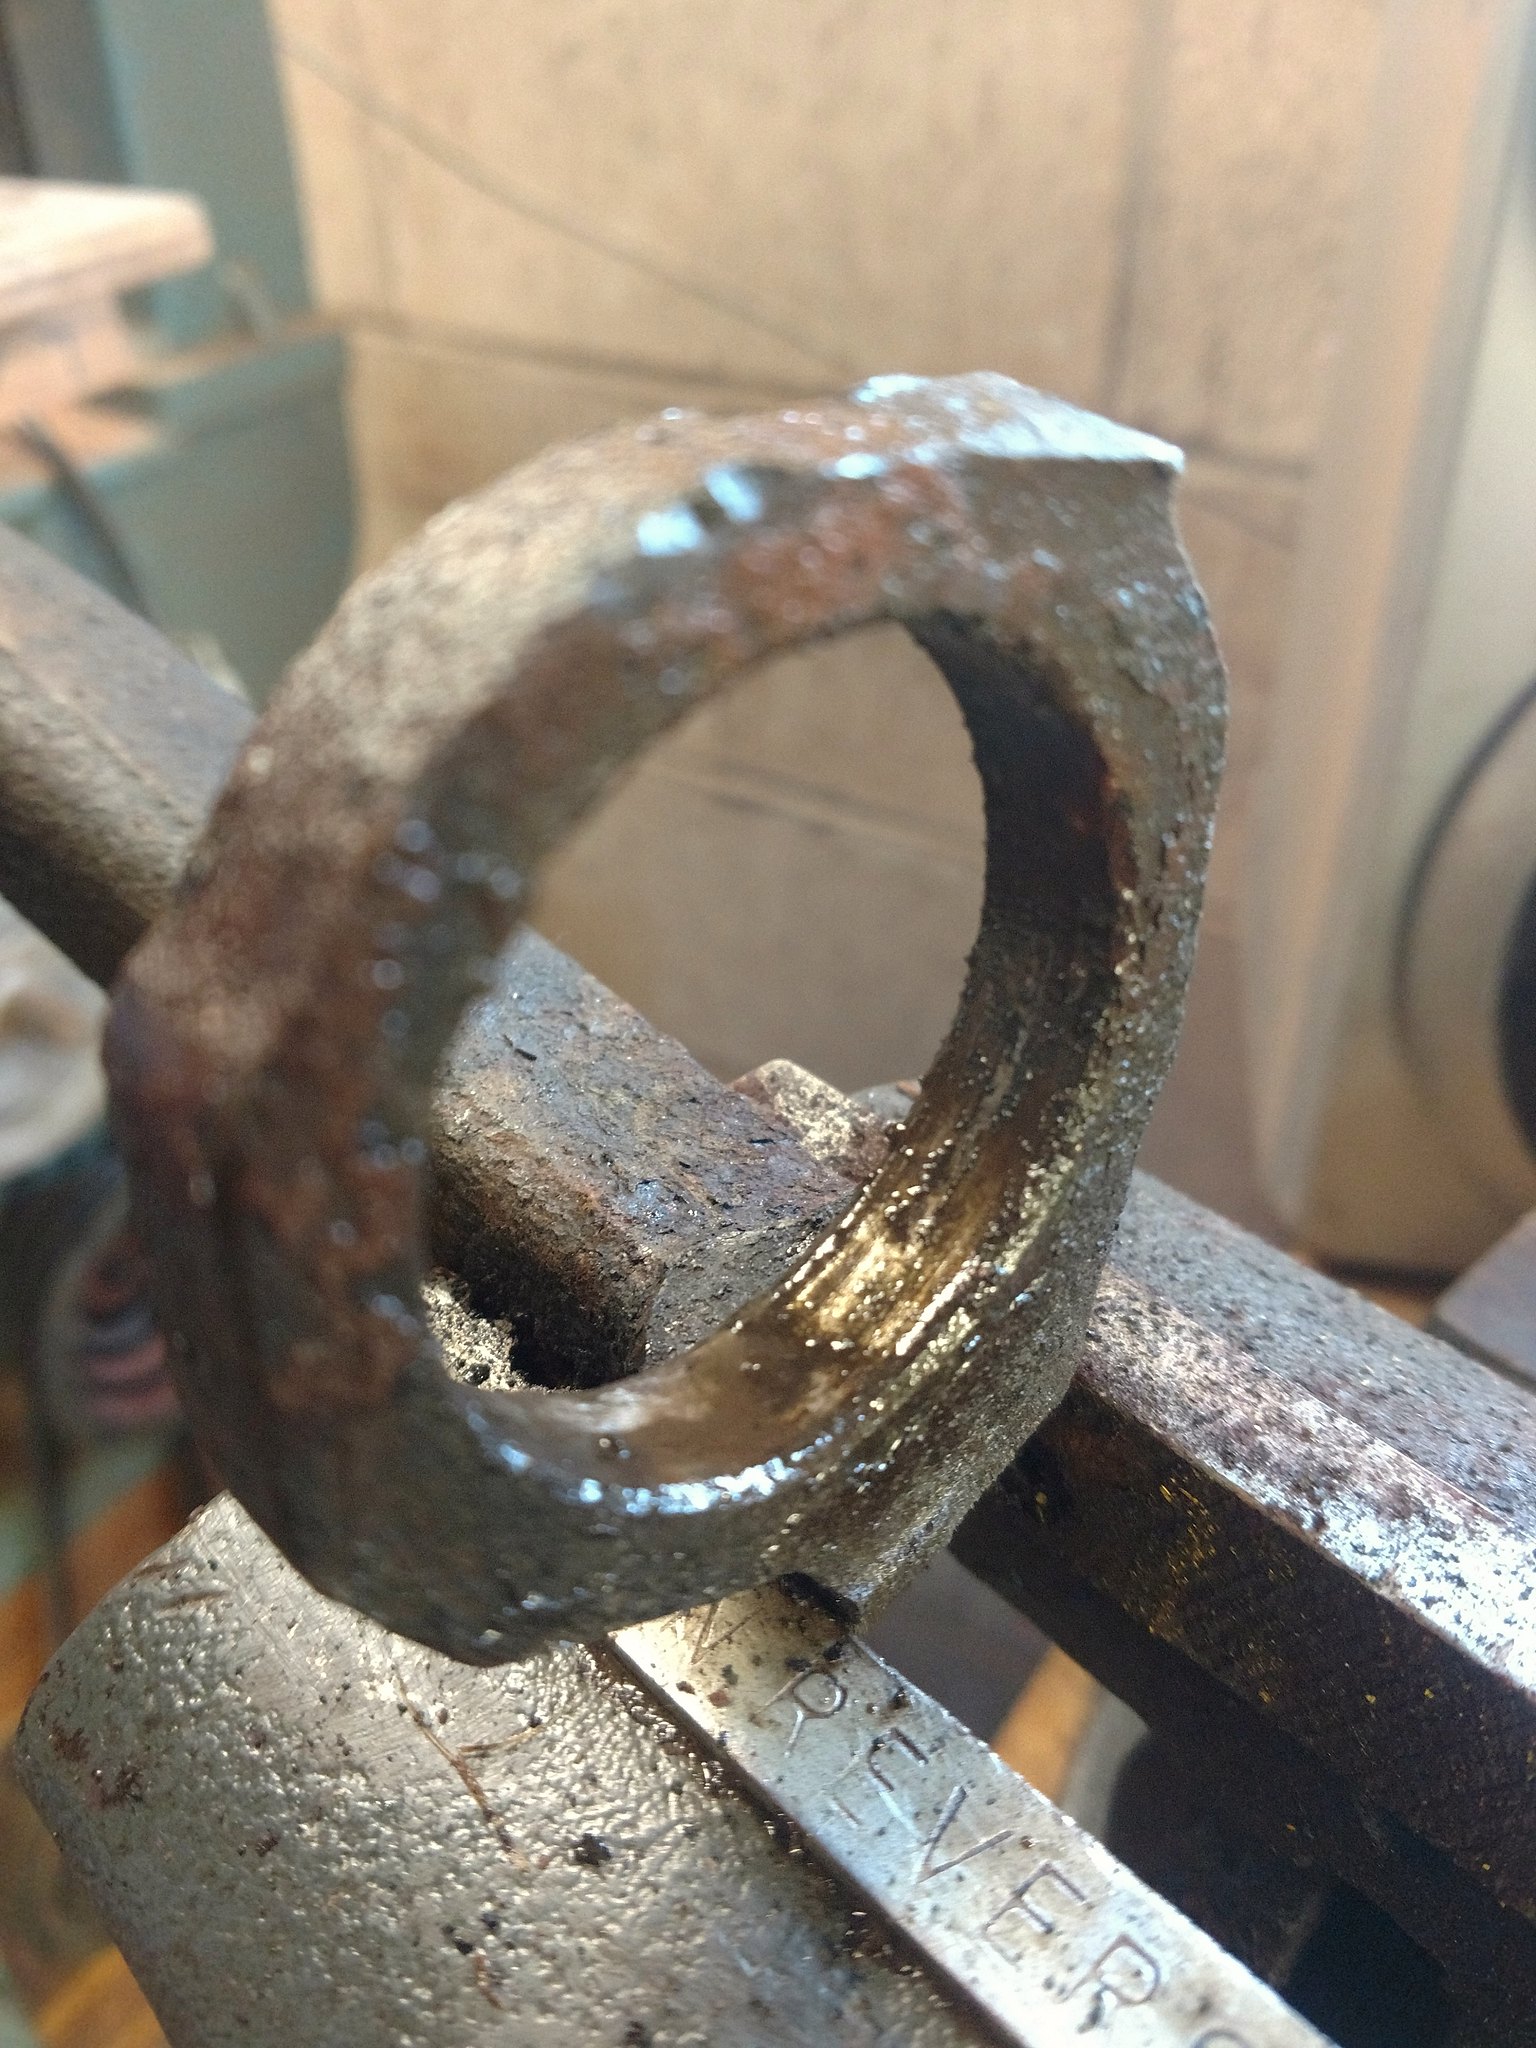
My back was so inflamed I laid down and cried. Finally, I could prep for installing the gussets:
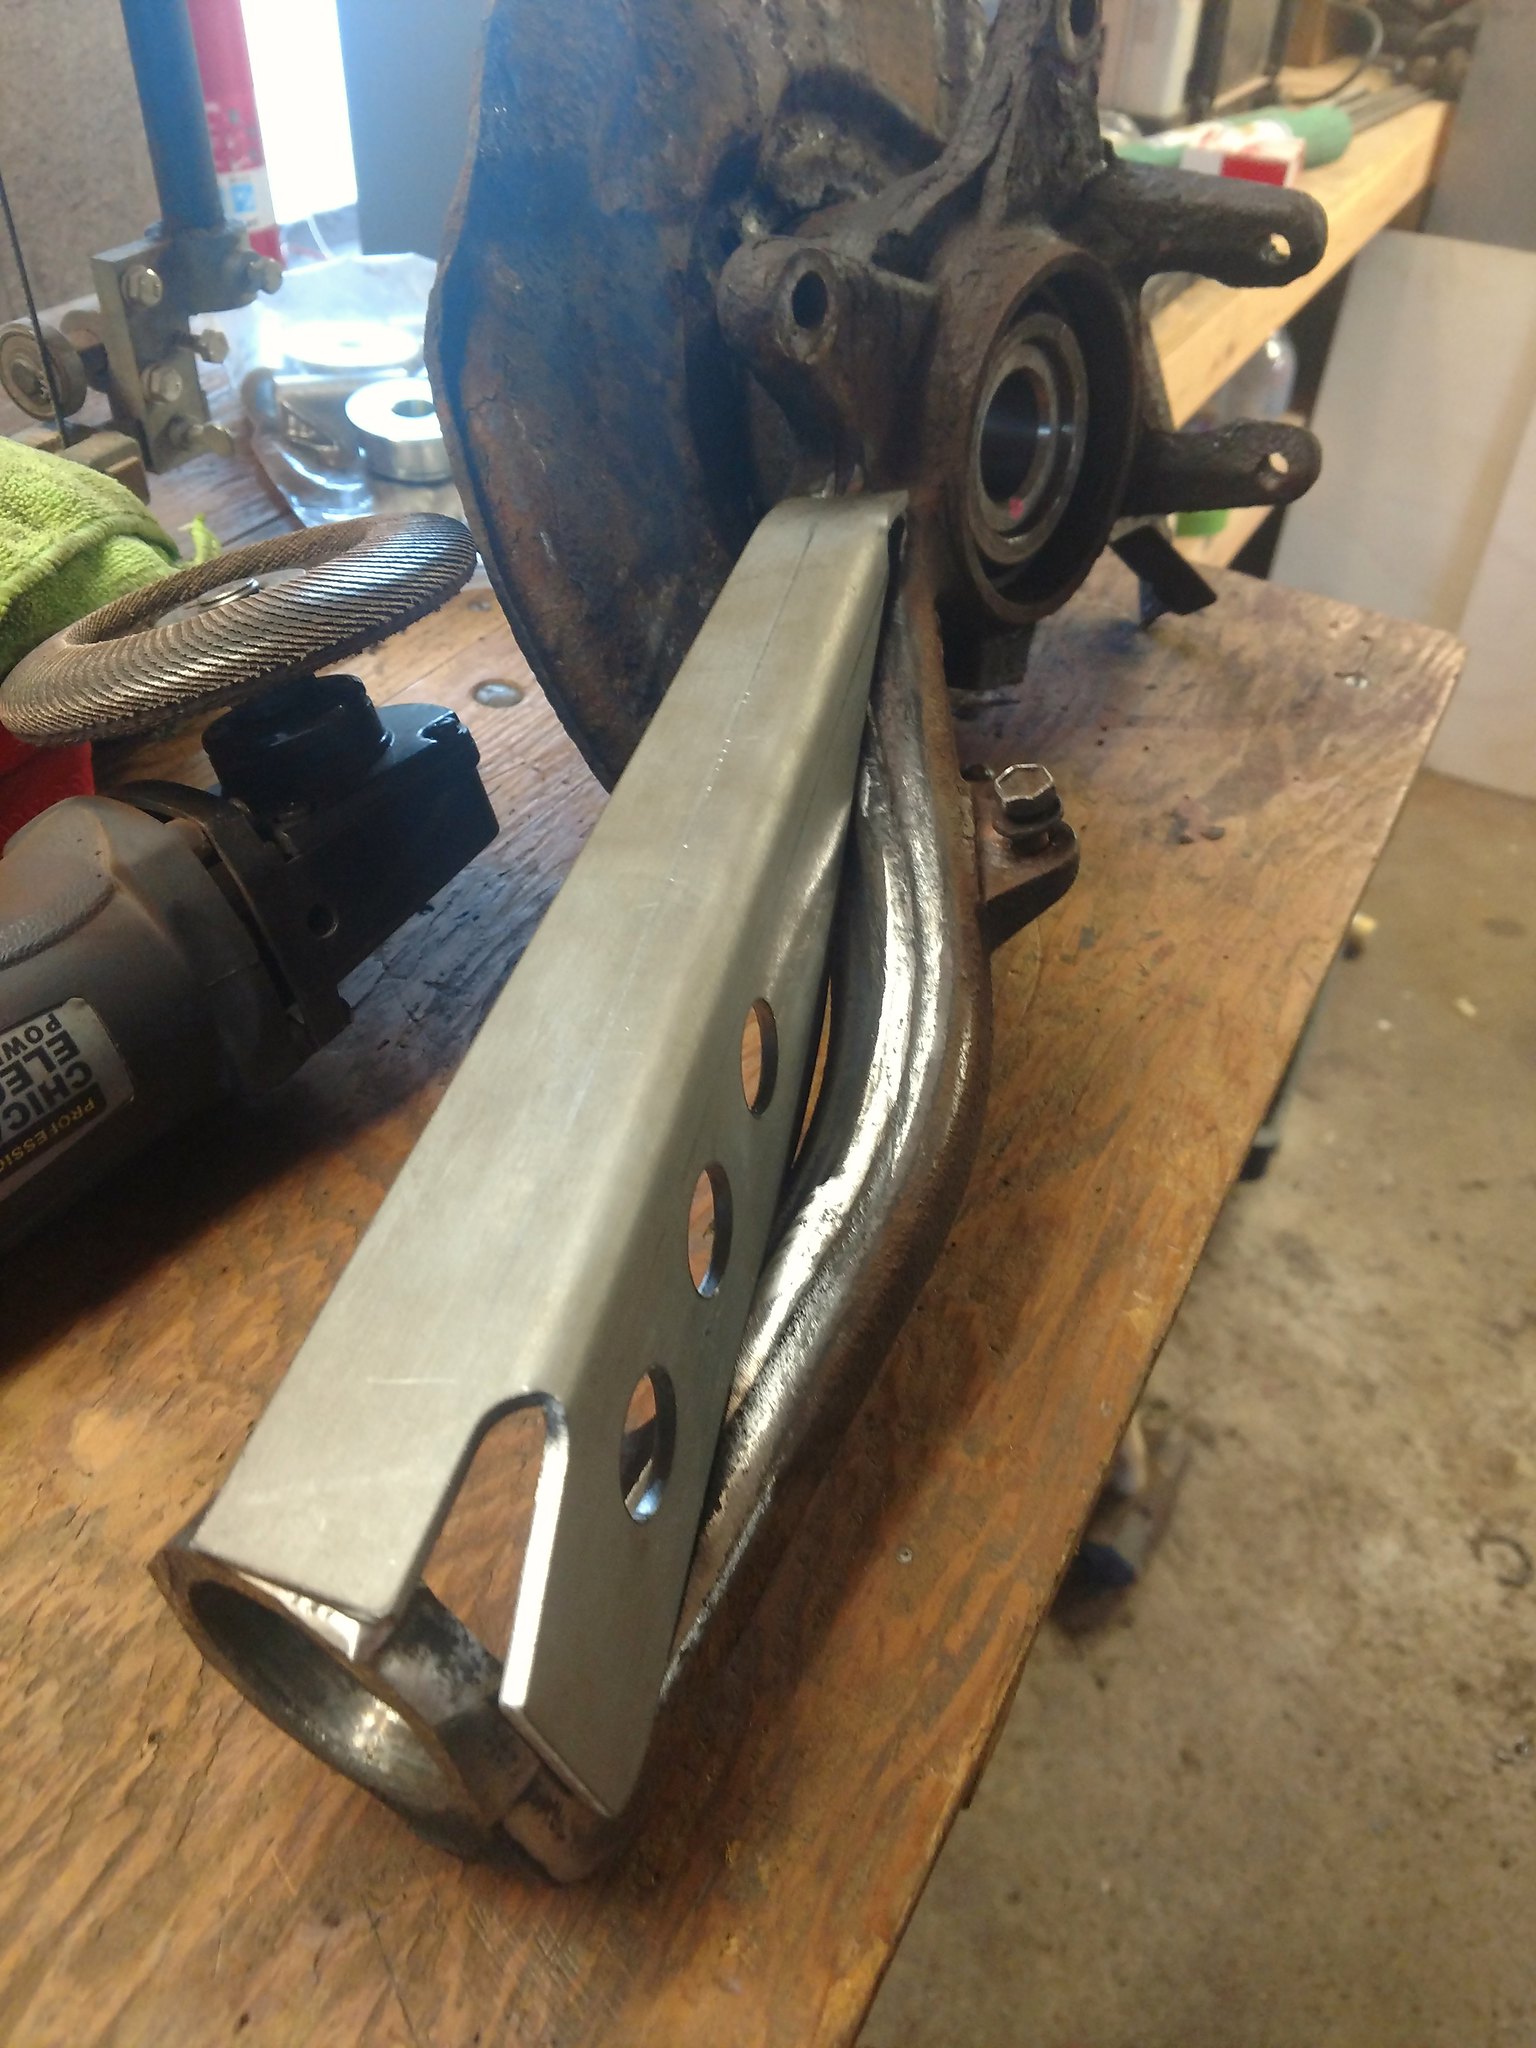
The bend made this one slightly funky, but it's fine. The ball joint has more than enough flexibility to compensate for the discrepancy.
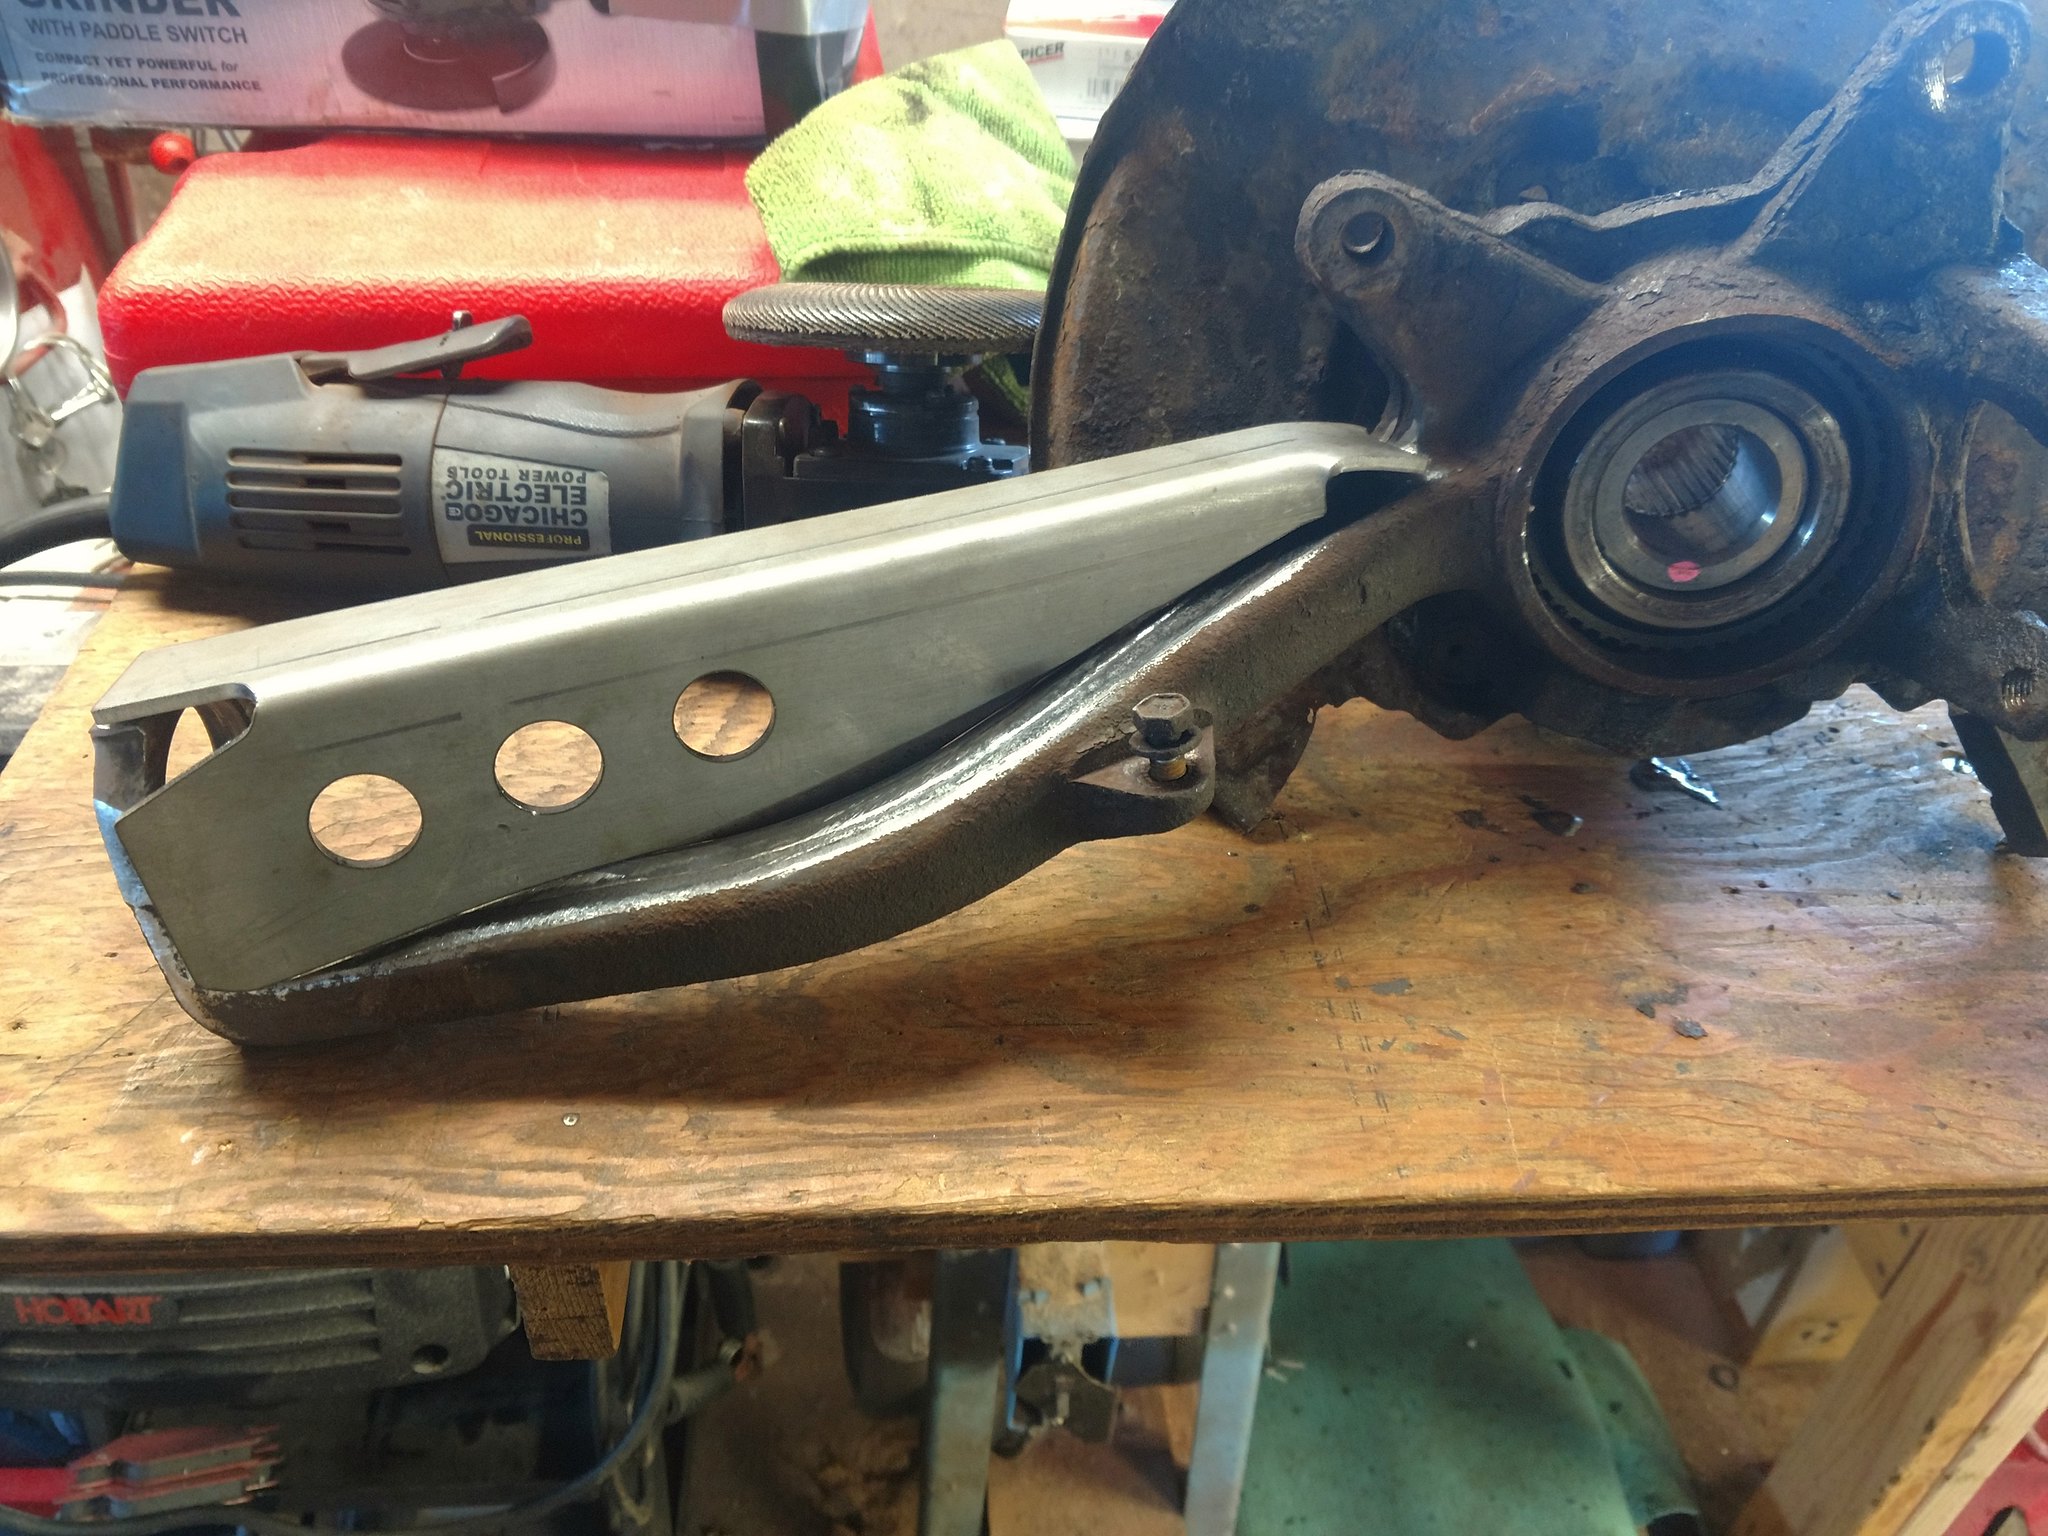
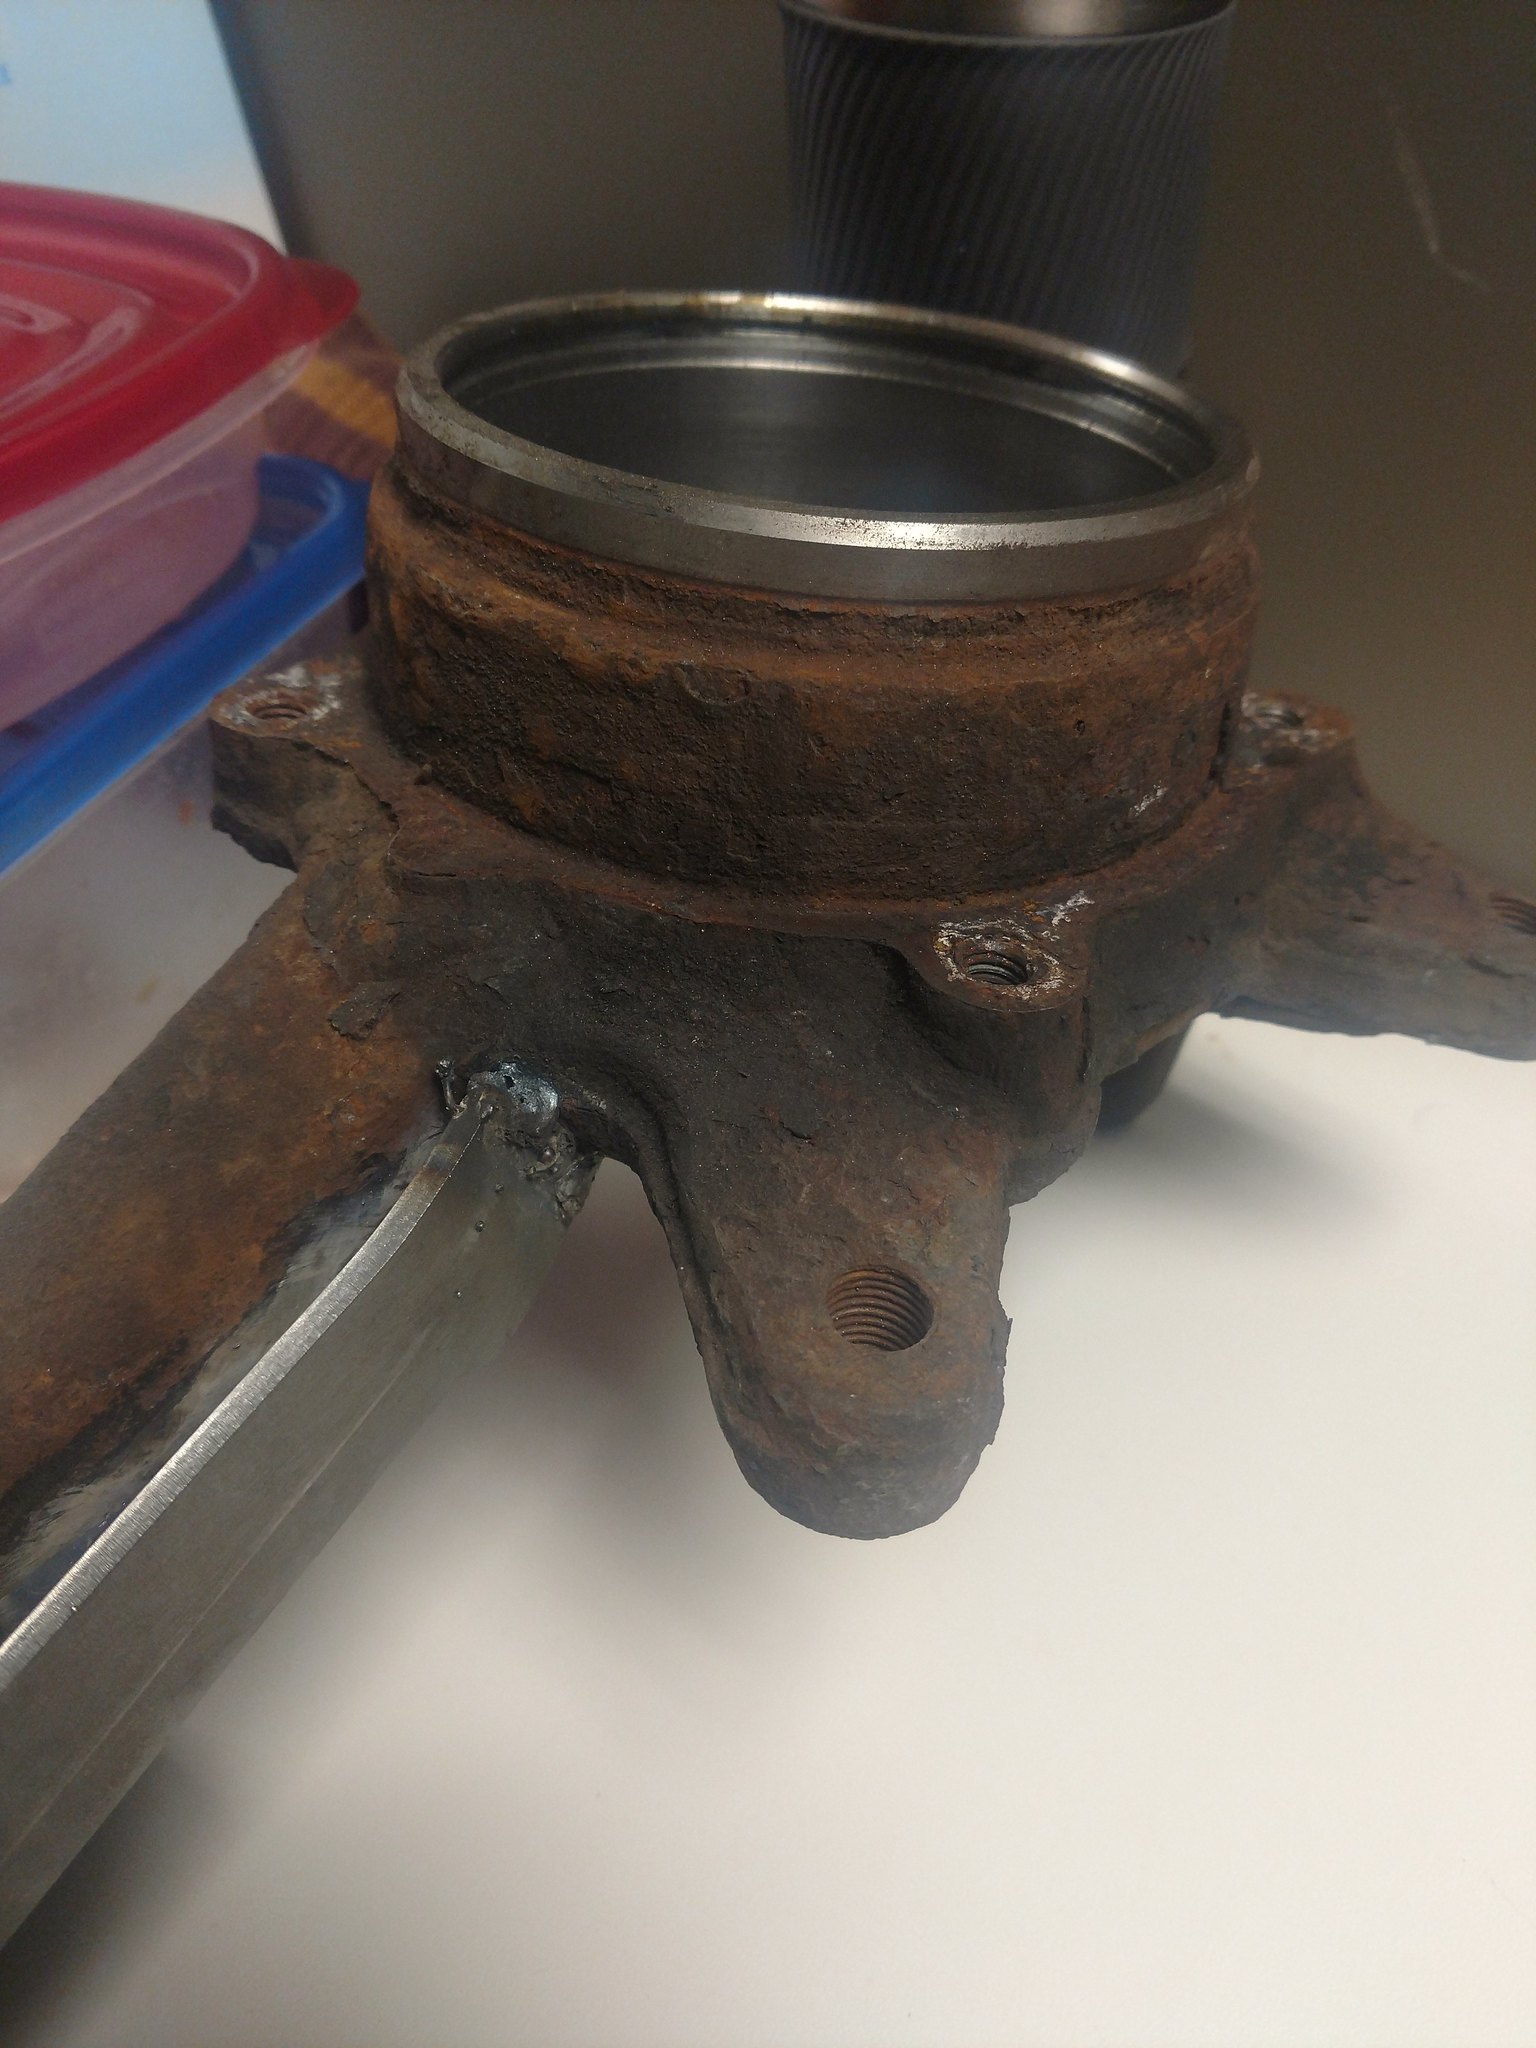
Off-screen, I took it to the neighbor's and, with his gracious help, pressed out the bearing and then pulled the inner race off the hub. Part of that process required cutting off what was left of the brake dust shield, so I shopped around for a reasonable price on those (they were hard to find online, but Toyota gave me an astronomical price and a part number. shopping by part number was much more fruitful) and got them on order. It was about this time that I realized the seals are separate from the wheel bearings. So I got those on order also. The steering knuckle was crusty AF:
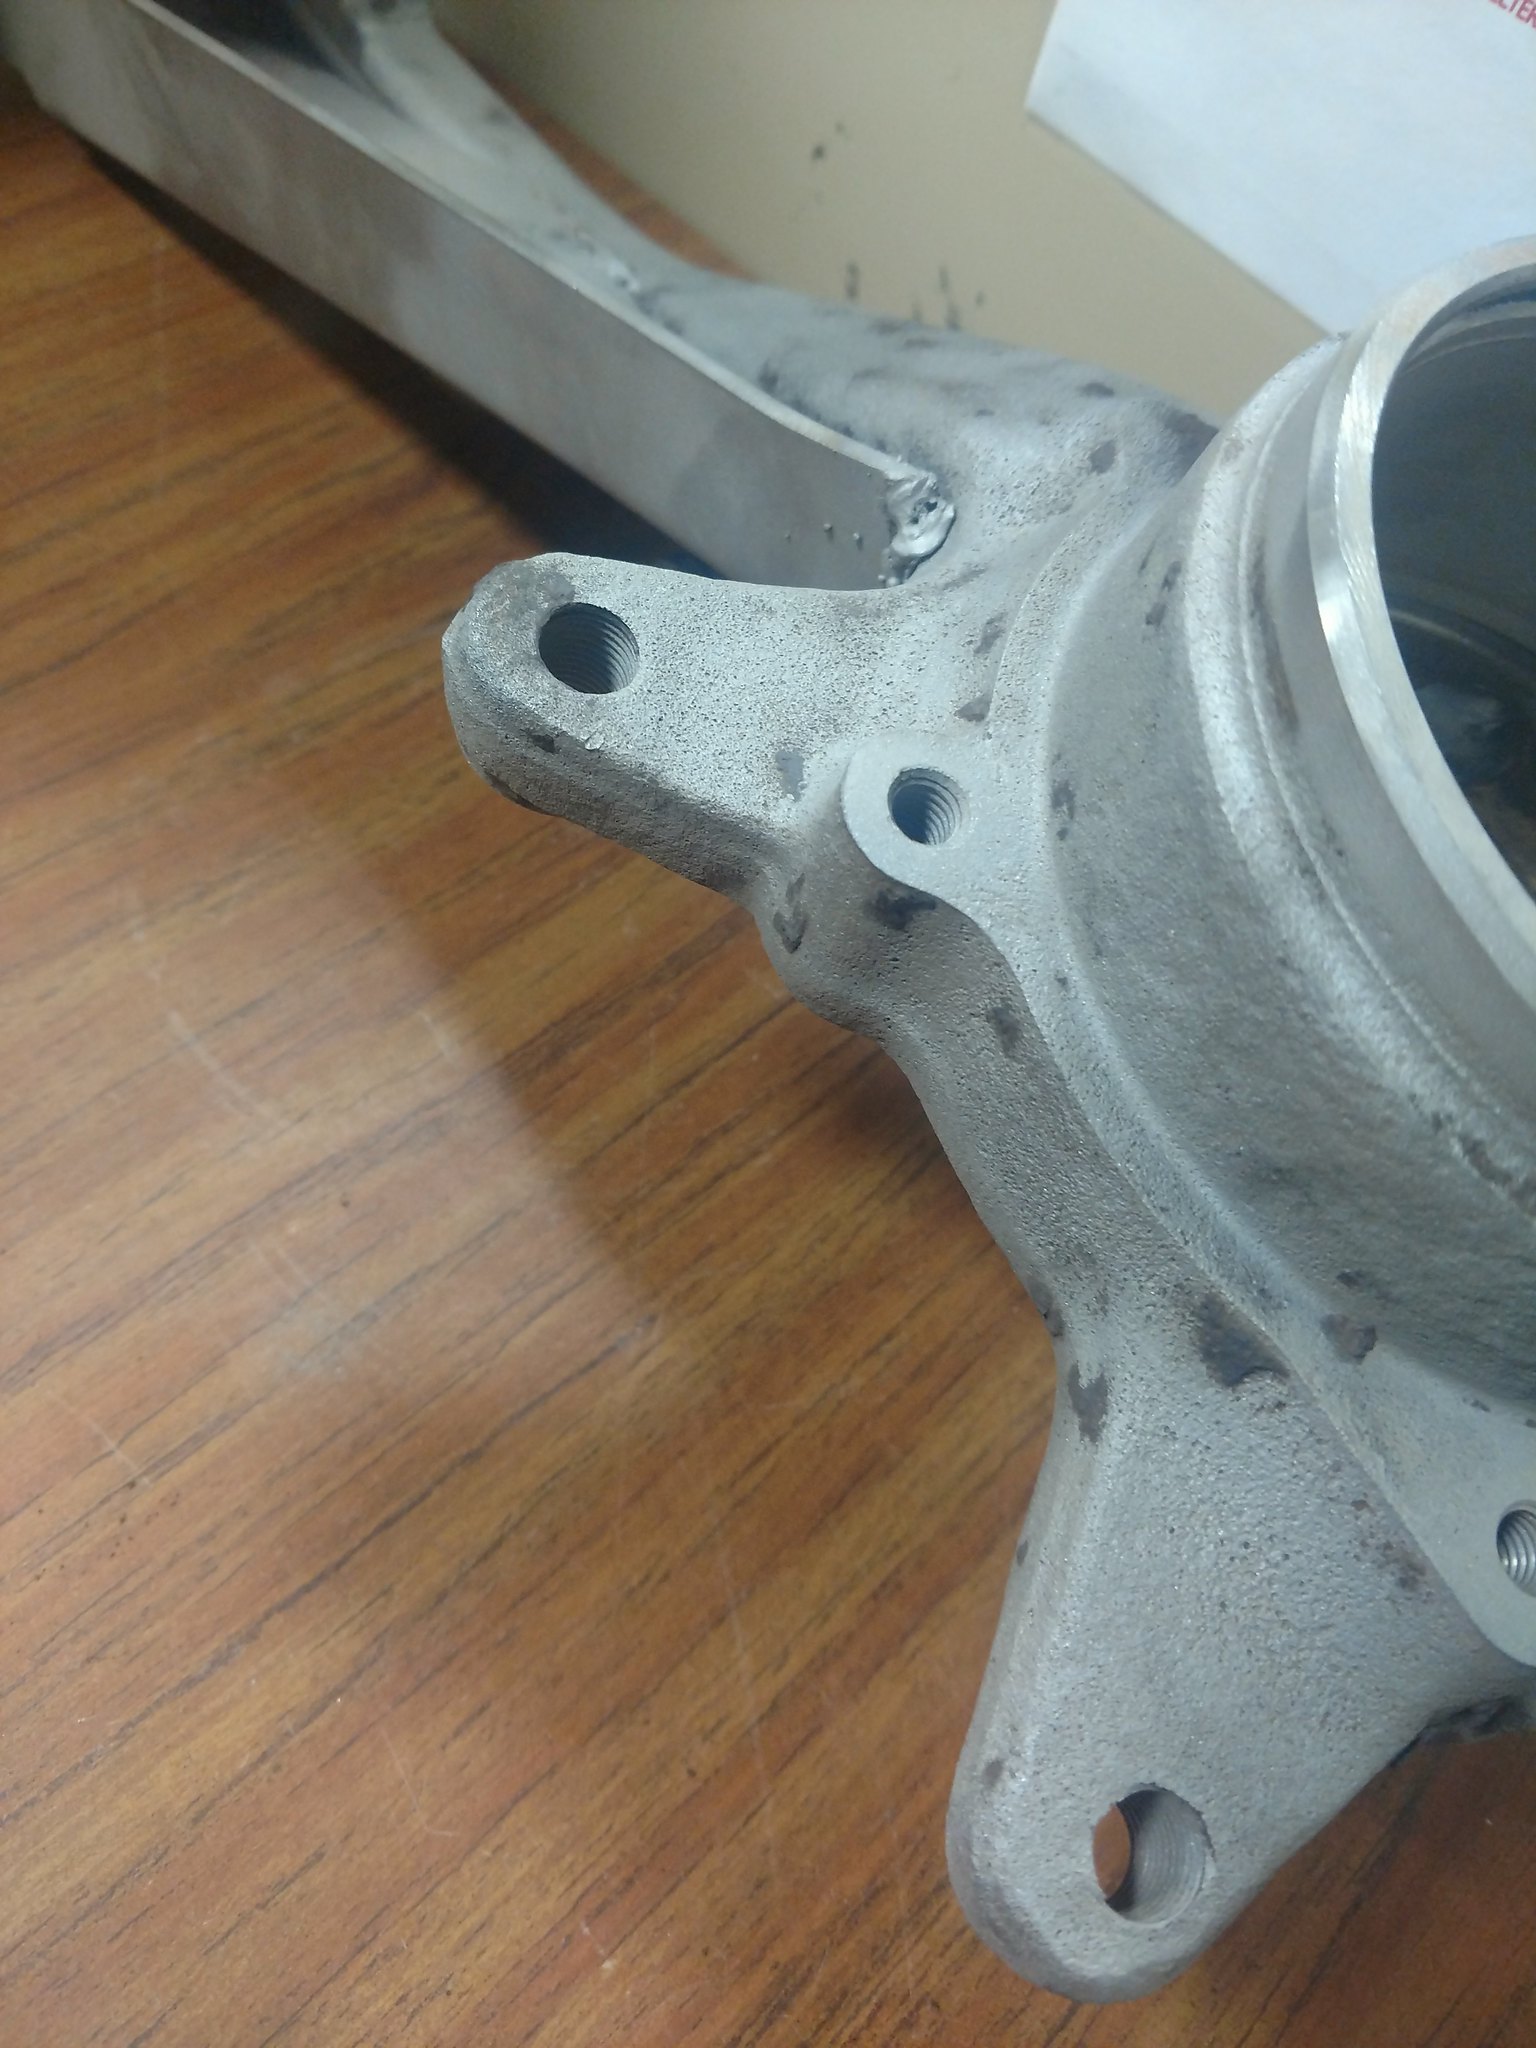
After a quick sandblast:
I threw in the upper control arms with minimal hassle:
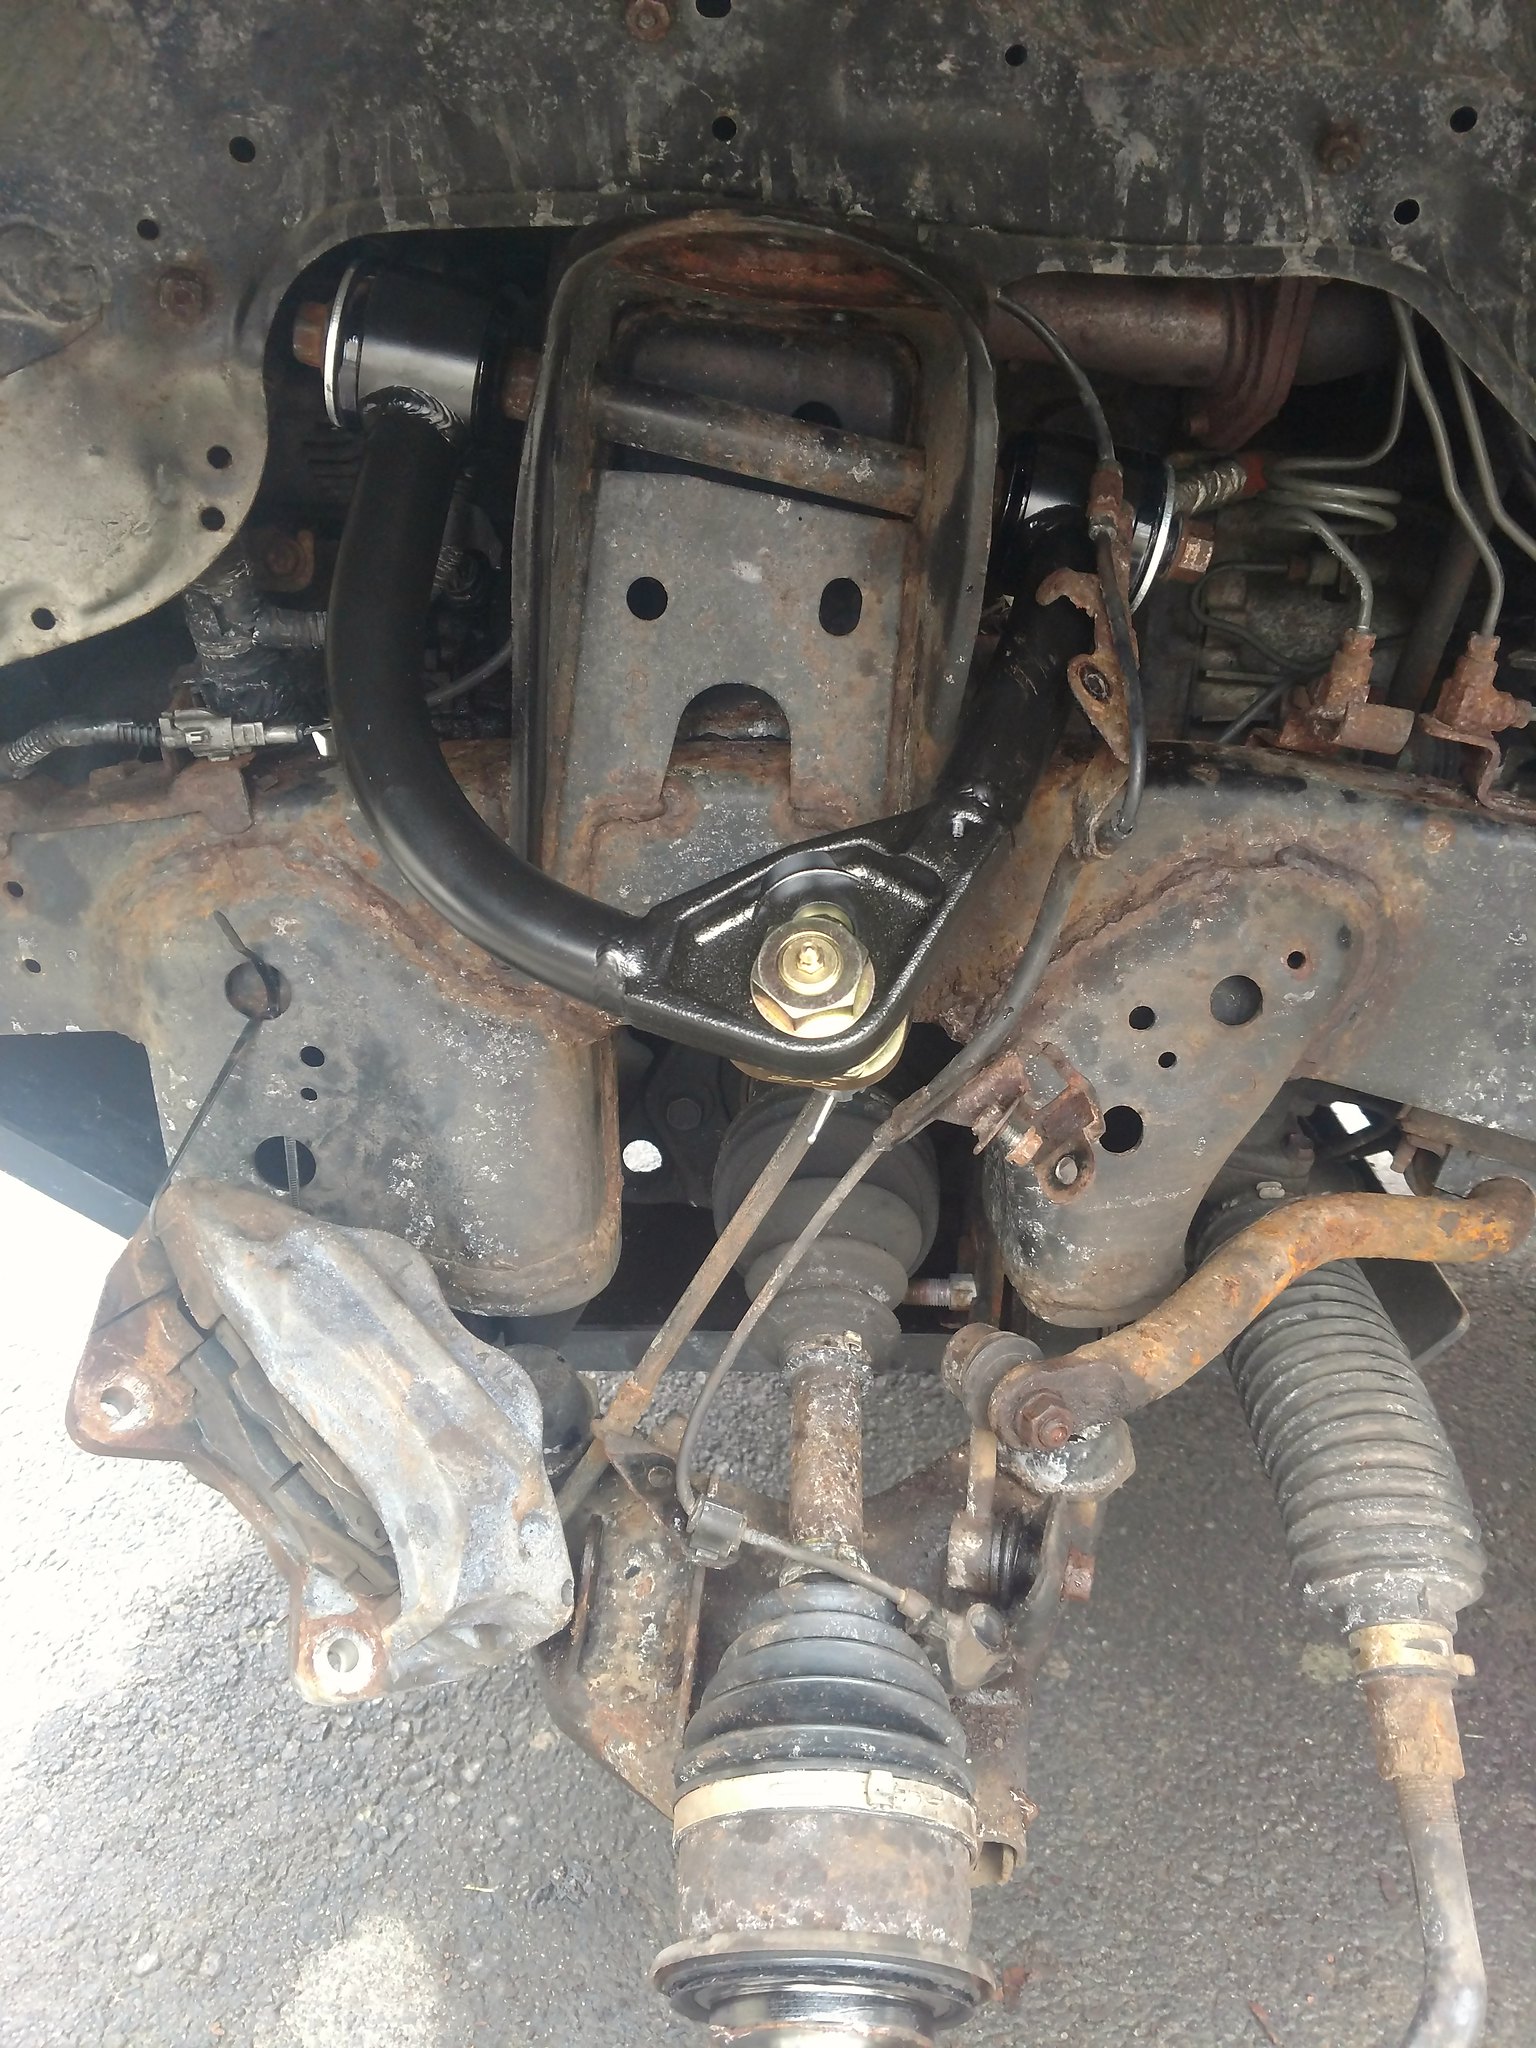
The shock tower looks....shocked. :laugh: The order of operations is a little wonky here because of the way parts were arriving and such. I chipped away at what I could when I was able to and/or when I felt up to the challenge. The next order of business was removing the lower control arm. I put this off for a few days because I knew it was going to suck. The mounting hardware is a little funky; I was unfamiliar until I saw it all apart. There is the bushing, obviously, with its integral metal sleeve. Then through that sleeve and the frame-side ears, passes another sleeve, with an eccentric cam washer attached to it, and a nut. Then, from the other side of the mount, installs a bolt, also with a cam washer on it. So when it's not seized, you can loosen the bolt to adjust the camber by rotating the sleeve/nut thing, then snug the bolt down. It's hard to picture, I'm sure, but the way it's designed allows the bolt to be tightened without throwing off the camber adjustment. It's pretty slick, actually. Except that the bushing sleeve and the camber sleeve like to seize together. So I thought I was home free when the bolt came out easily. Joke was on me though. For two reasons, actually. First, I soon realized the sleeve was stuck. Second:
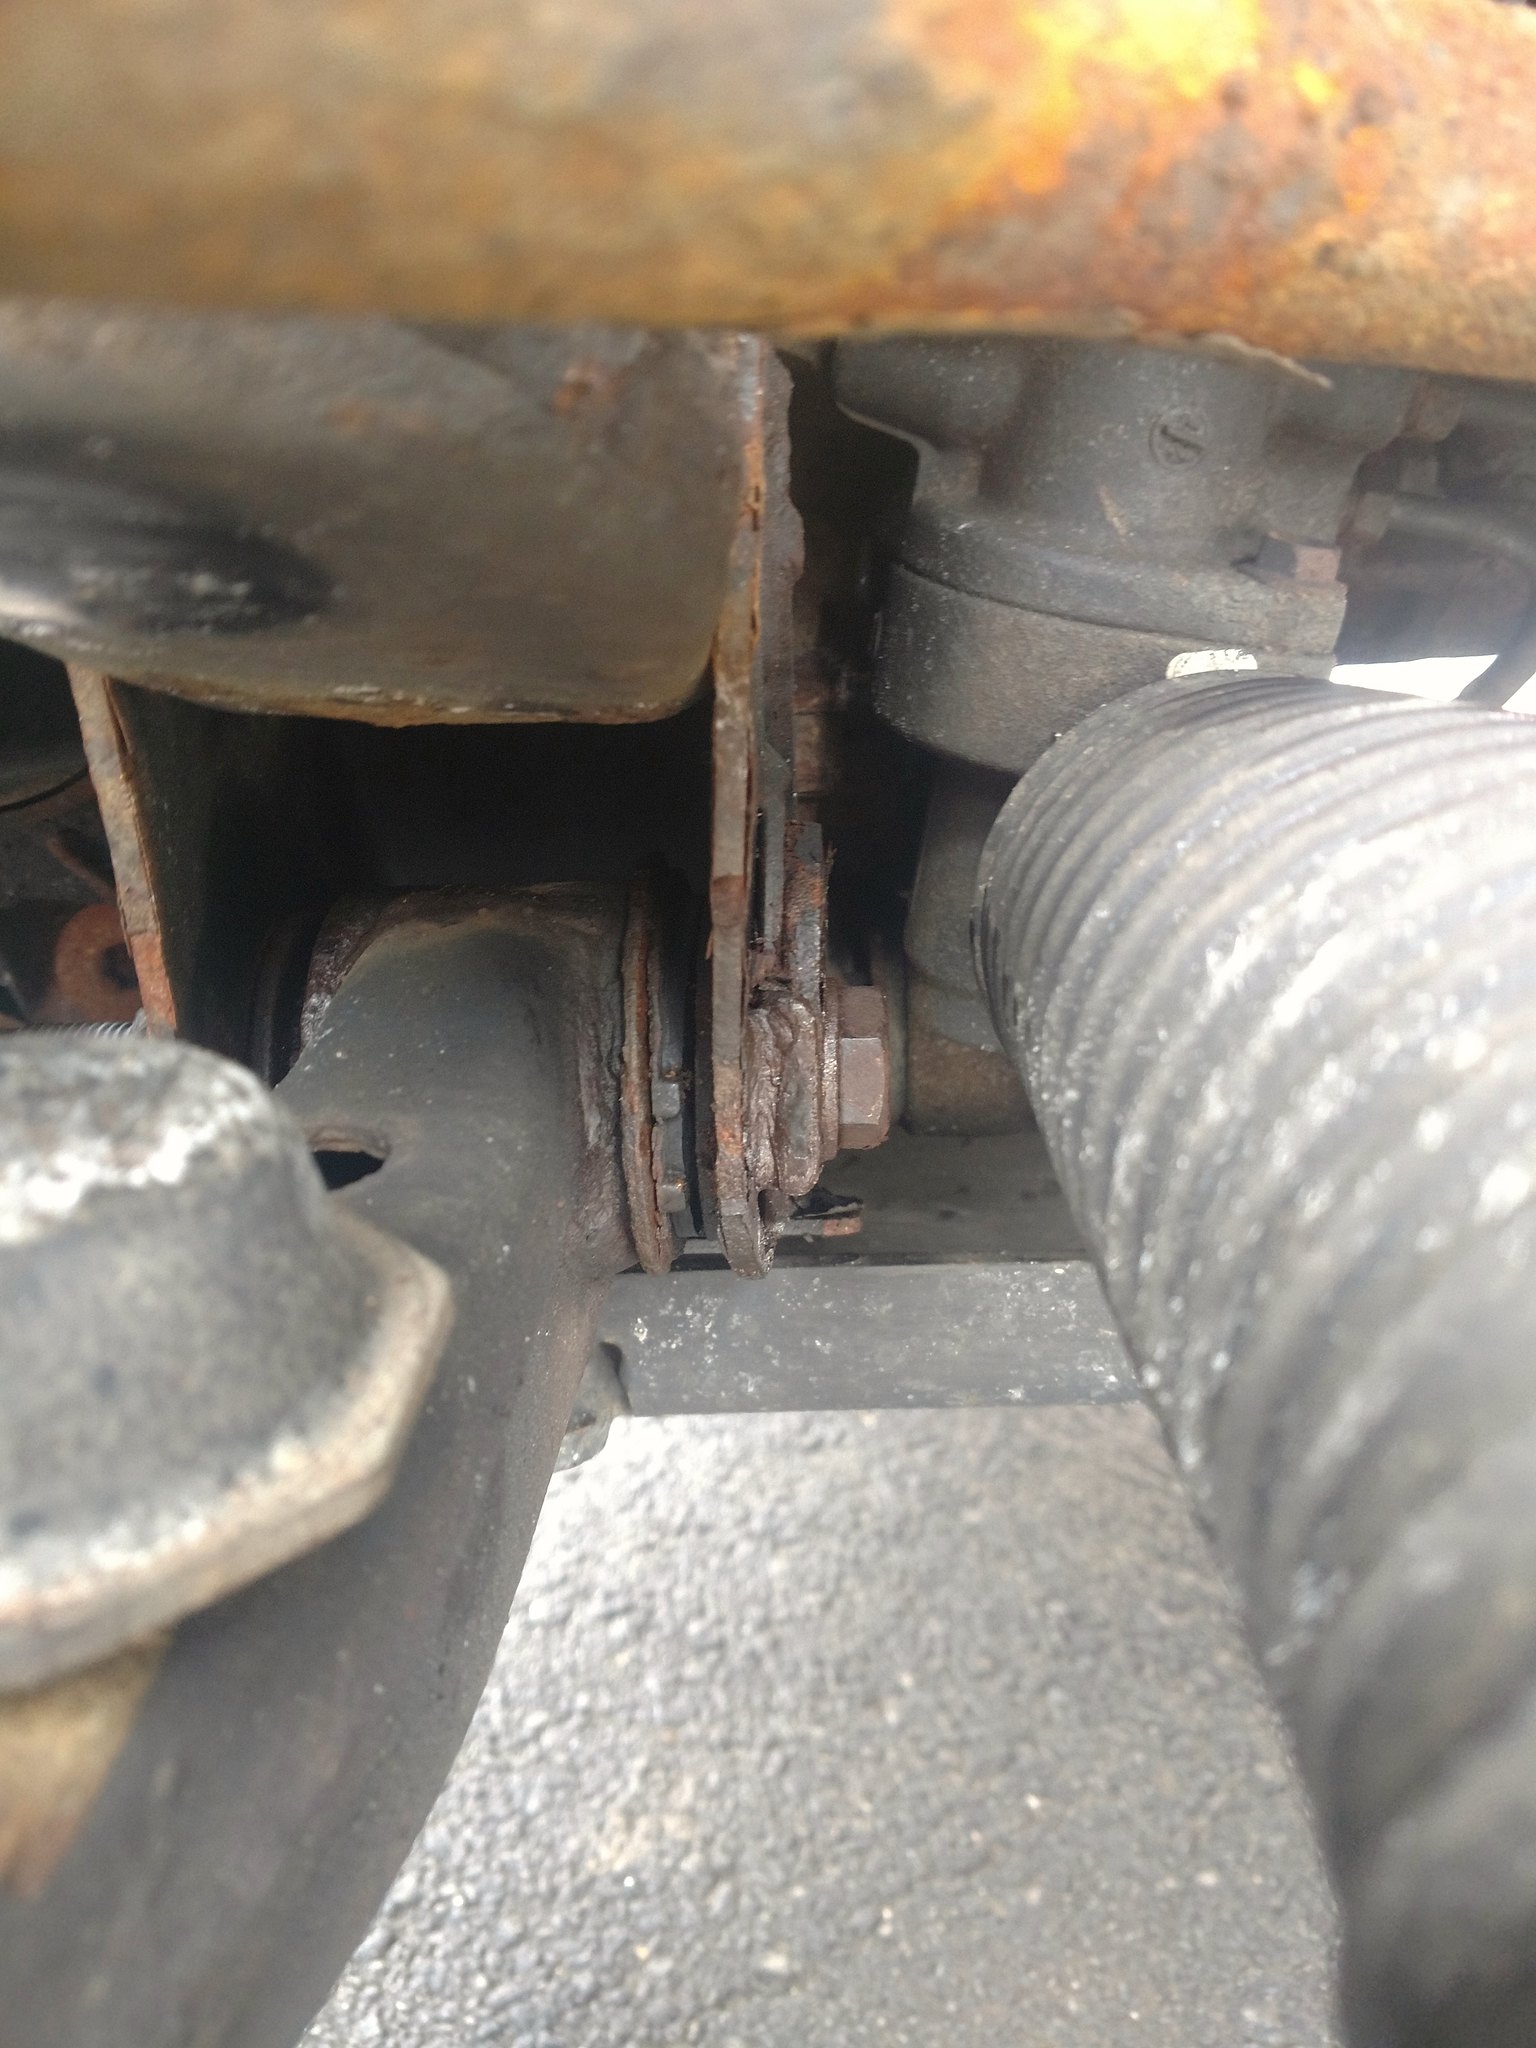
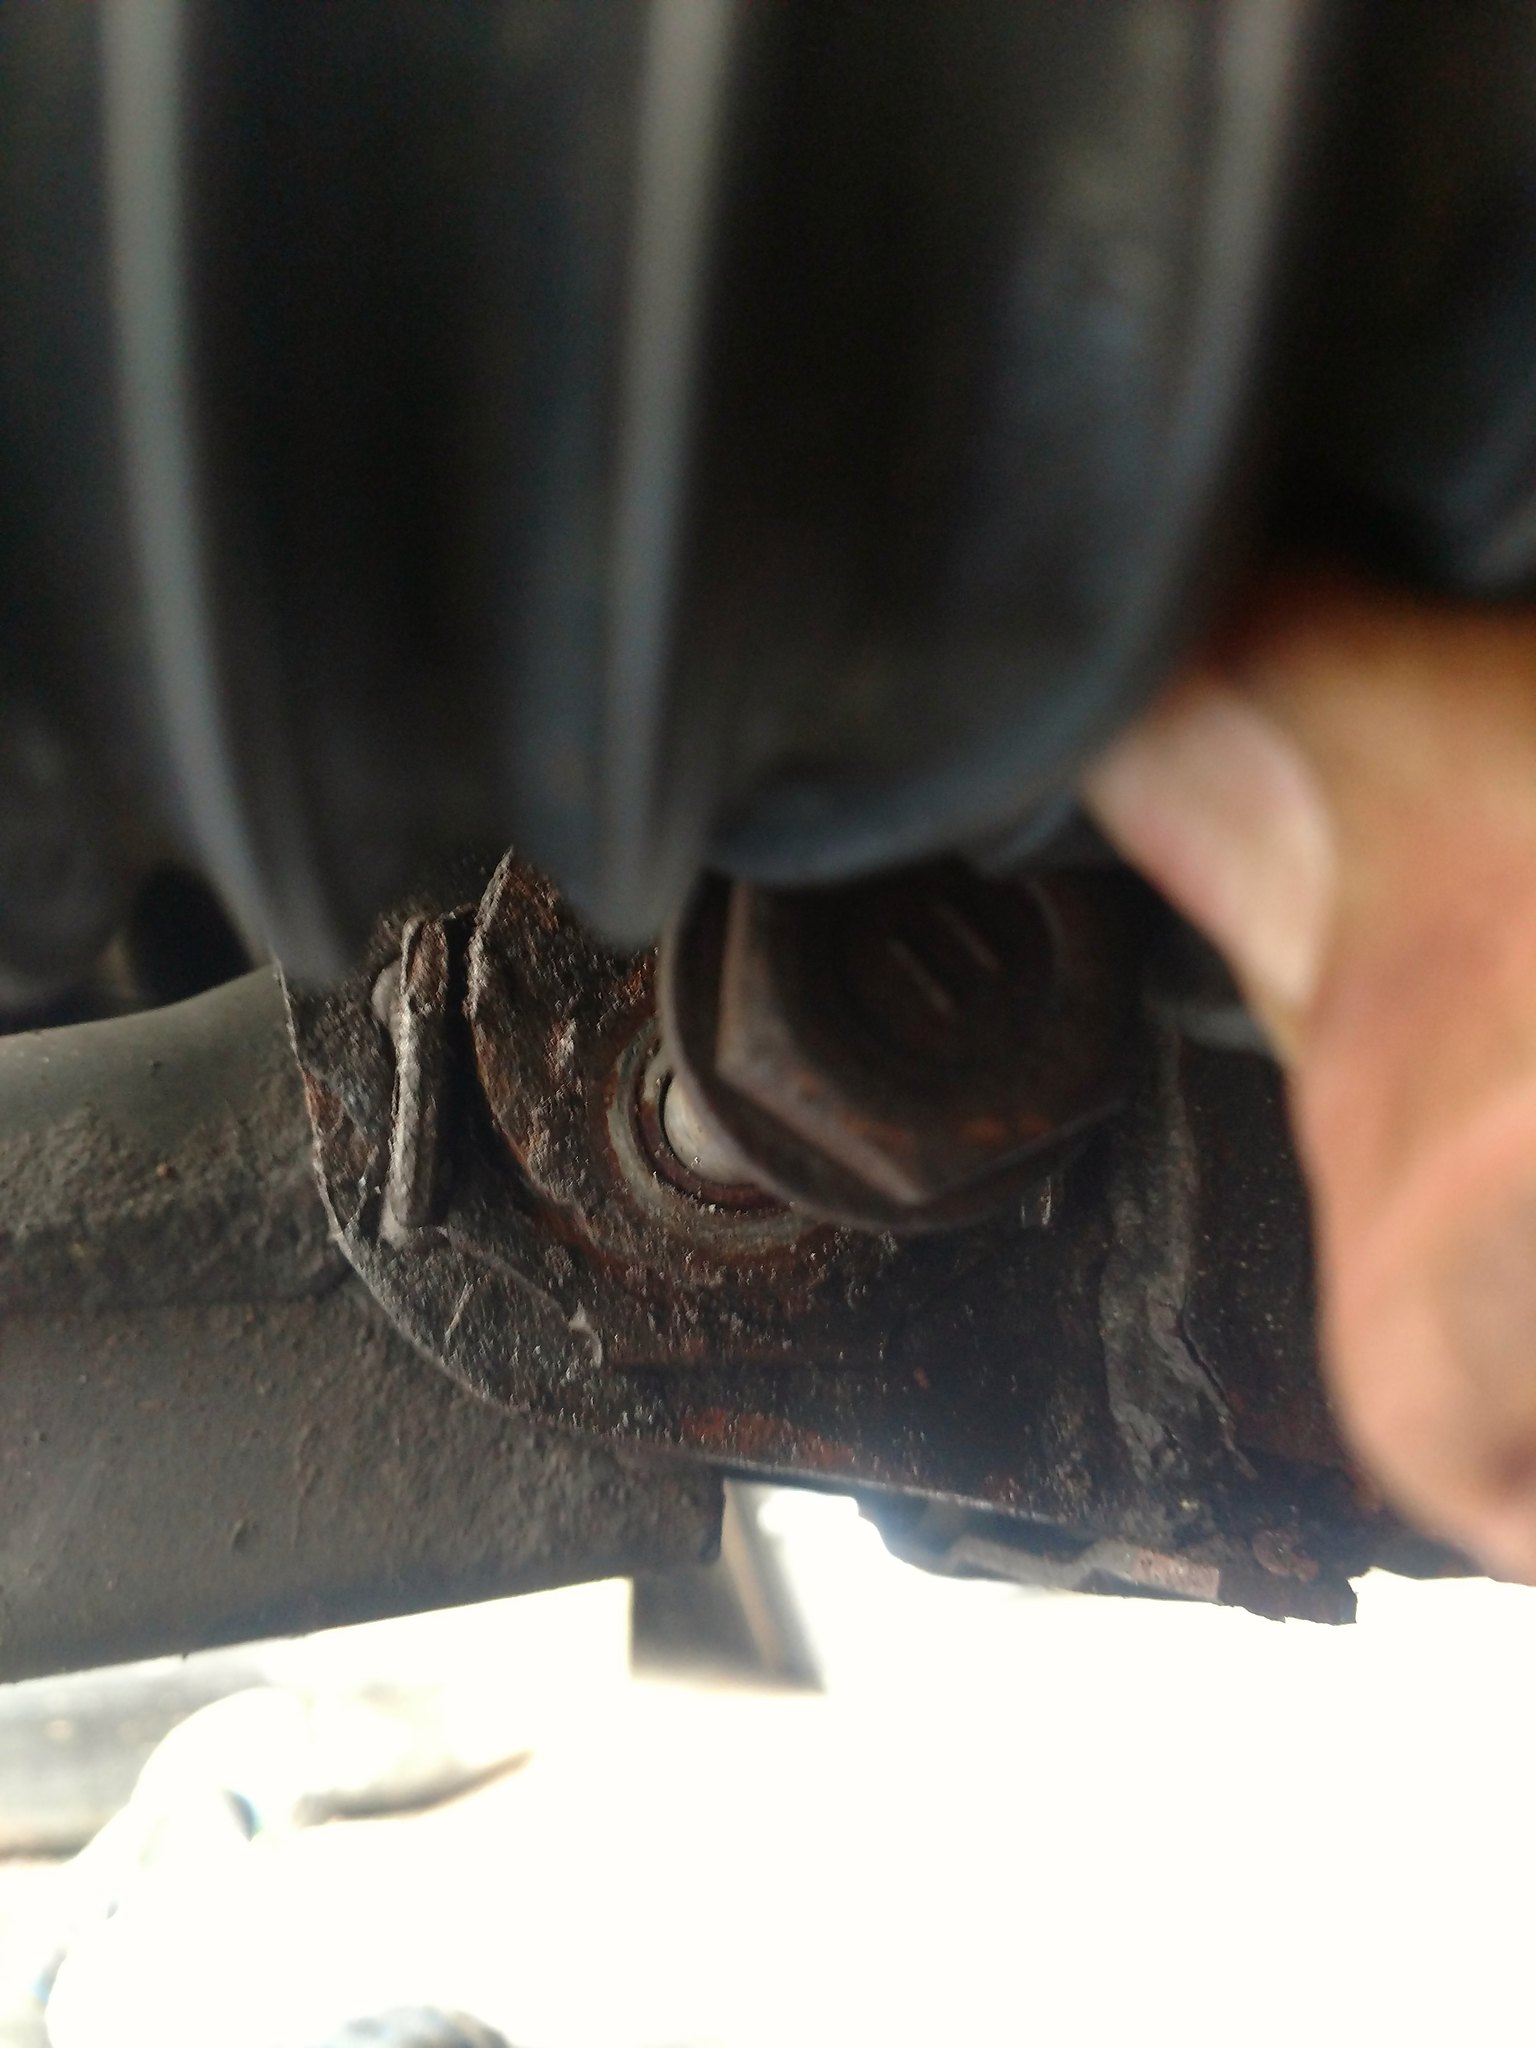
For whatever reason I don't understand, Toyota installed the bolts from the rear instead of the front. So you can loosen them no problem. But you can't remove them (and subsequently can't remove the control arm) without removing the steering rack. I rage quit that day. When I calmed down, I got a set of poly steering rack bushings on order because I may as well, right? So I set about removing the steering rack. No big deal, right? I forgot to mention that I DO have the proper service manual for this truck, and I referenced it heavily for everything. I don't mean to give the impression I'm just some hack with no idea what I'm doing. I just didn't "believe" it when it said remove the steering rack in the control arm procedure. But yeah, so, here we are:
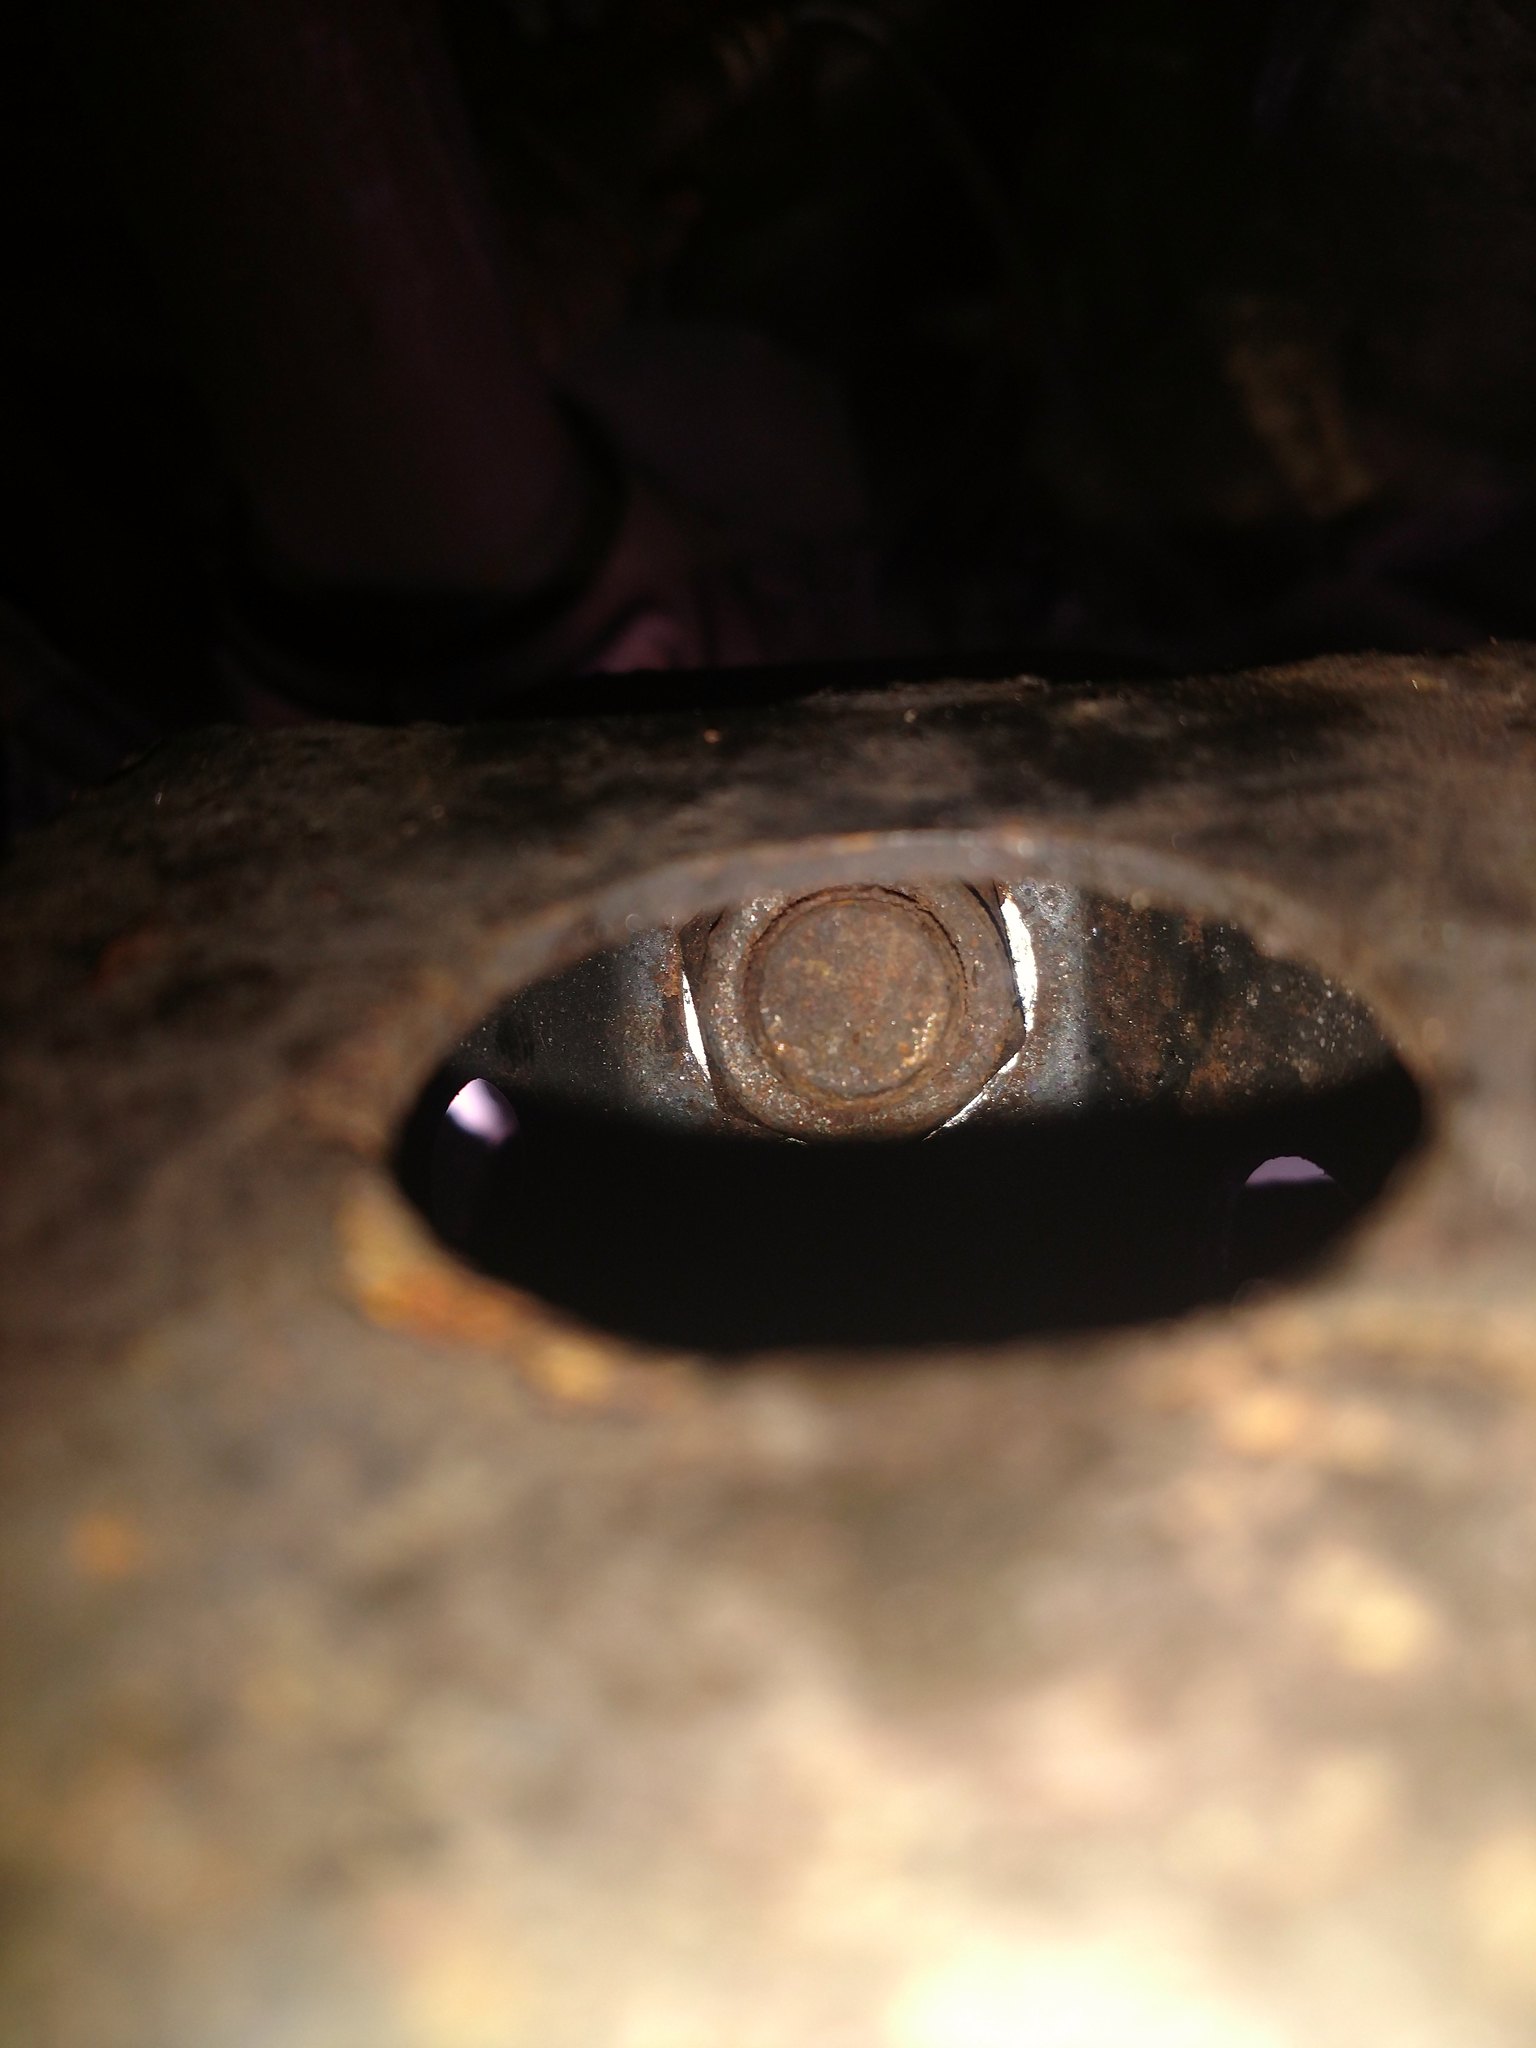
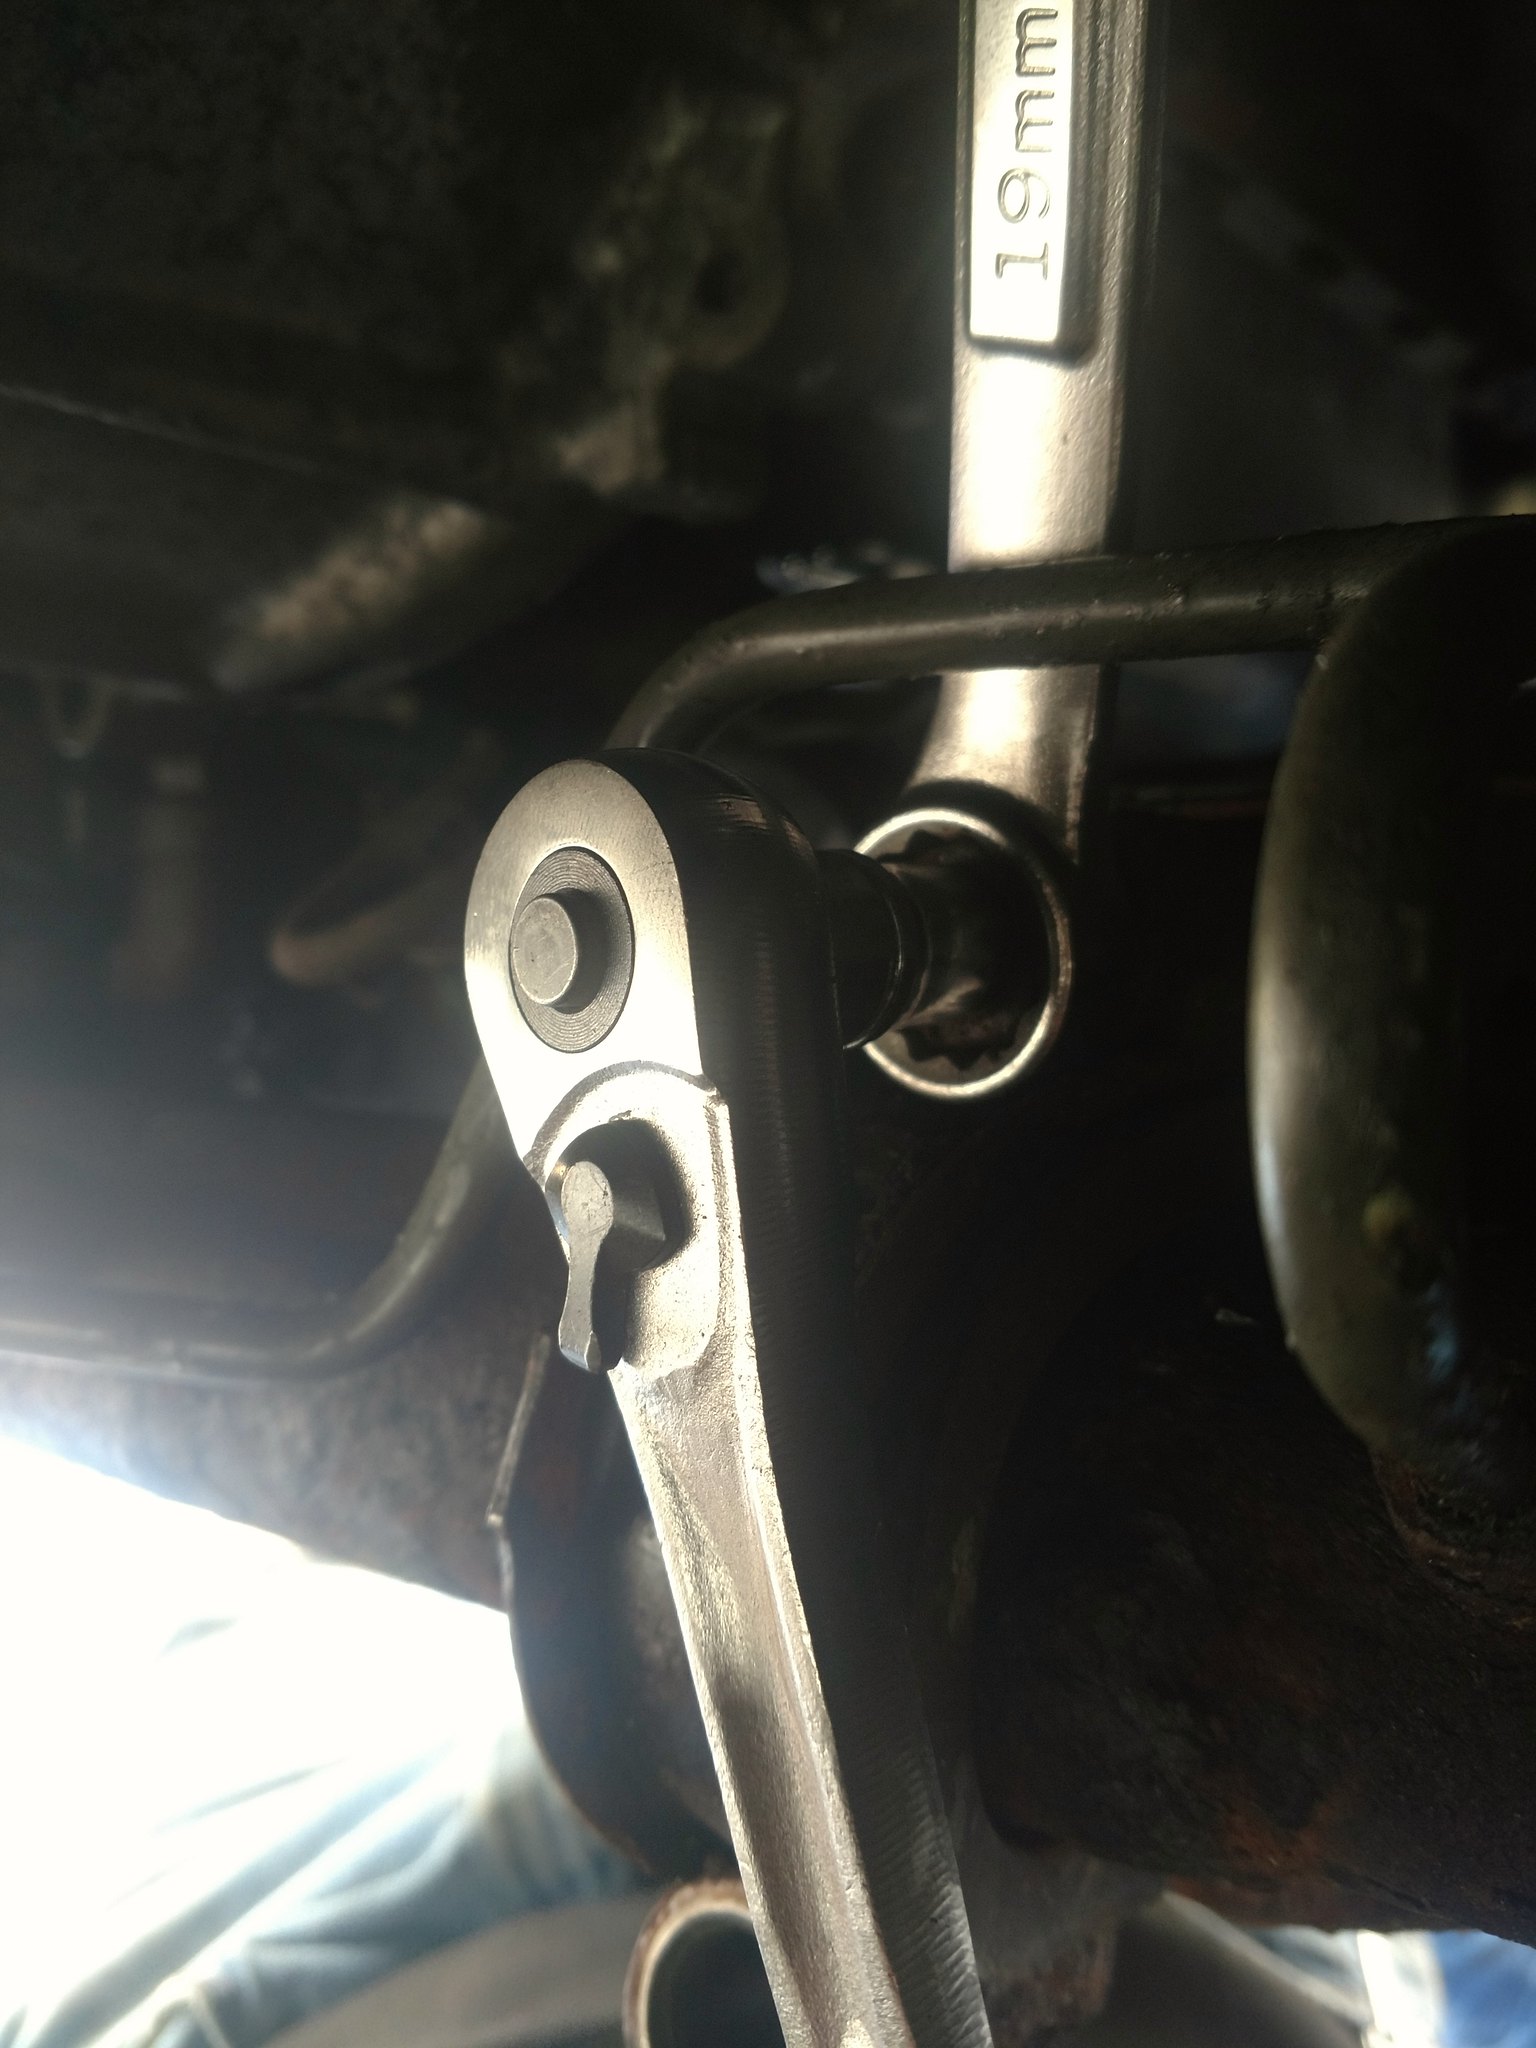
The flip side of rusty fasteners. The darker side. Most often, rust makes stuff stick together. And that sucks. But sometimes, it makes stuff spin free that isn't supposed to. For that, I absolutely despise when hidden weld-nuts are used. Because it's pretty much inevitable that they will come loose and **** you over. That's what you see here. It's a captive nut inside the engine/differential subframe/crossmember thingy, into which threads one of the steering rack bolts. Though not completely hidden (I was able to see it through that hole by sticking my phone up in there and taking a picture), access was limited to "oo I can just barely touch it with the tip of my finger!". The kicker was that the bolt started to come loose before the nut spun. So my options were have an eternally-loose rack (heh) or cut it and hope to the old gods and the new that I could find this definitely special fastener somewhere and be able to install it. Just before I quit for the day, I noticed that there was a hex socket in the stud end. Thinking back to the sway bar end link ordeal, I thought, "No way this will work, but I have to try it." I was so shocked that it actually worked, that I stopped to take a picture to send to a friend:
So with the rack out of the way, I was able to get the control arm bolt out and get a better picture of the sleeve that was stuck in there:
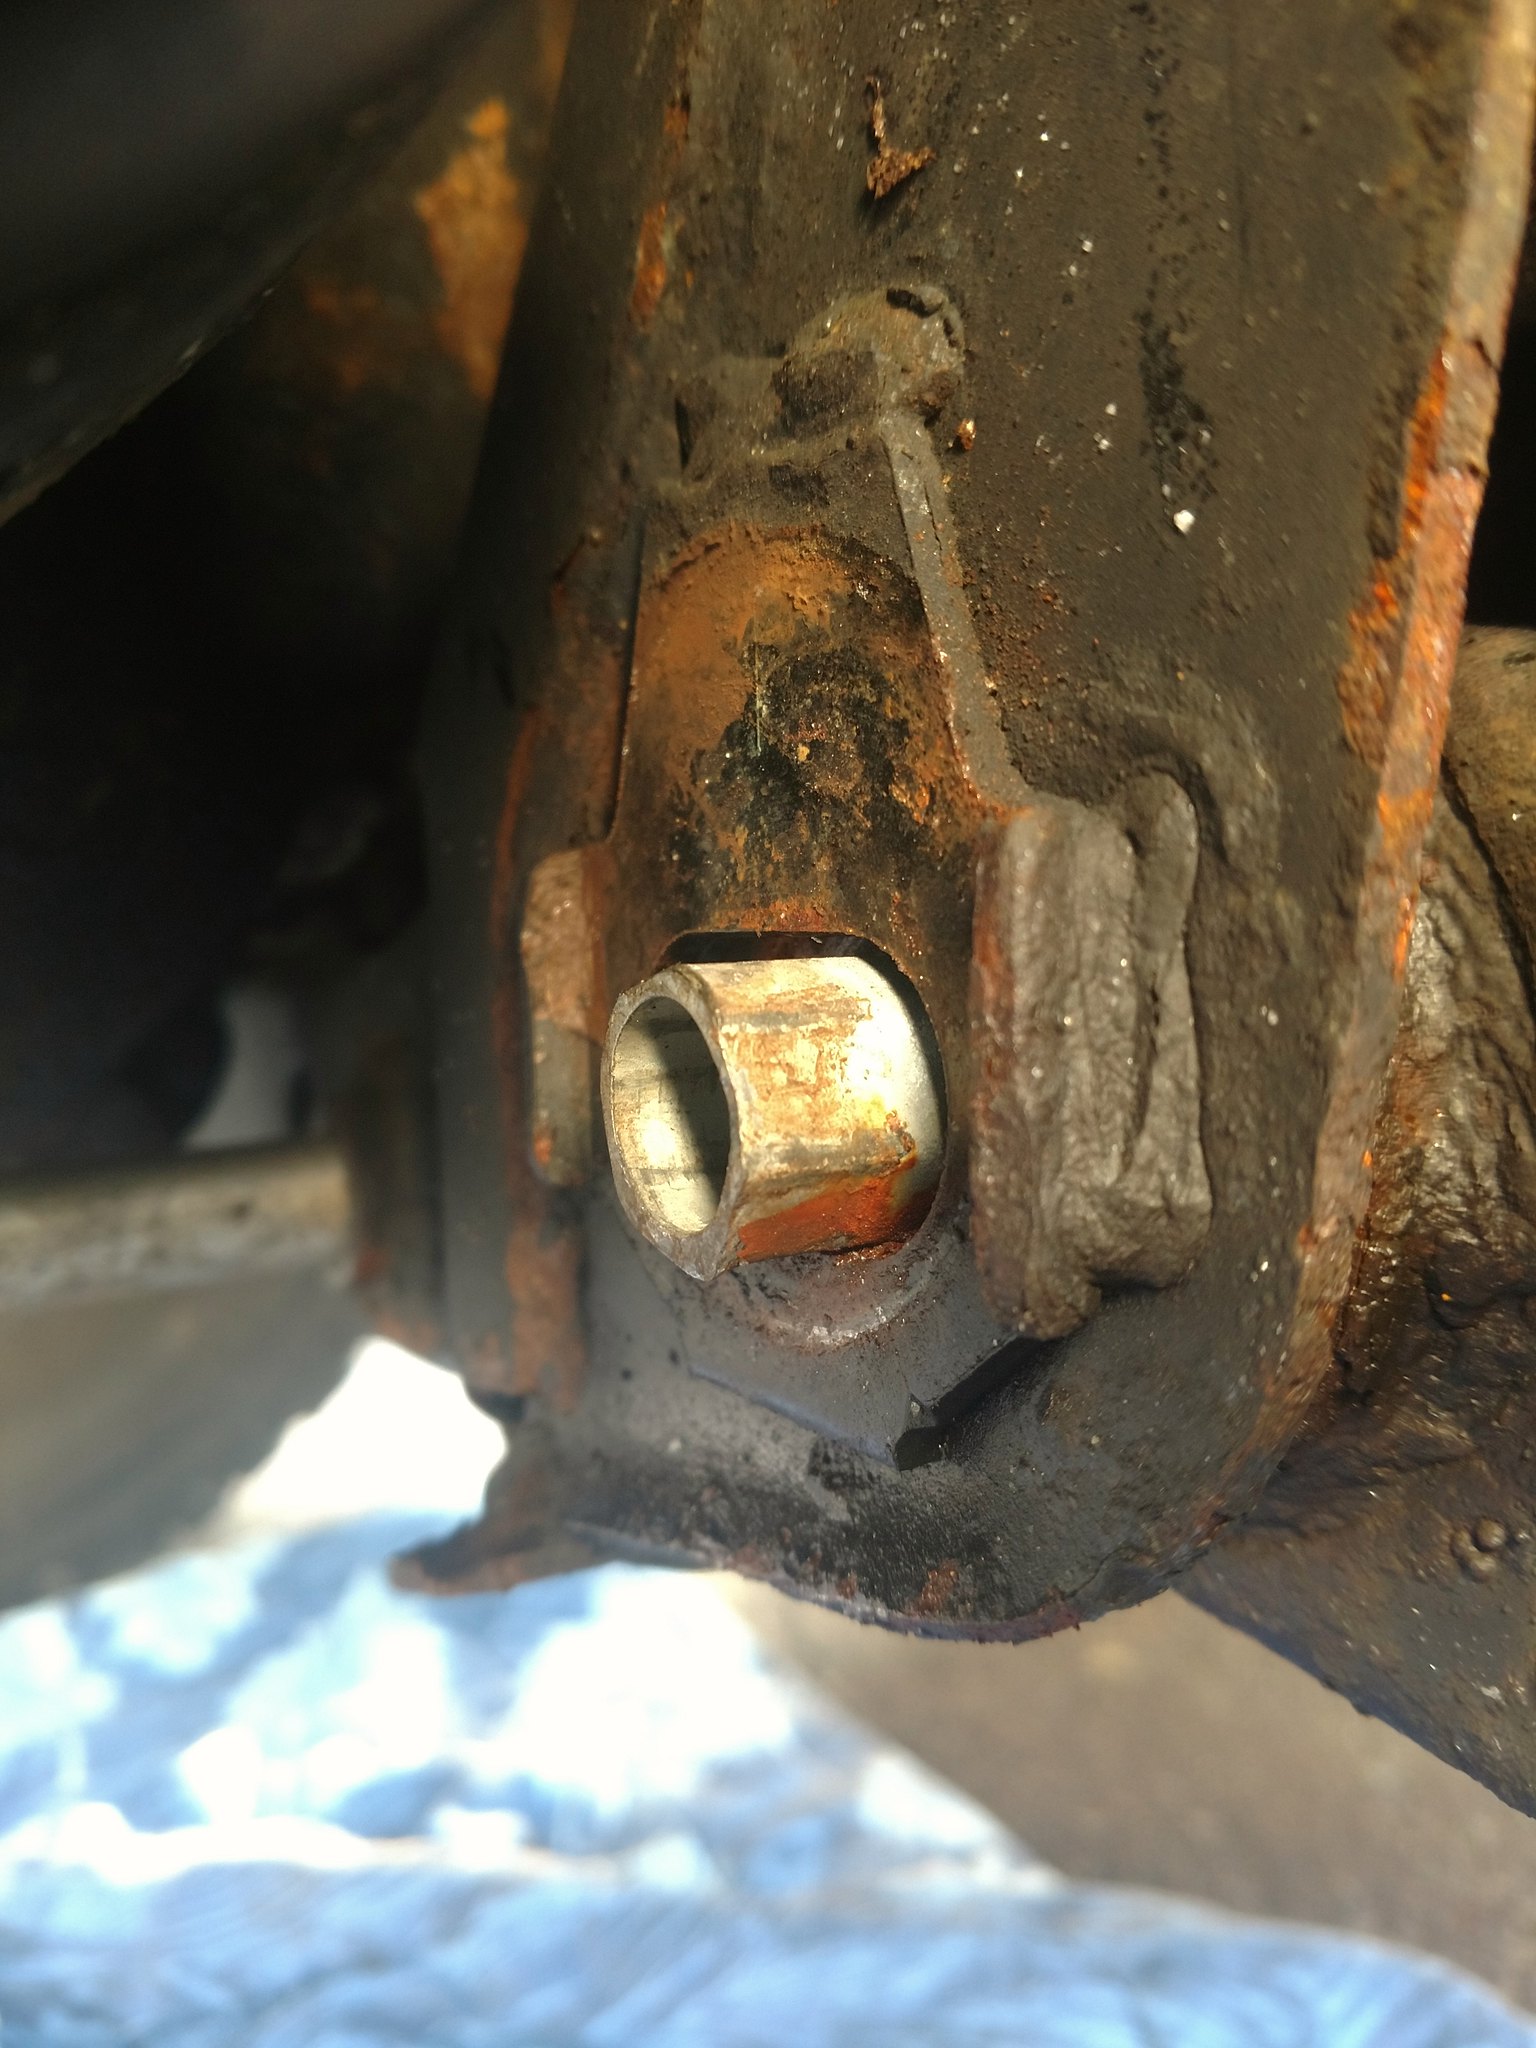
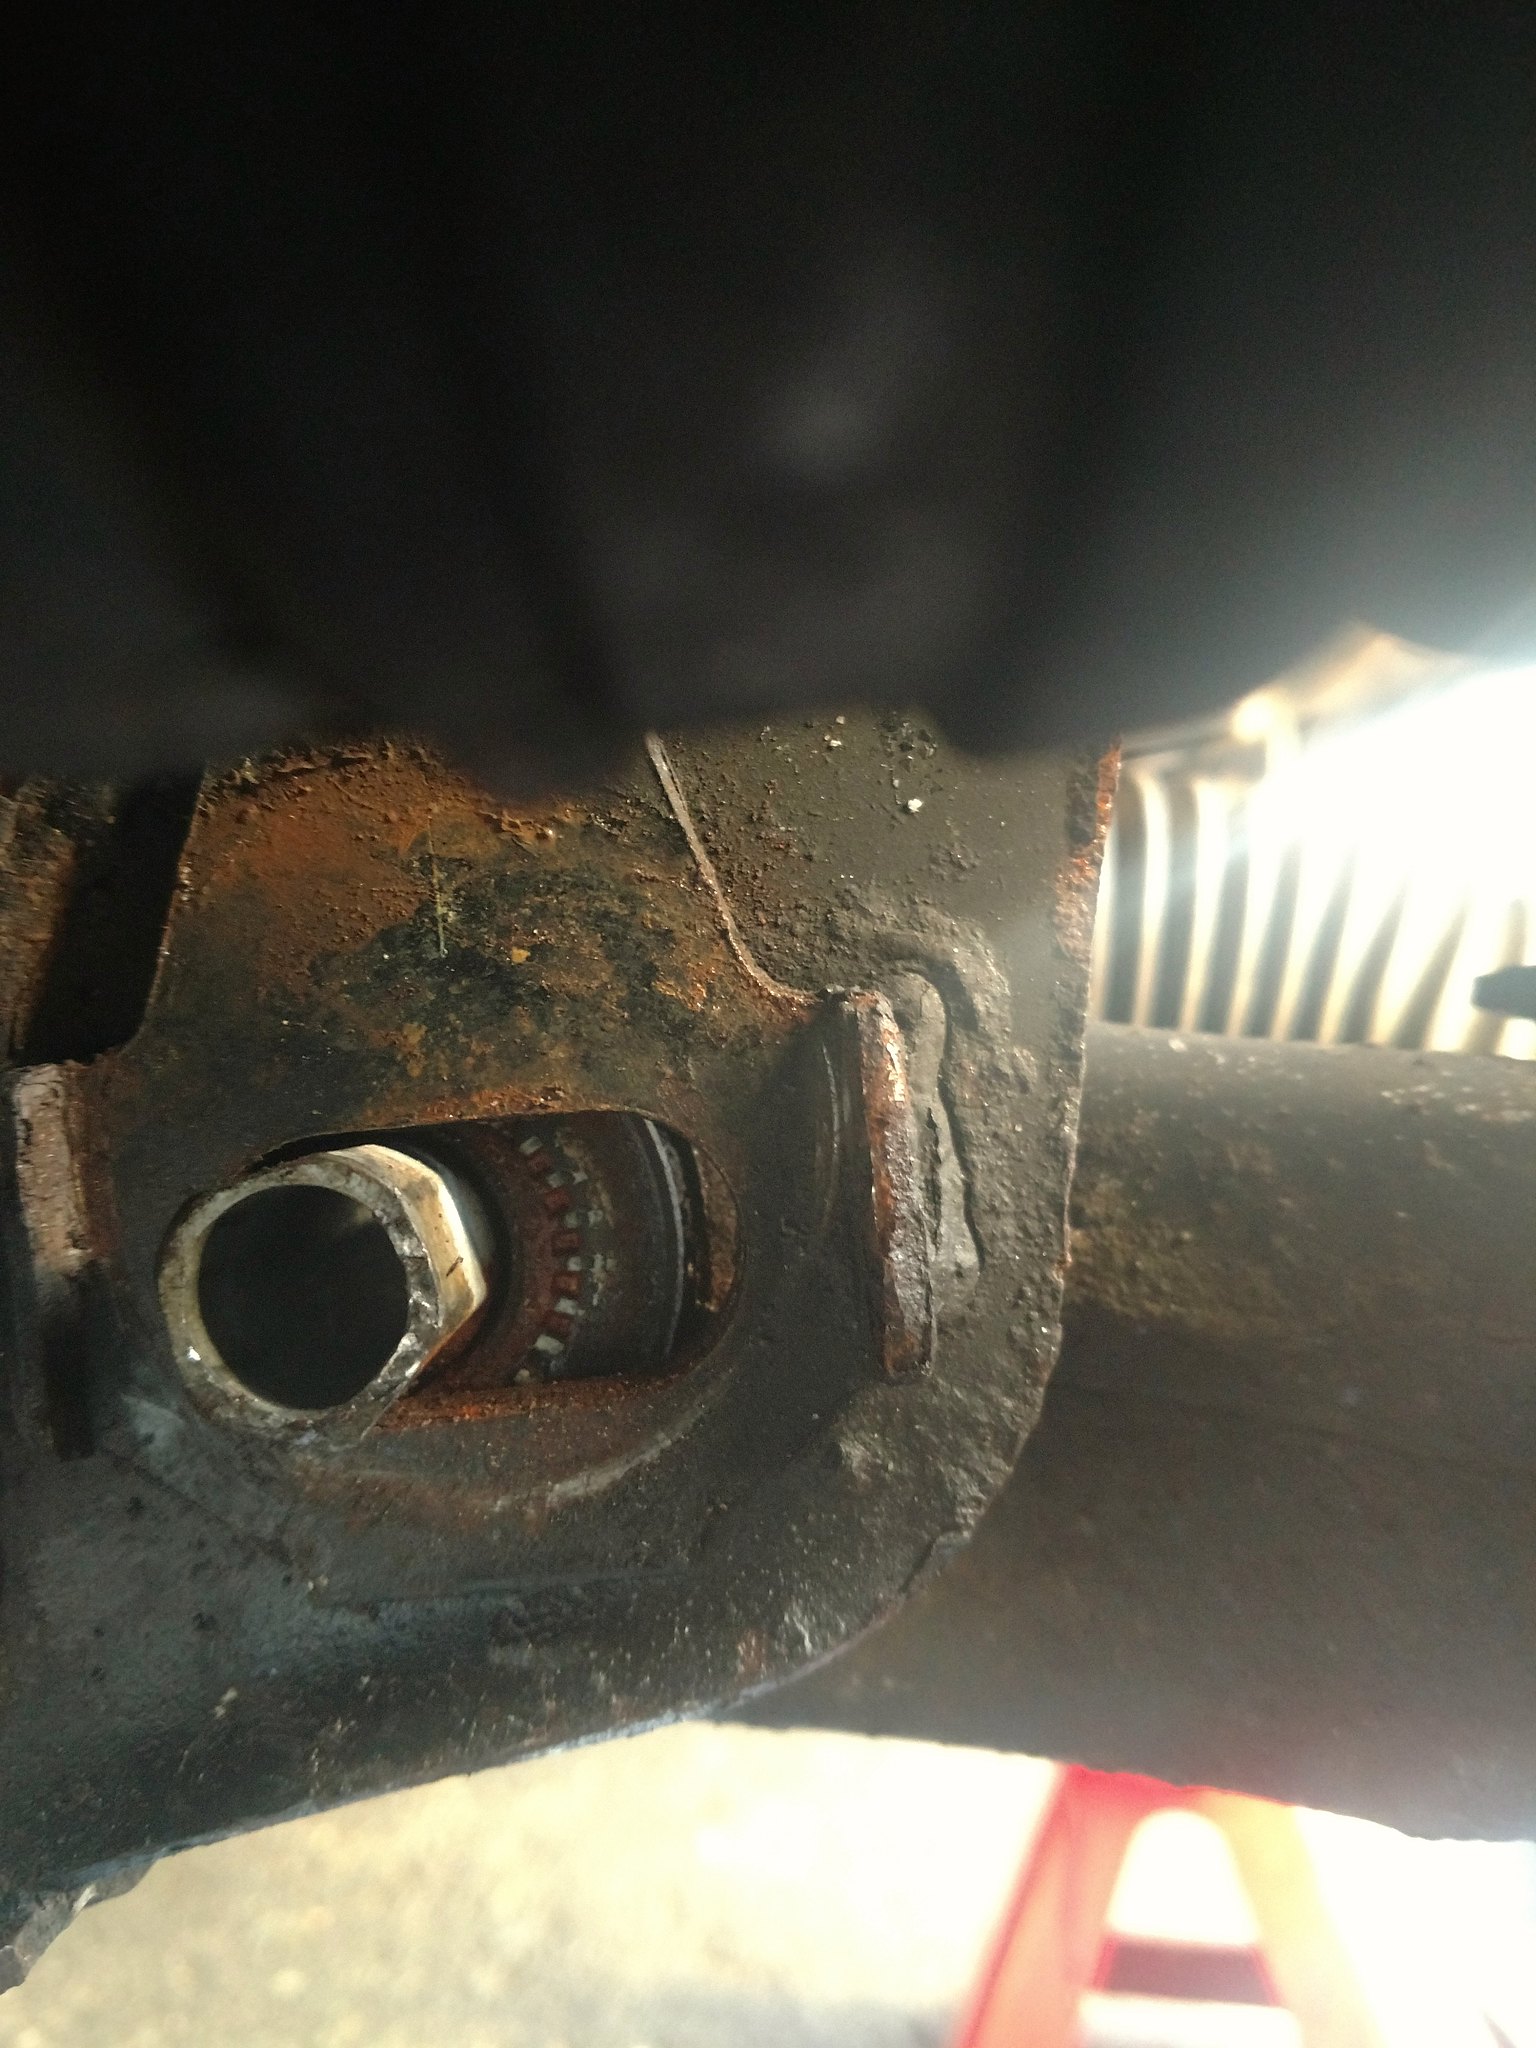
Maybe it's a little clearer for you now. I dunno. Lots of delicate cutoff wheel work later, I did another small victory dance. I finally got the control arm out. It didn't last too long, as next I was faced with the challenge of getting the bushings out. Again, thanks Toyota, they used flanged bushings, so it's not a straightforward process of pressing them out (well, not without special fixturing that I don't have, anyway). After I torched, pressed, hammered, and screamed at the bushing centers, they politely fell out.
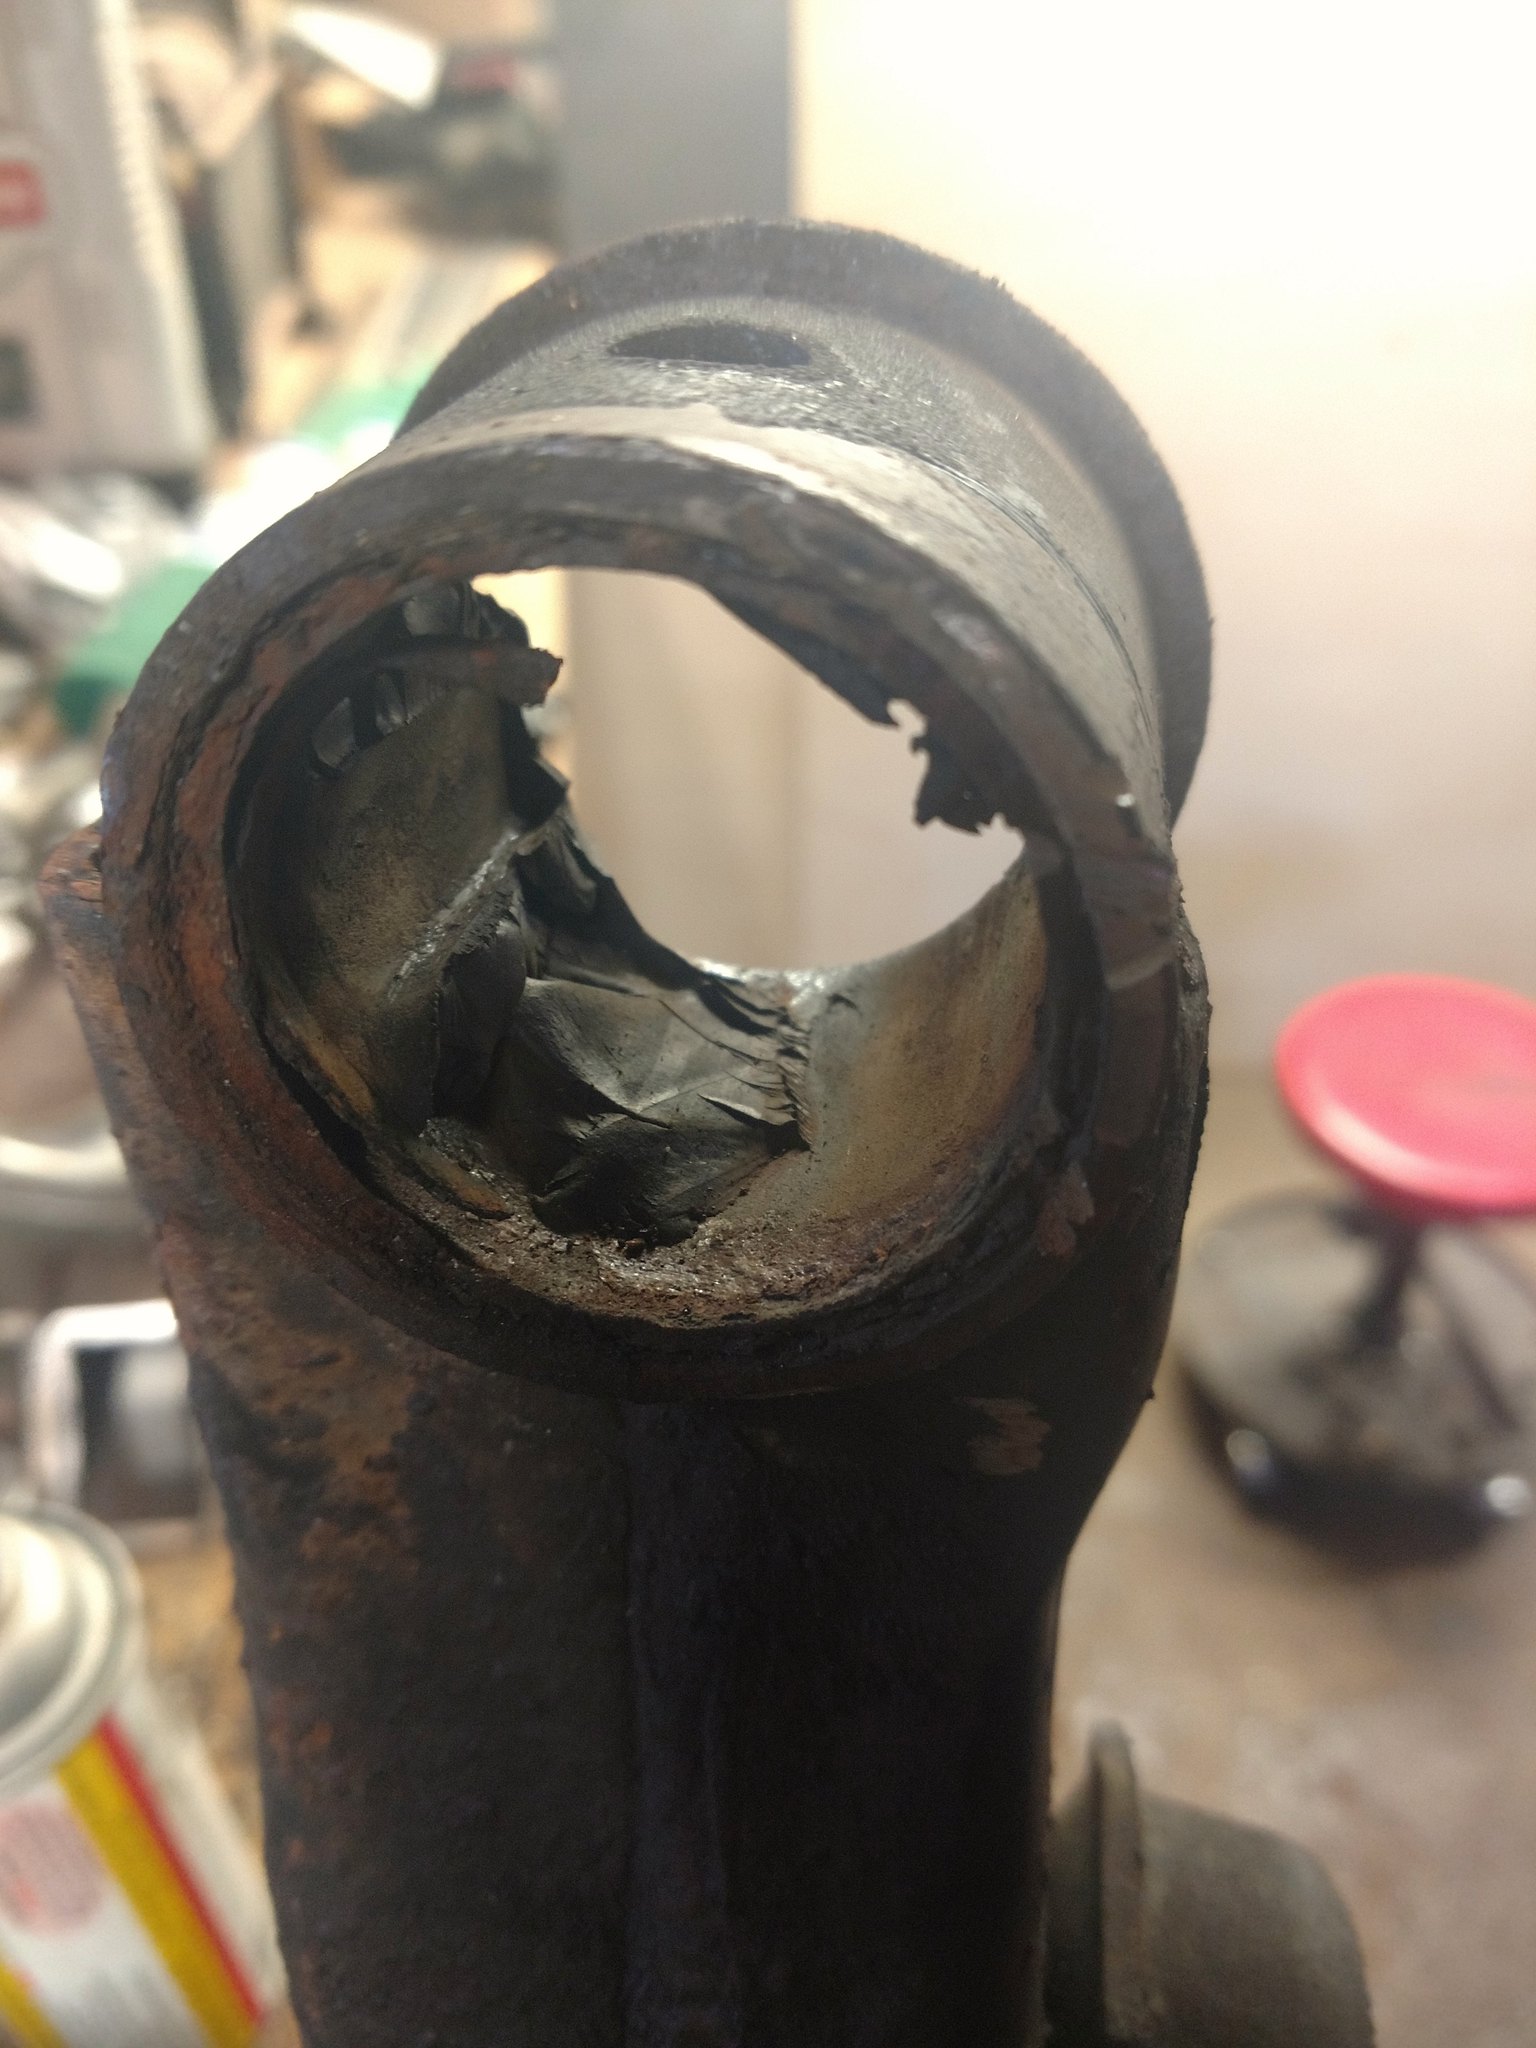
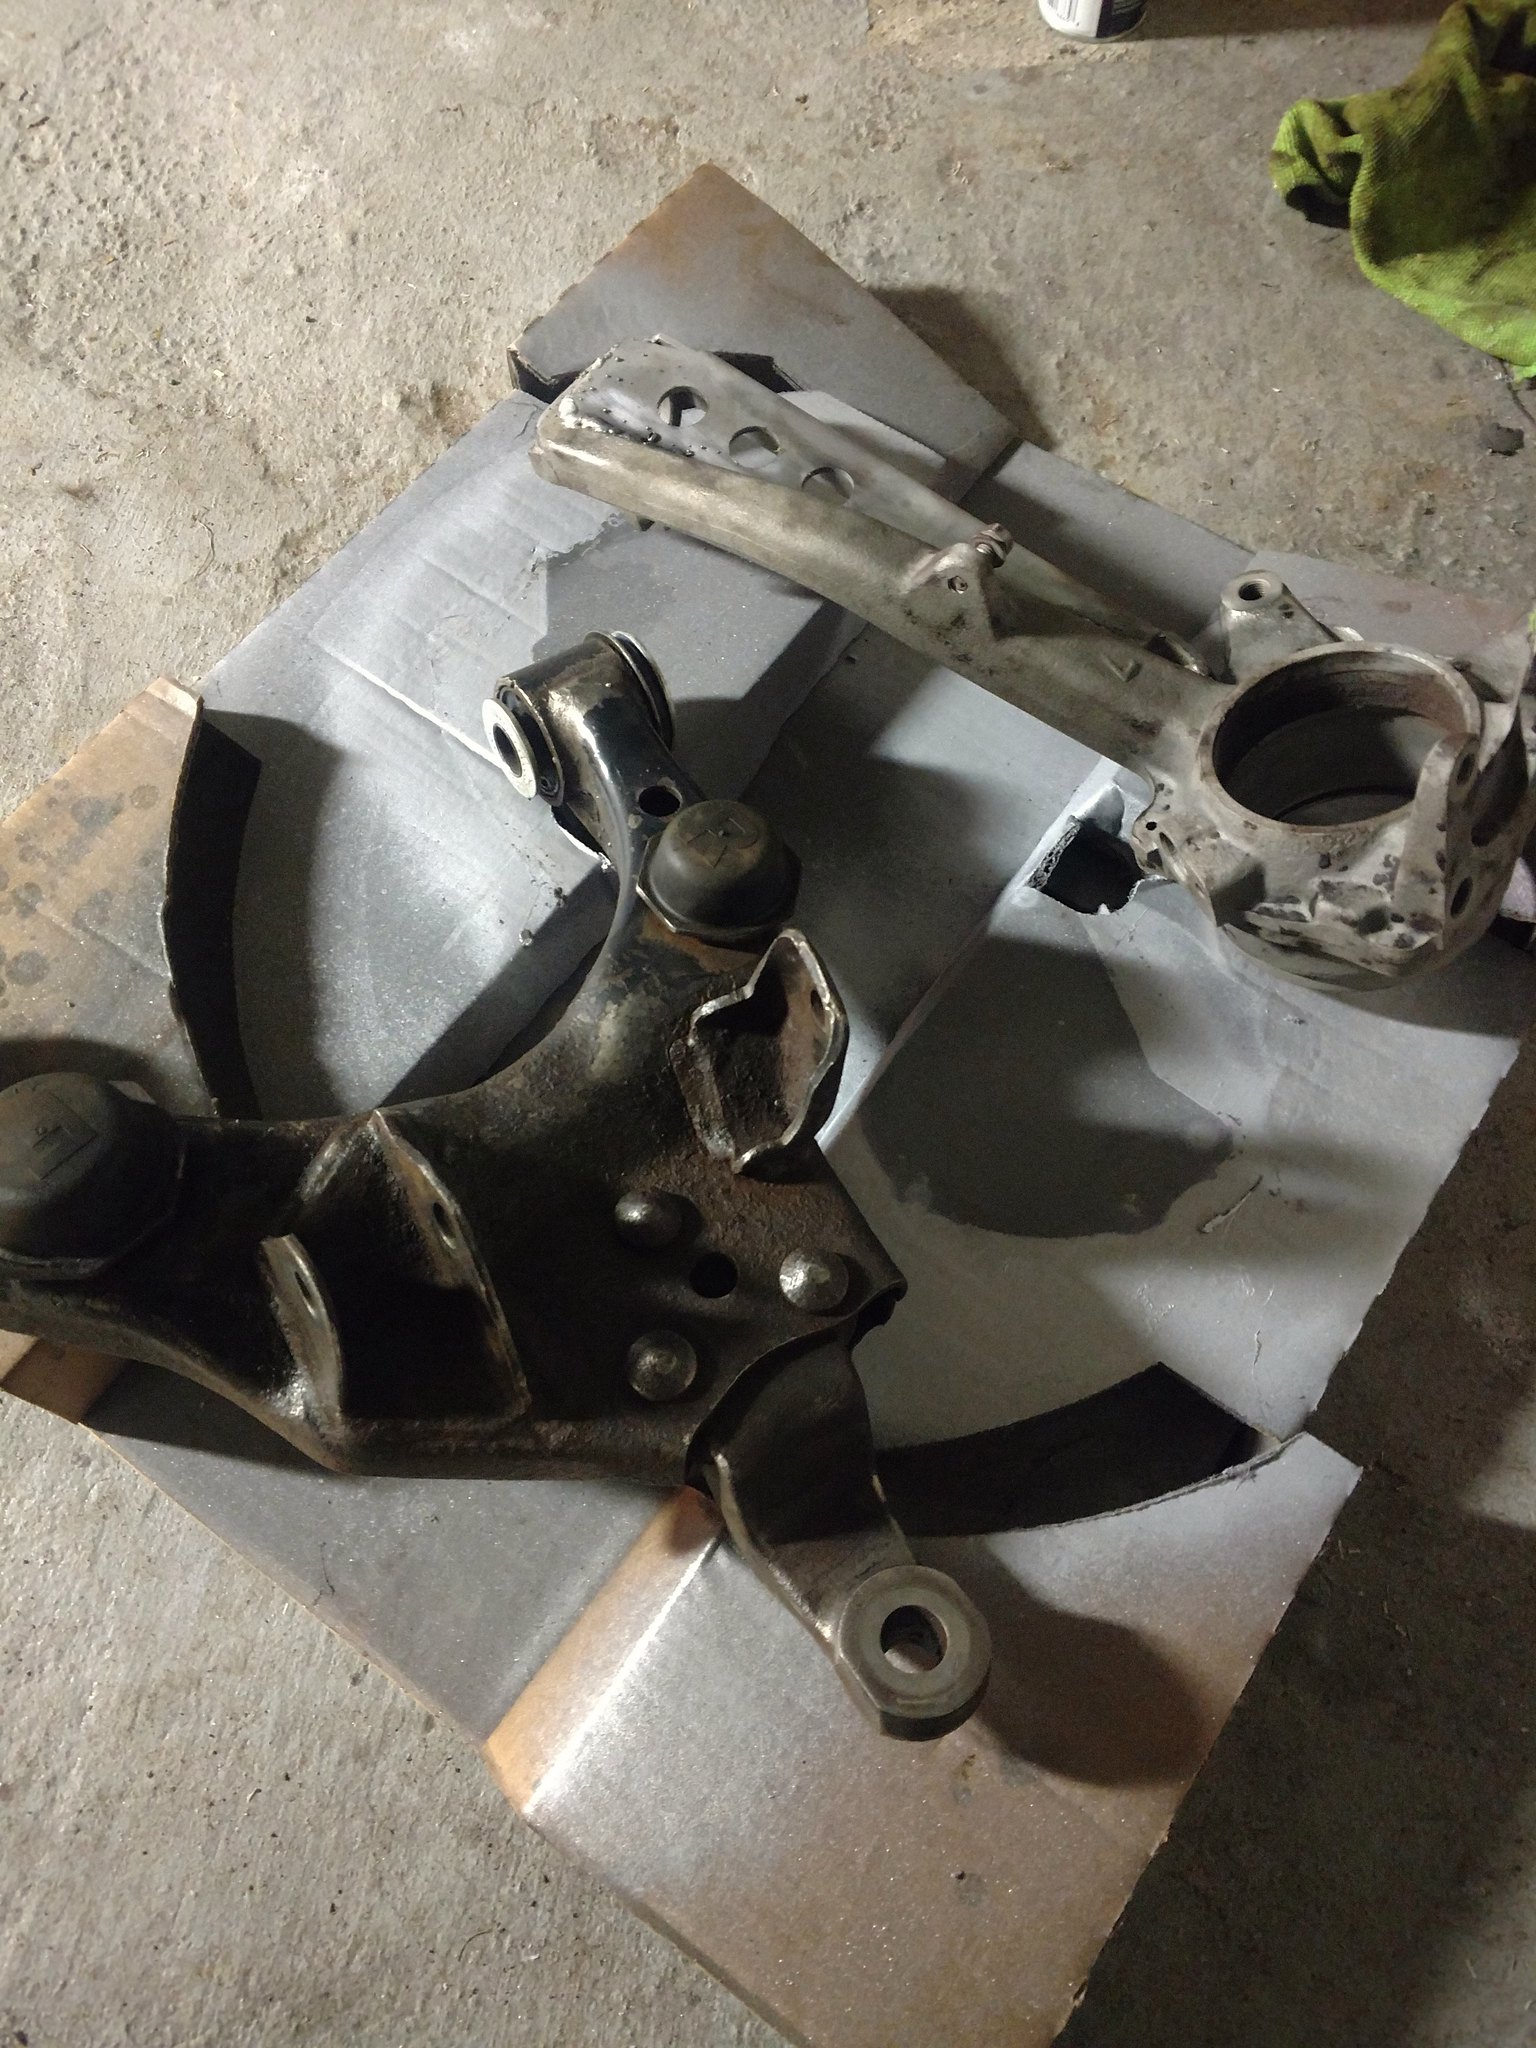
My Sawzall battery sucks, so I hack-sawed the outer sleeve by hand. Then I torched and hammered and hammered and hammered the sleeves out. I did a quick wire-wheel-over both parts before priming and painting them black:
Once all the second-round-order parts came in, I was able to install the brake dust shield, wheel bearing, seals, and hub and it was finally ready to go back in.
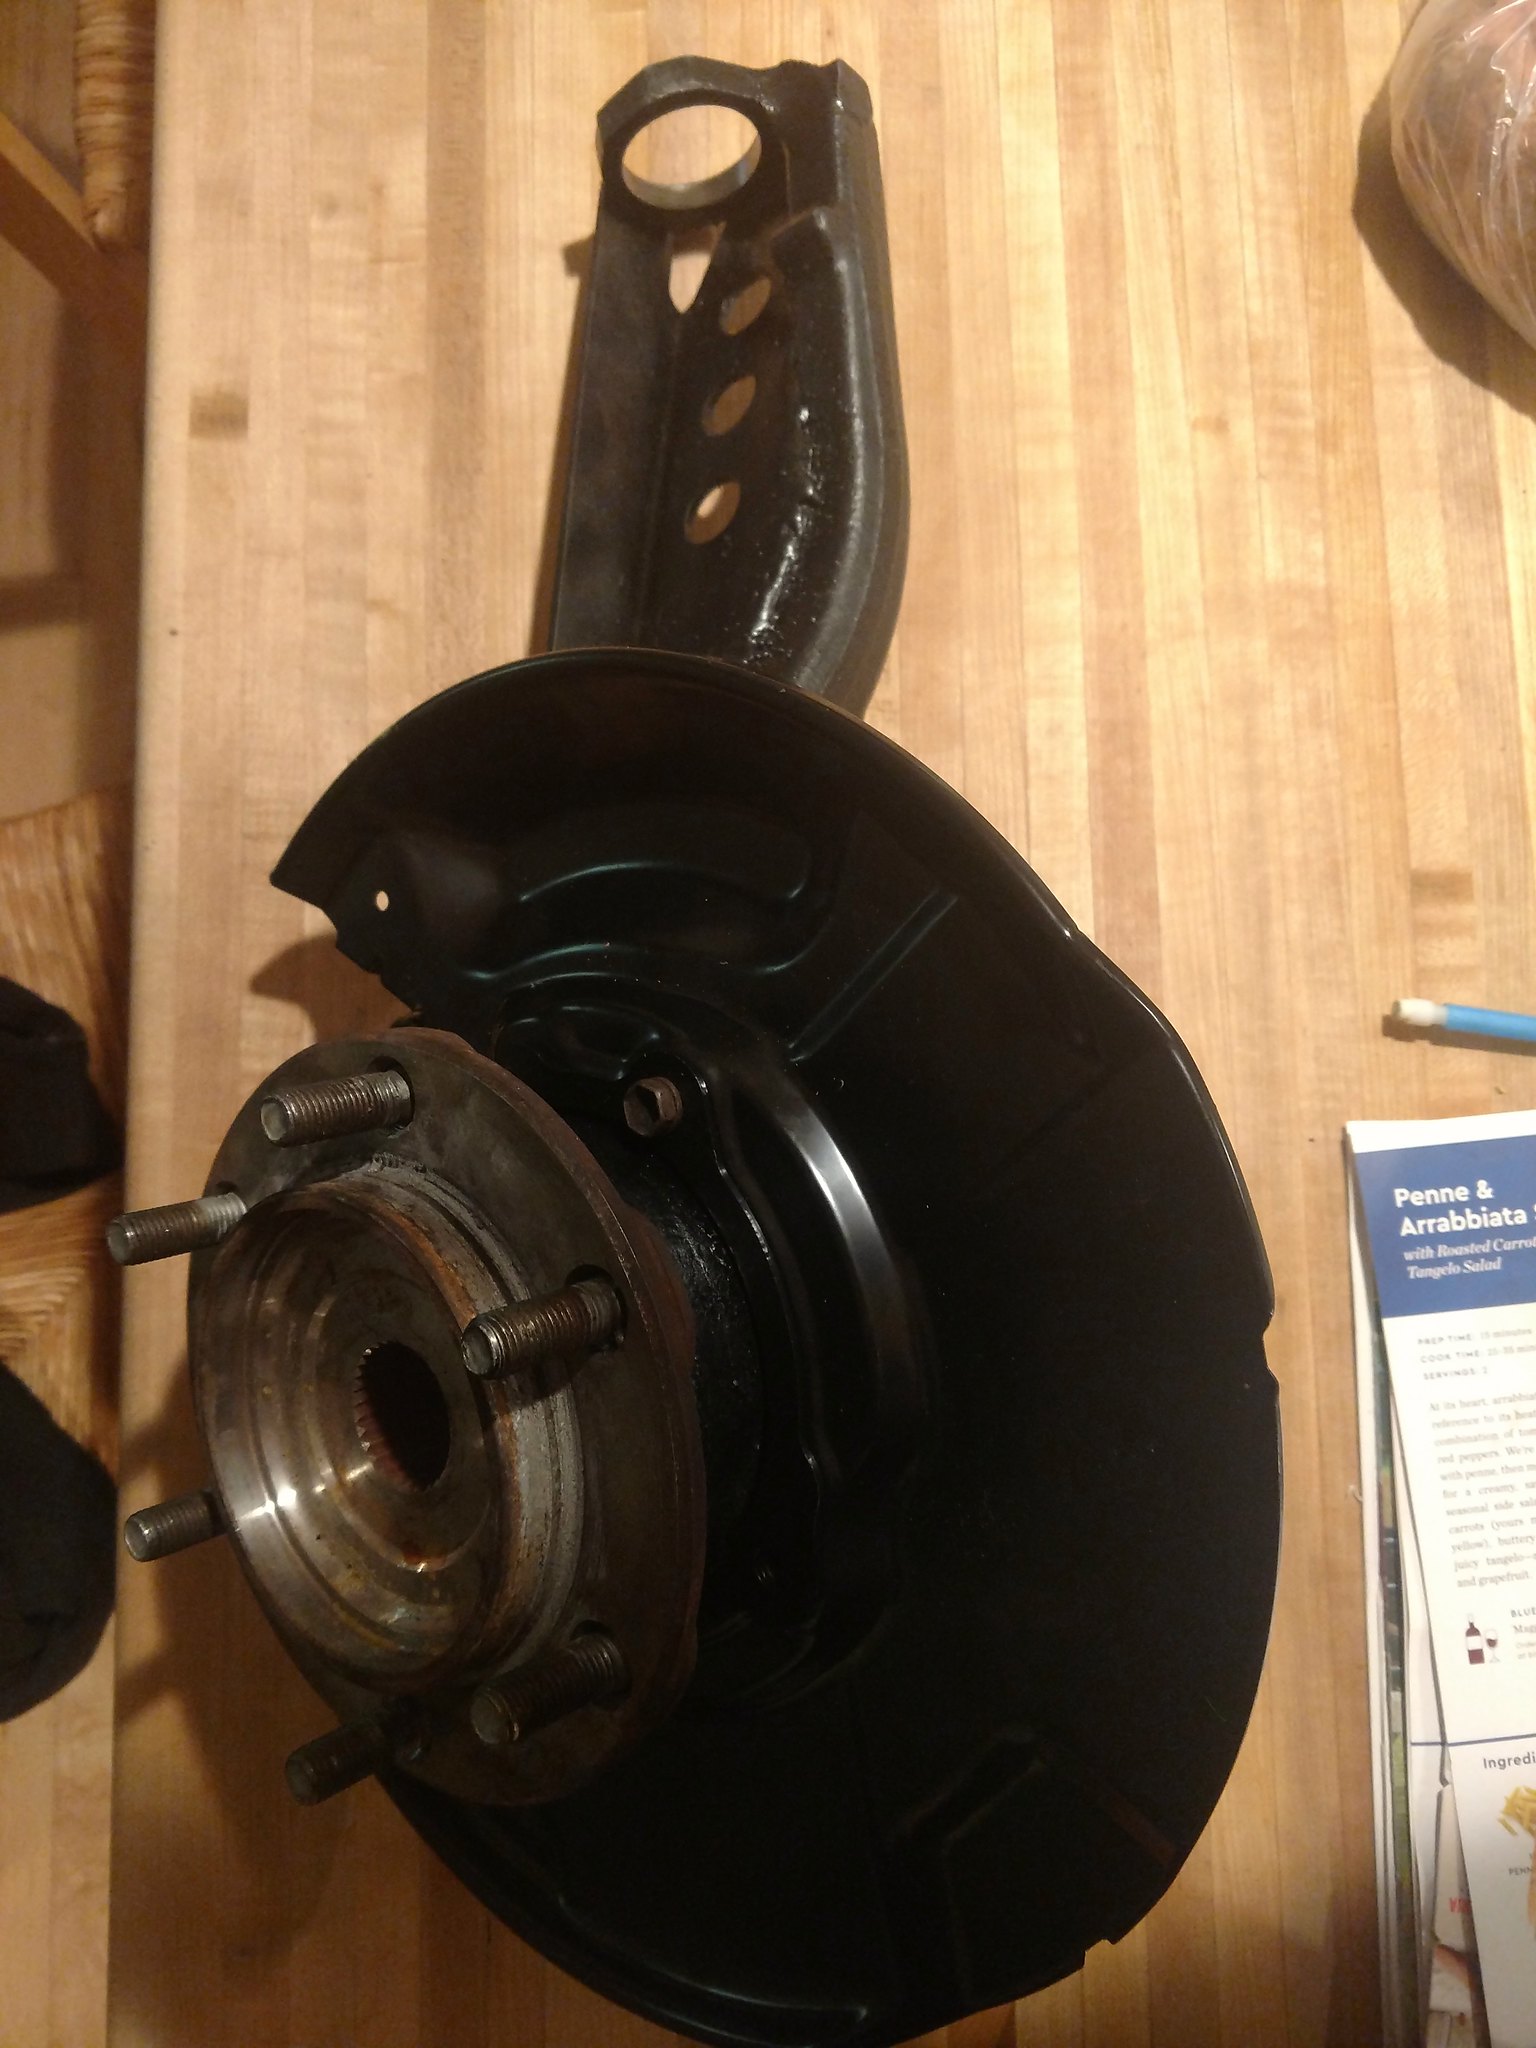
I was pretty pleased once it was all together. It was a drastic improvement over what came out. At reassembly, I found a problem. I wish. AFTER reassembly, I found the problem when I put everything together and the brake rotor would not spin. What I found was that the axle was contacting the new lower ball joint. At the time, I had no idea the depth of the rabbit hole I was falling into. I thought this was odd that there would be an interference there, because it was a result of the lower ball joint casting being clearly wrong. I had ordered Detroit Axle brand ball joints from Amazon. They were cheap, they were greasable, and they had a good quality finish on them. I want to make it clear that, aside from the issue with the part dimensions, it seemed like a great product. Which is really unfortunate, for reasons that will become clear in a moment.
I scratched my head a bit, and sent off a polite email through Amazon to the vendor to say, "Hey this part doesn't fit, but I think the issue is systemic, not just a one-off screwed up part." Or something to that effect. Because if a casting is wrong, they must all be bad parts, right? Anyways, I wanted to help them out, because it seems like a great part, and I wanted exactly that, but in a version that would fit my truck. I was put in contact with (what I think was) a Detroit Axle employee (instead of an Amazon person), and I sent a long-winded, but professional e-mail explaining what exactly the issue was, and attached a few pictures of the ball joint, so they could understand, because it's hard to explain in 240 characters that Amazon permits or whatever. So they got back to me and they were apologetic and they explained that I must have been sent ball joints for a 2WD, and I have a 4WD. They sent out replacements quickly. Great, thank you. So what I received shortly thereafter were definitely 2WD ball joints. They have a completely different design, with a different number of fasteners. Not even close to working for me. So I called Detroit Axle and (obviously connected with someone other than whom I sent the e-mail to) I was like look this is what has happened so far, and today I received what I'm positive are 2WD joints. I have 4WD joints, and they install, but they don't fit. I was struggling to explain the issue, but I felt like if I could just get them to understand then they would realize what's going on. So they told me, threateningly, their solution. They requested I send back the latest set of joints (I'd already sent back the first set), and they would send me a third set. If this third set still didn't work, it would be up to me to pay for all the shipping costs. The whole thing left a really bad taste in my mouth, and so I decided to just go with AutoZone ones. Held side-by-side (AutoZone is on the left, Detroit Axle on the right) you can see the ball socket "well" is too tall on the Detroit Axle part:
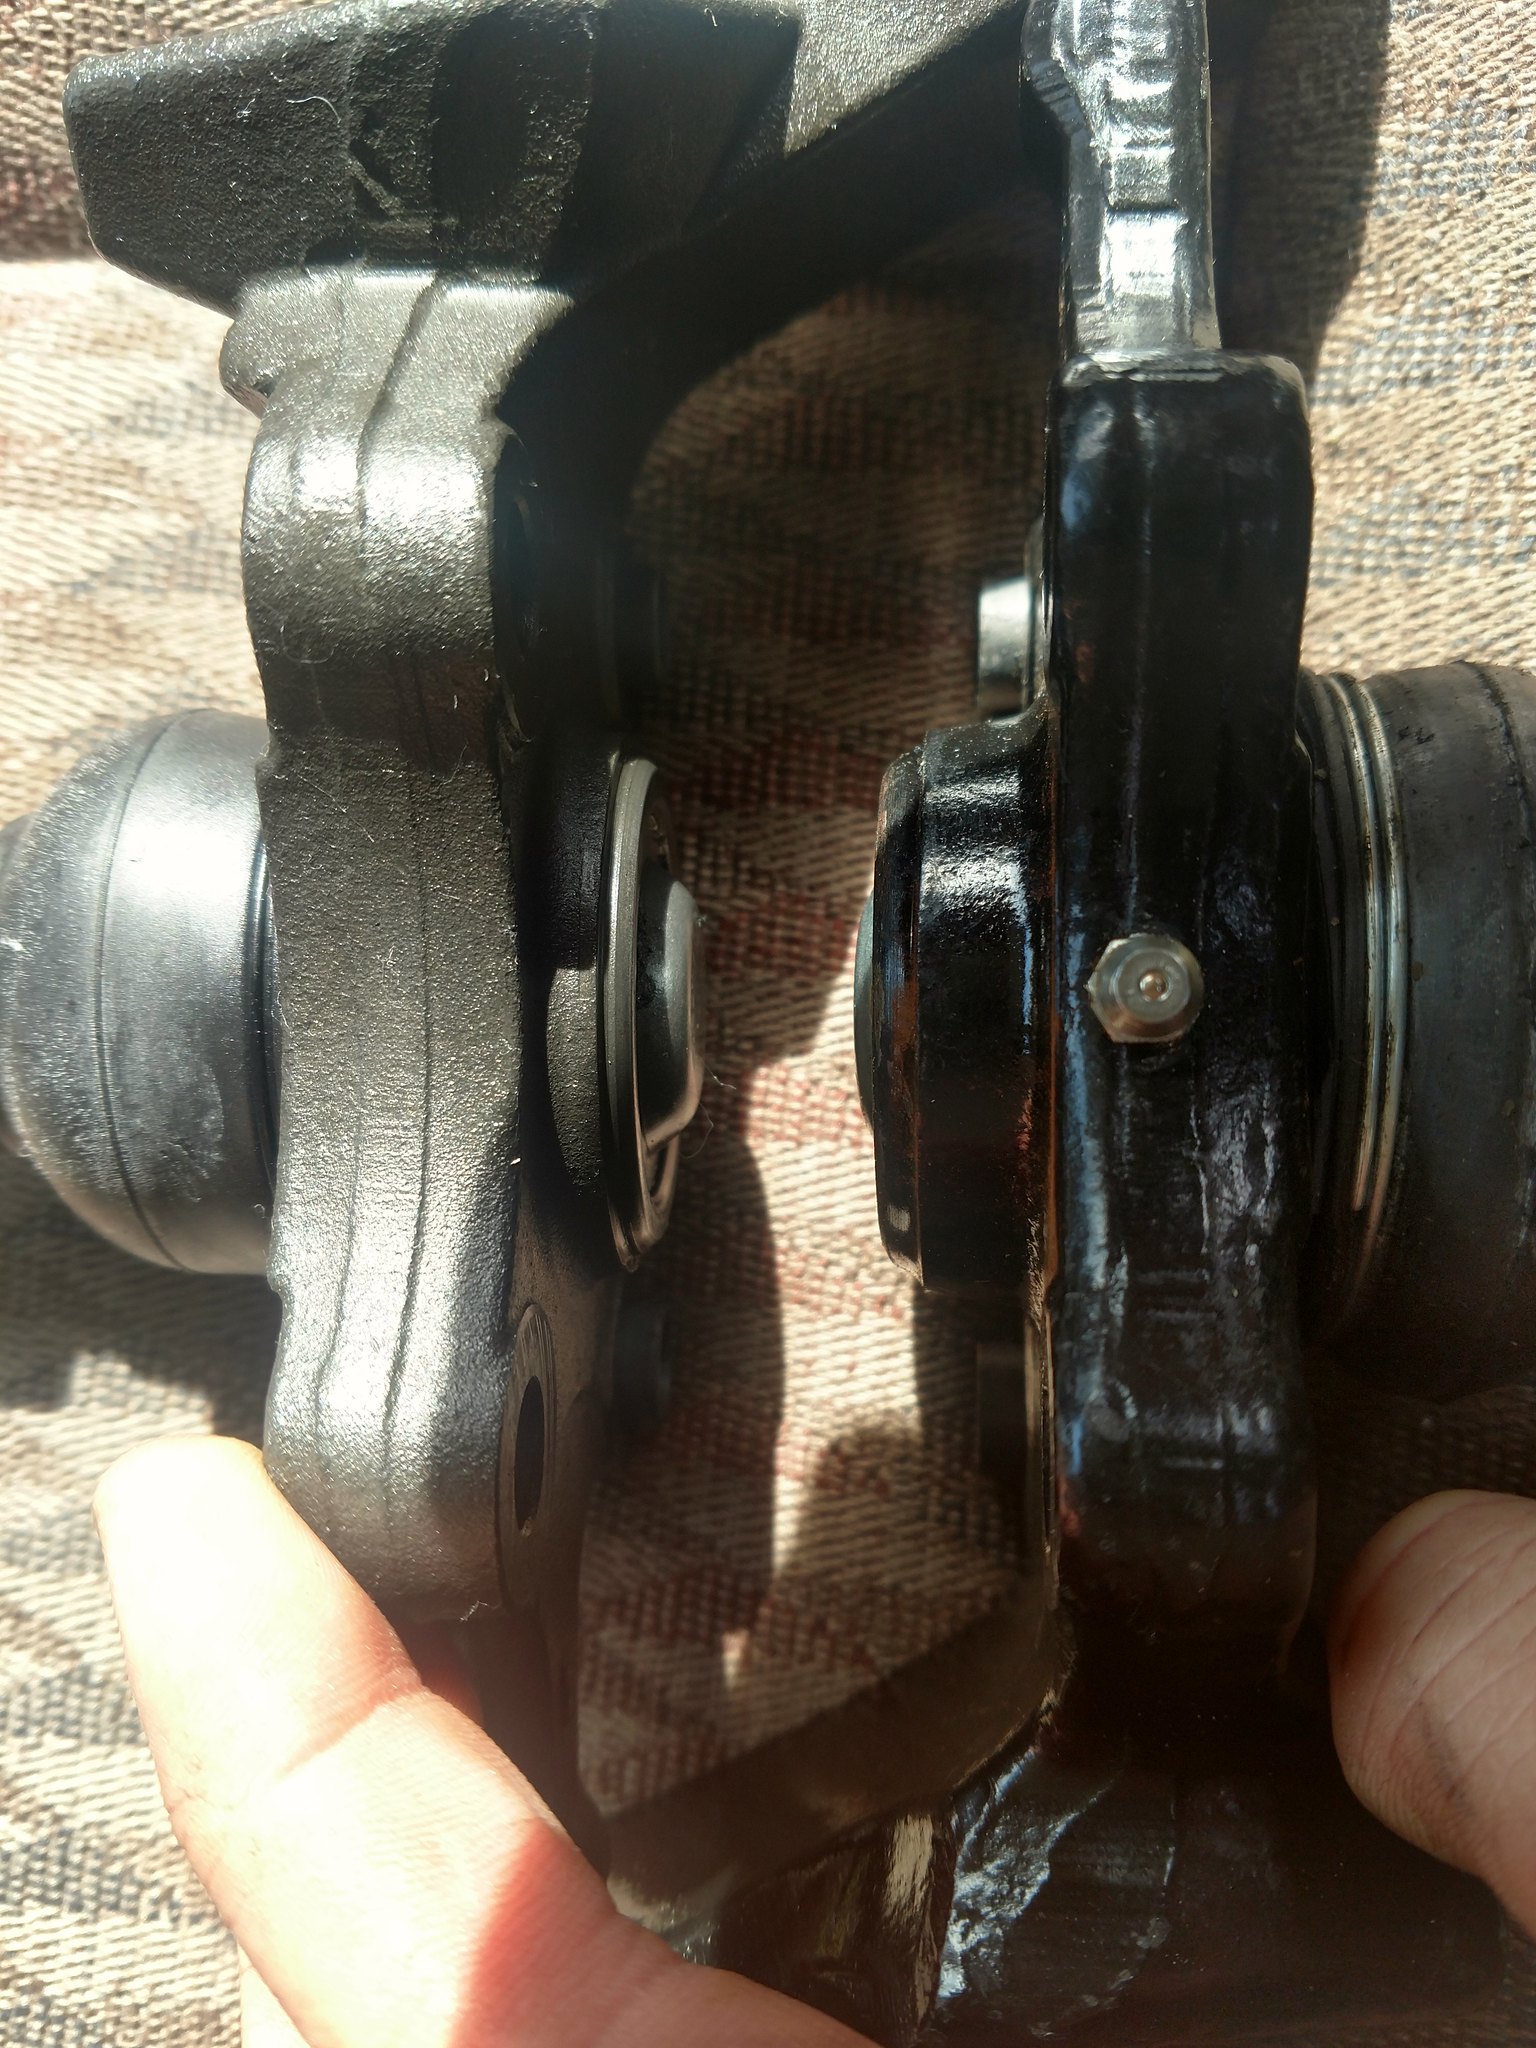
I sent them this, and many other images with a ruler and etc. etc. They just didn't get it. I didn't want to be on the hook for their incompetence, so I gave up. I moved on. I ordered greasable lower control arm bolts IIRC, made by Moog. My hope is that they don't seize like the OEM ones. They aren't quite on par with the OEM ones, but, whatever. I'd rather be able to remove them in the future if the need arises. I installed them from the forward side, so that if I DO need to remove them, I can do so without touching the steering rack:
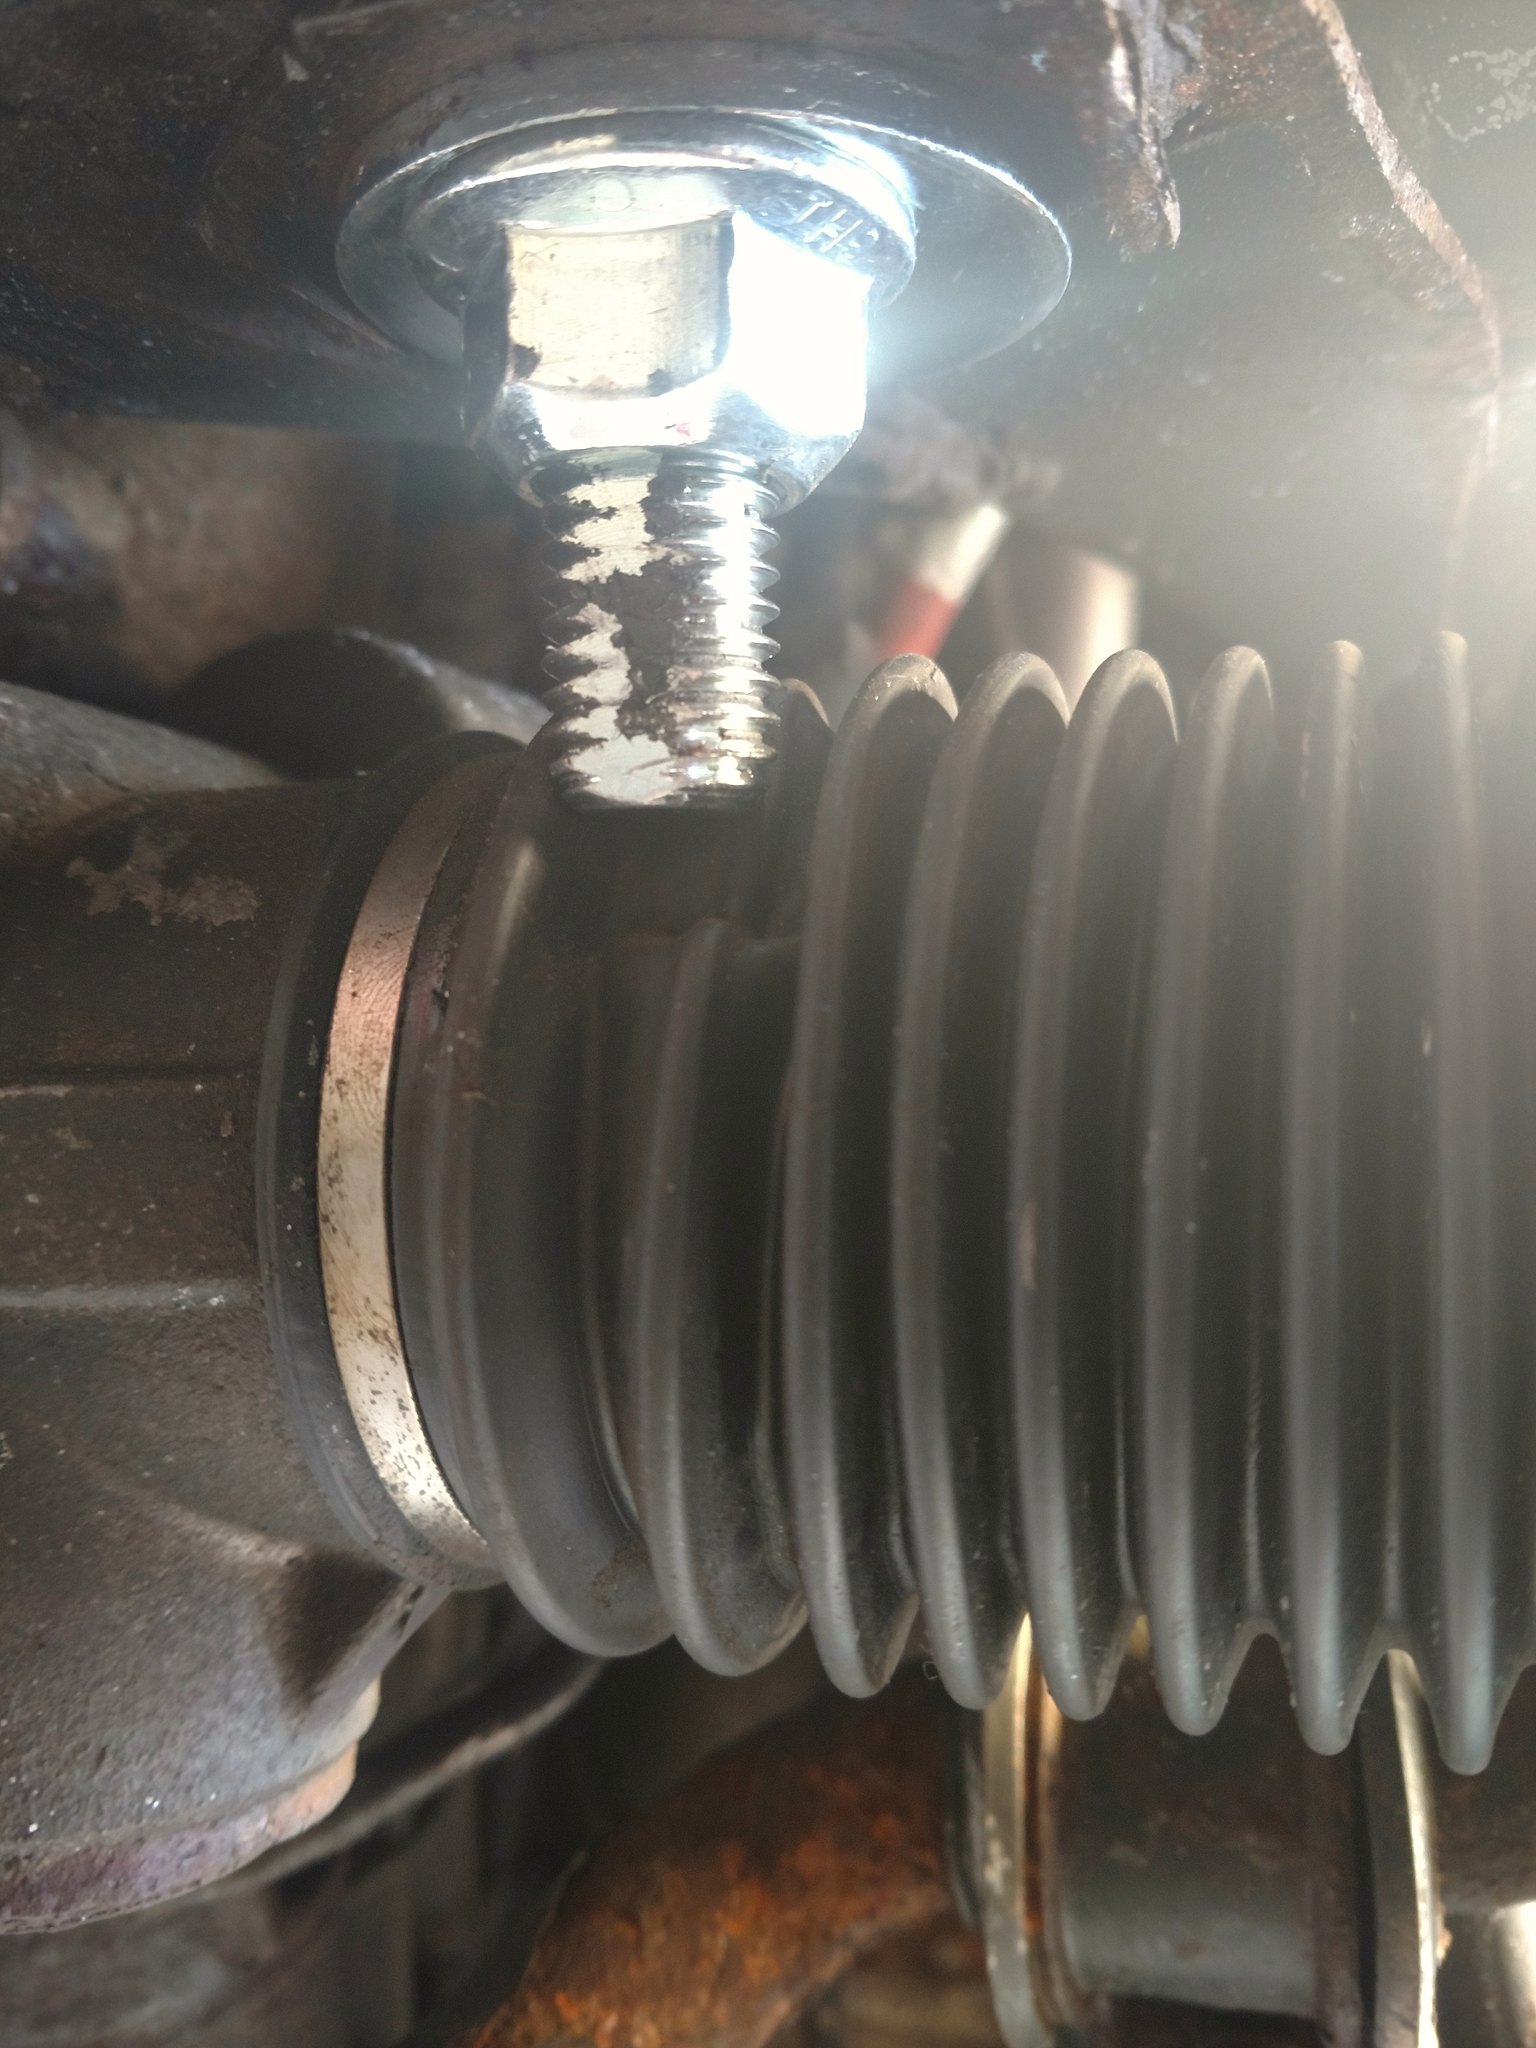
I had to trim ~1/4" off the end of the bolt, to eliminate the interference with the steering rack boot. No big deal. Oh, yeah, since I replaced literally every other bushing up front at this point, I ordered and installed sway bar bushings:
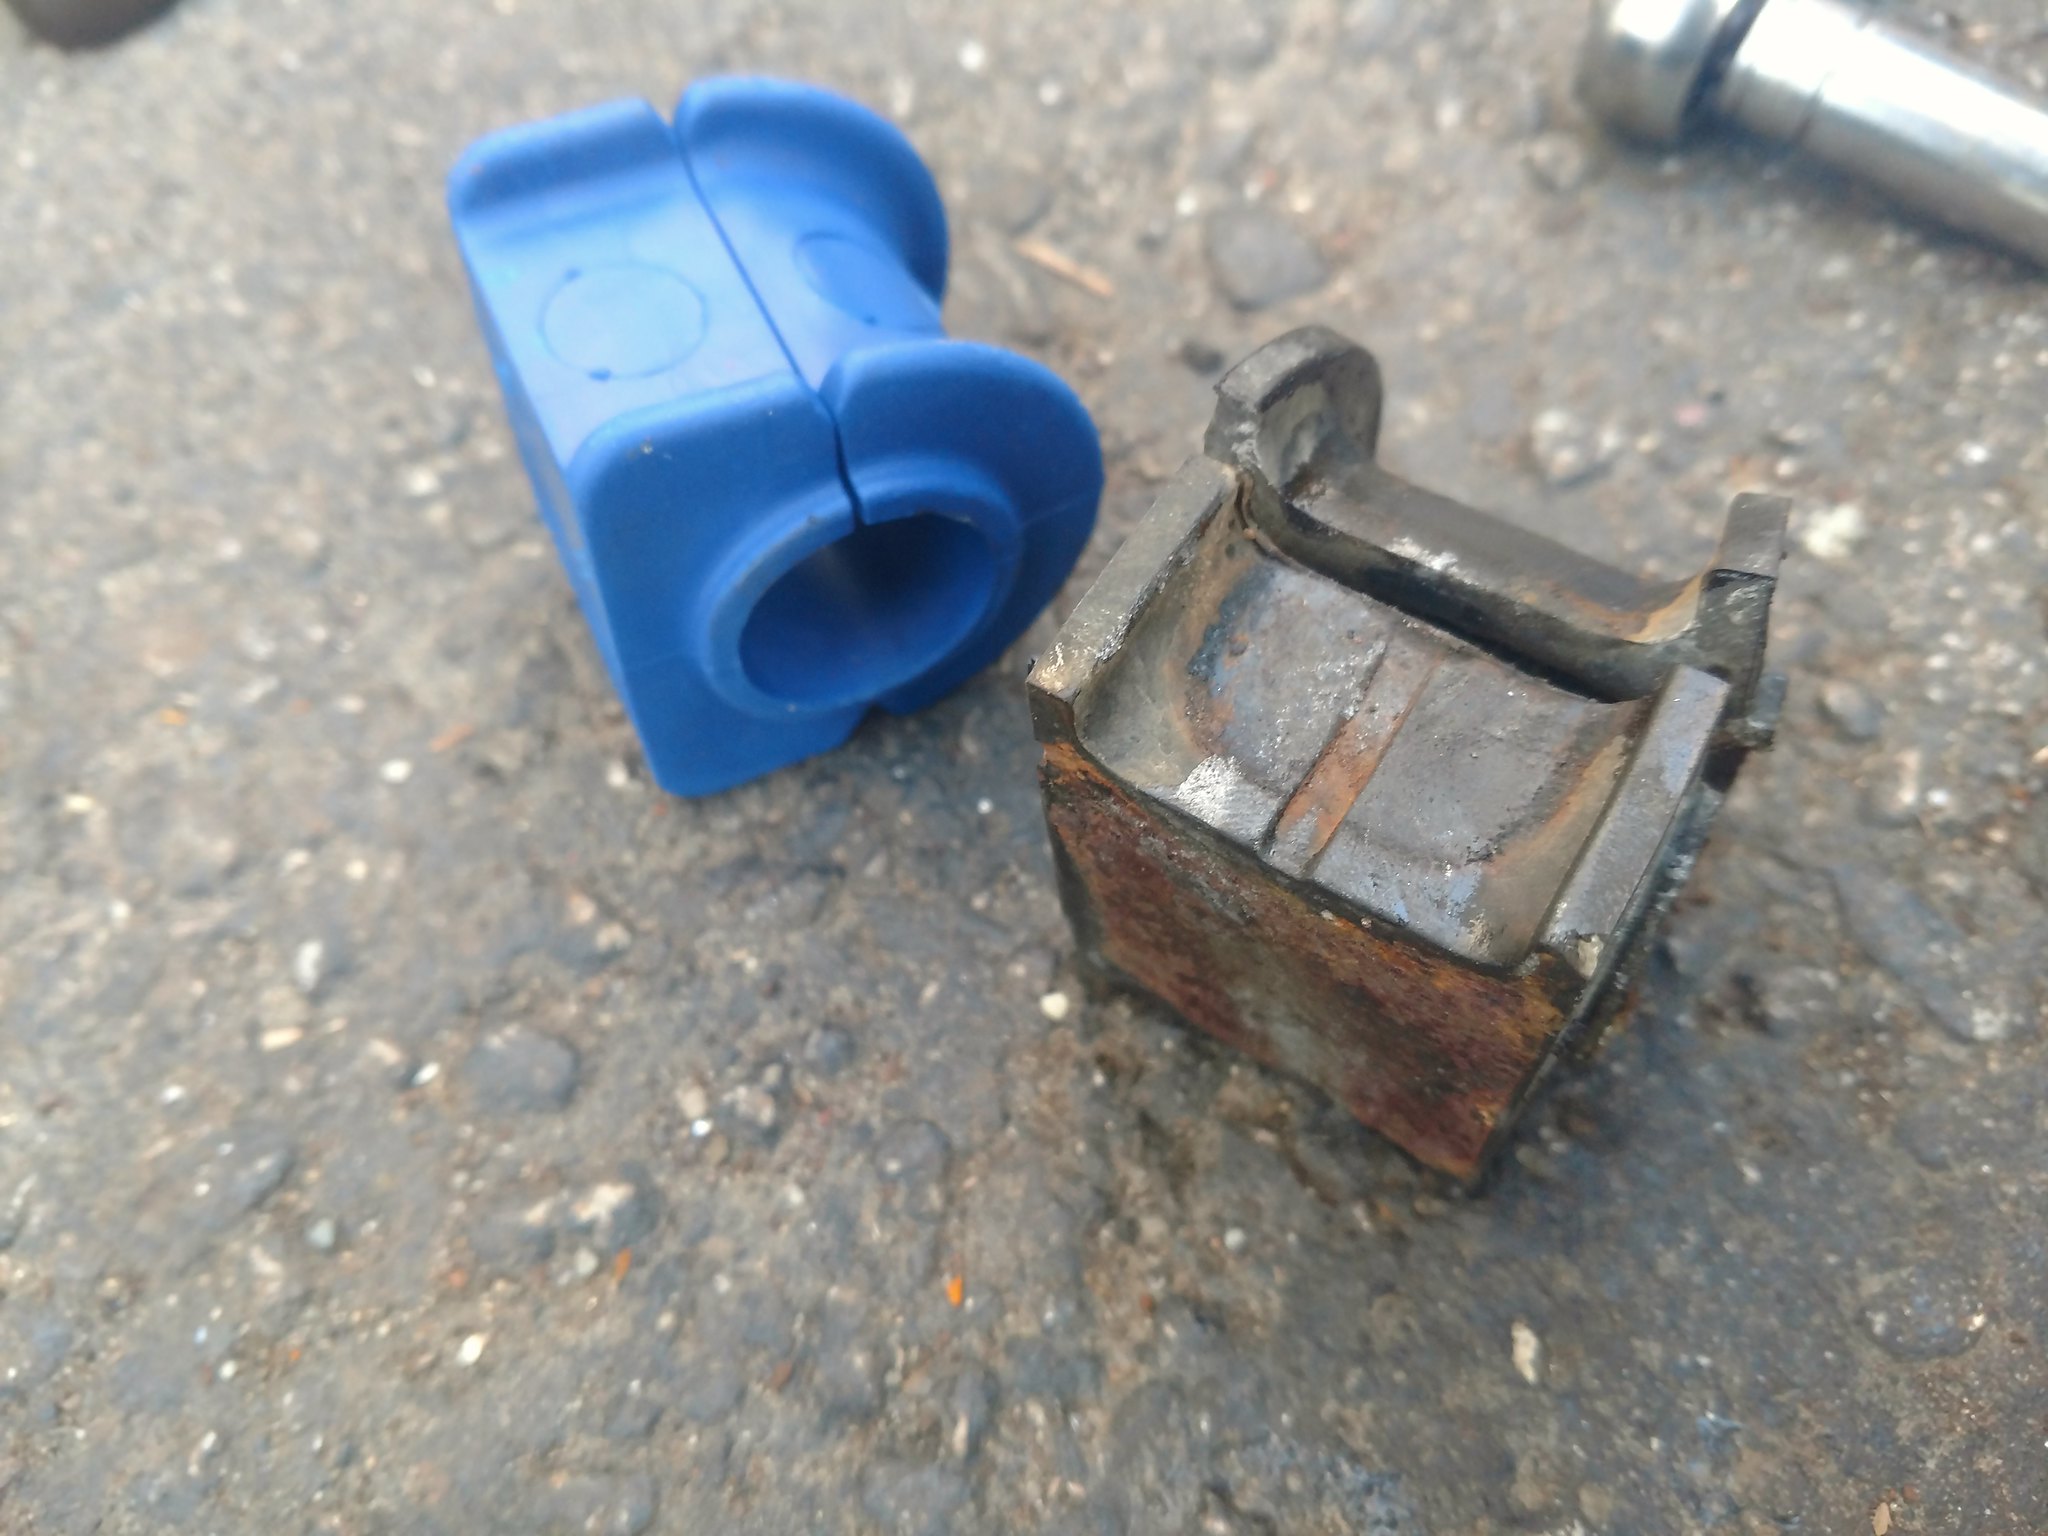
It felt wrong to leave them untouched. :laugh: At this point, finally, it was just a matter of reassembly. And it was actually quite easy. When I had everything apart, I chased every thread for which I had an appropriate tap or die, and I applied anti-seize compound before putting them back in. PLZ don't hate on my booger welds:
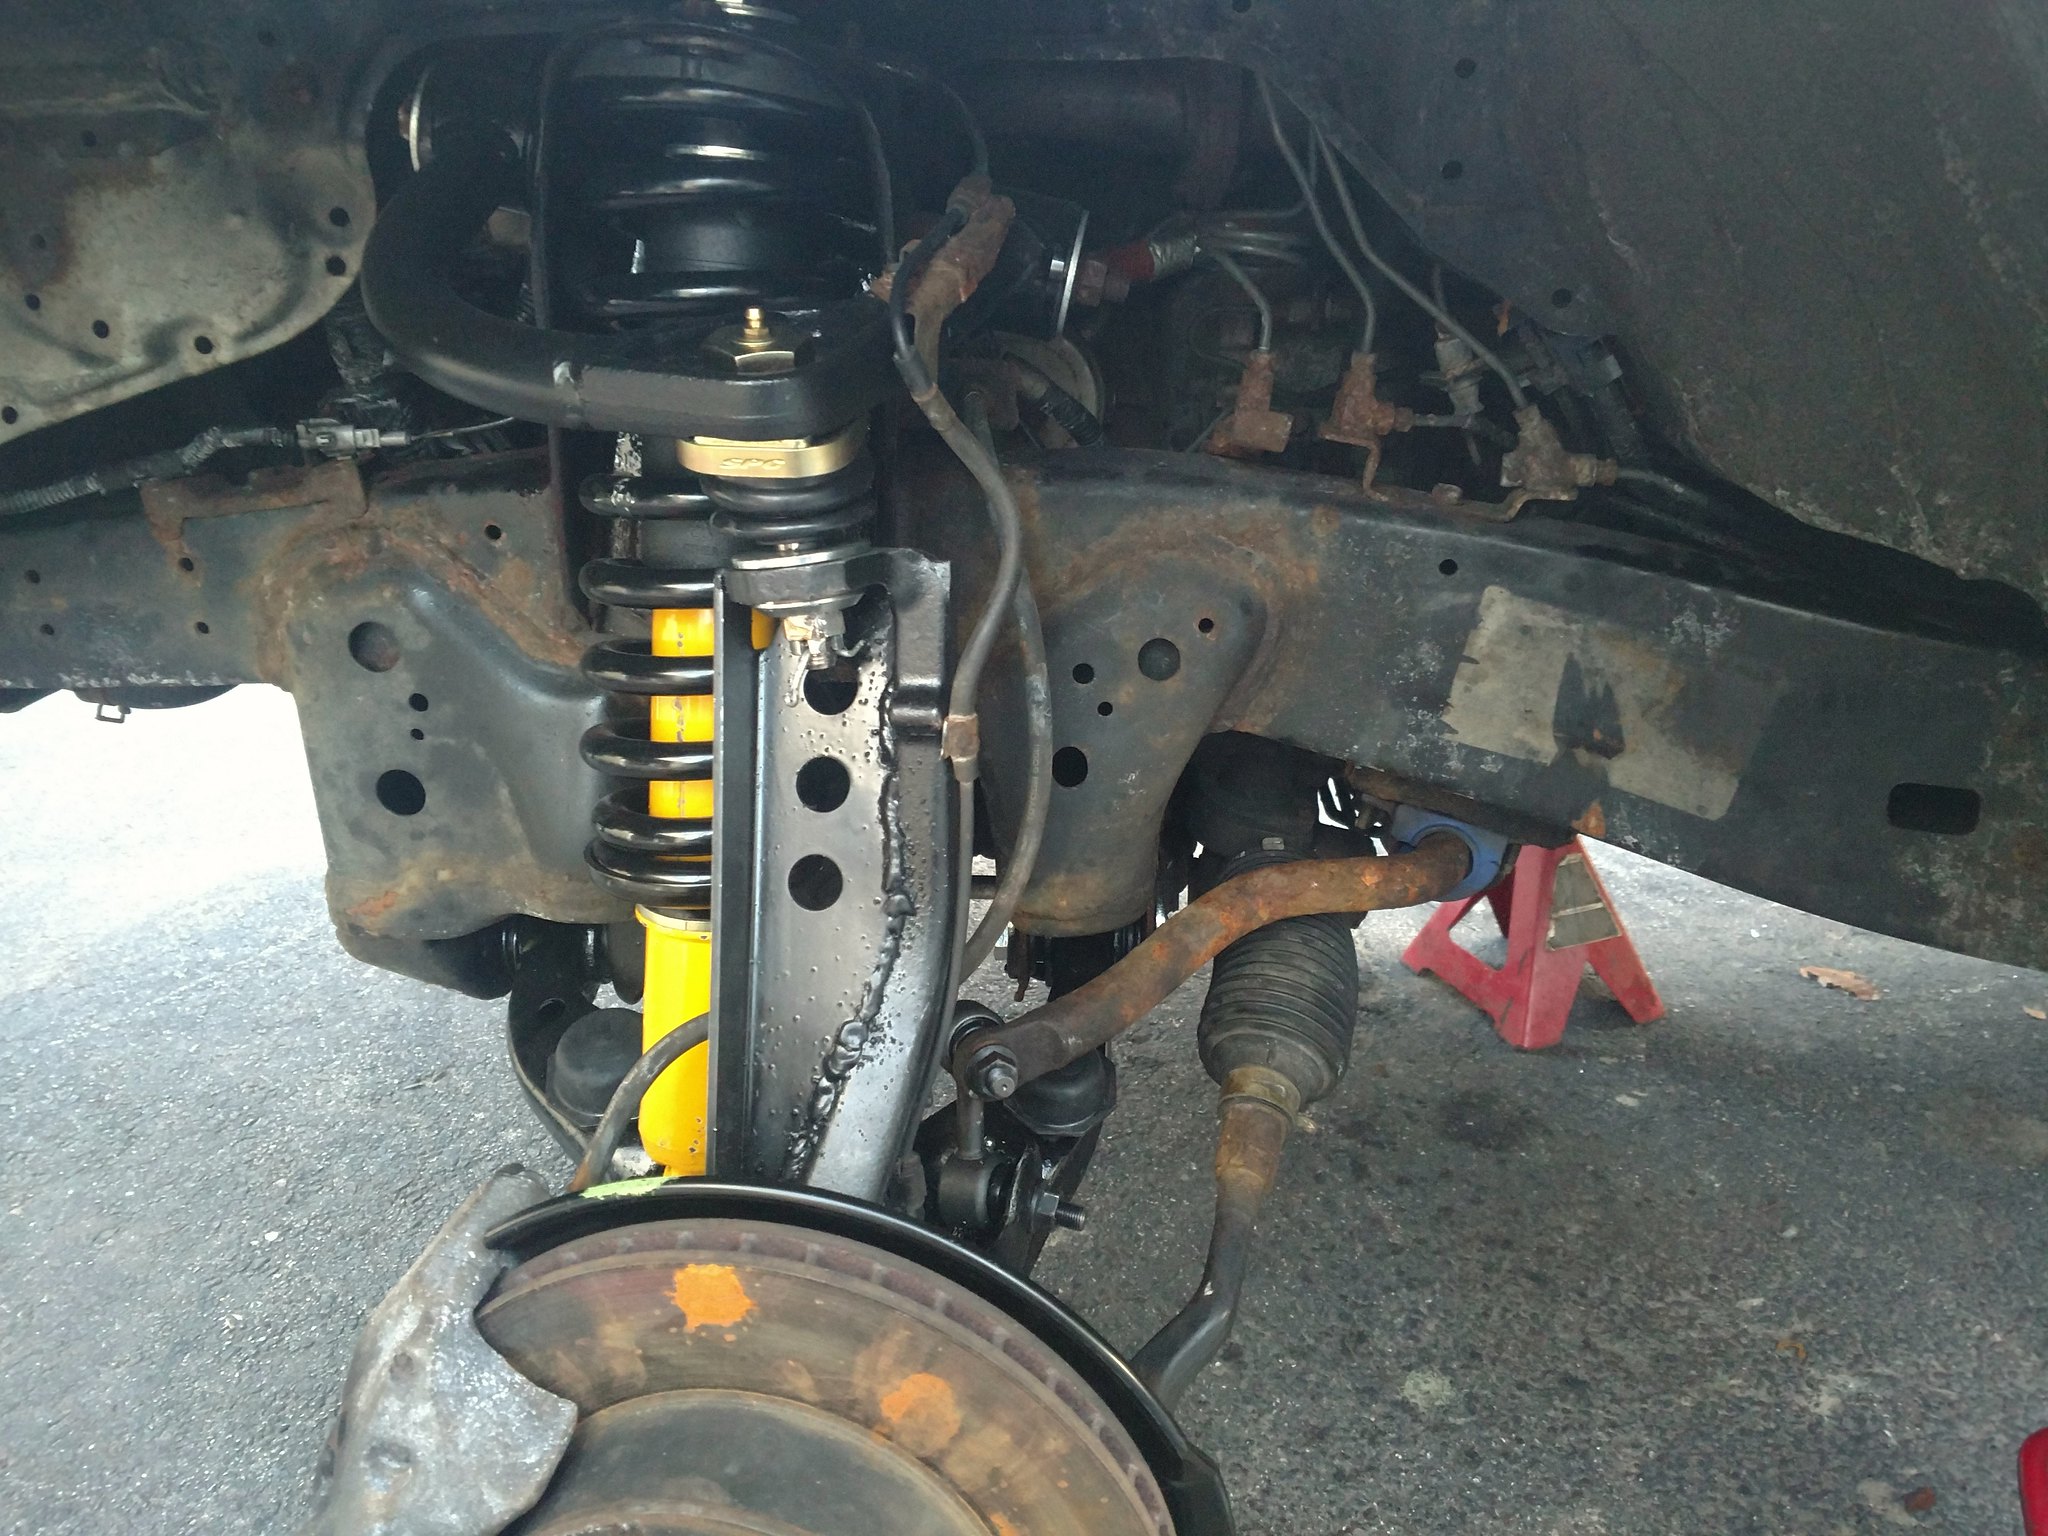
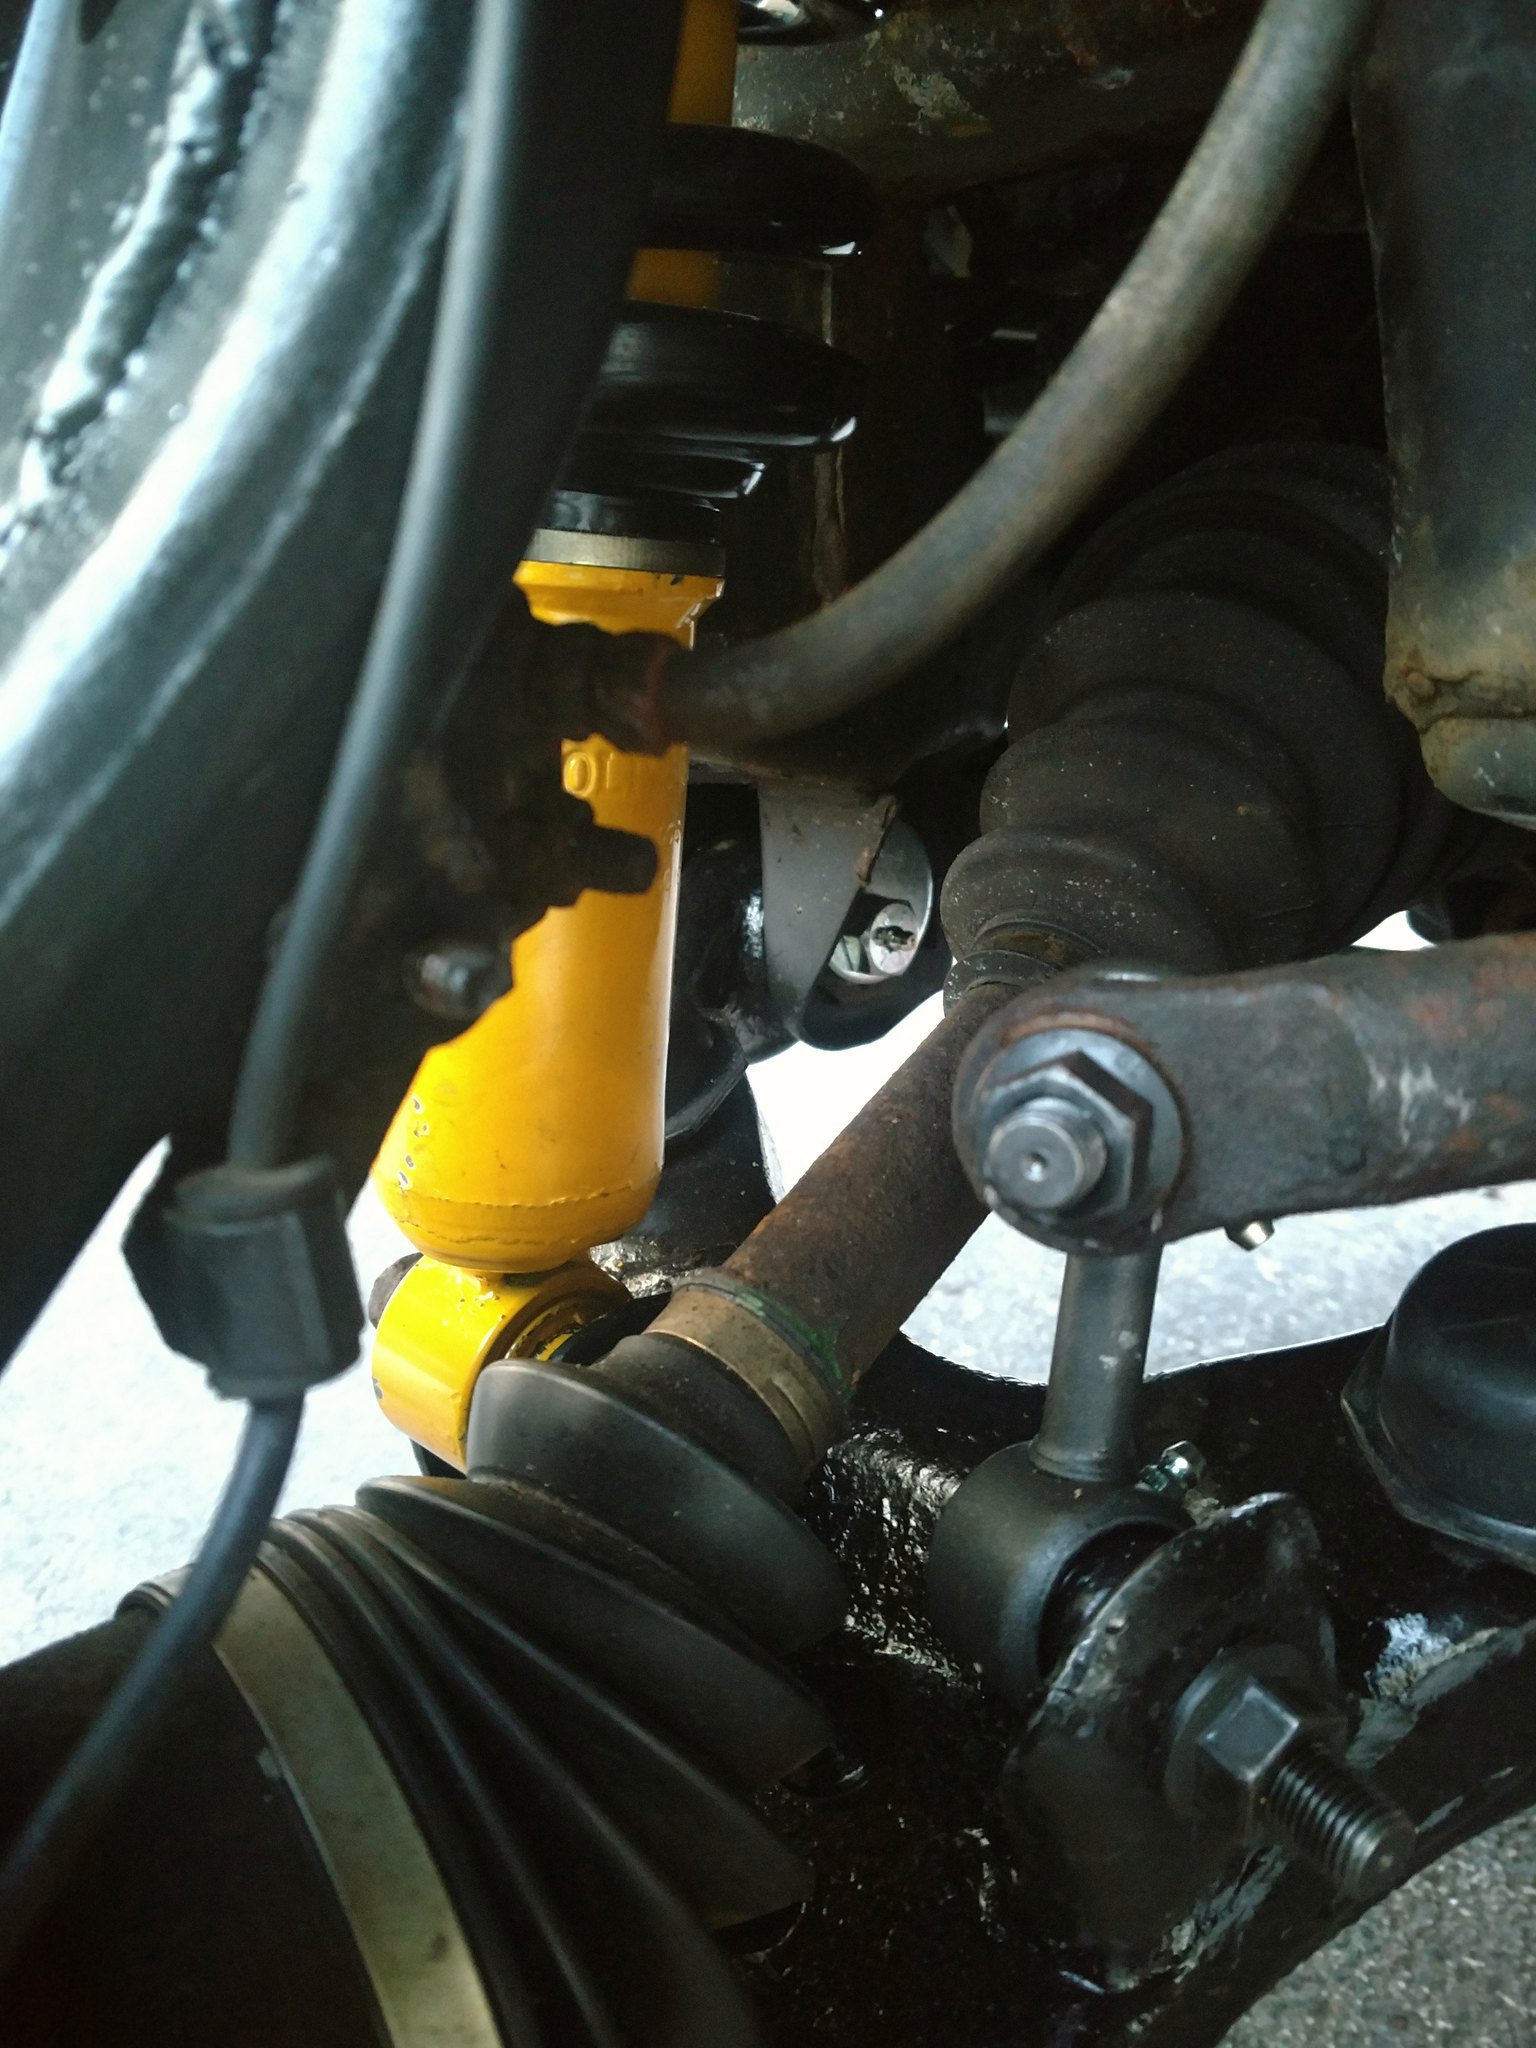
The steering rack went back in with its new bushings once I got the passenger's side control arm hardware out of the way:
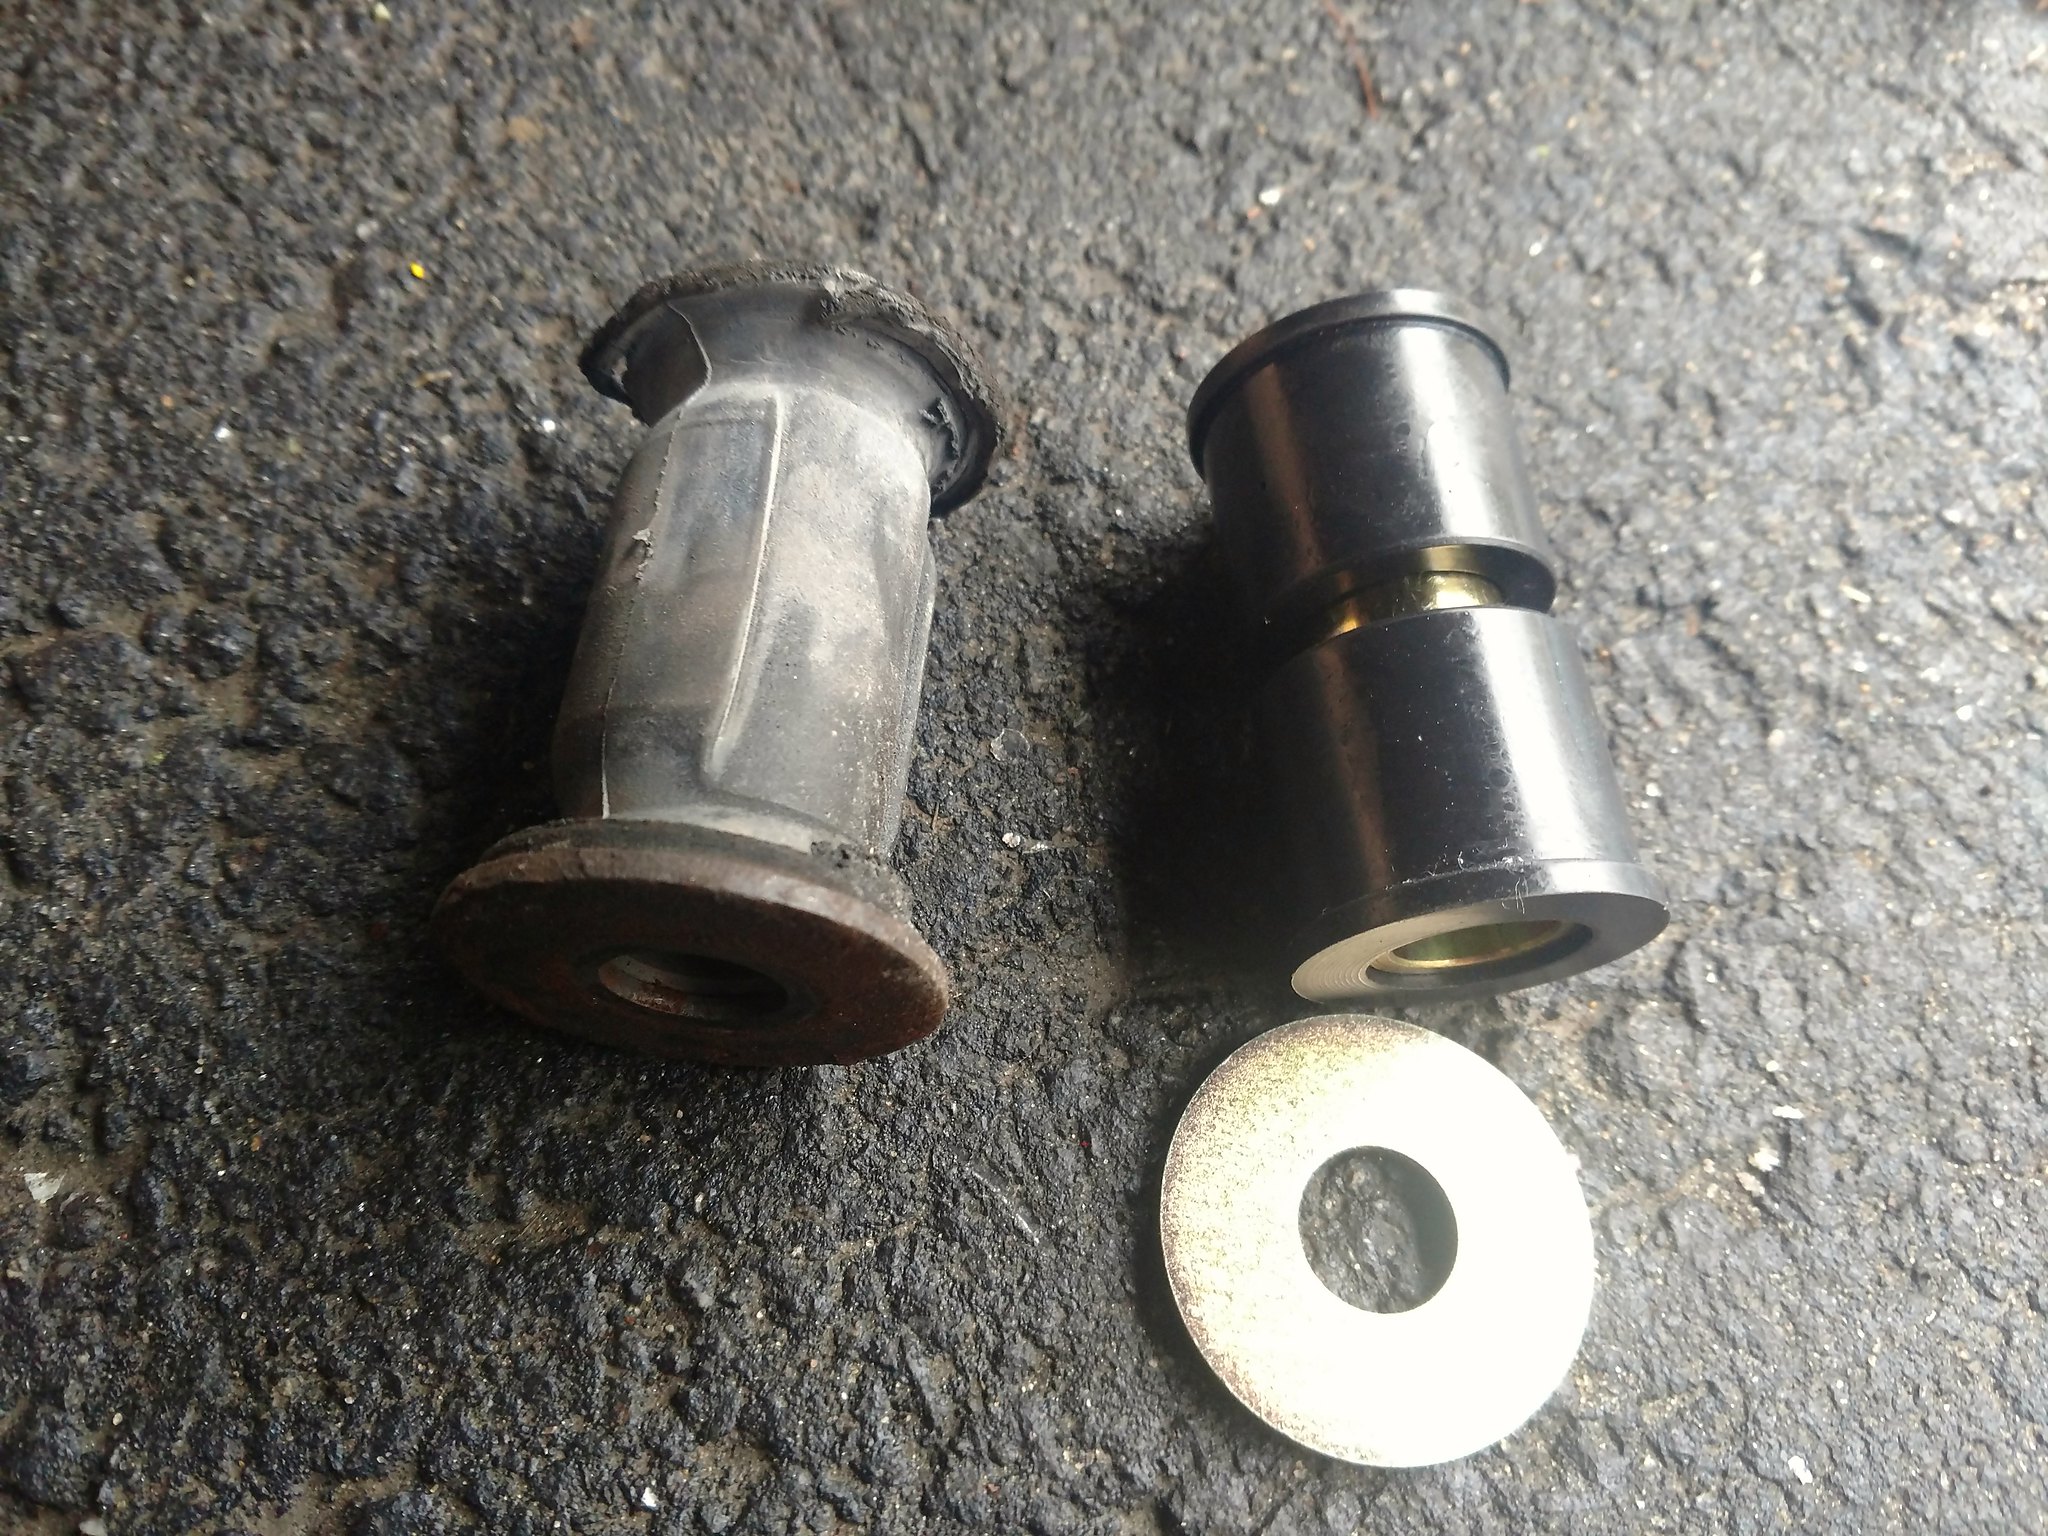
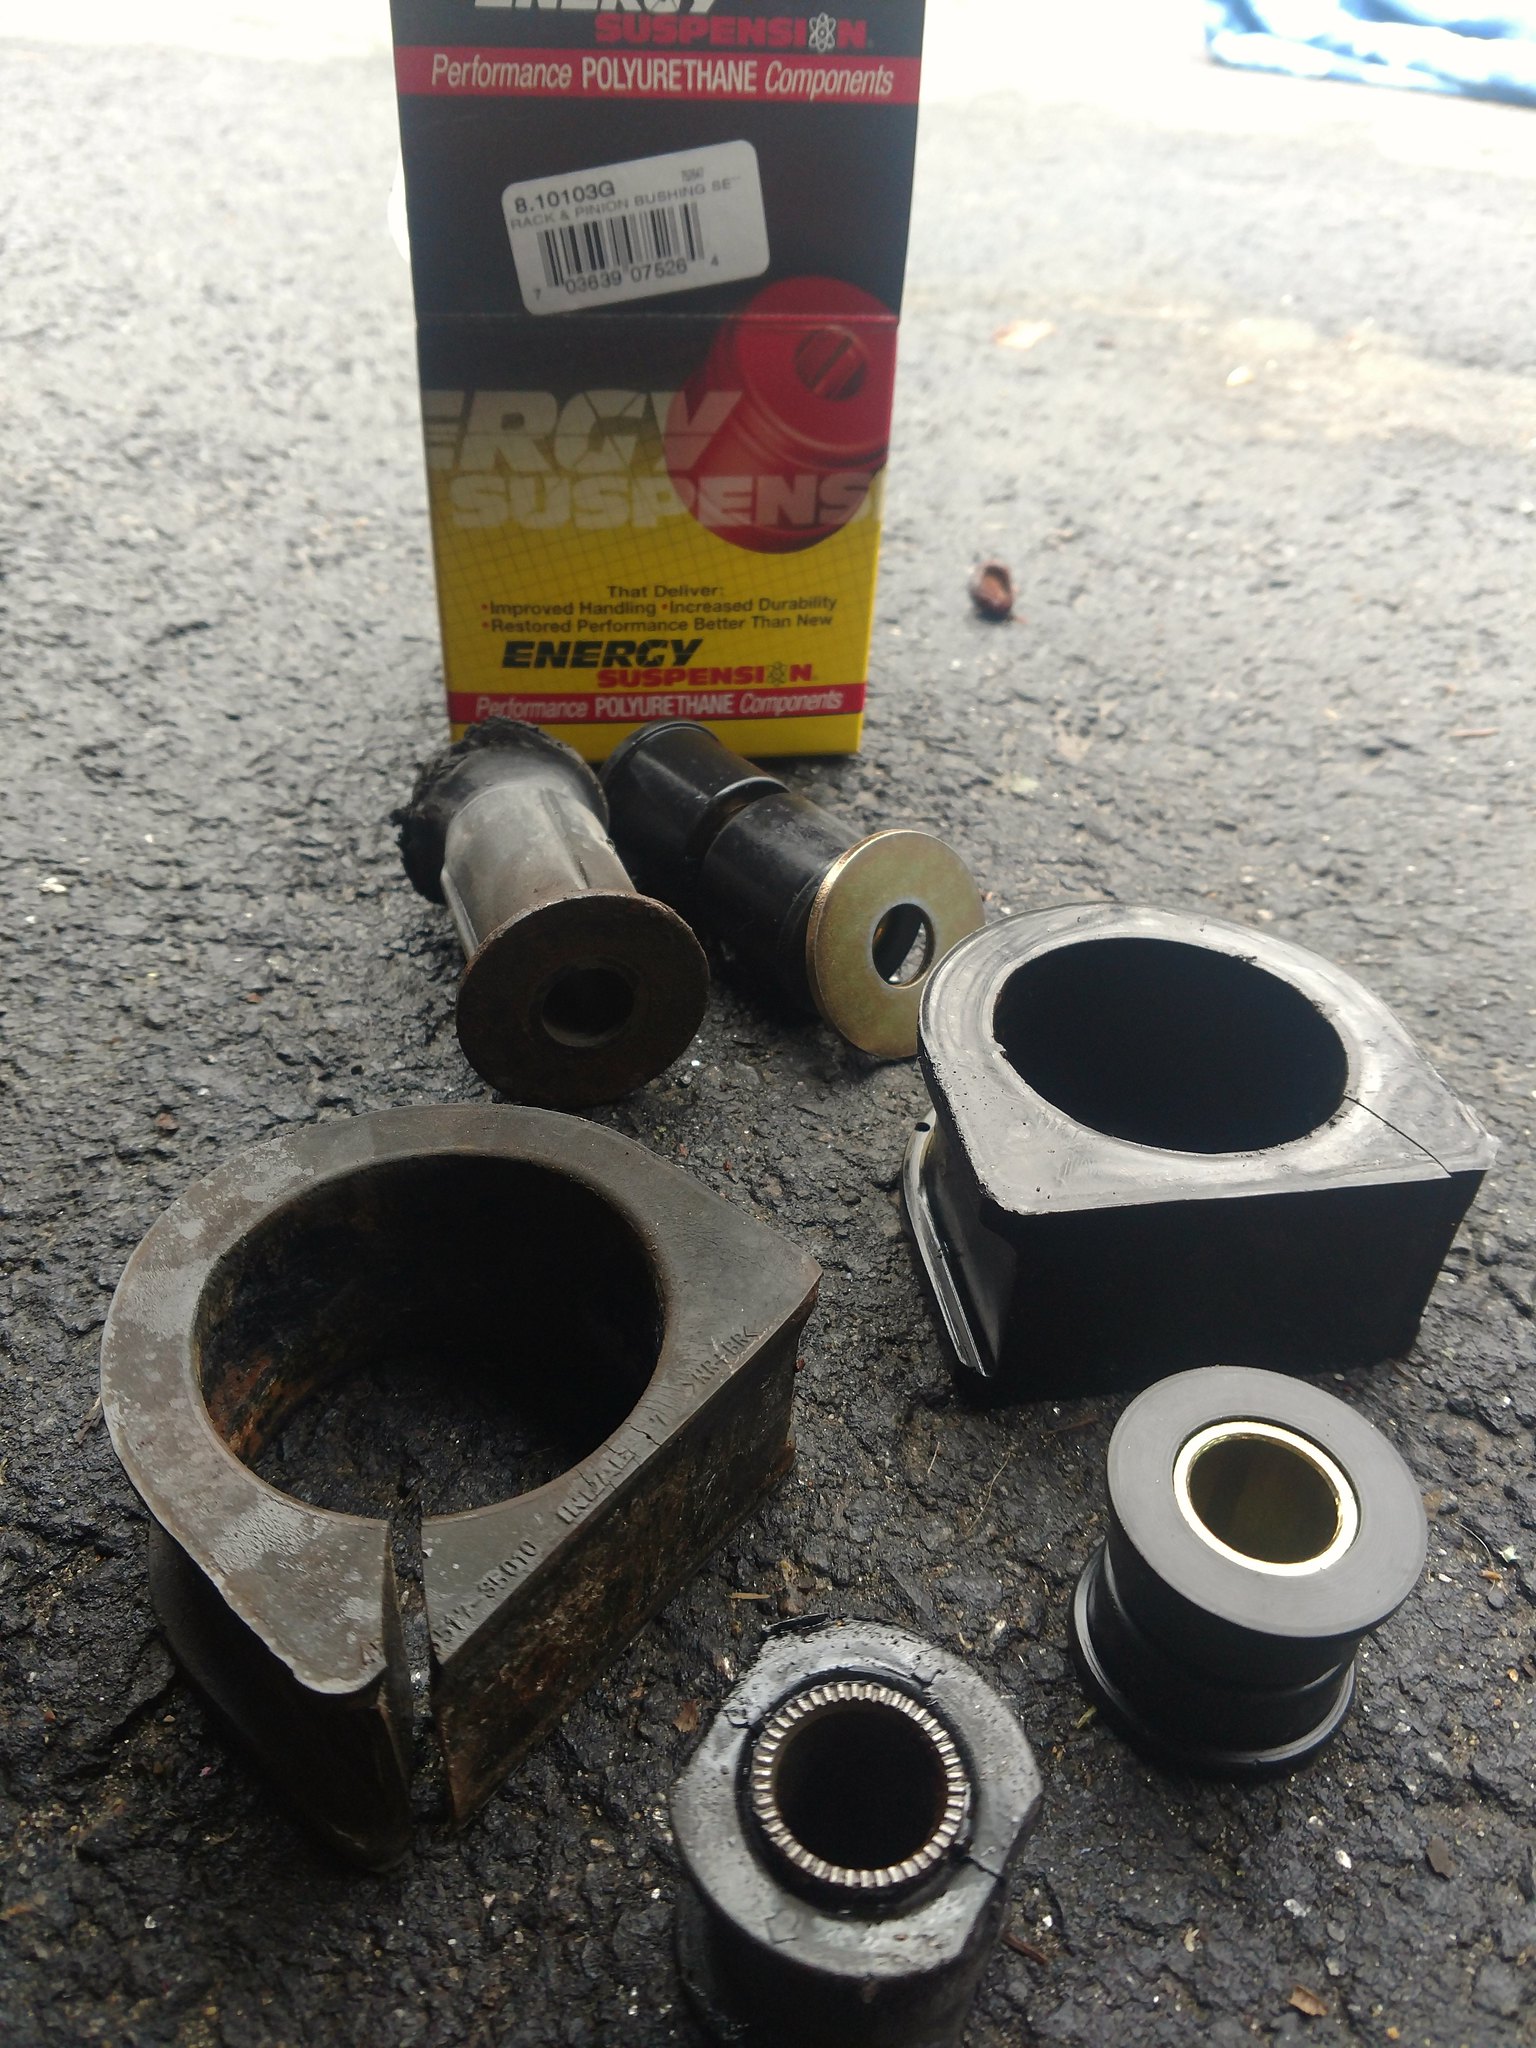
Annnnd another ****ing captive nut broke loose. Another inaccessible one. I hate these things, did I mention that?
Here's a terrible picture of it:
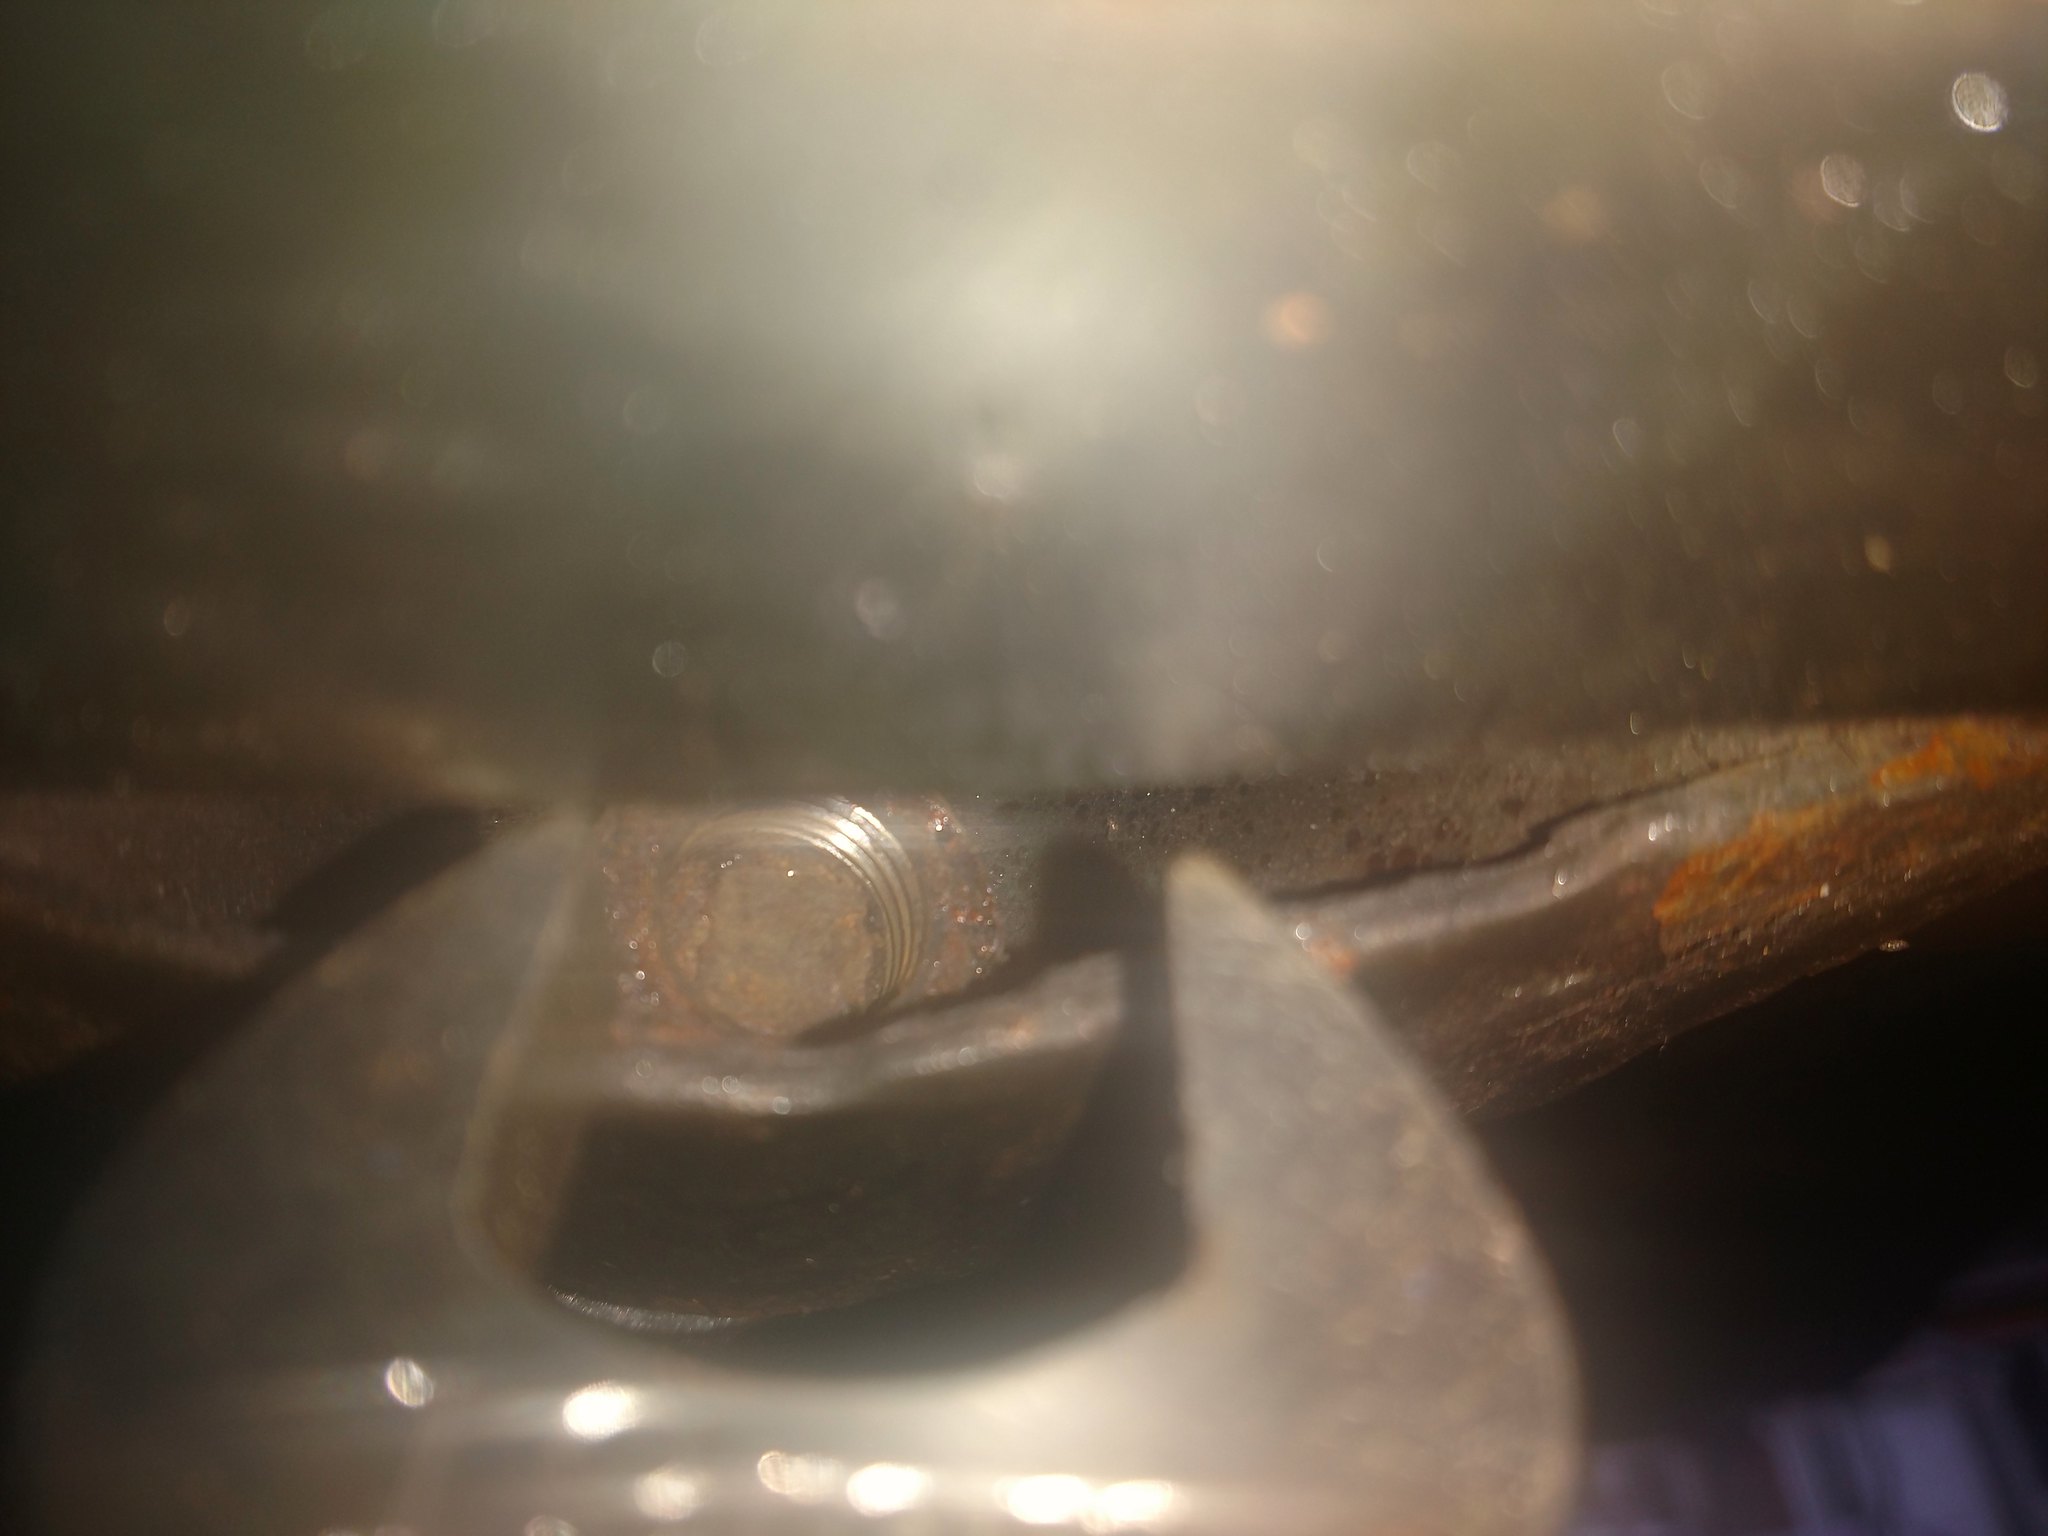
Whatever, I was angry, sue me. :laugh: I used the wrench to pry the subframe slit opening a little wider, and shoved the wrench in and luckily was able to catch the nut with it. IDFK. Whatever, it tightened. Success. Then I jizzed all over it:
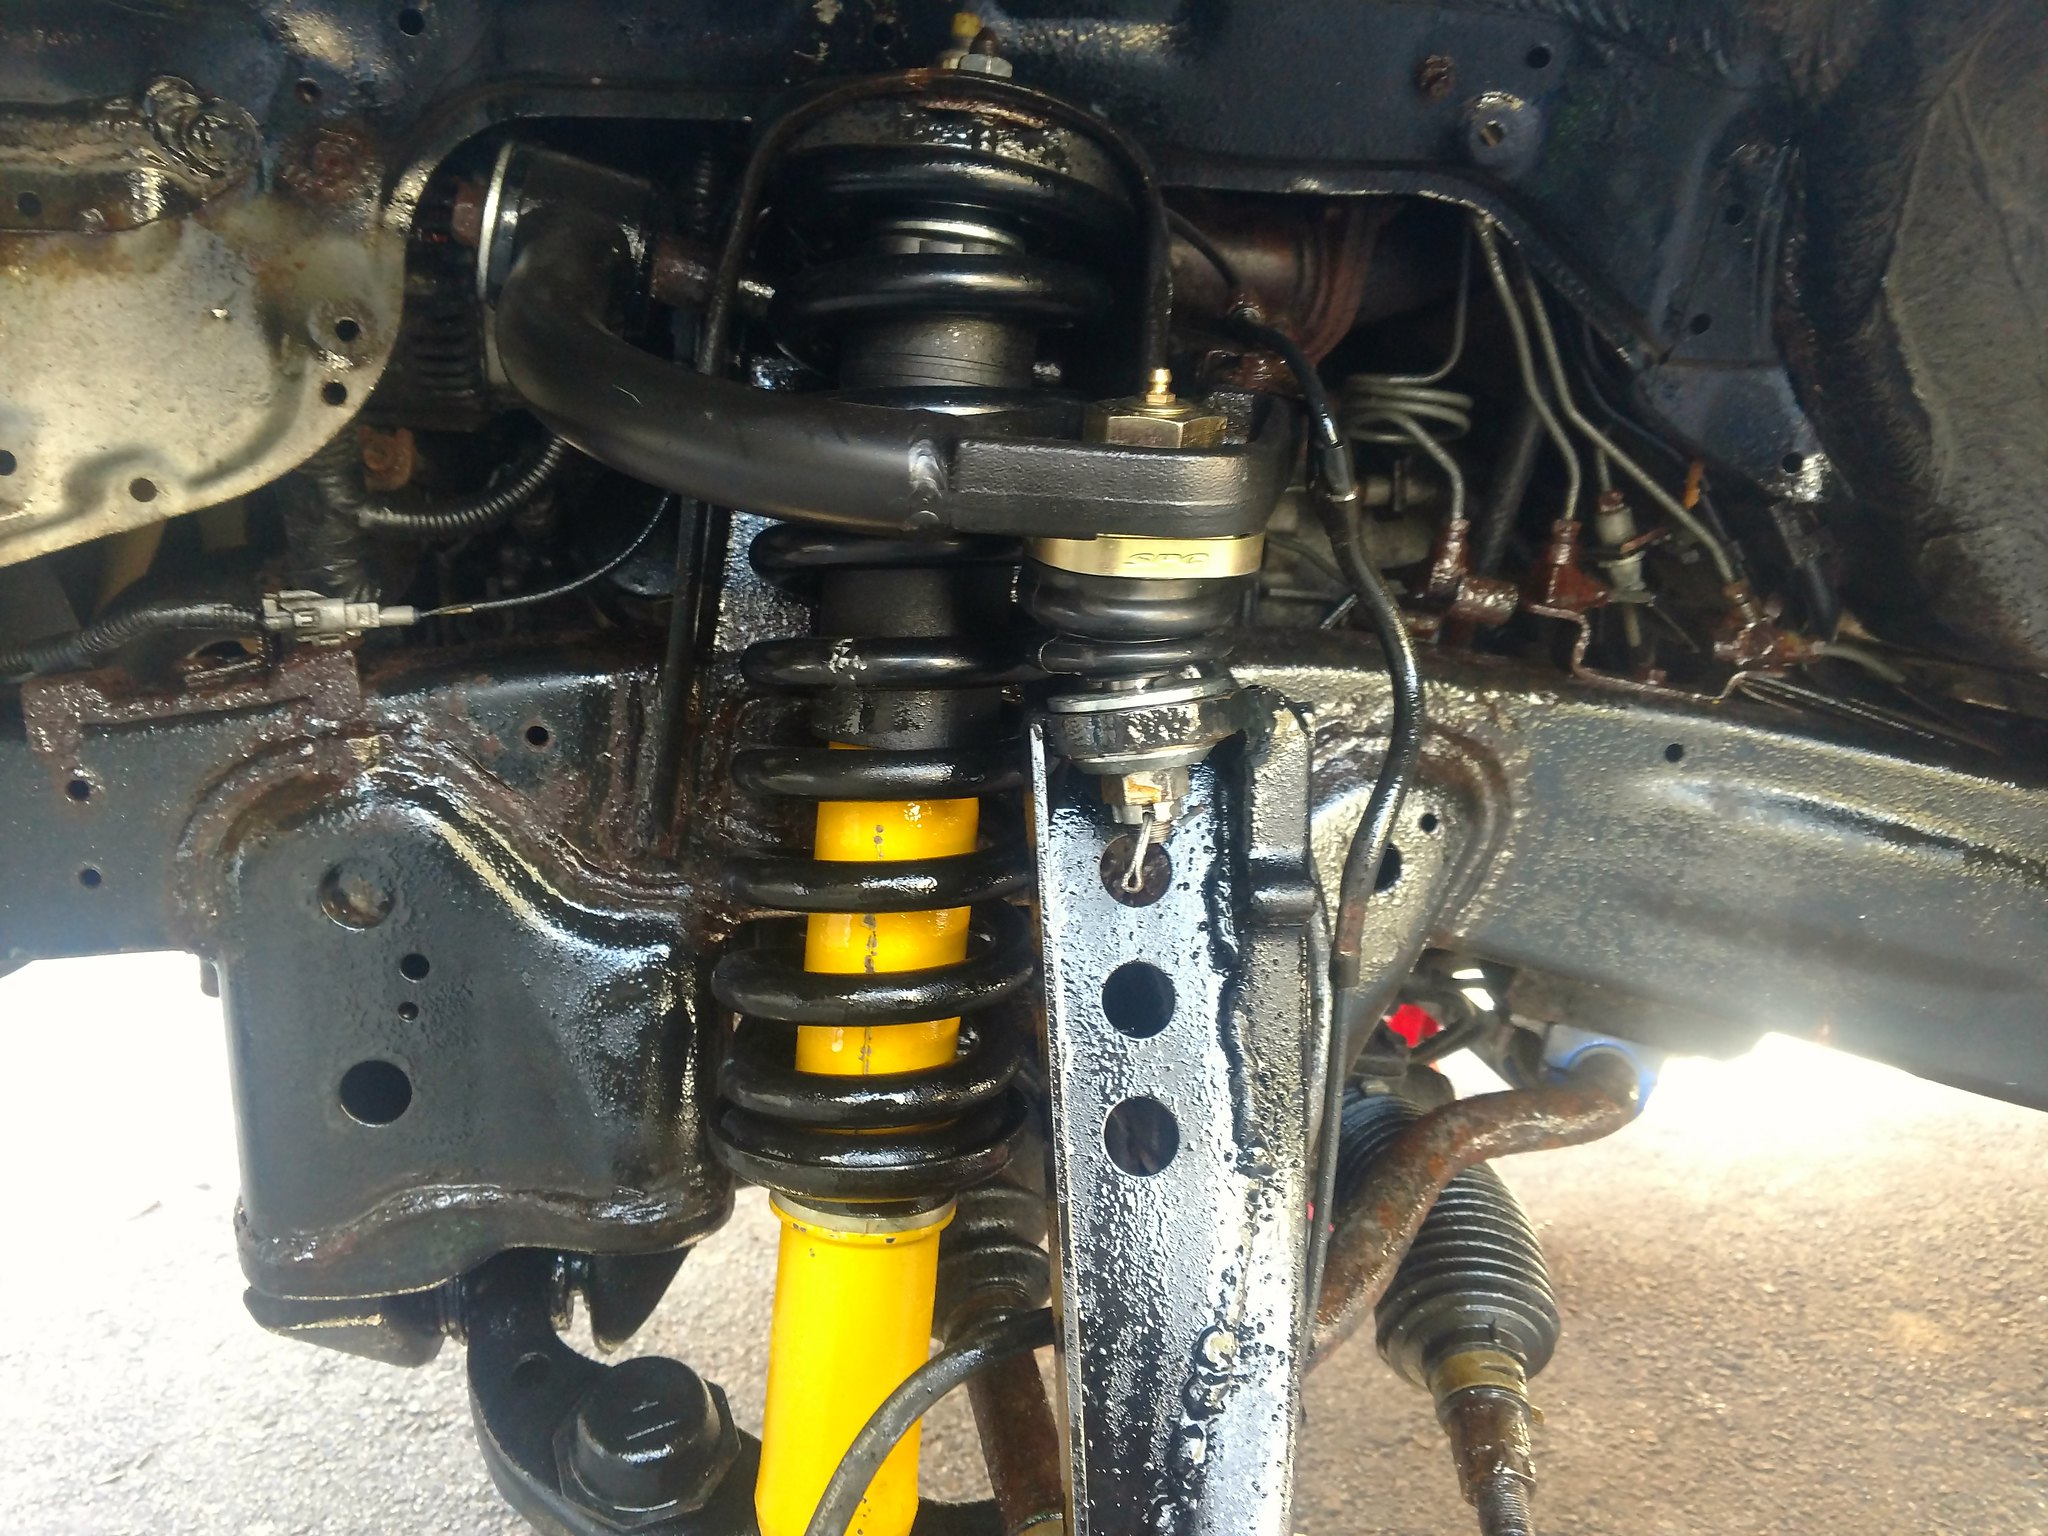
Just kidding, that's Fluid Film. I'm not sure if it's worth it or not yet. :thumbup::thumbdown:? I've received only great reviews from others, but to be honest, a few weeks after applying it, everything appears dry again. I've used it on my Jeep, too. Do you have to apply it that frequently?
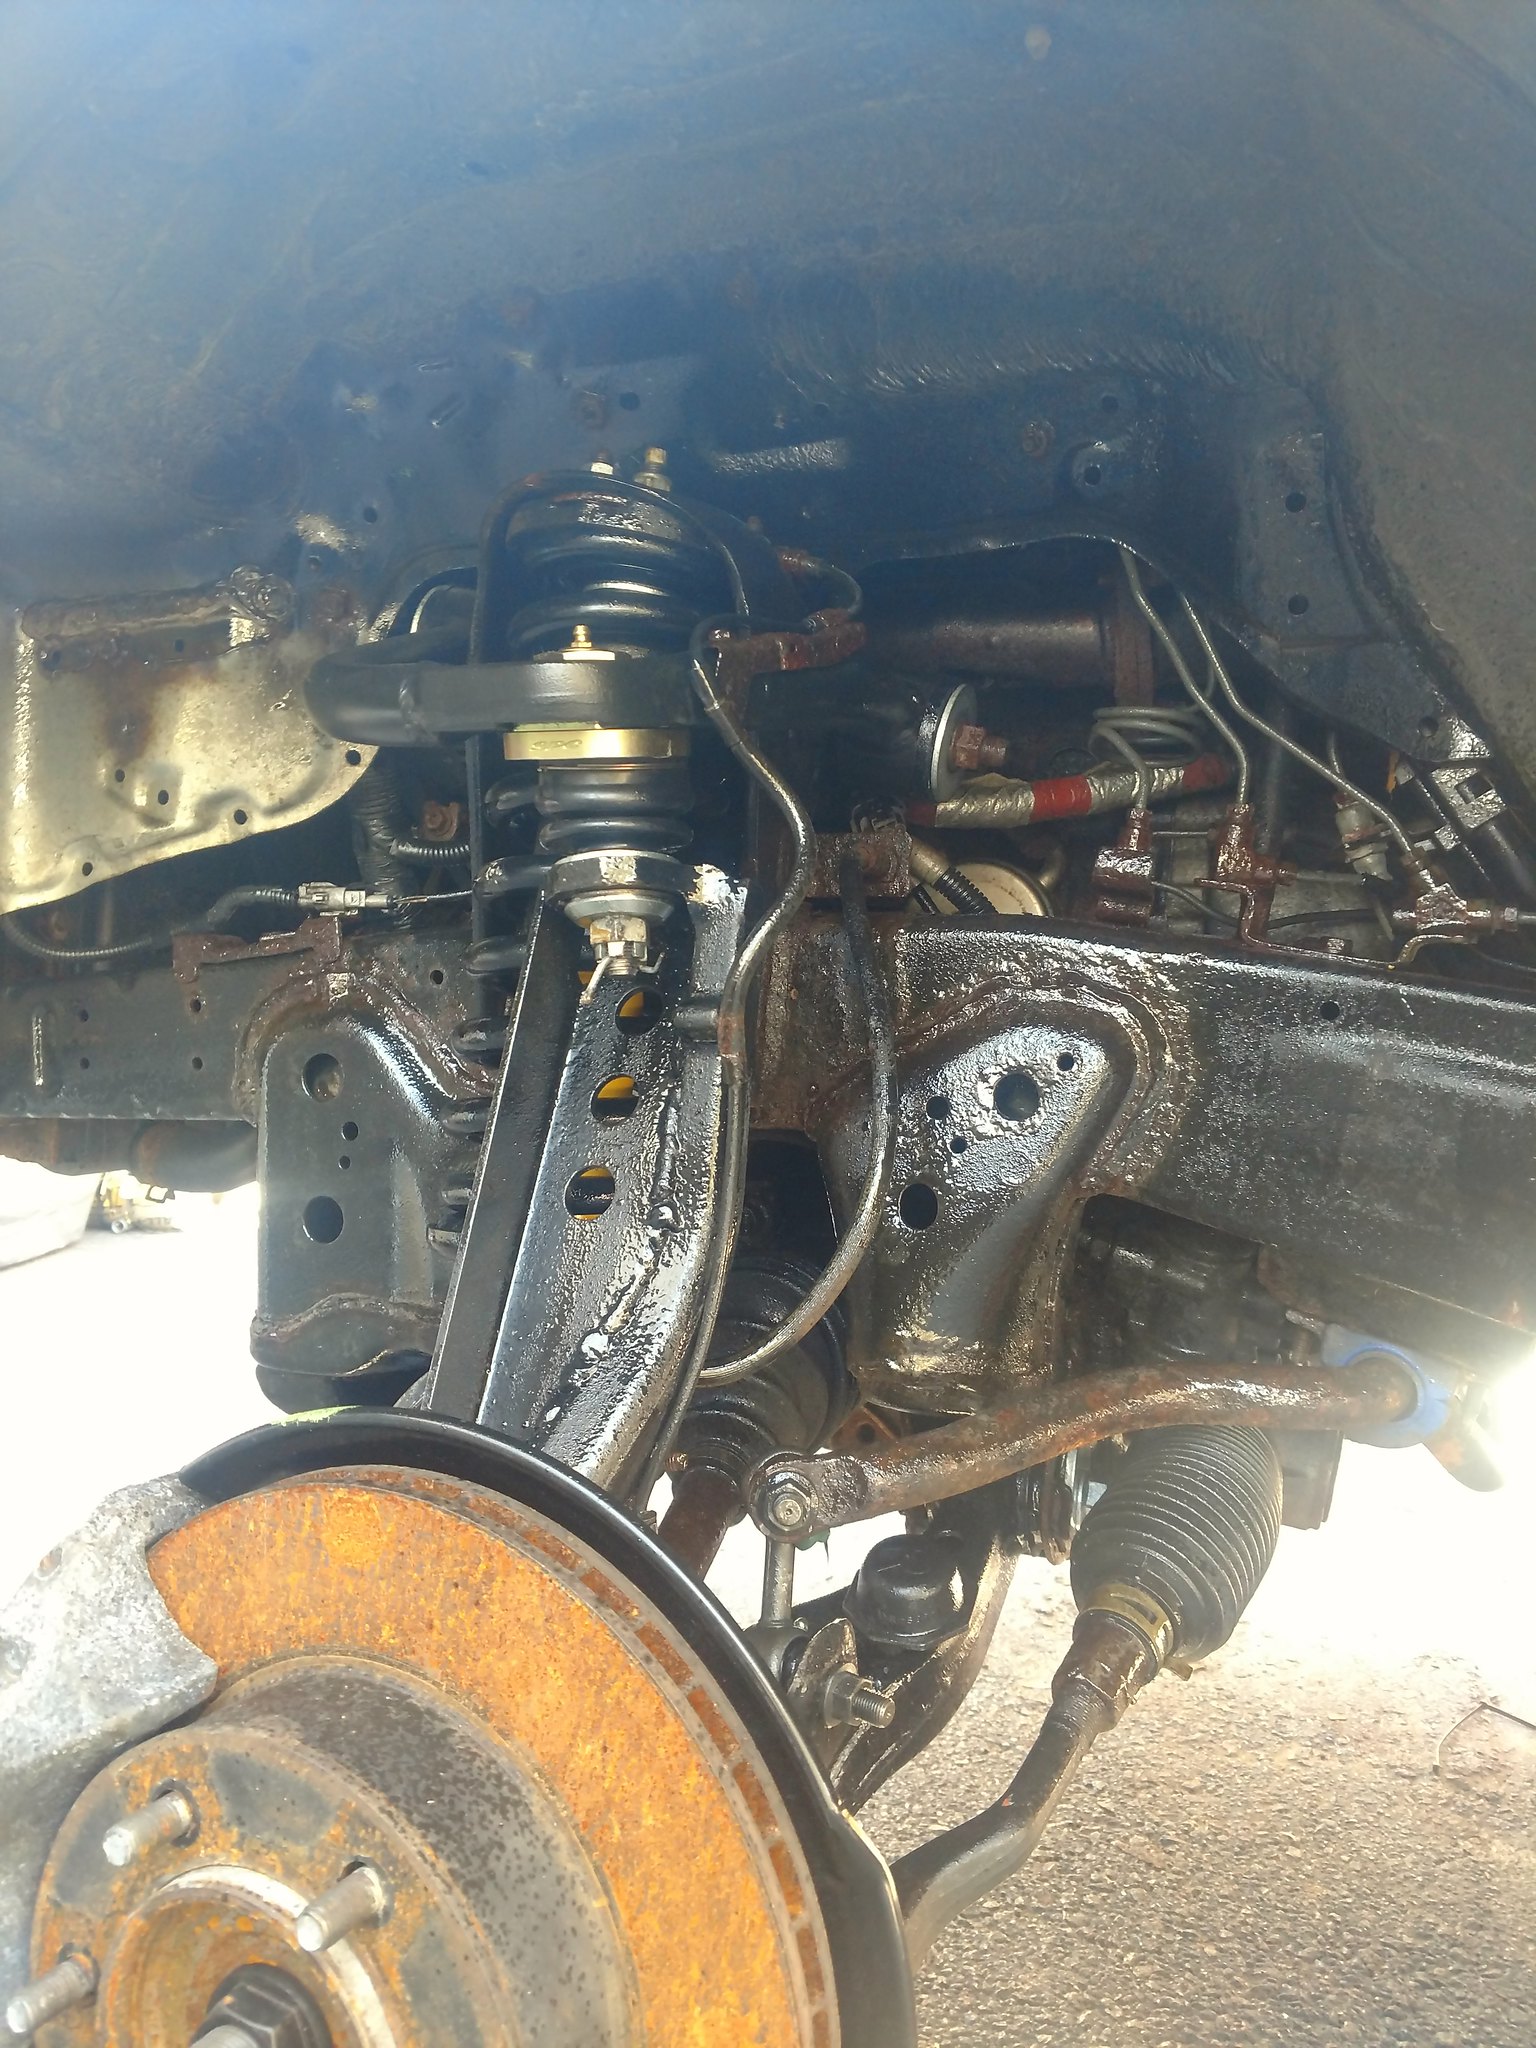
I used a higher-power welder for the other gusset and the welds came out a little better:
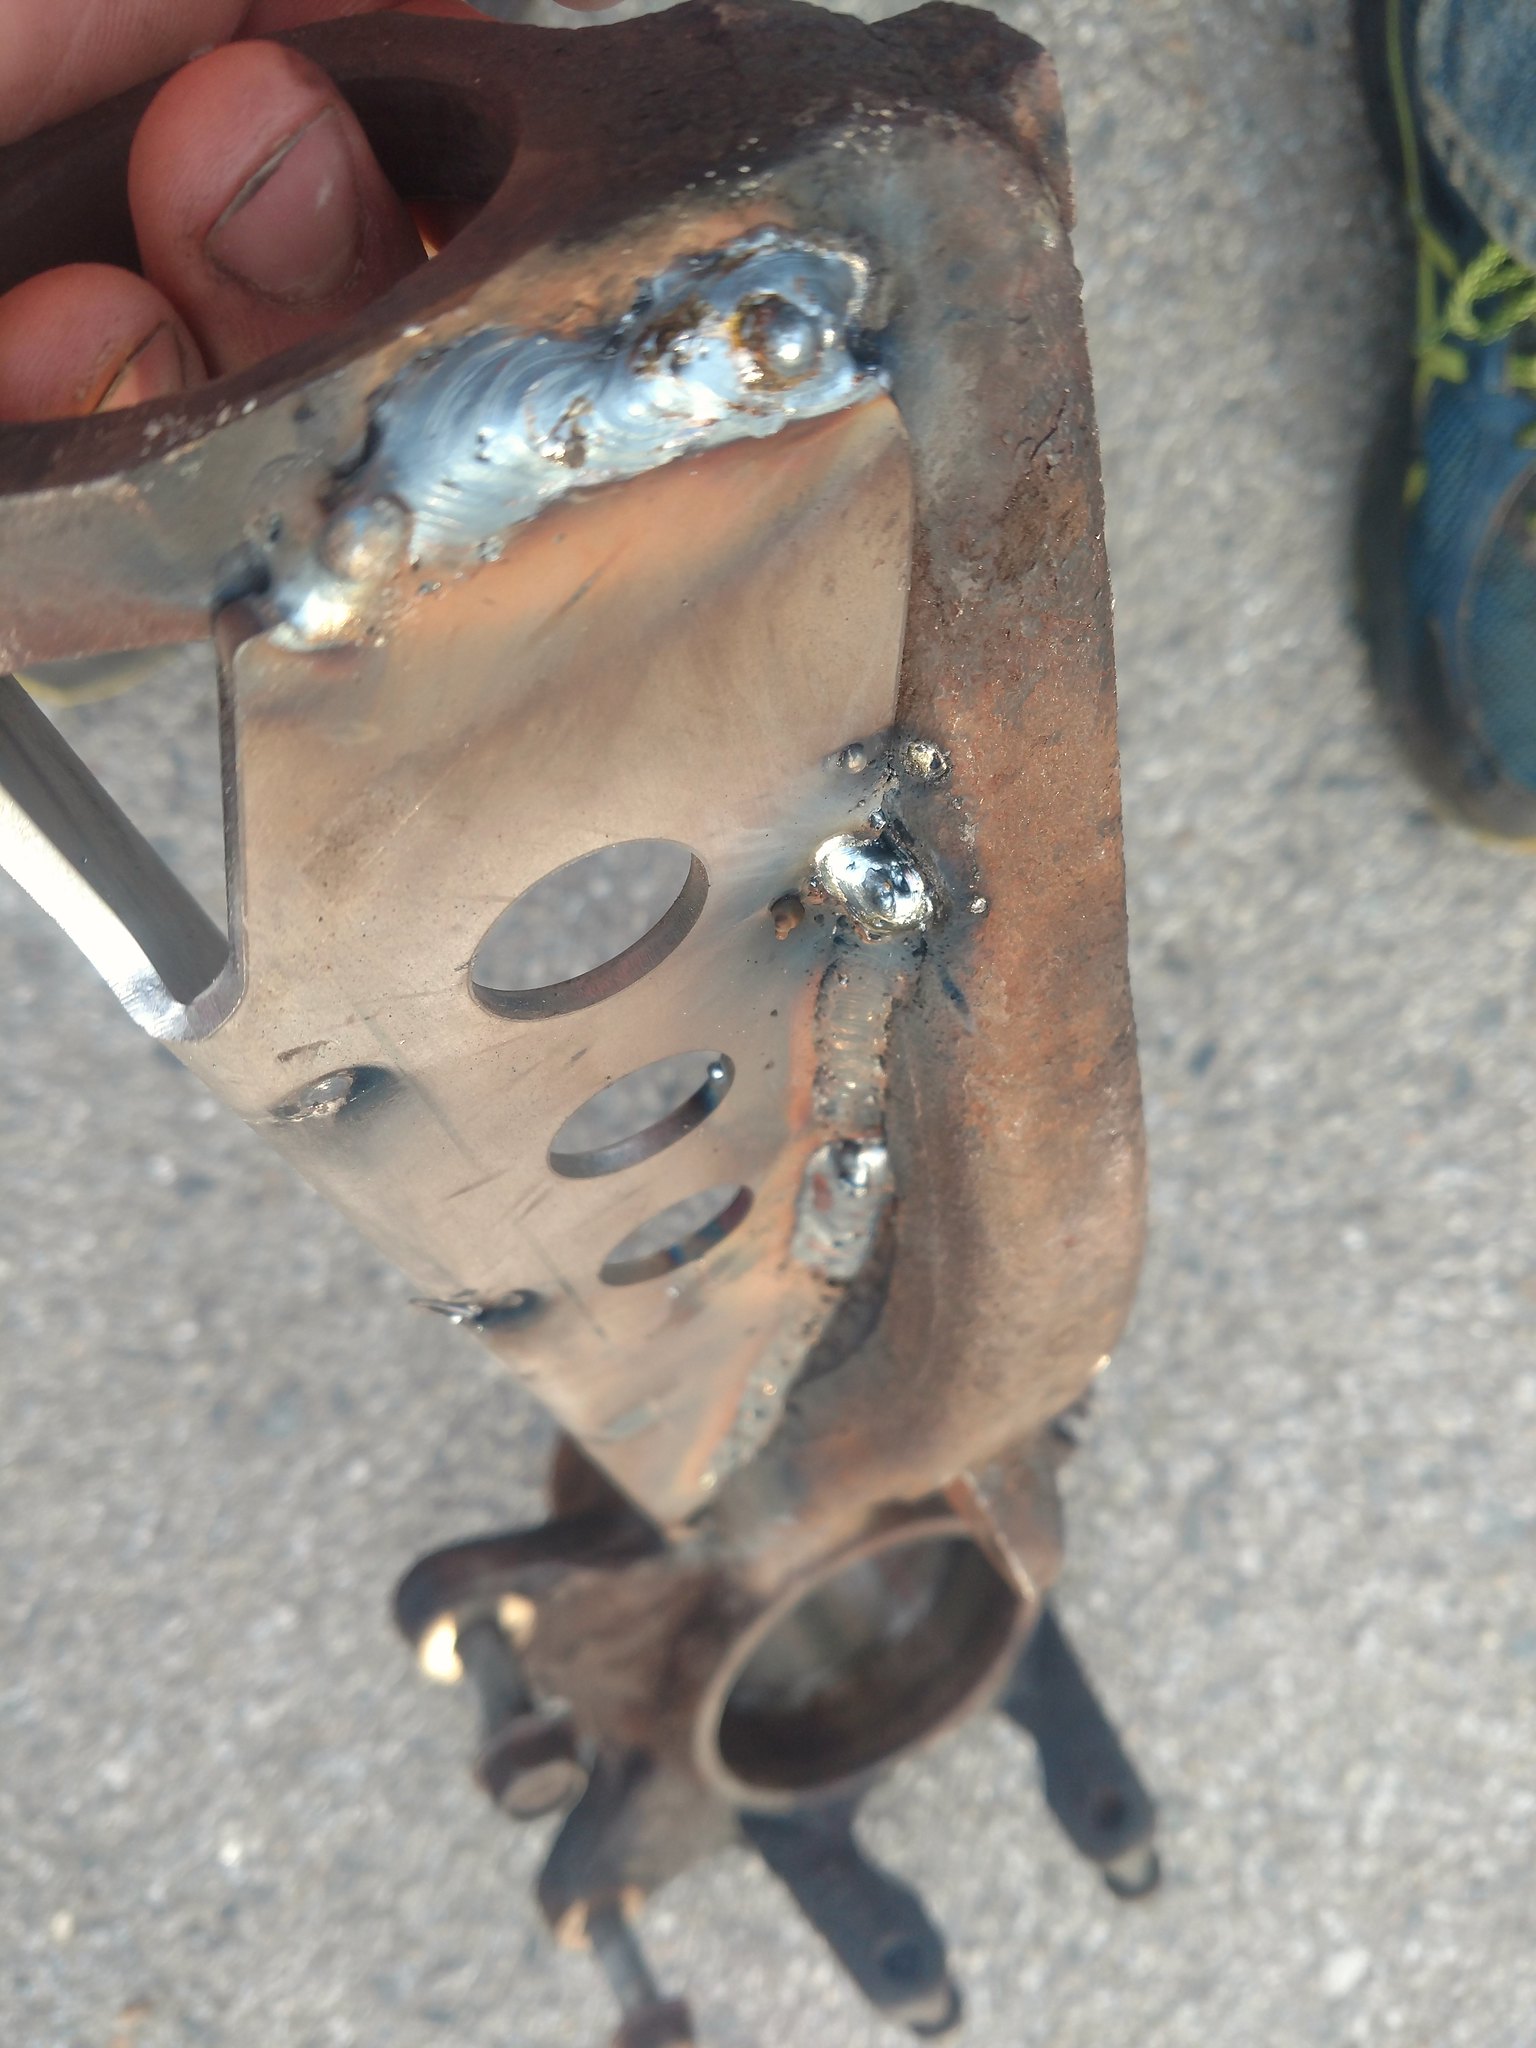
Then I dropped it off for sandblasting (which never happened; the guy who said he'd do it is a total slacker) and started on the rear. I was a little scared of the rear because of the crustiness, but I was hopeful.
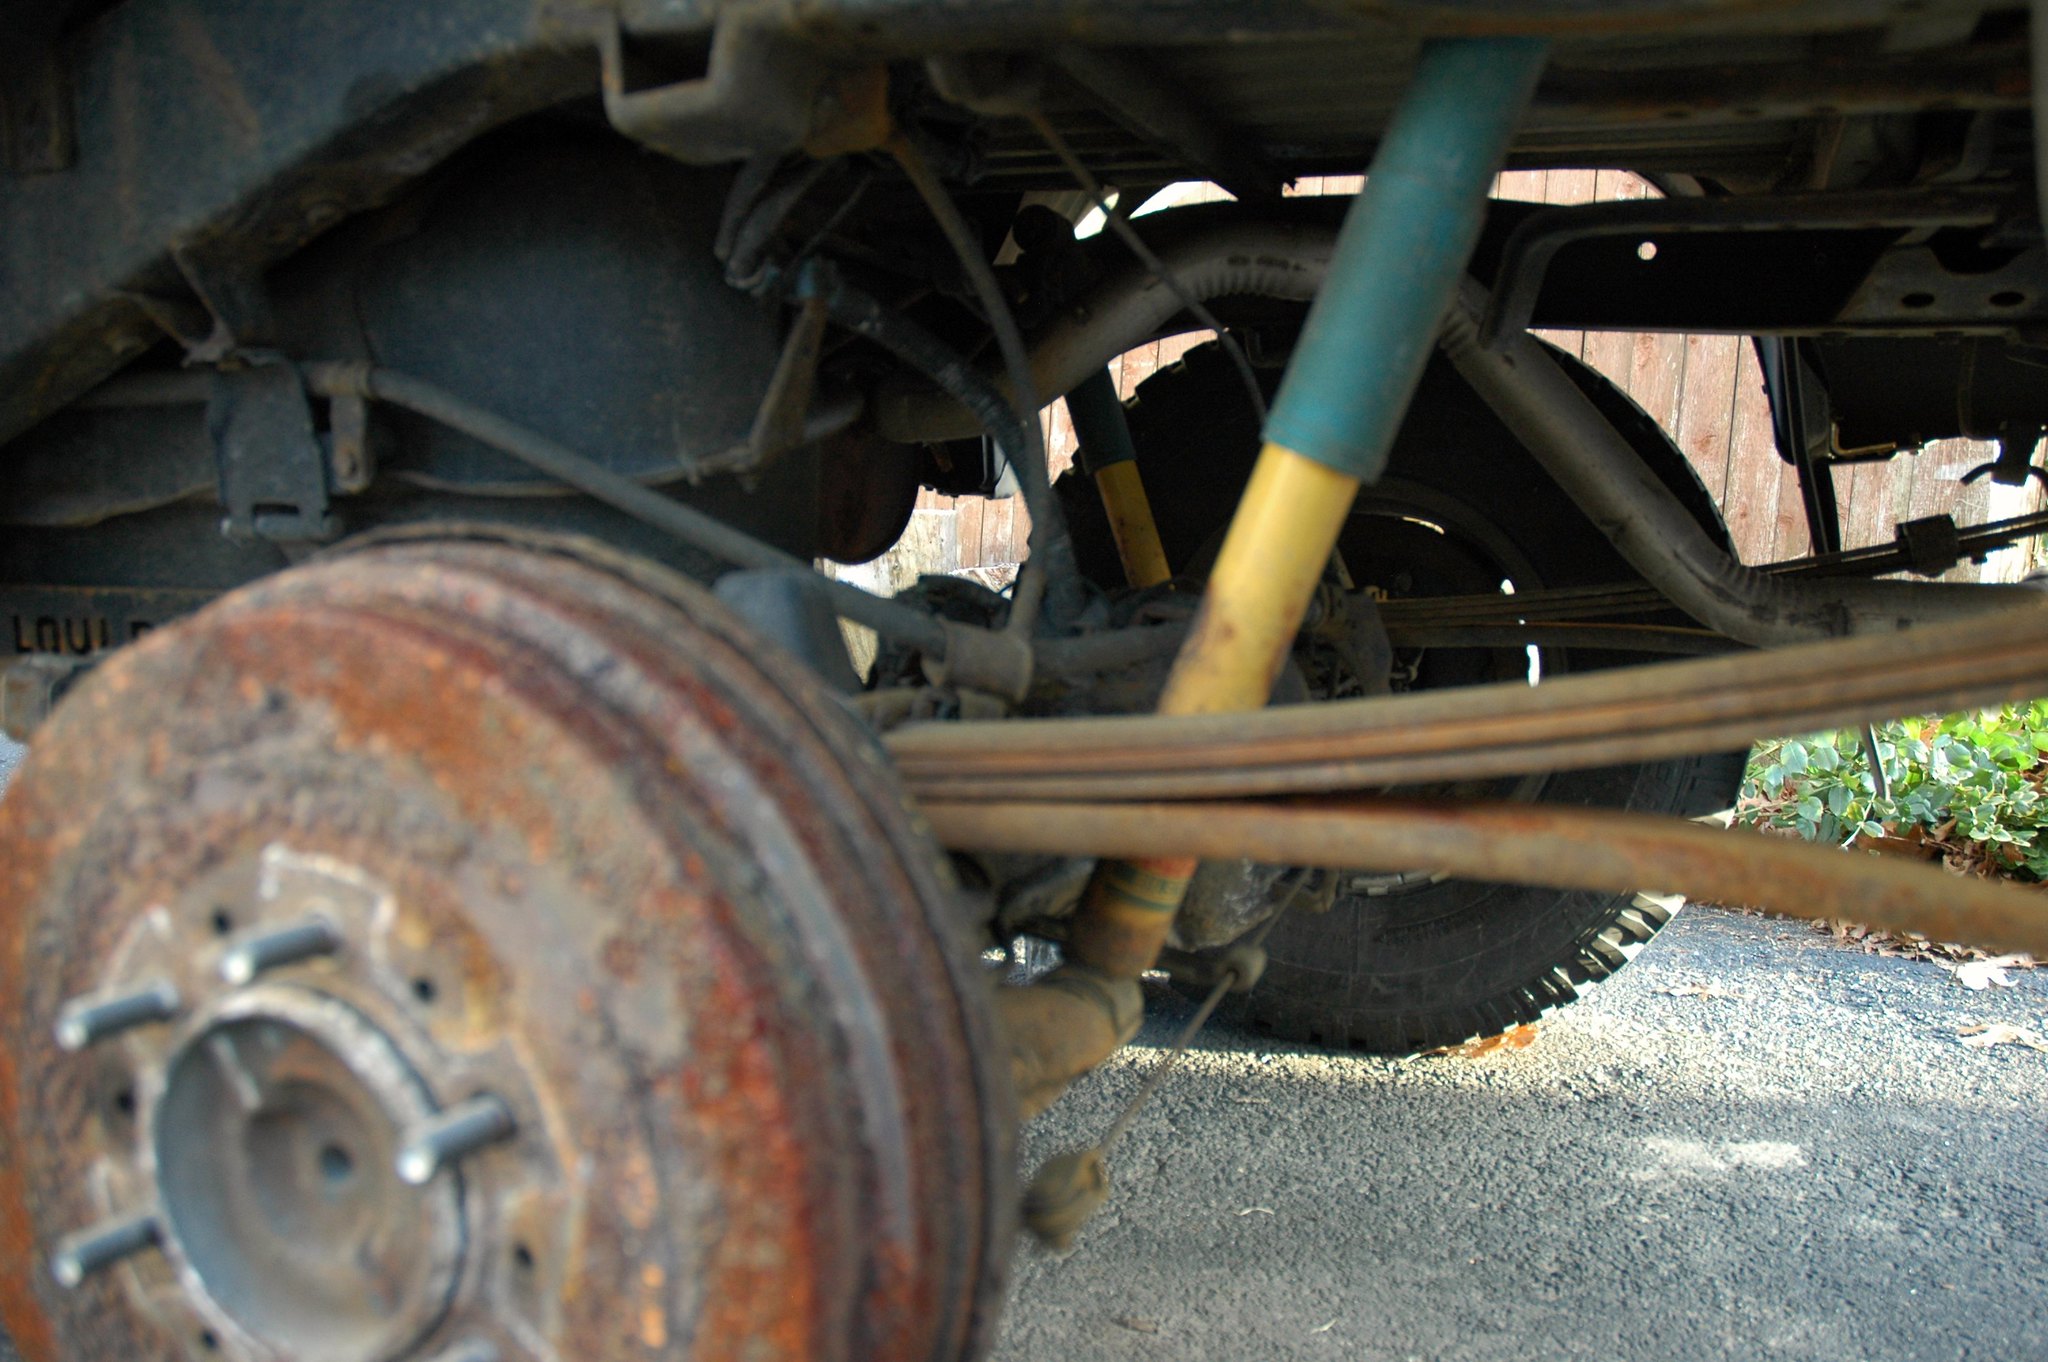
Here you can see that I've already replaced the gas tank skid. The OEM one was hardly there when I bought the truck.
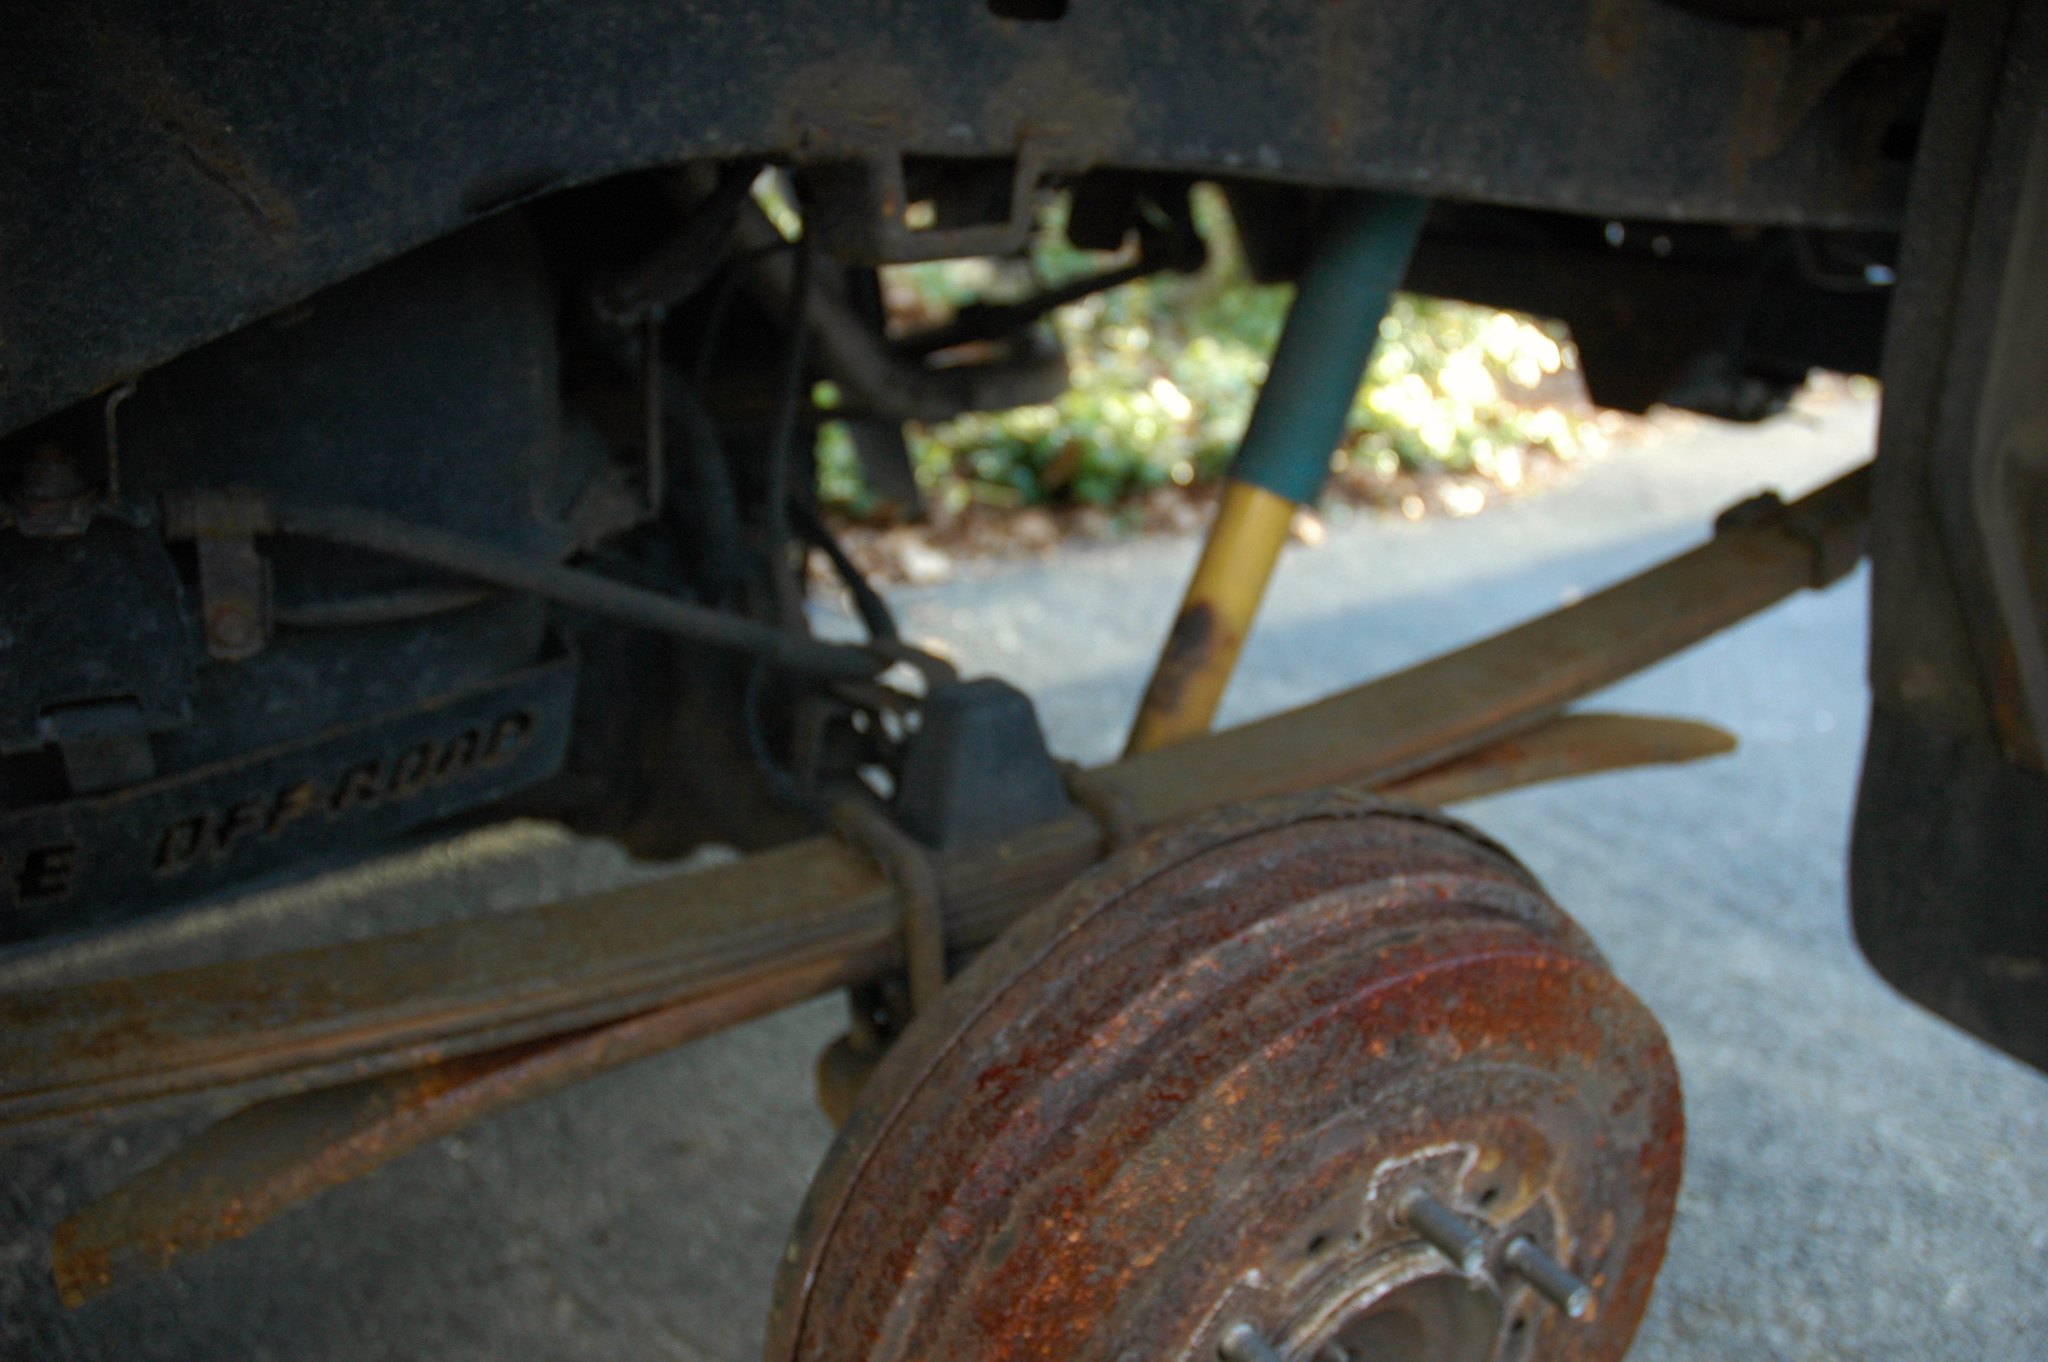
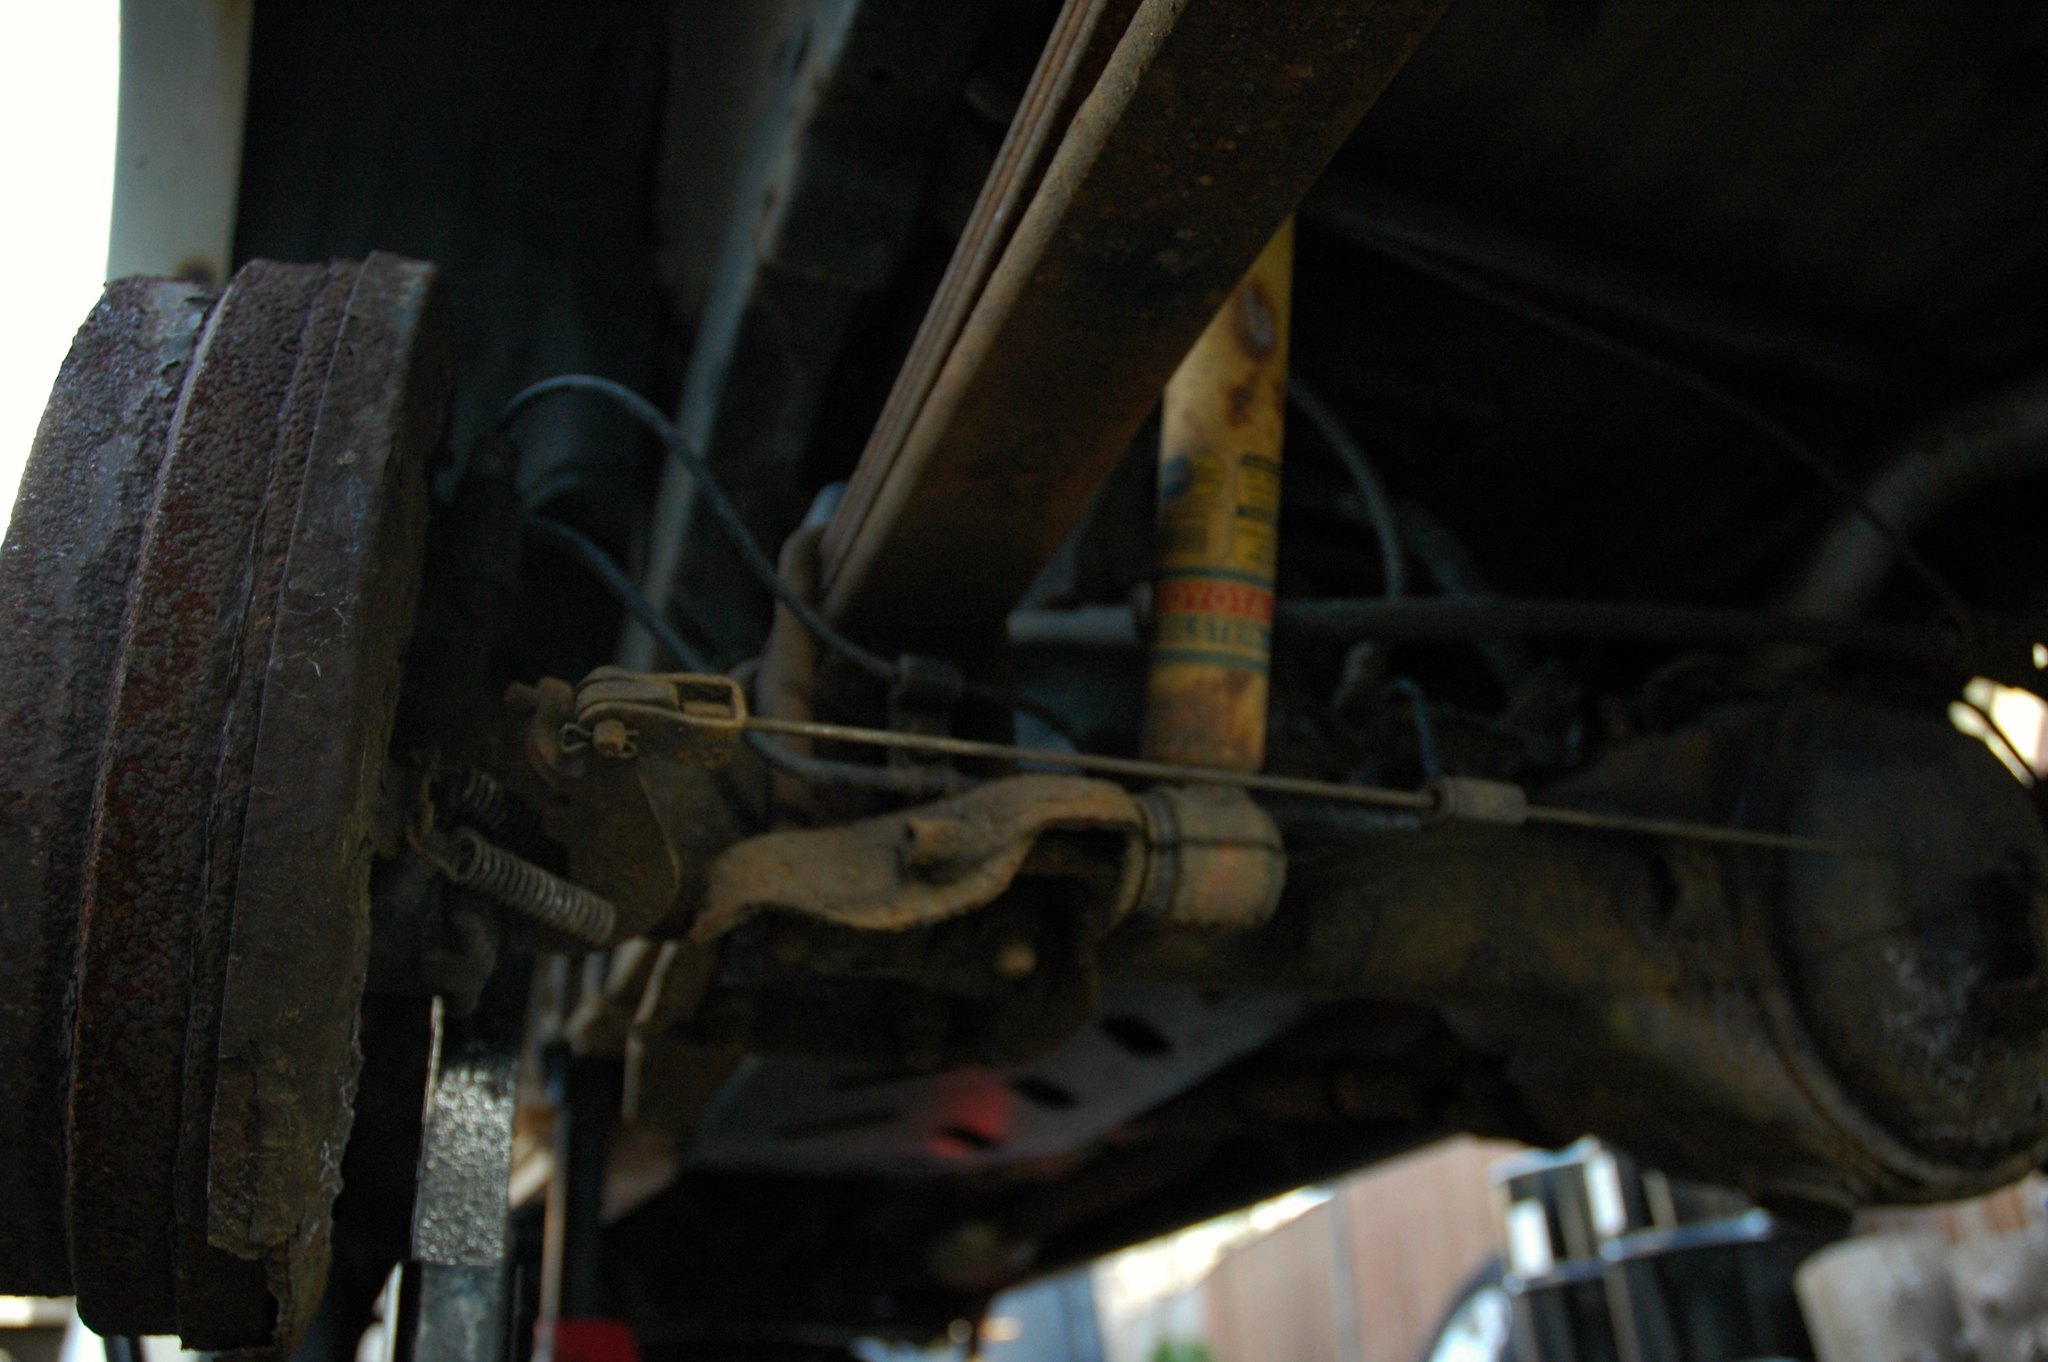
For those of you from elsewhere in the world, this is pretty typical New England:
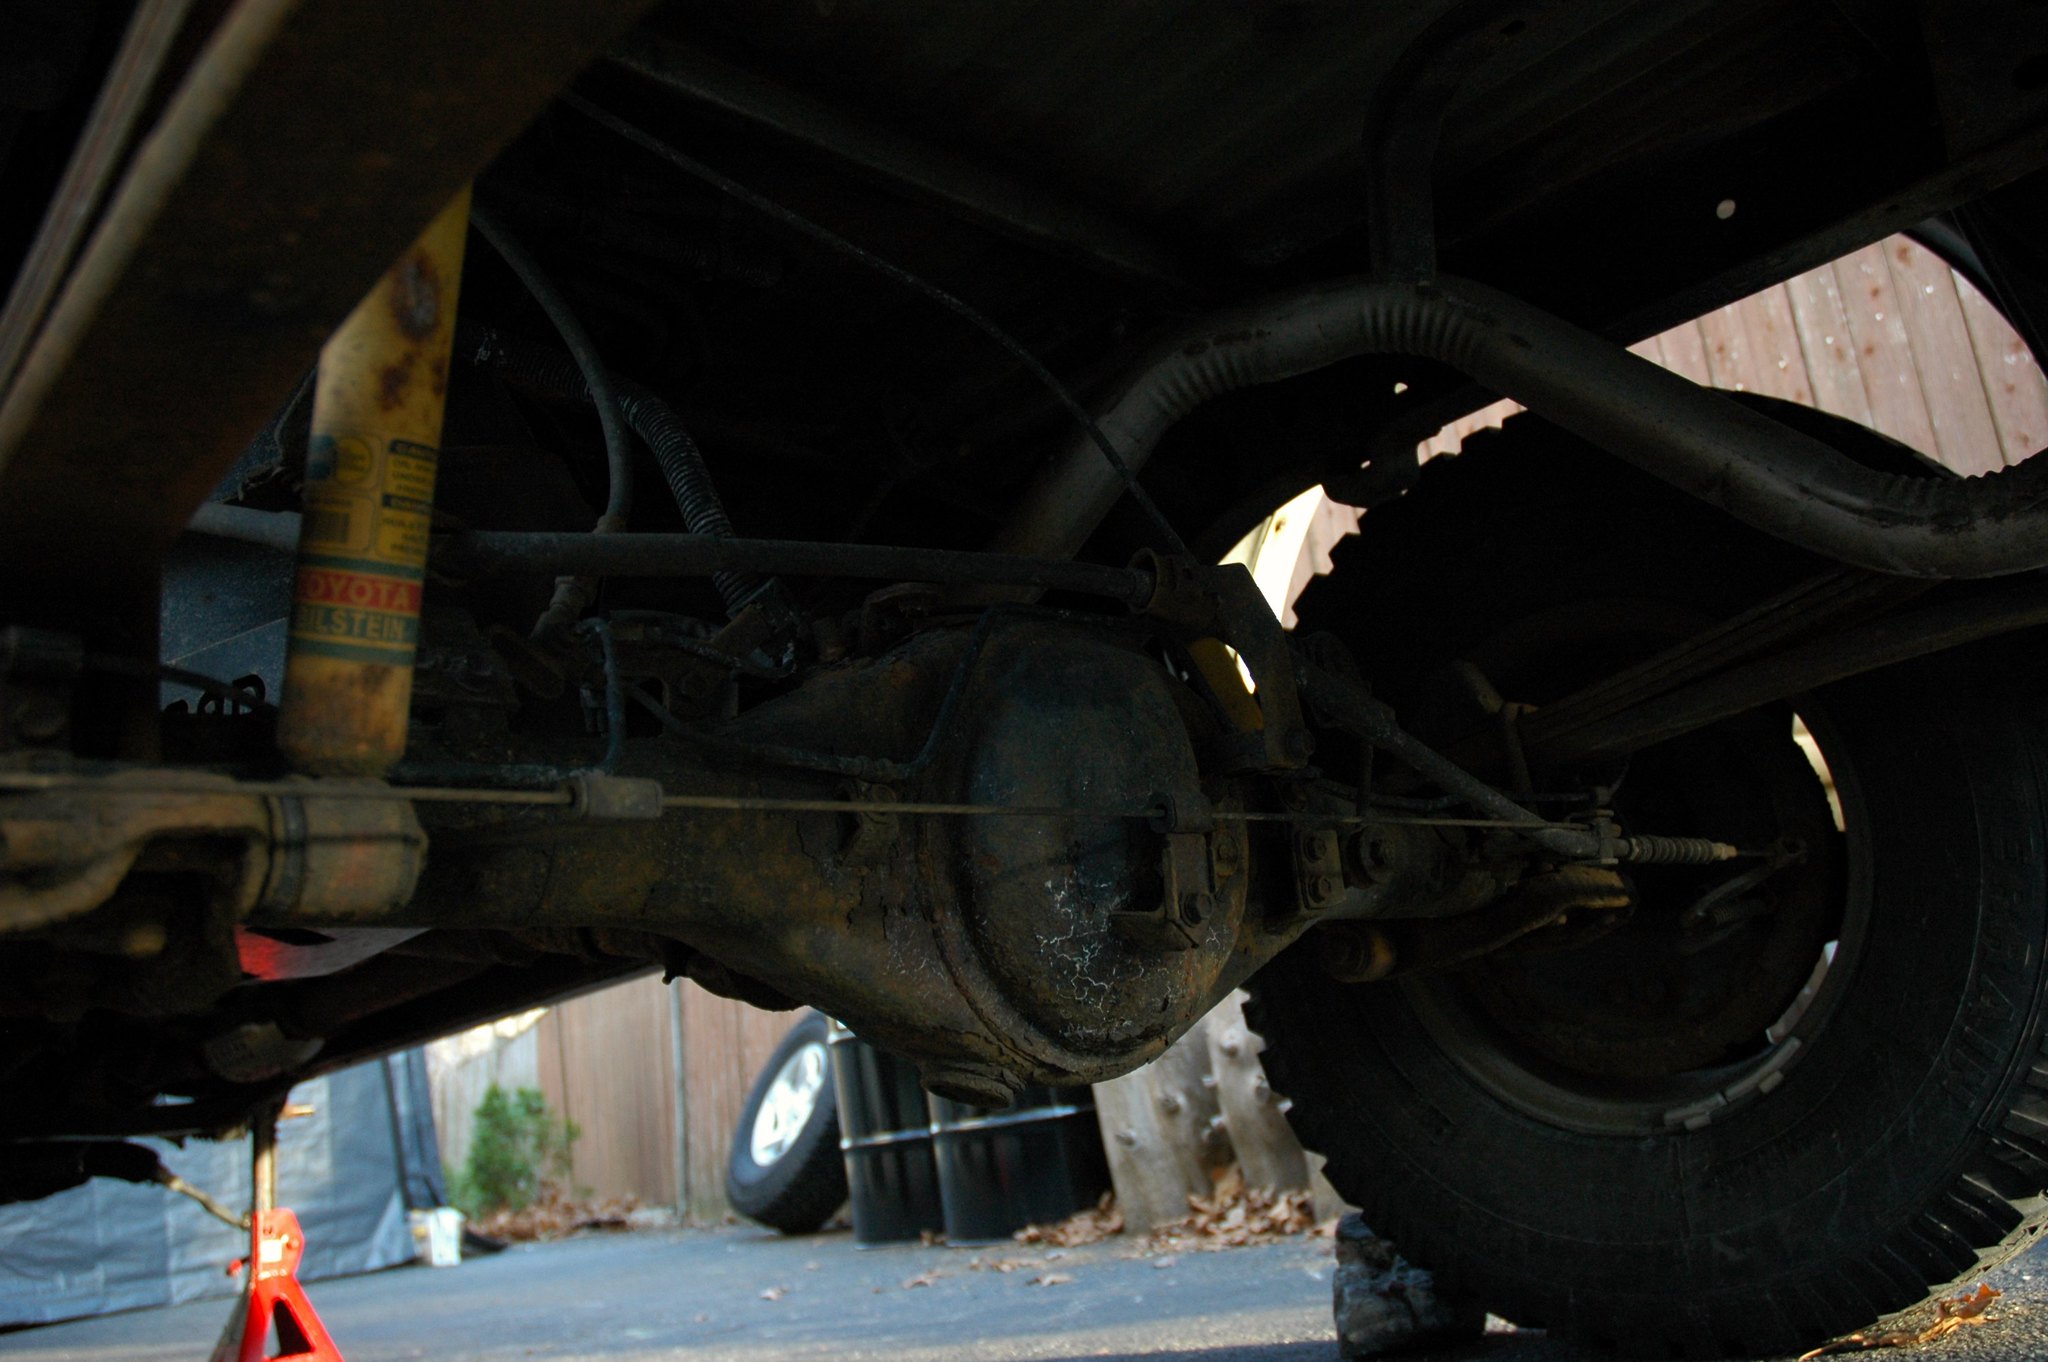
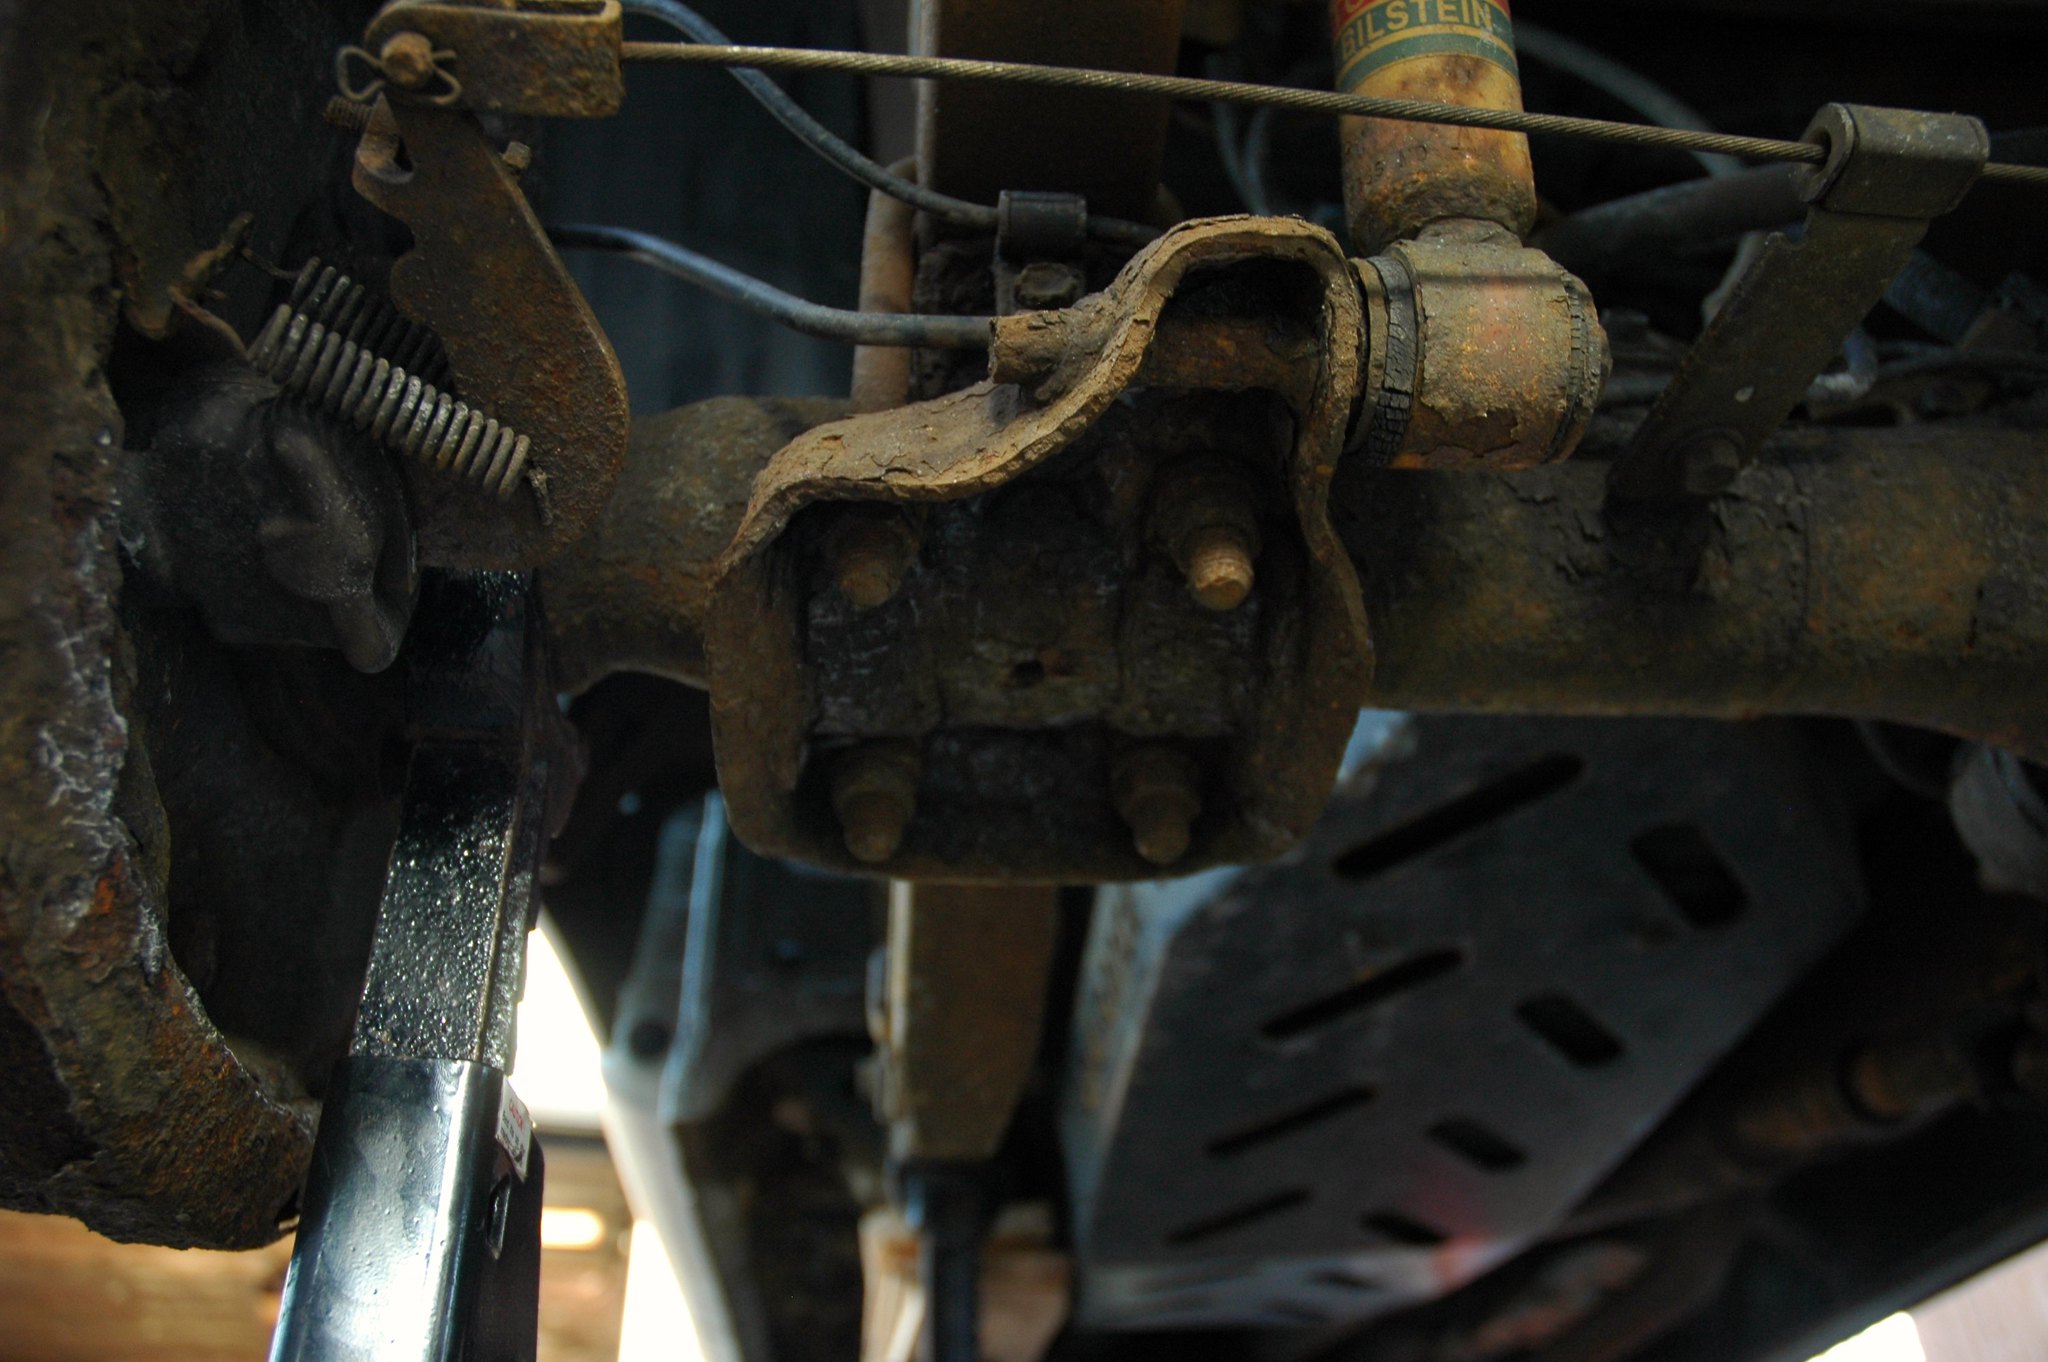
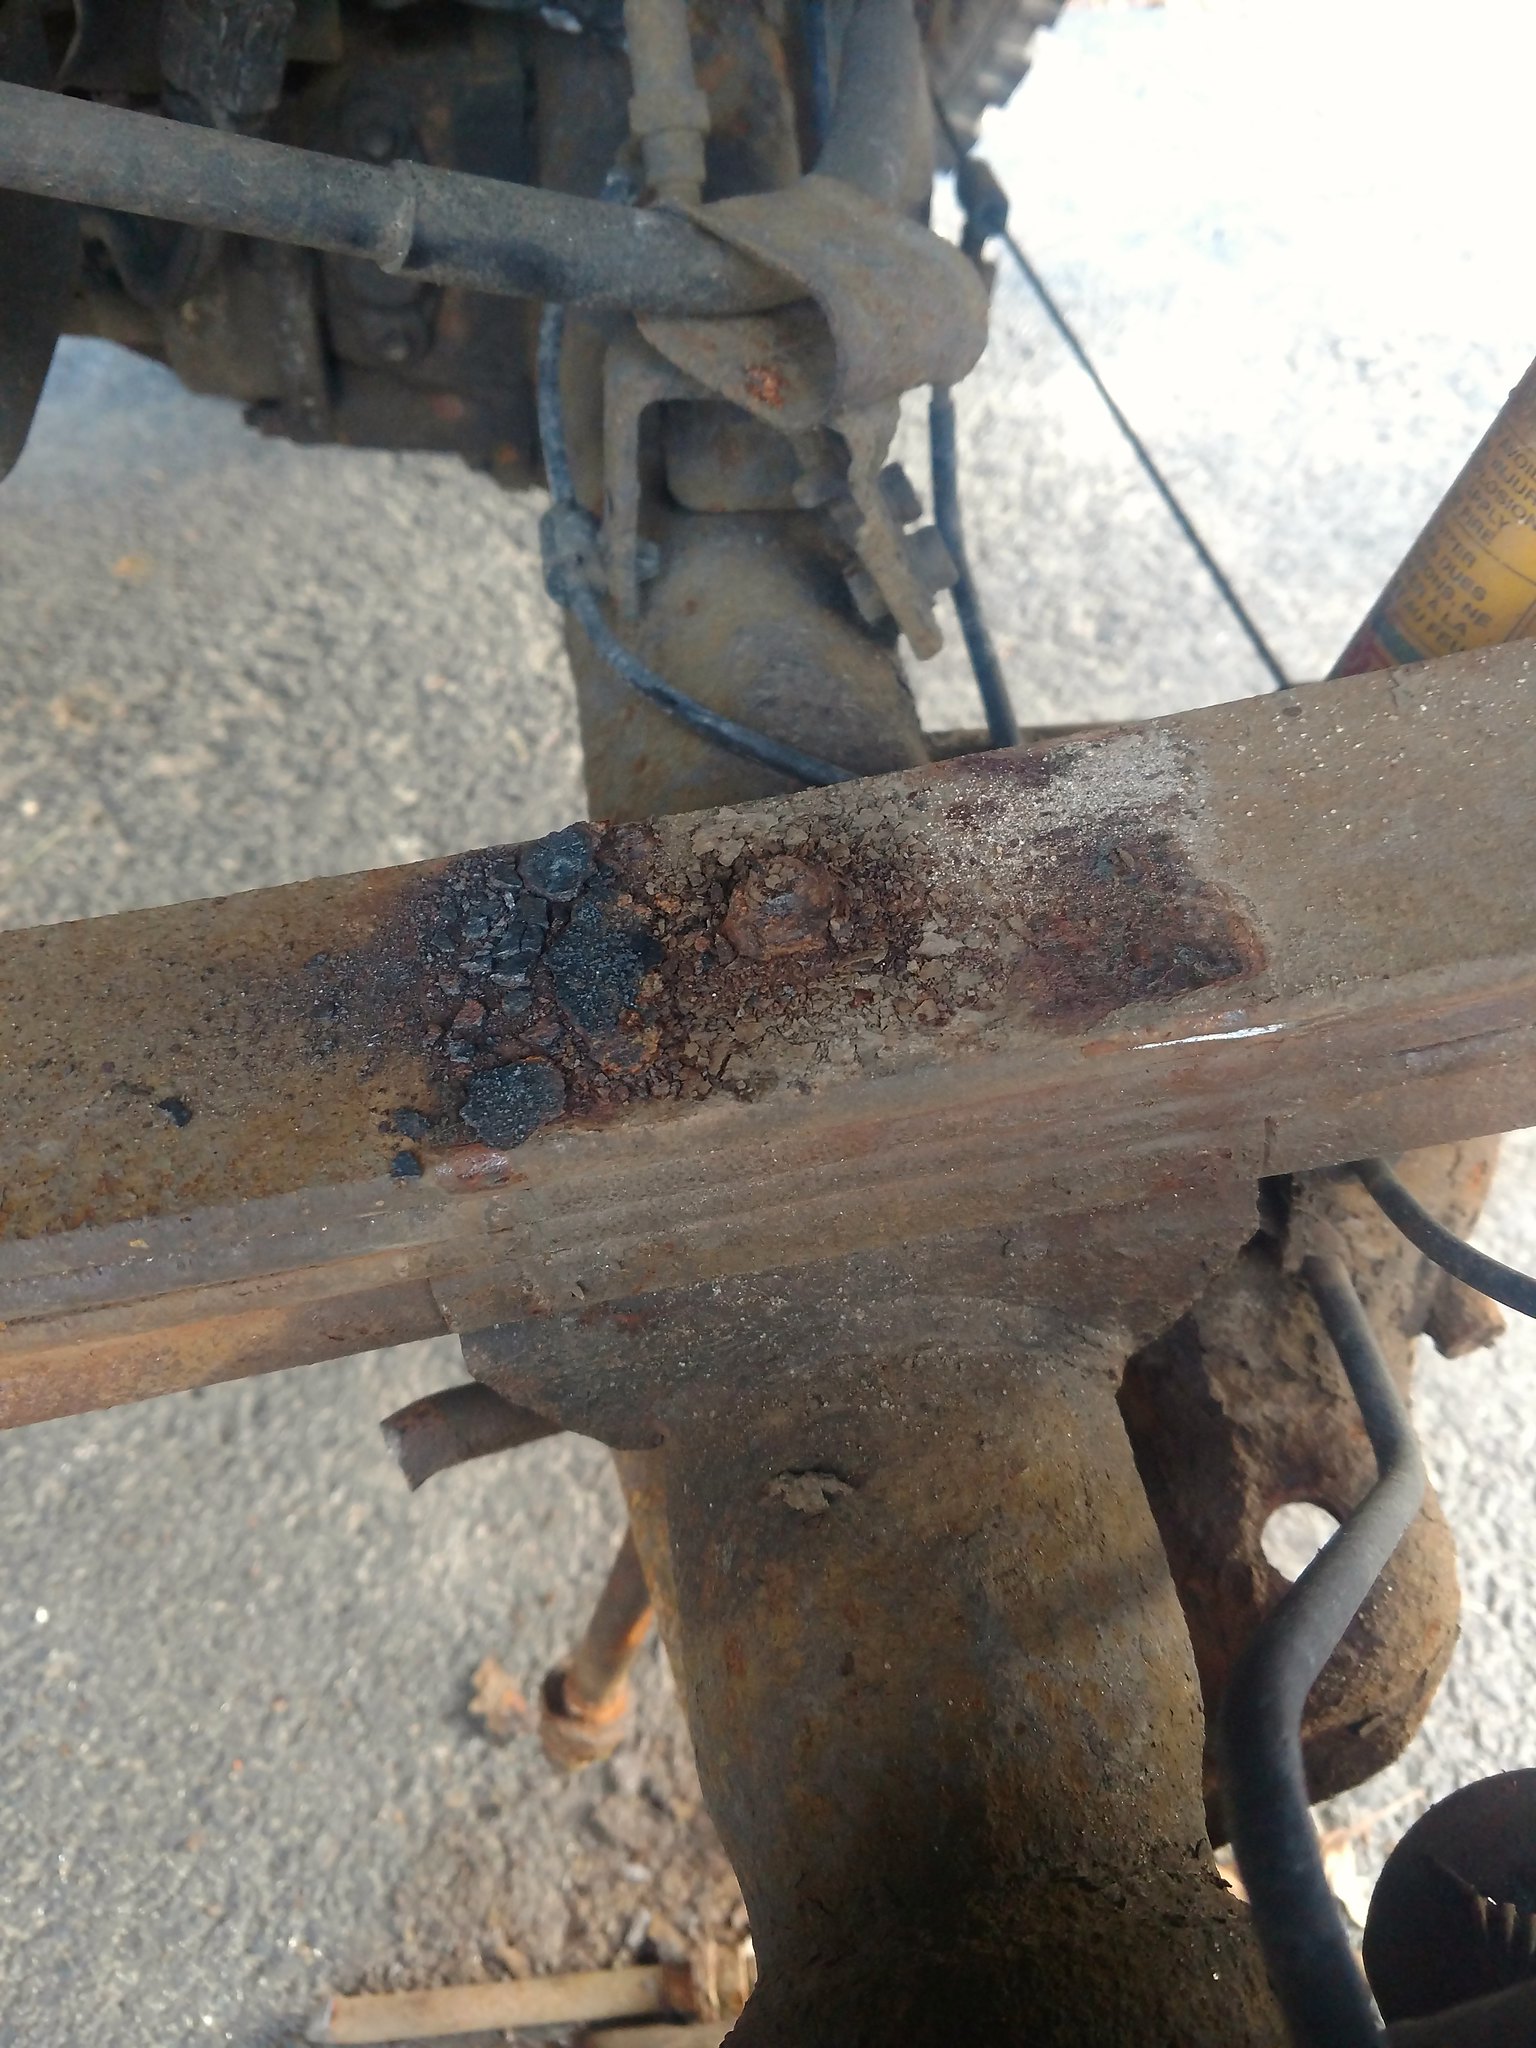
I nearly completed disassembly and reassembly in one evening. It was amazing.
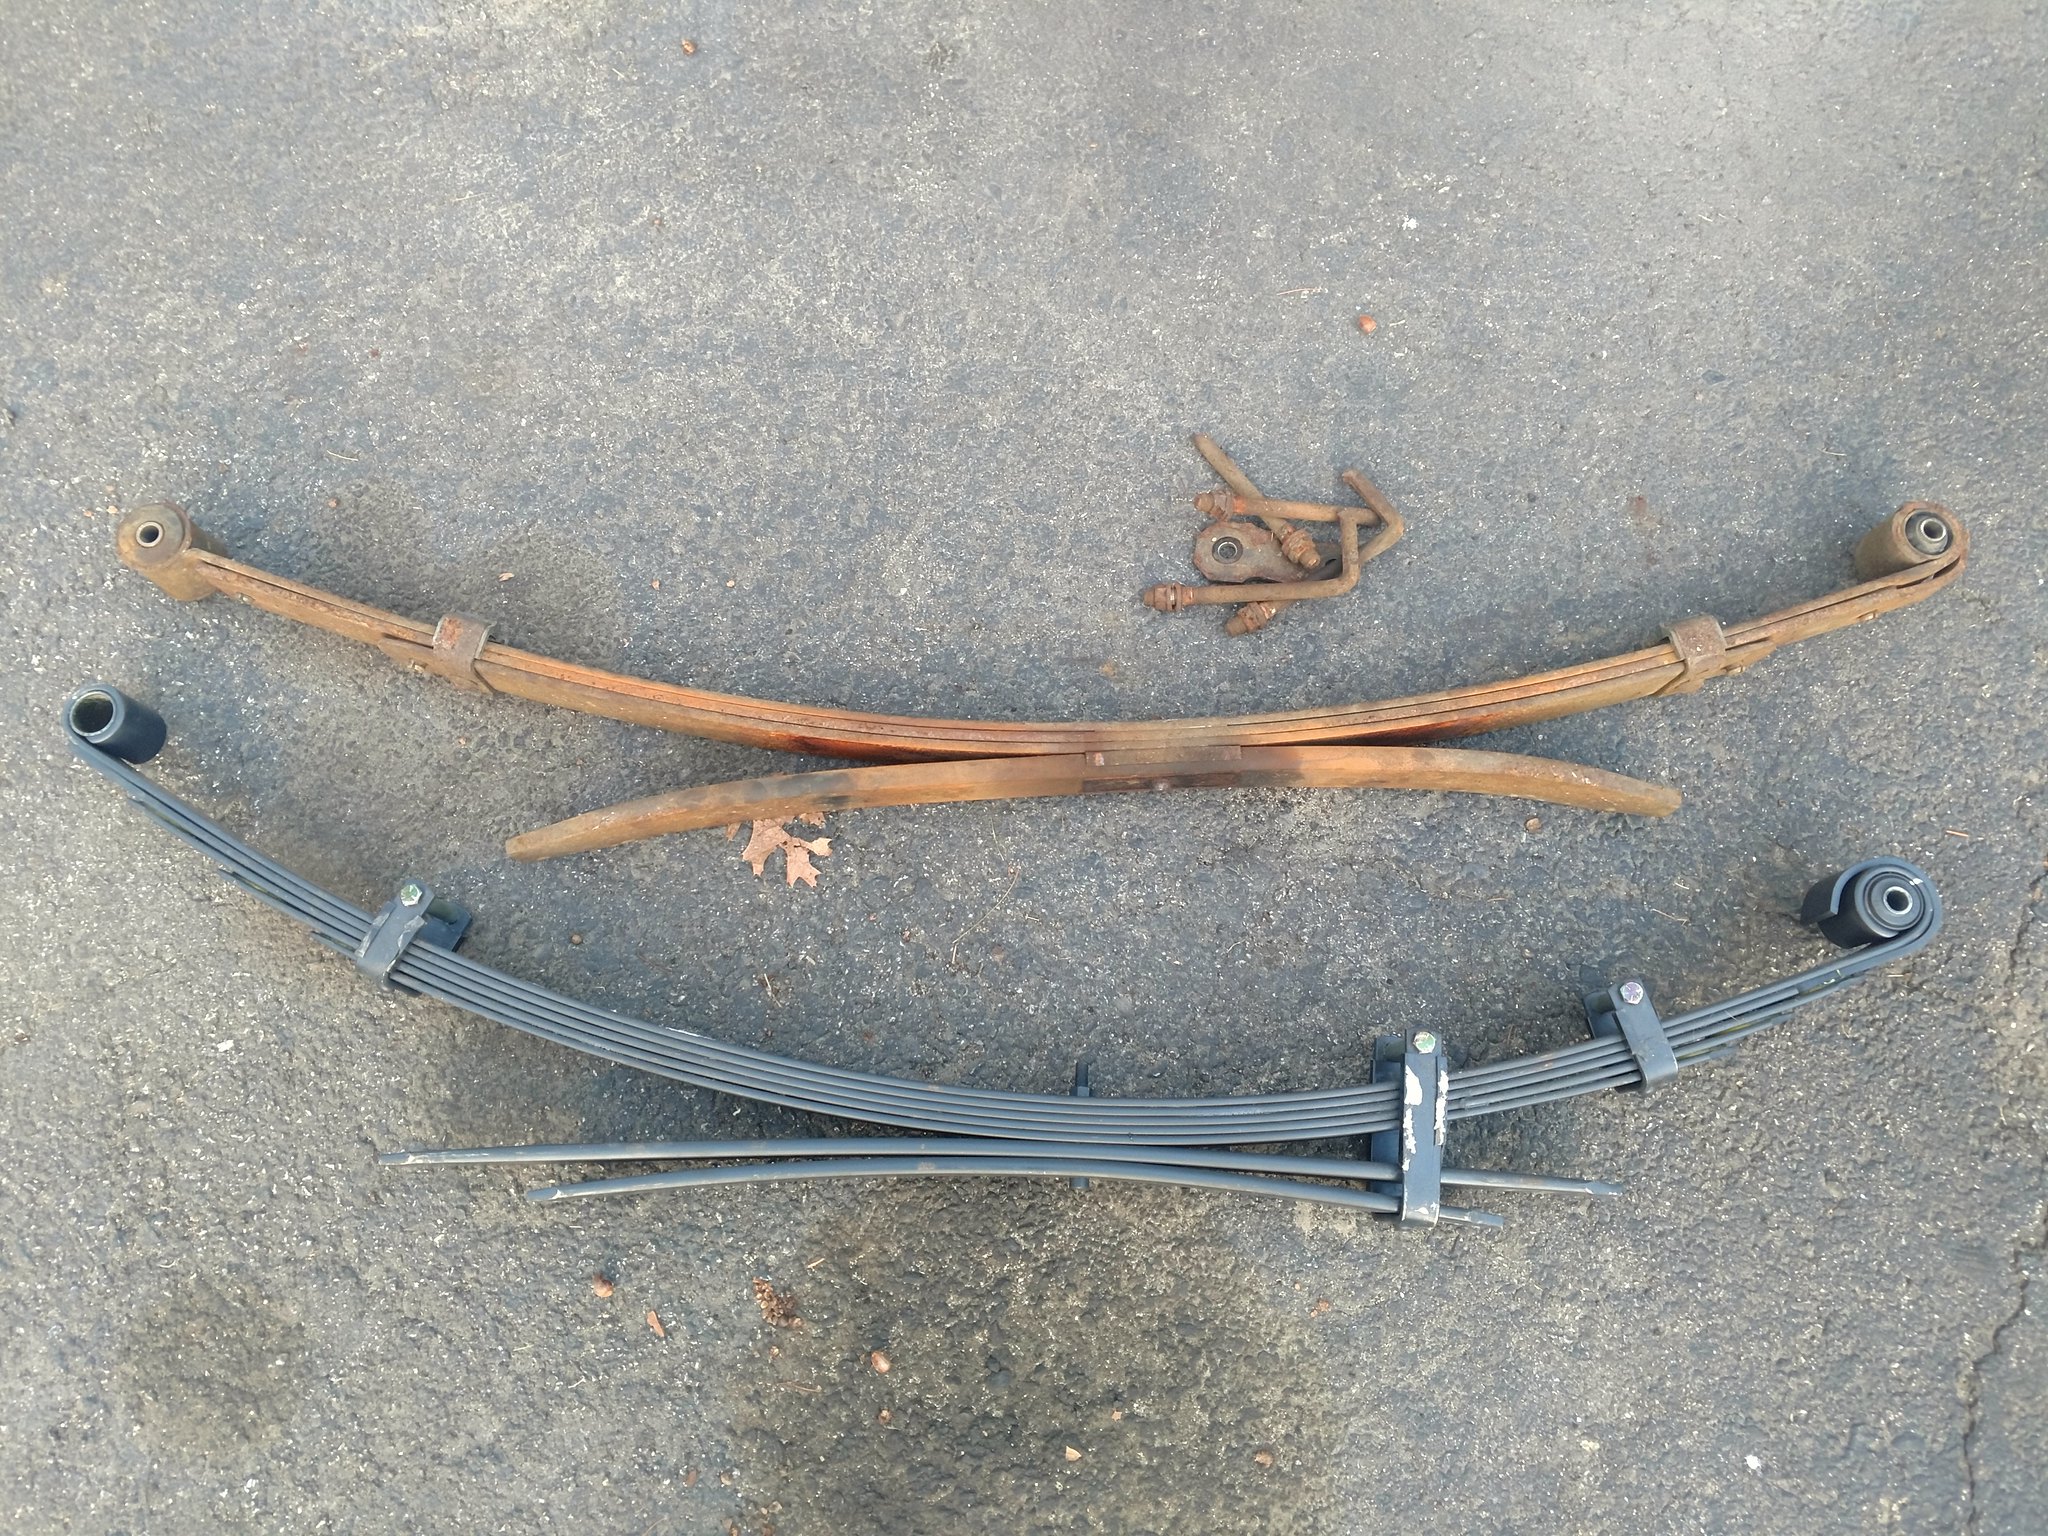
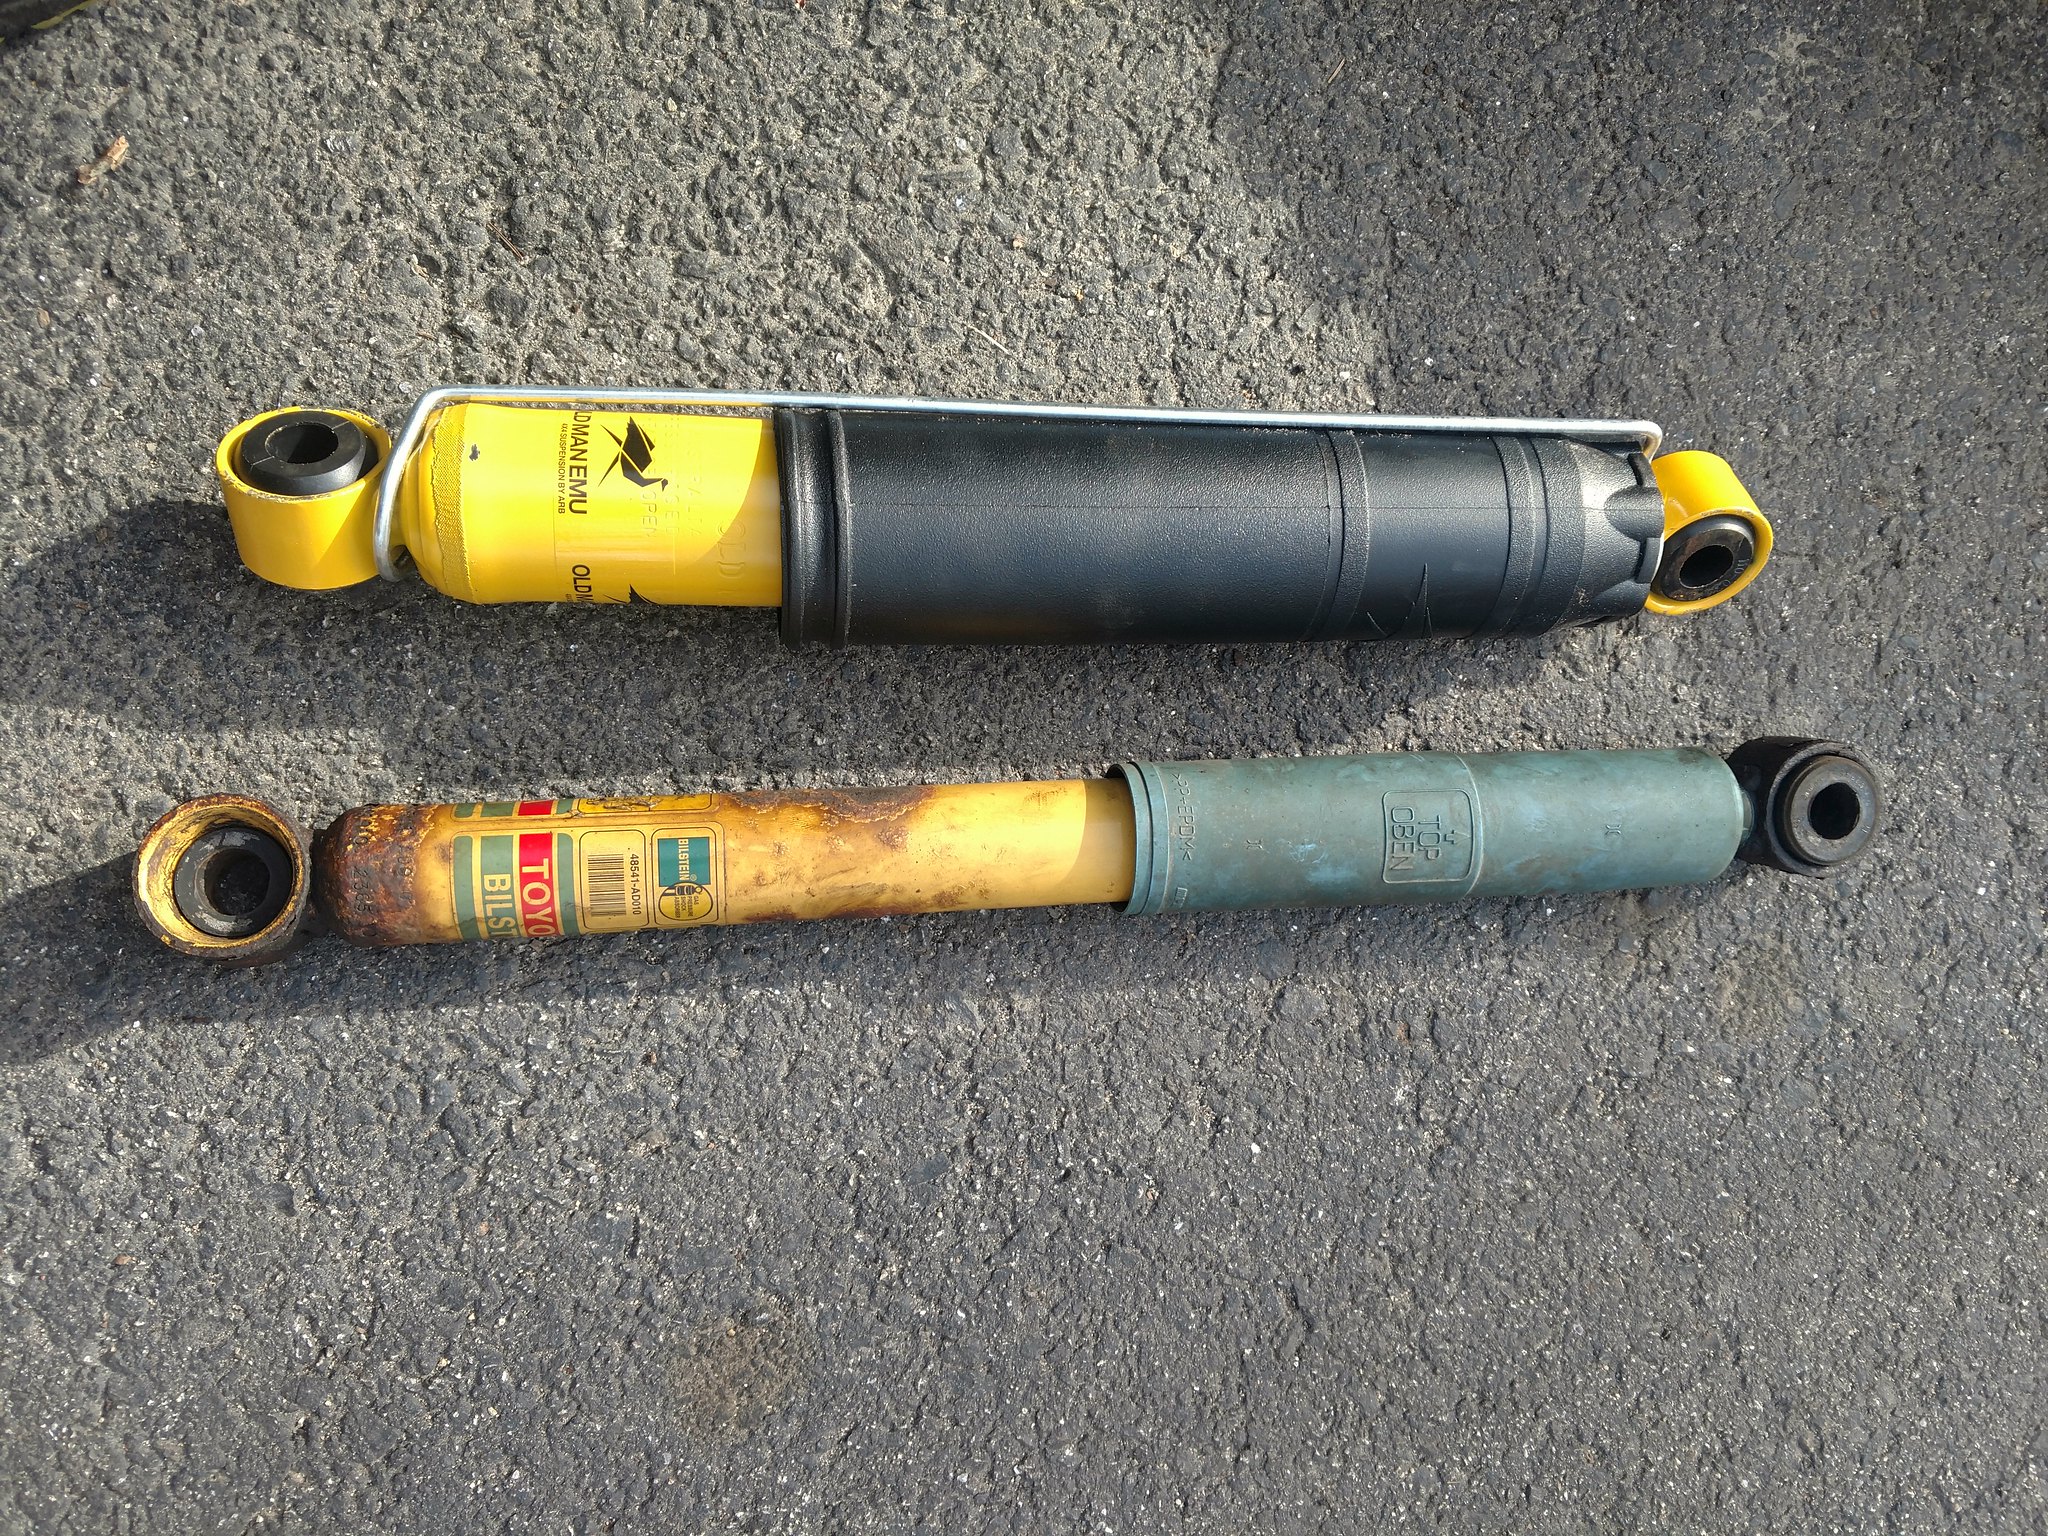
I was so distraught when I saw that the new leaf packs curved down like this. It was one of the major motivators for embarking on this adventure in the first place.
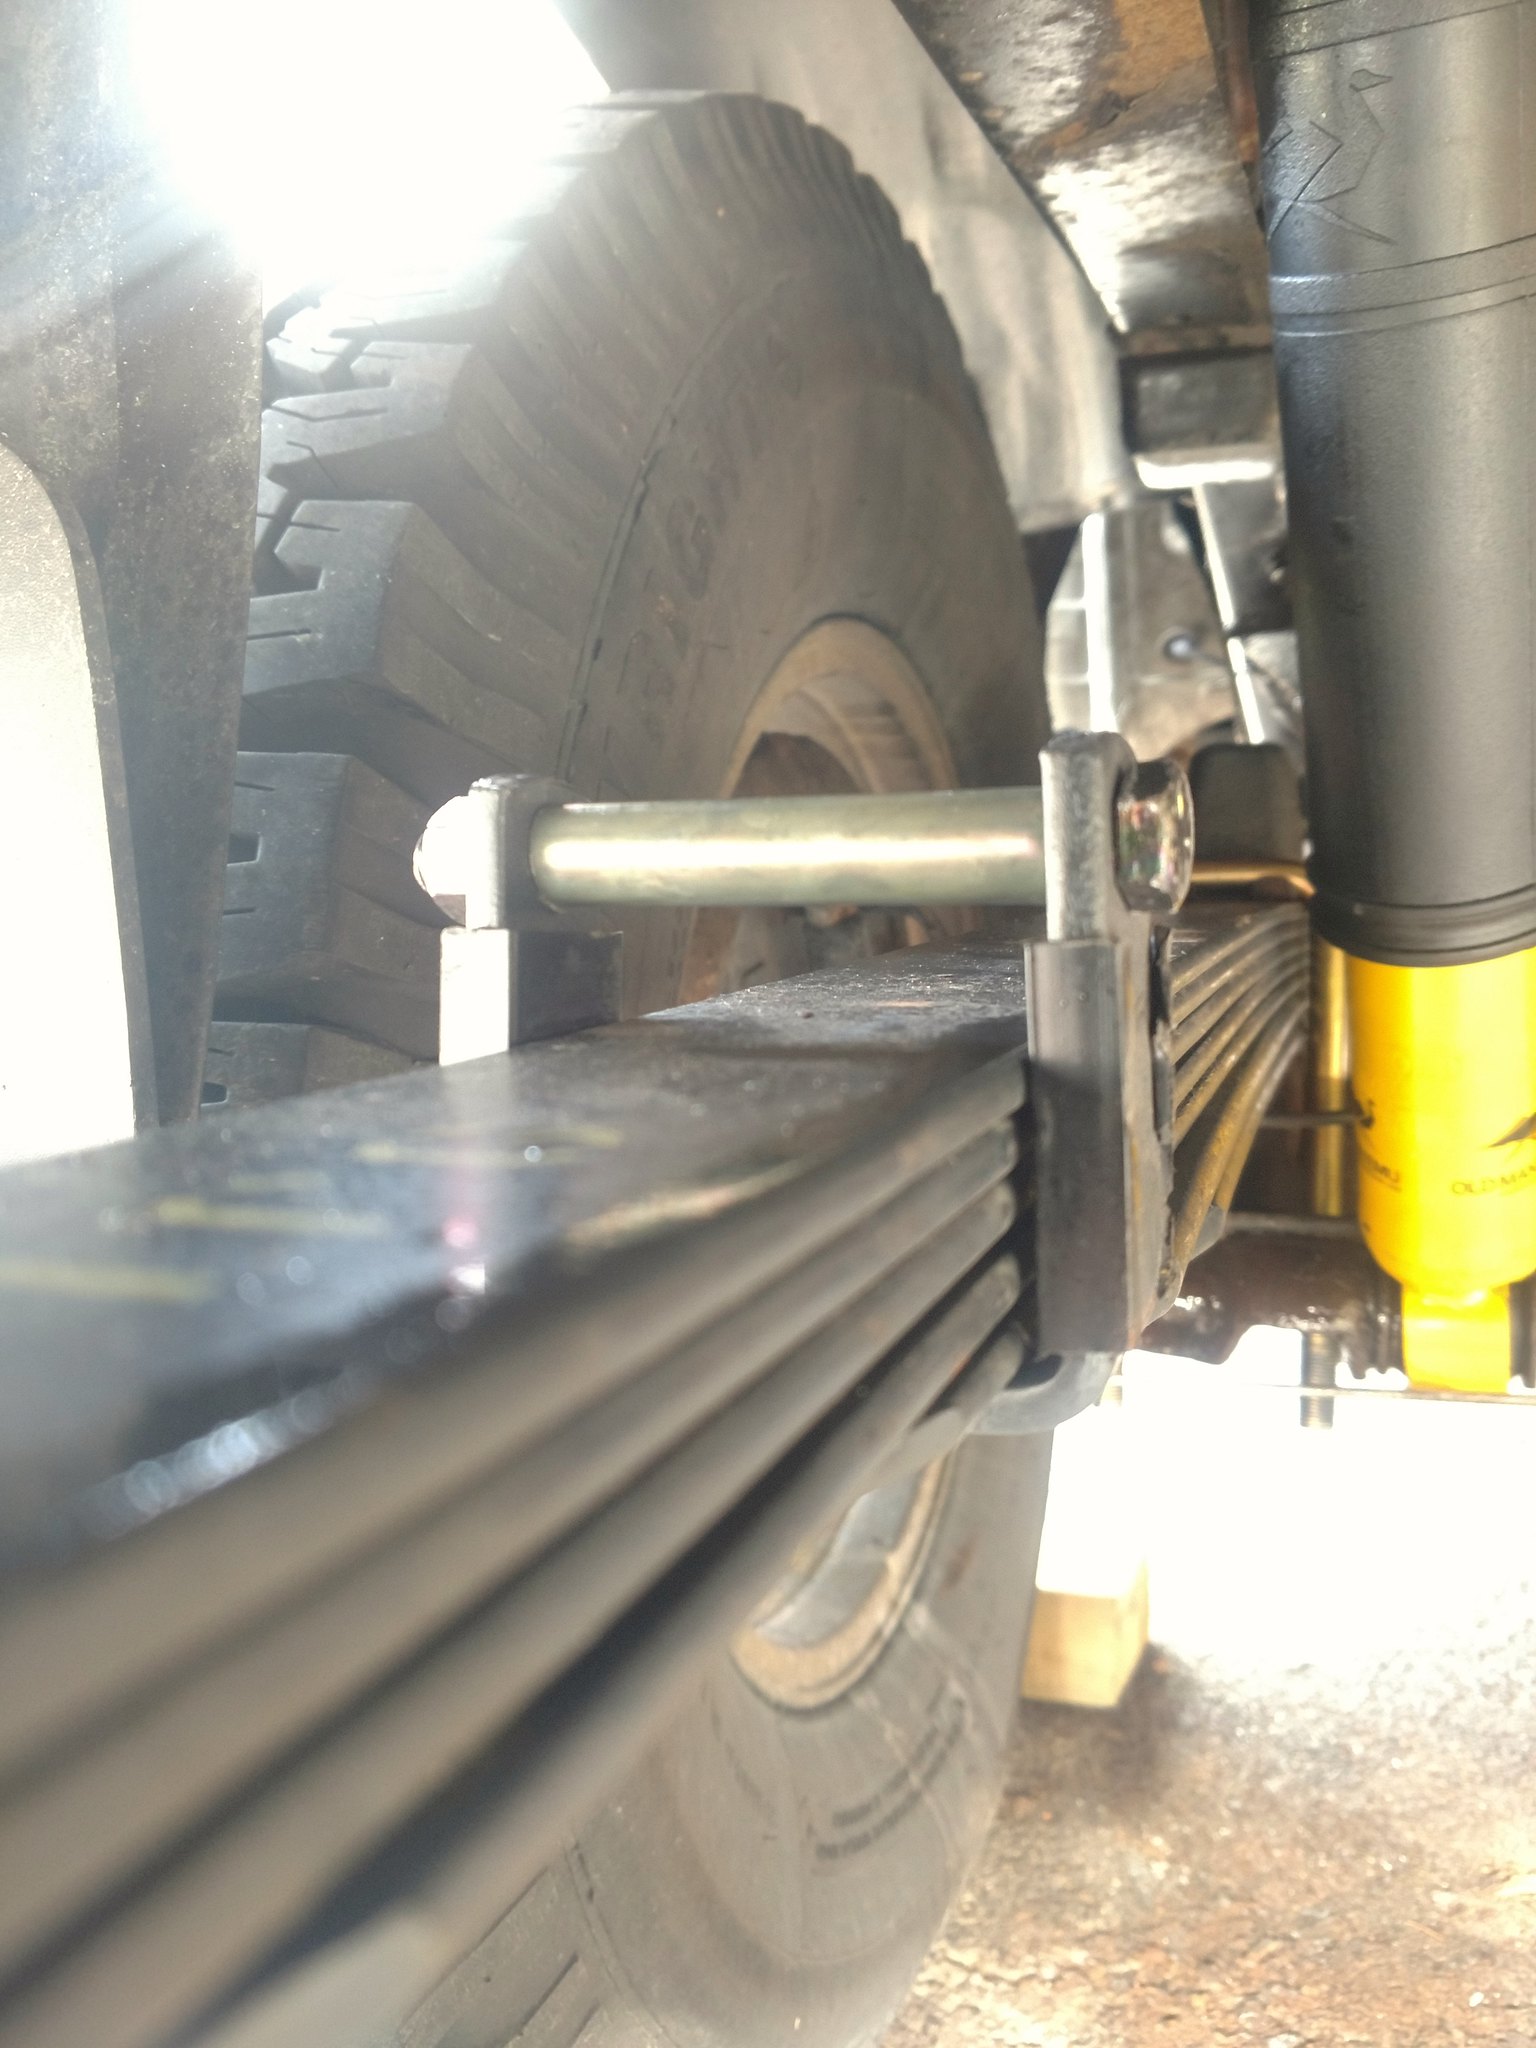
I later realized that it was just doing that because the other side was jacked up. I'm an idiot. The shackles were kind of a bear to tighten because the bushings were so tight, but I greased the **** out of them and cranked them down.
Then I moved on to the passenger's side front. This part's kinda boring. We already went over all the major sticking points. It was pretty much the same on this side, only I at least had a better idea of what to expect at each point in the process. Go straight for the big guns each time, and don't waste time trying to get things apart with the "right" tool.
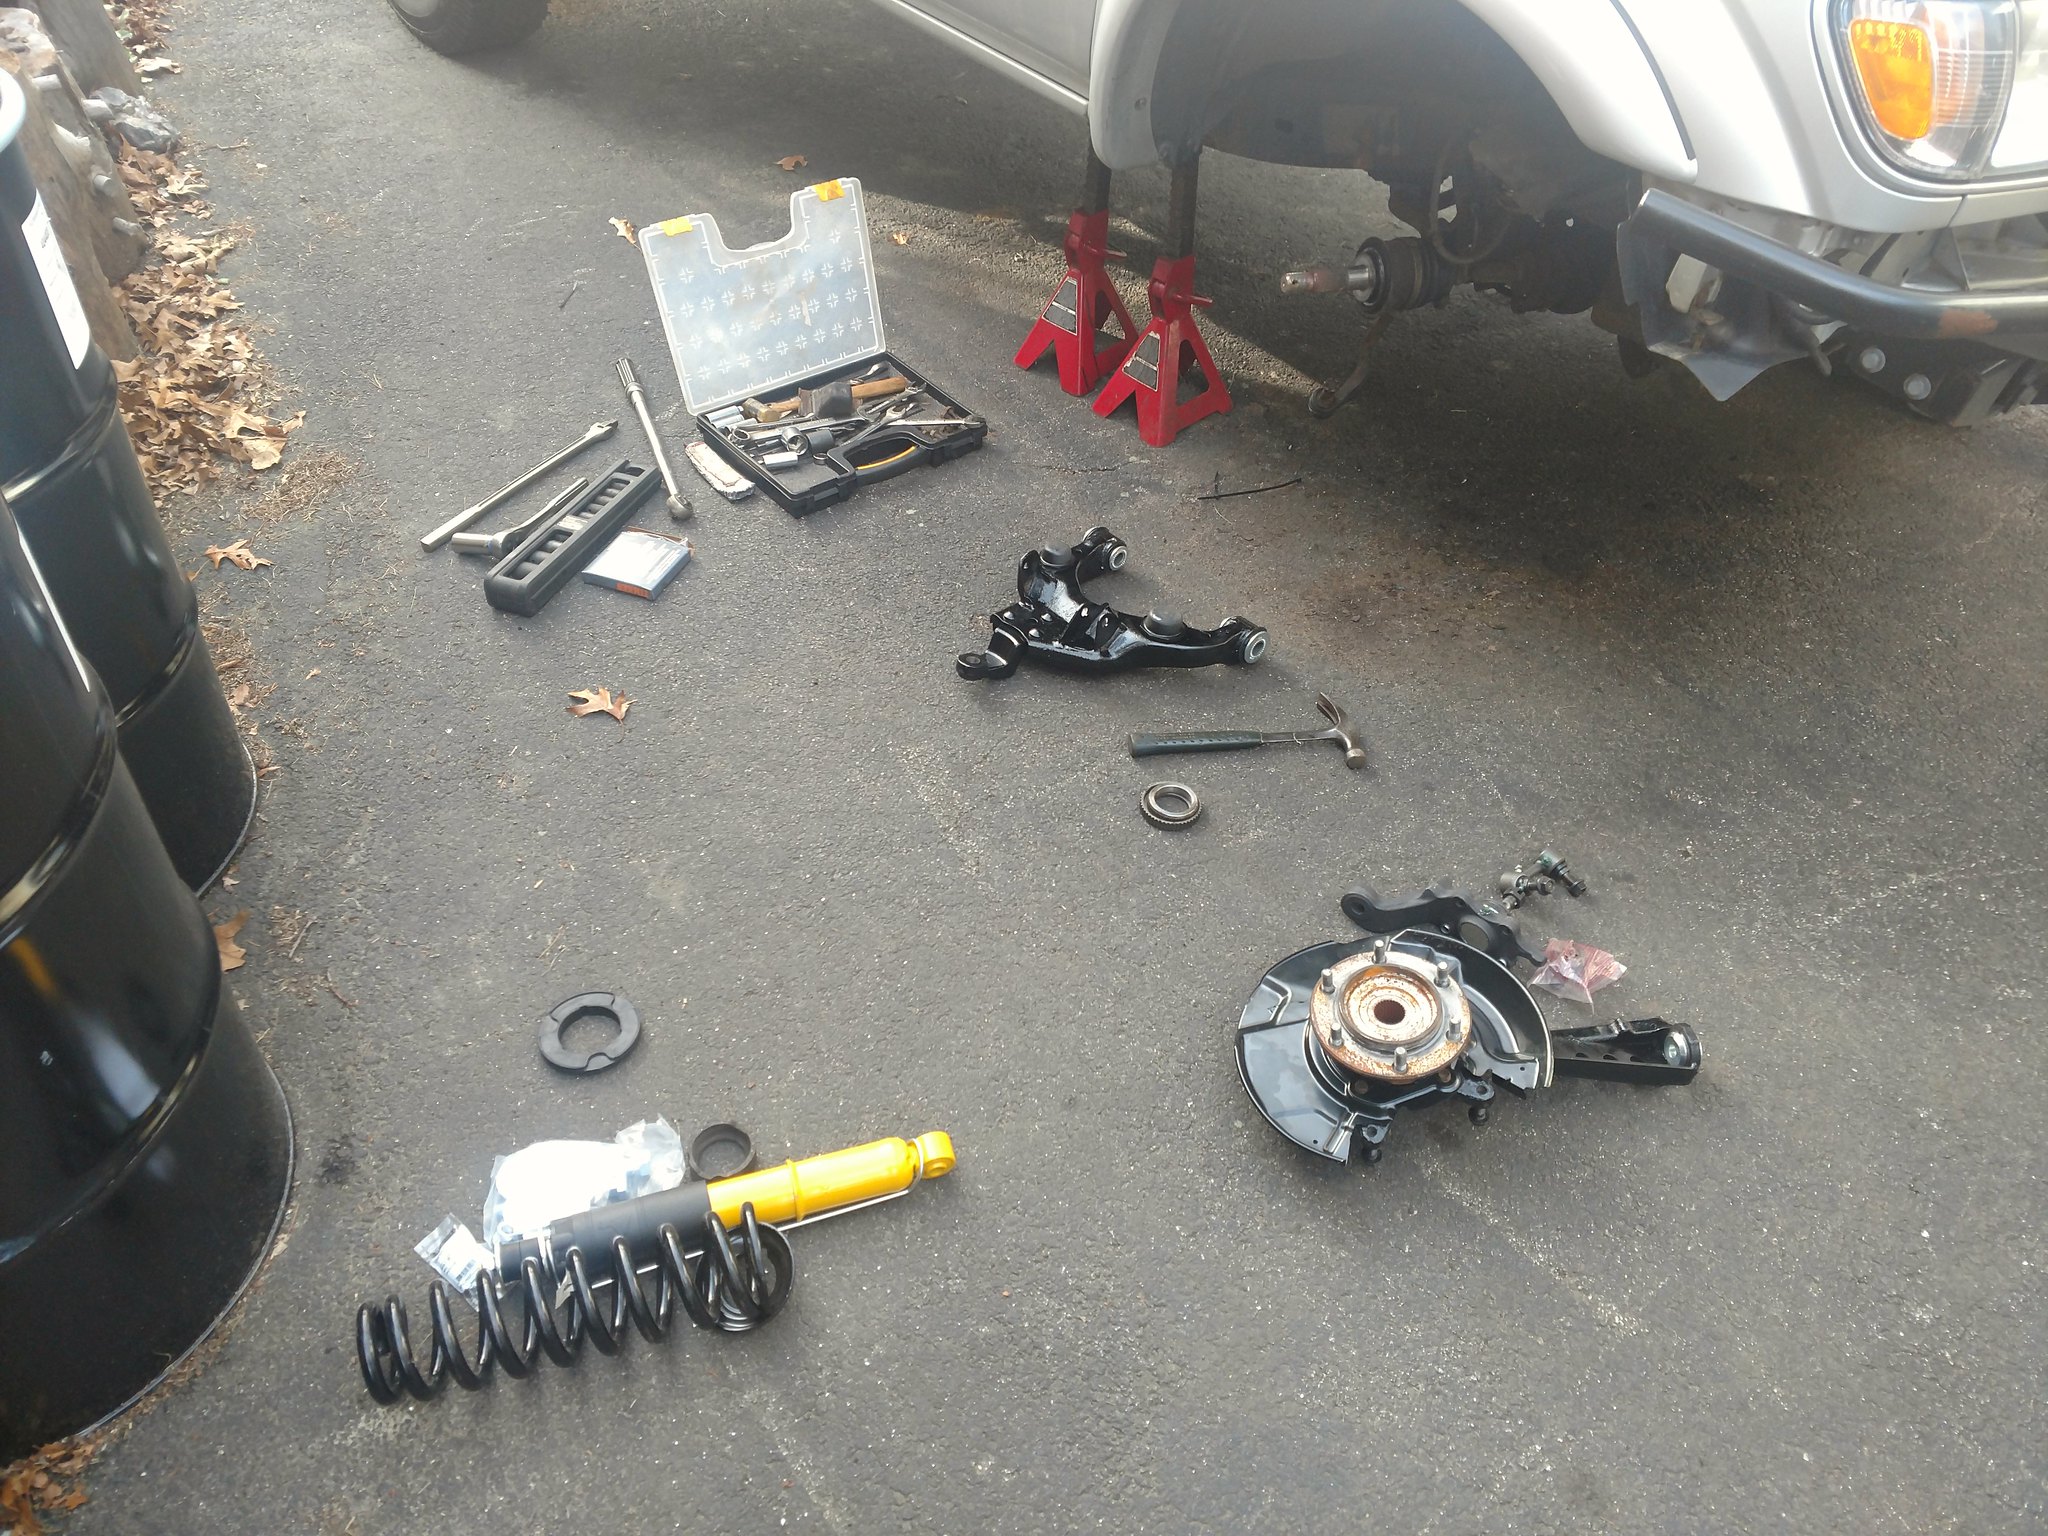
Here's all the new stuff ready to go in:
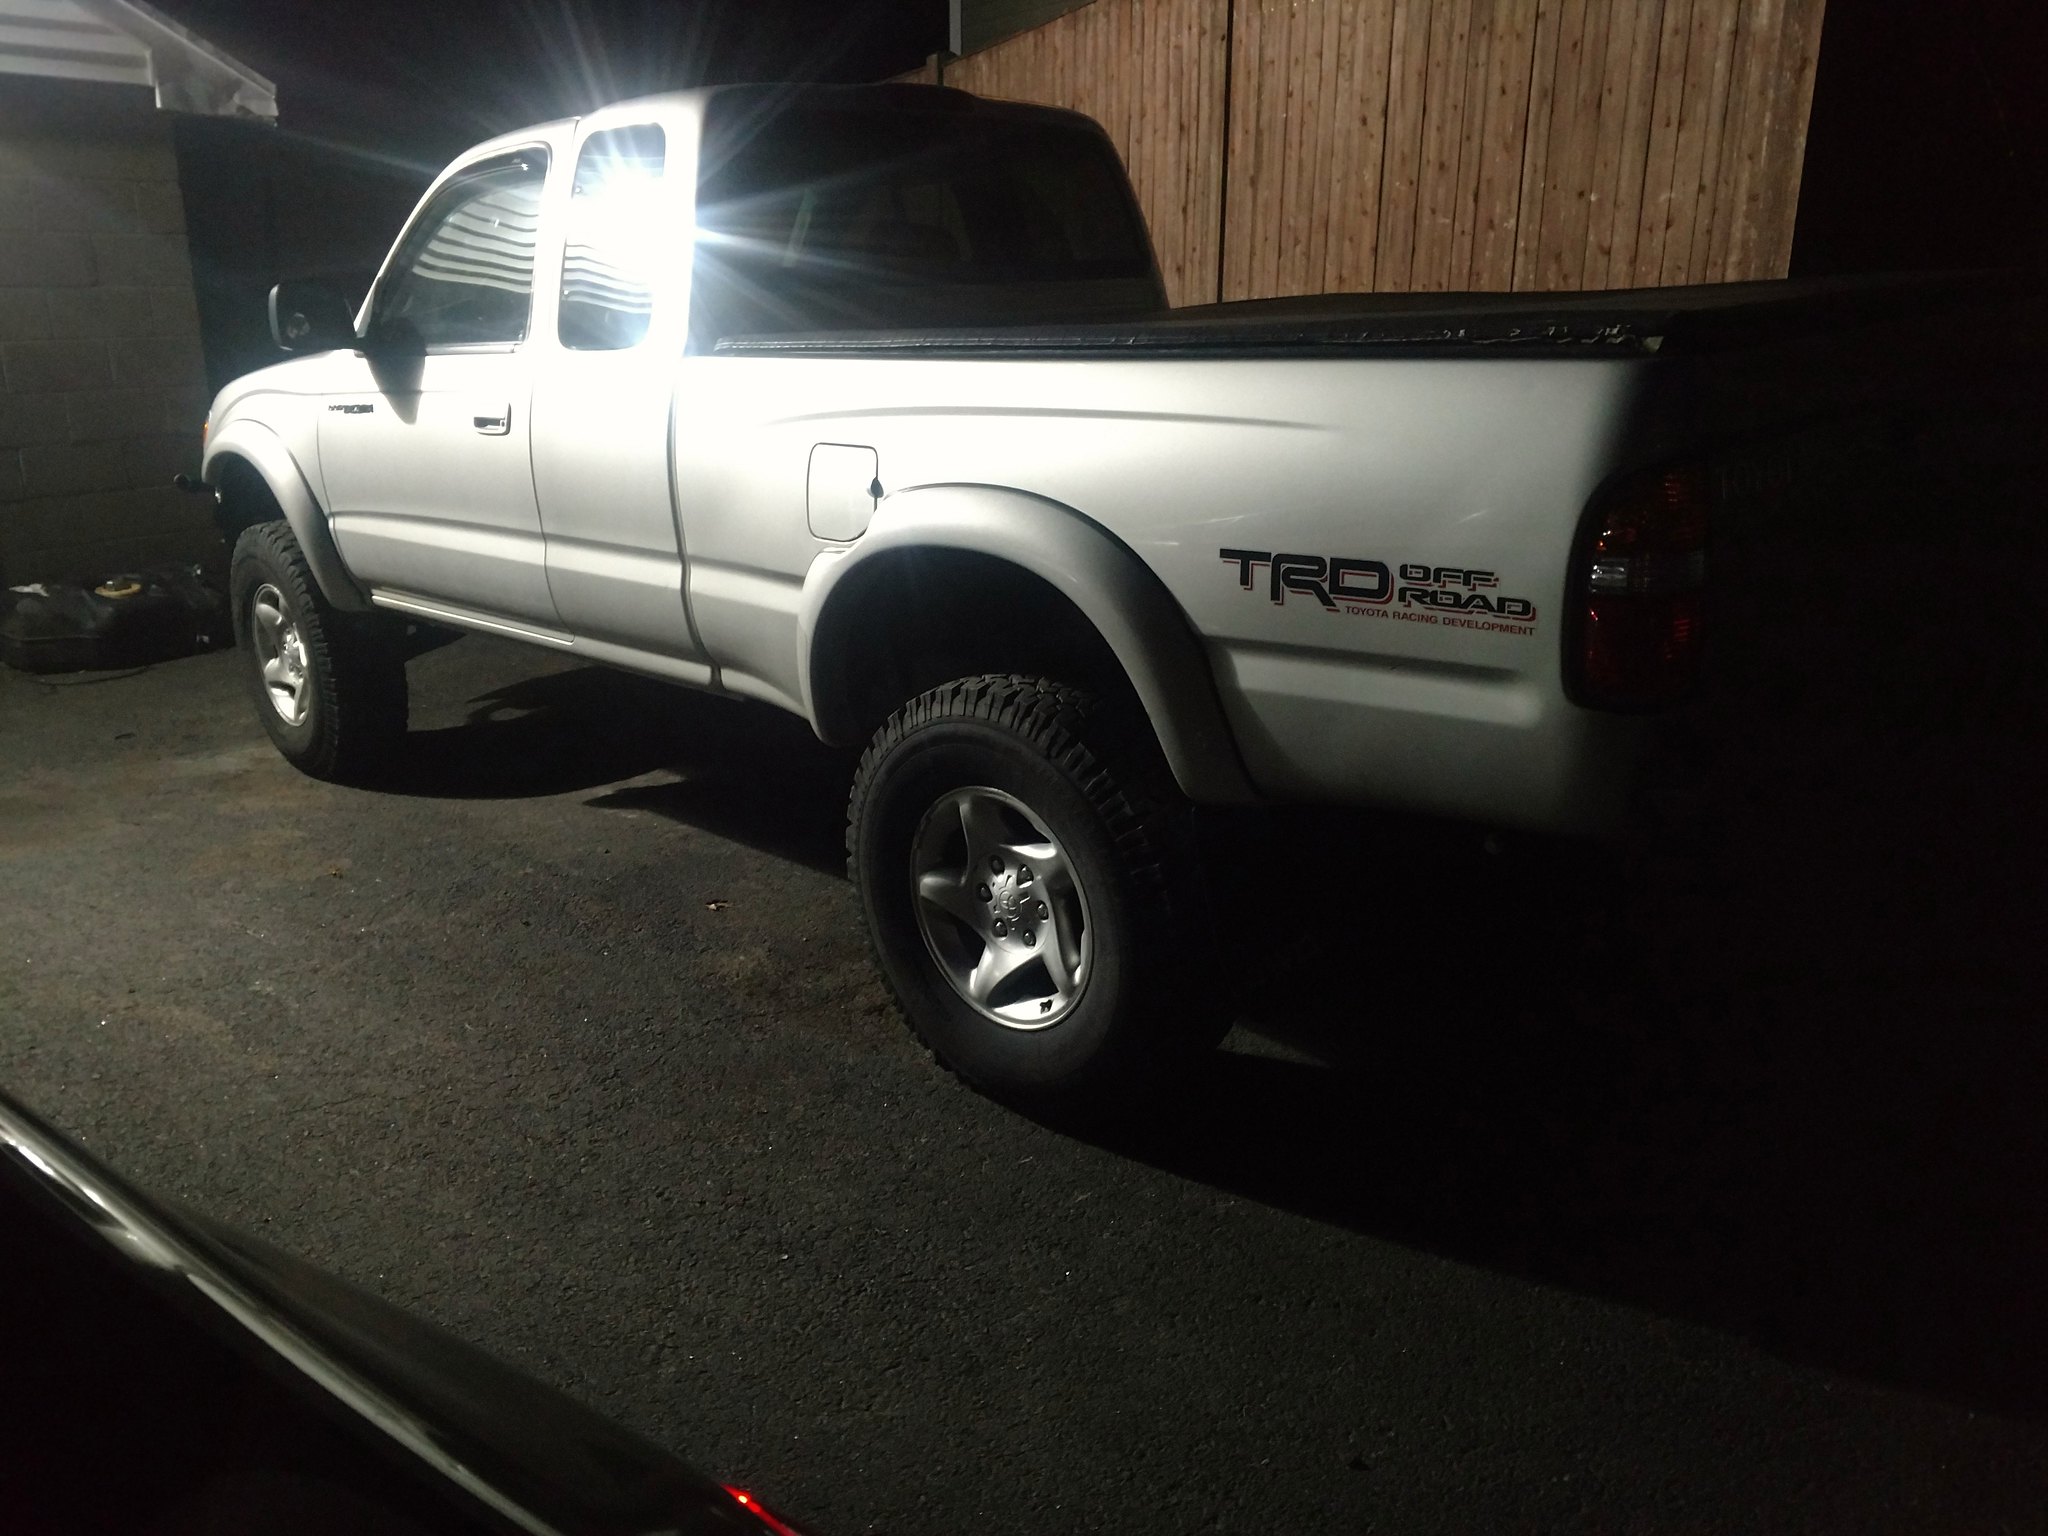
Once you get to this point, wrenching is easy. Probably what I imagine it's like in the rest of the world. It's getting to this point that can be an absolute nightmare. I ended up going late that night because I was so close I could taste it. I wanted to be done. I didn't necessarily rush, but I just kept going. I was so pumped, and also pretty pleased with my phone's night-shot-no-flash-handheld capability:
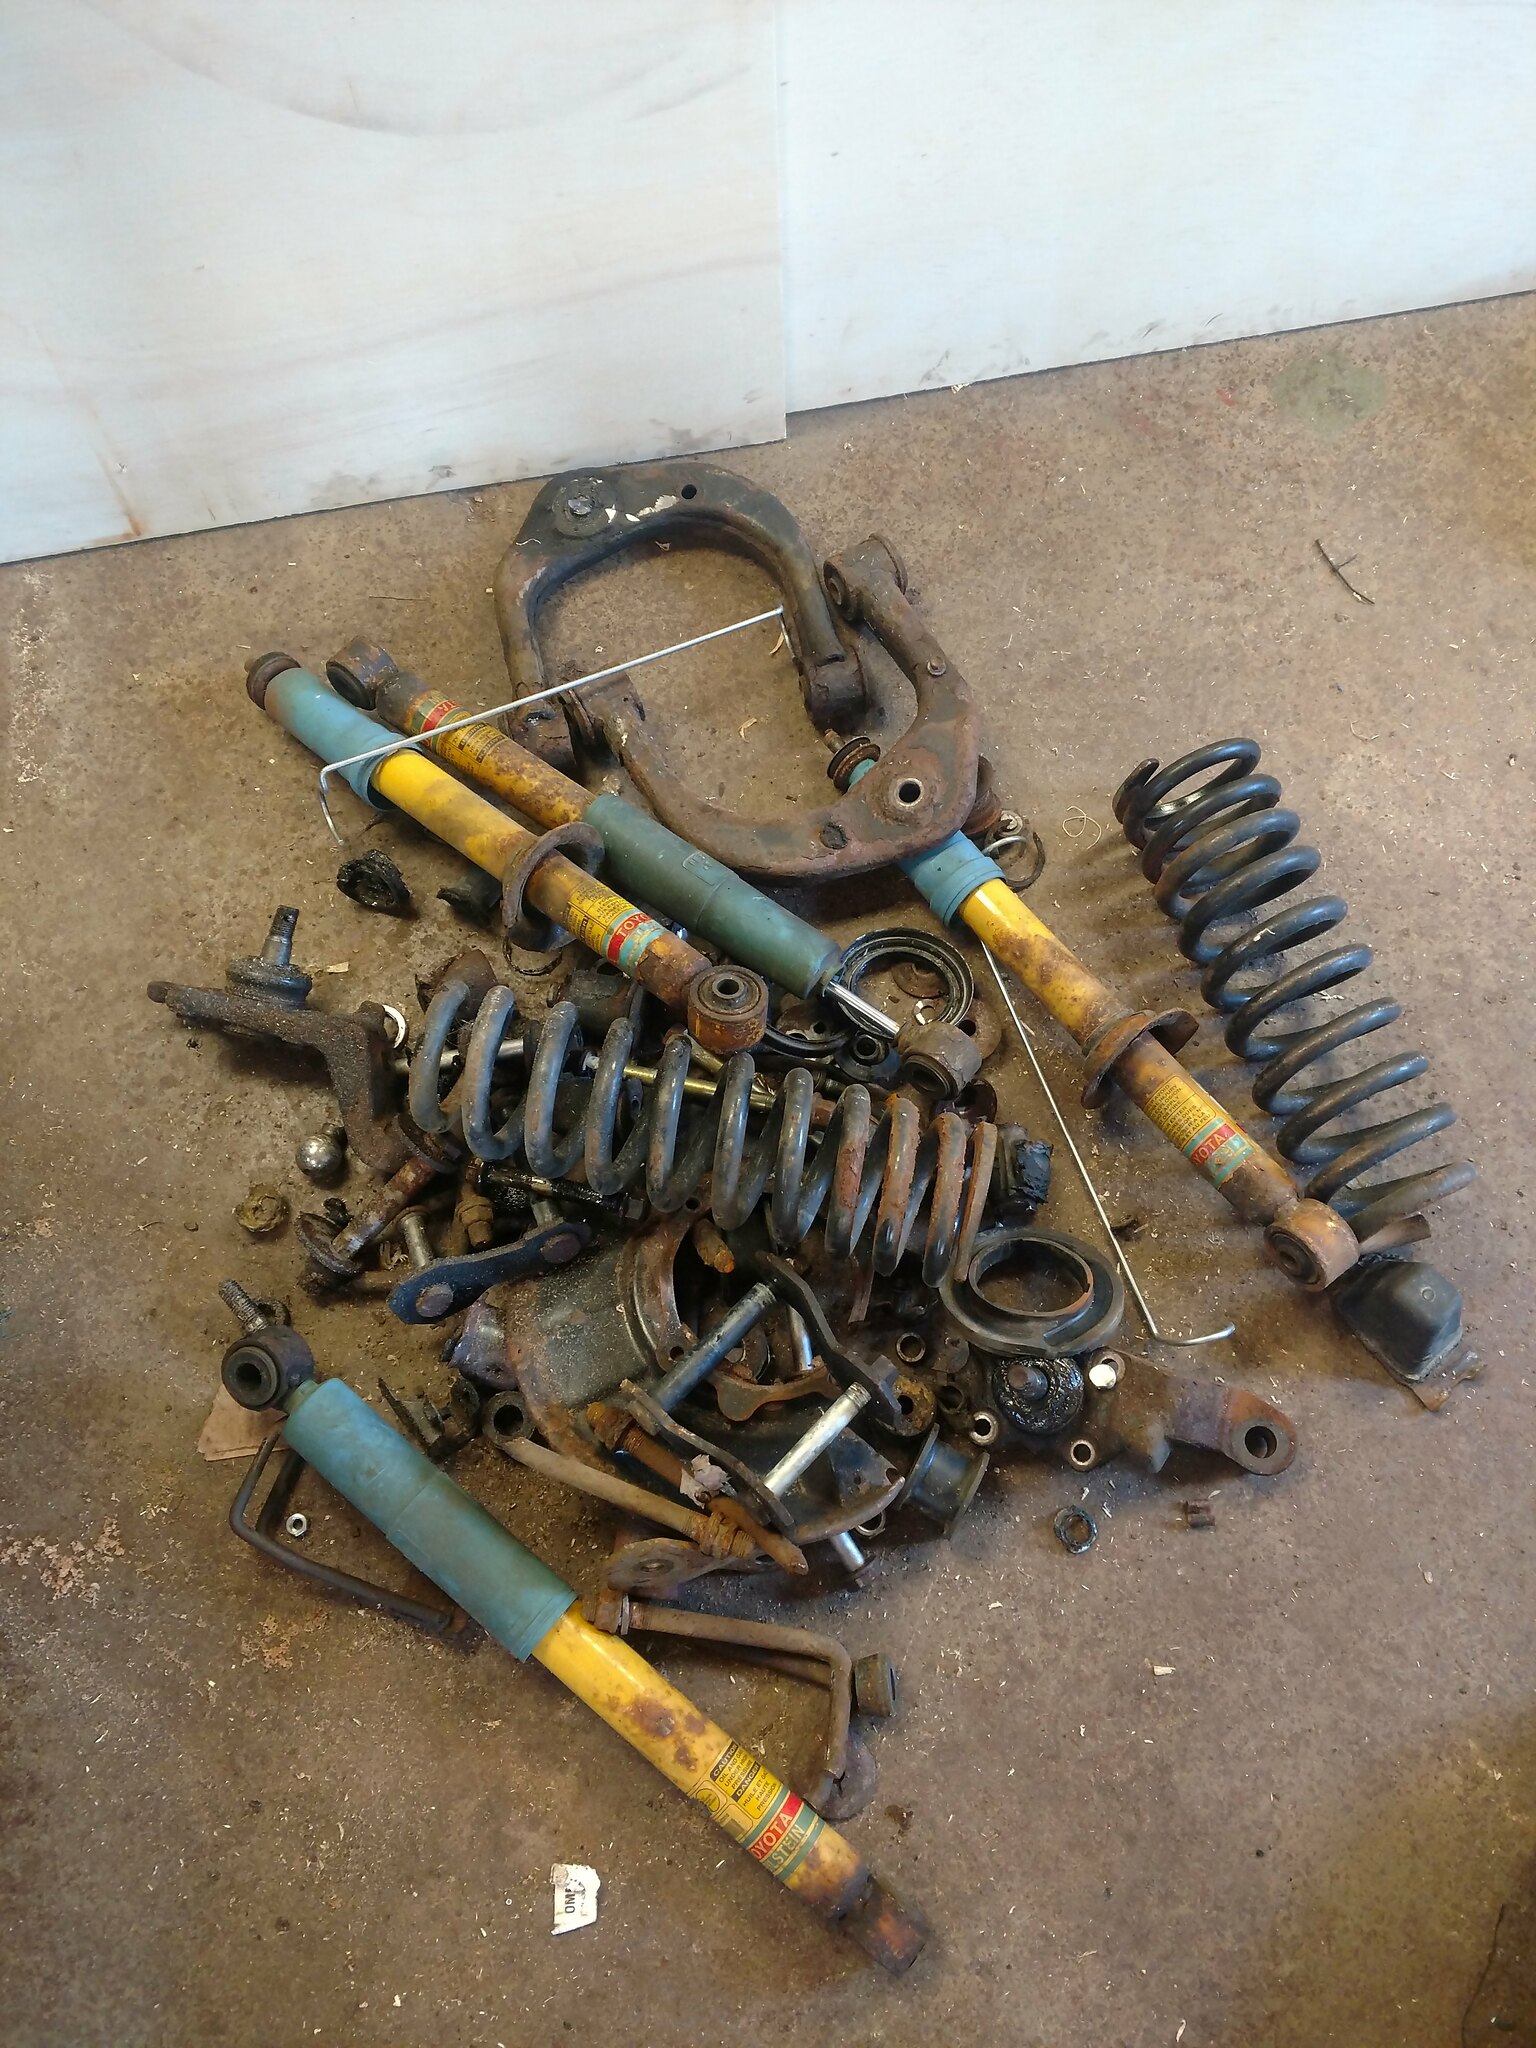
Here's the final pile of carnage:
And here's the before/afters:
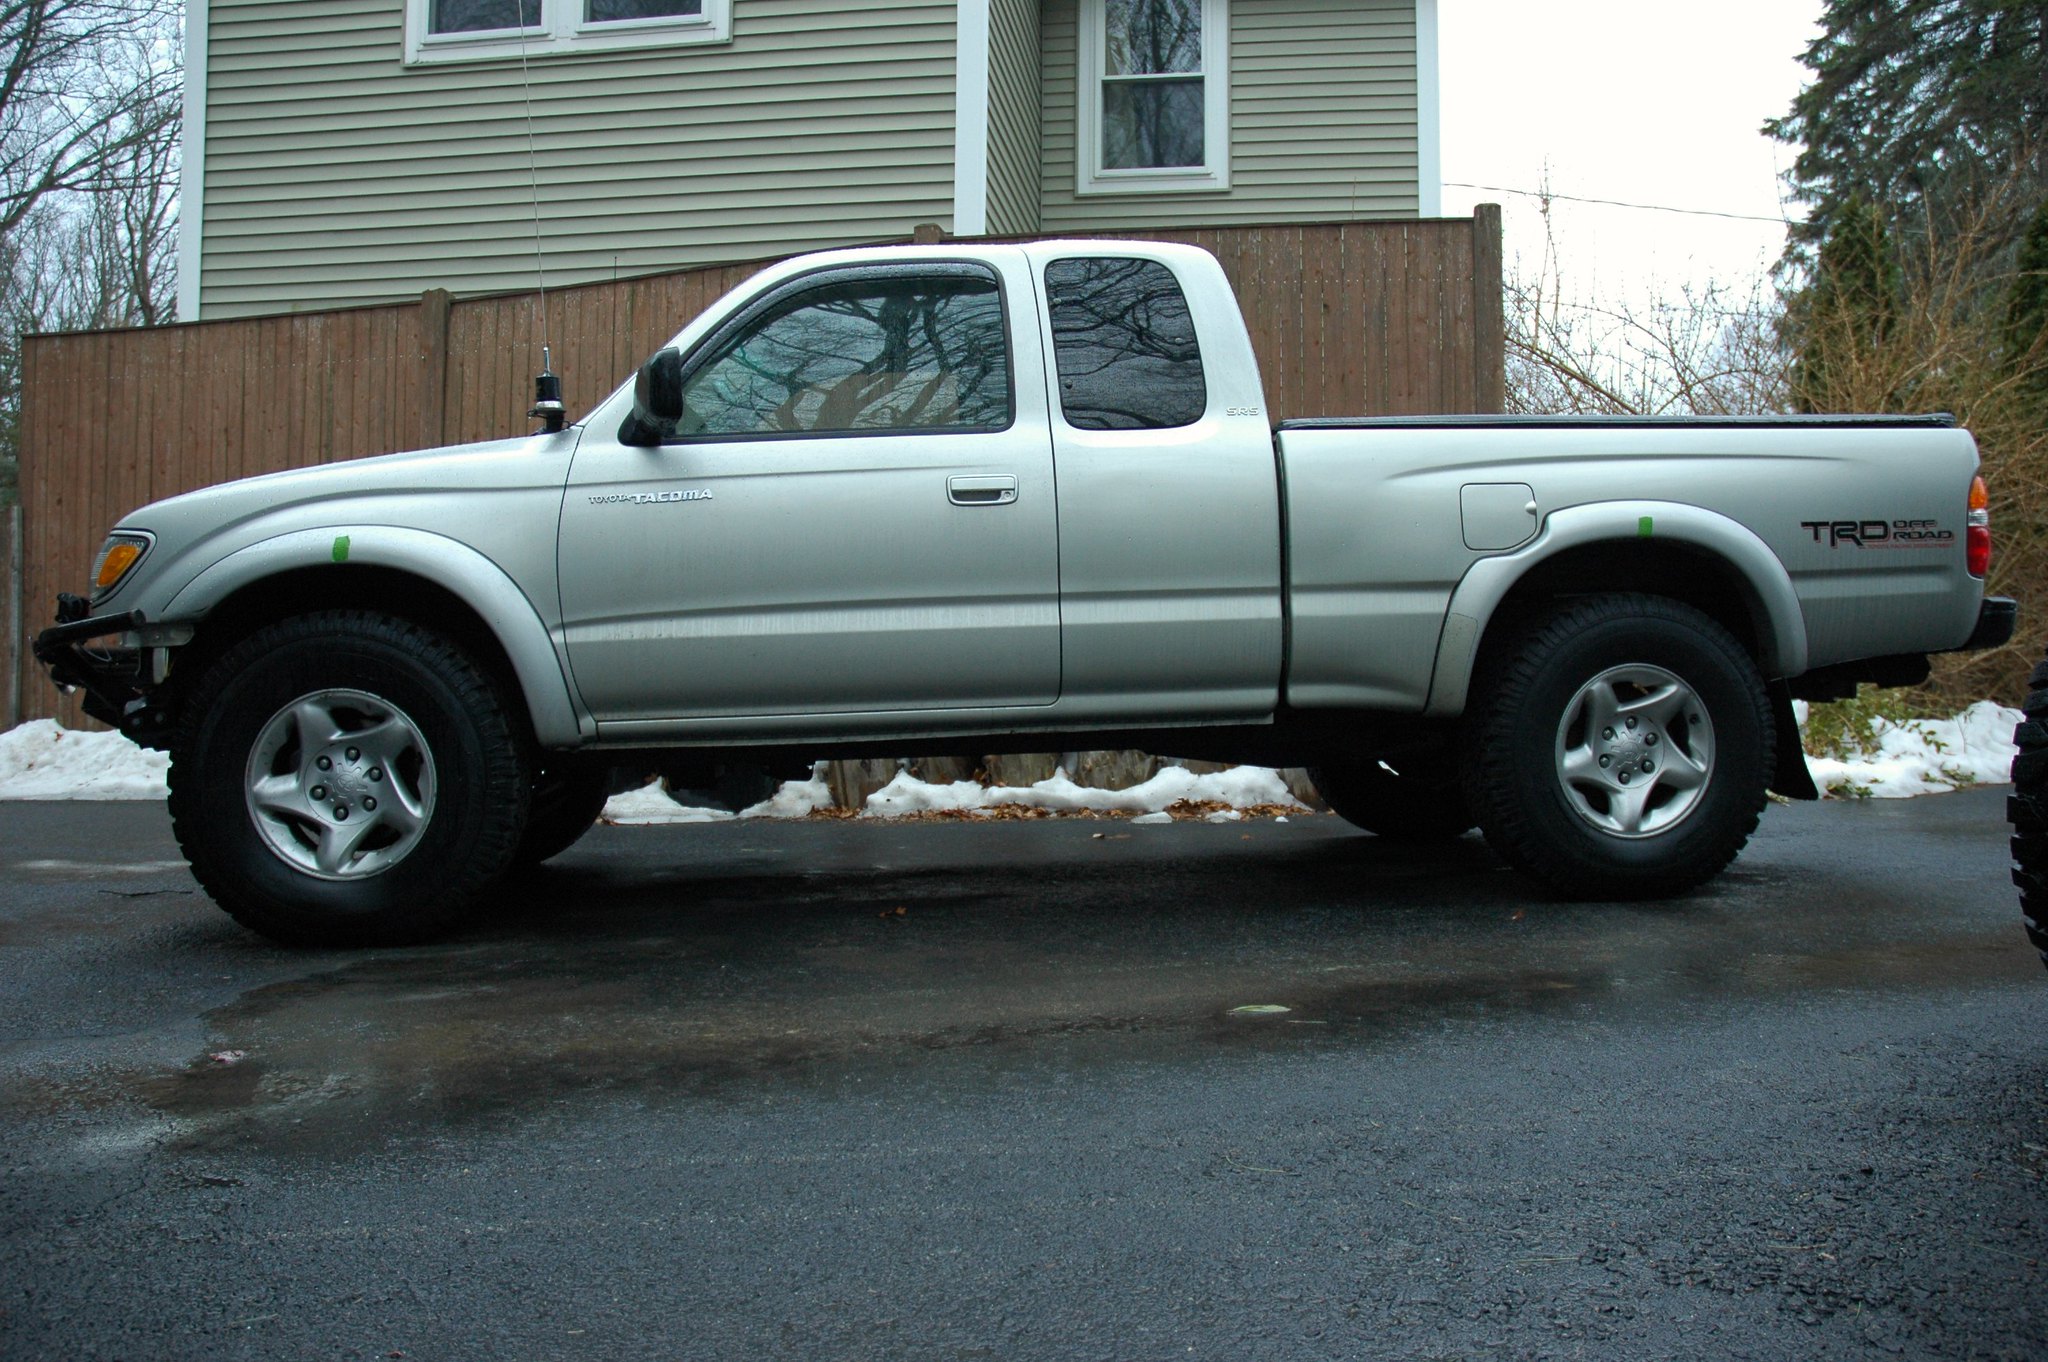
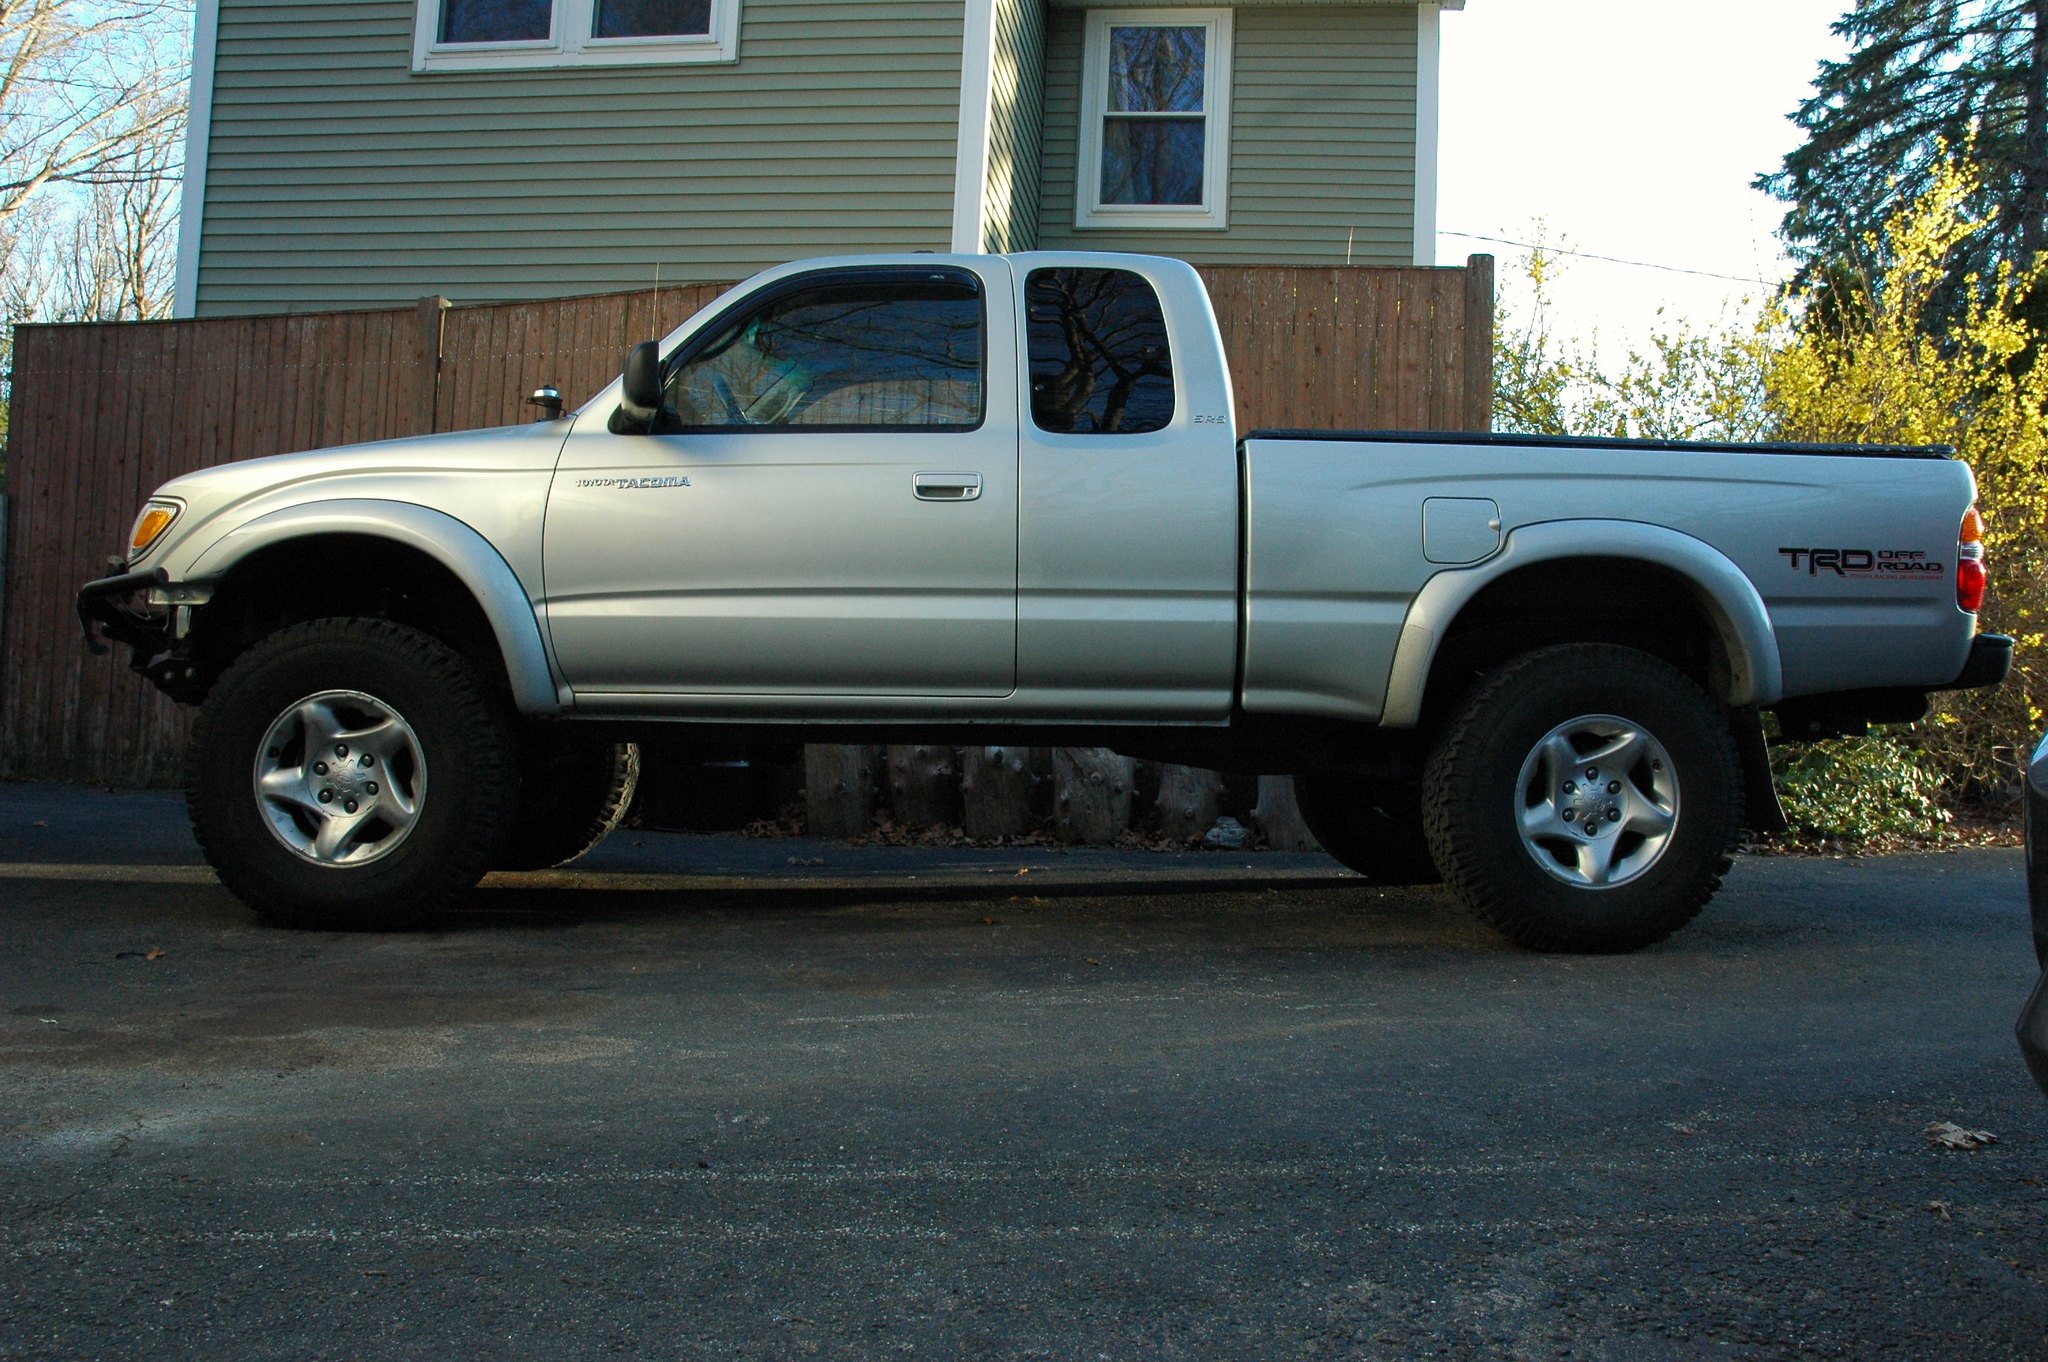
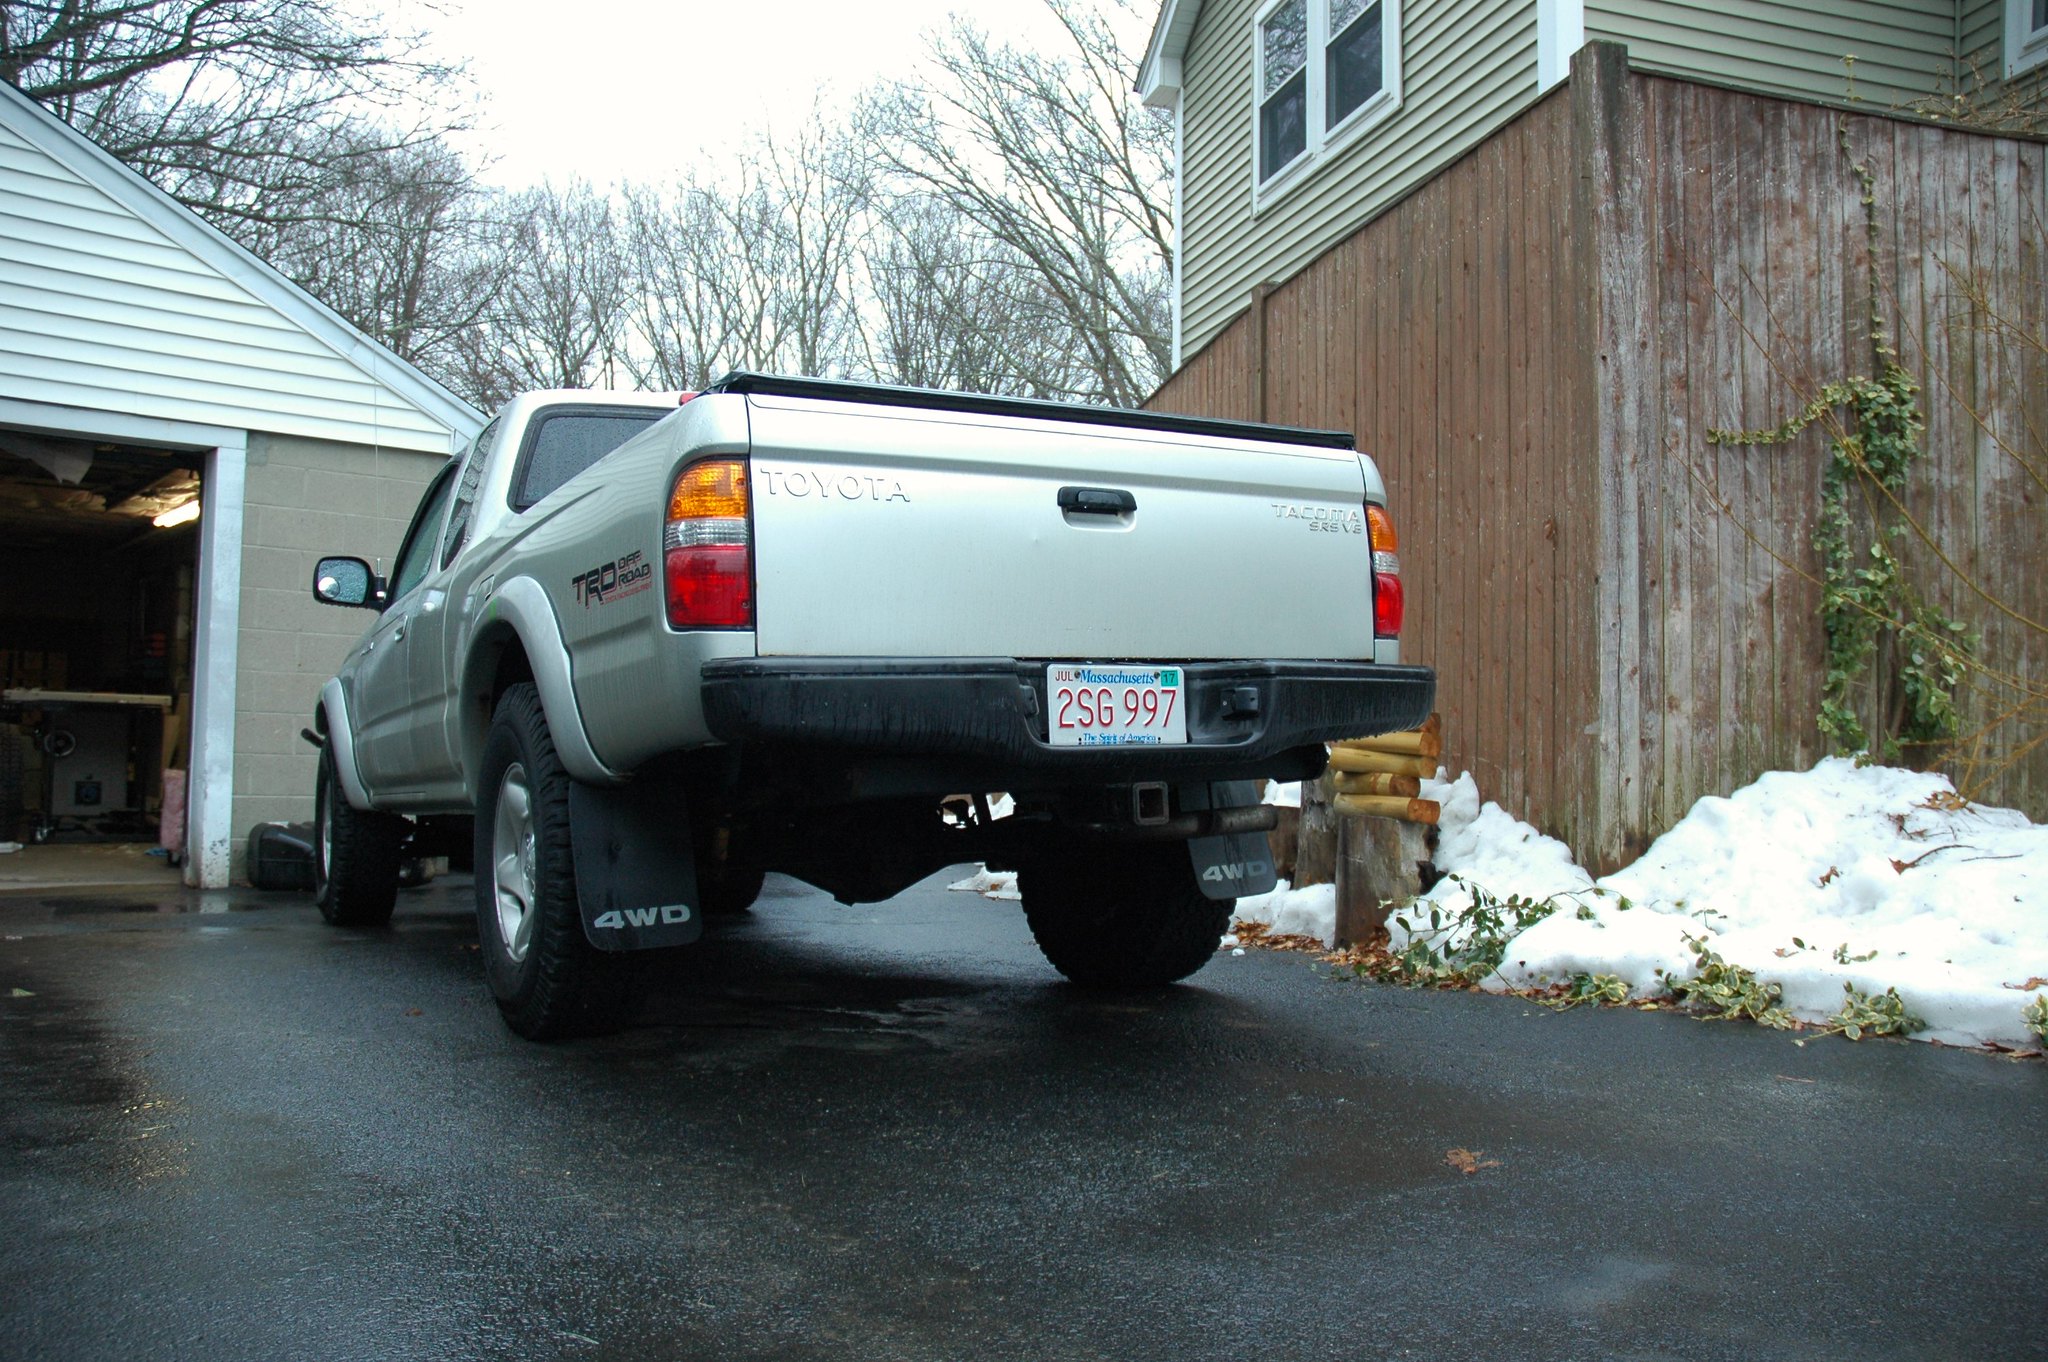
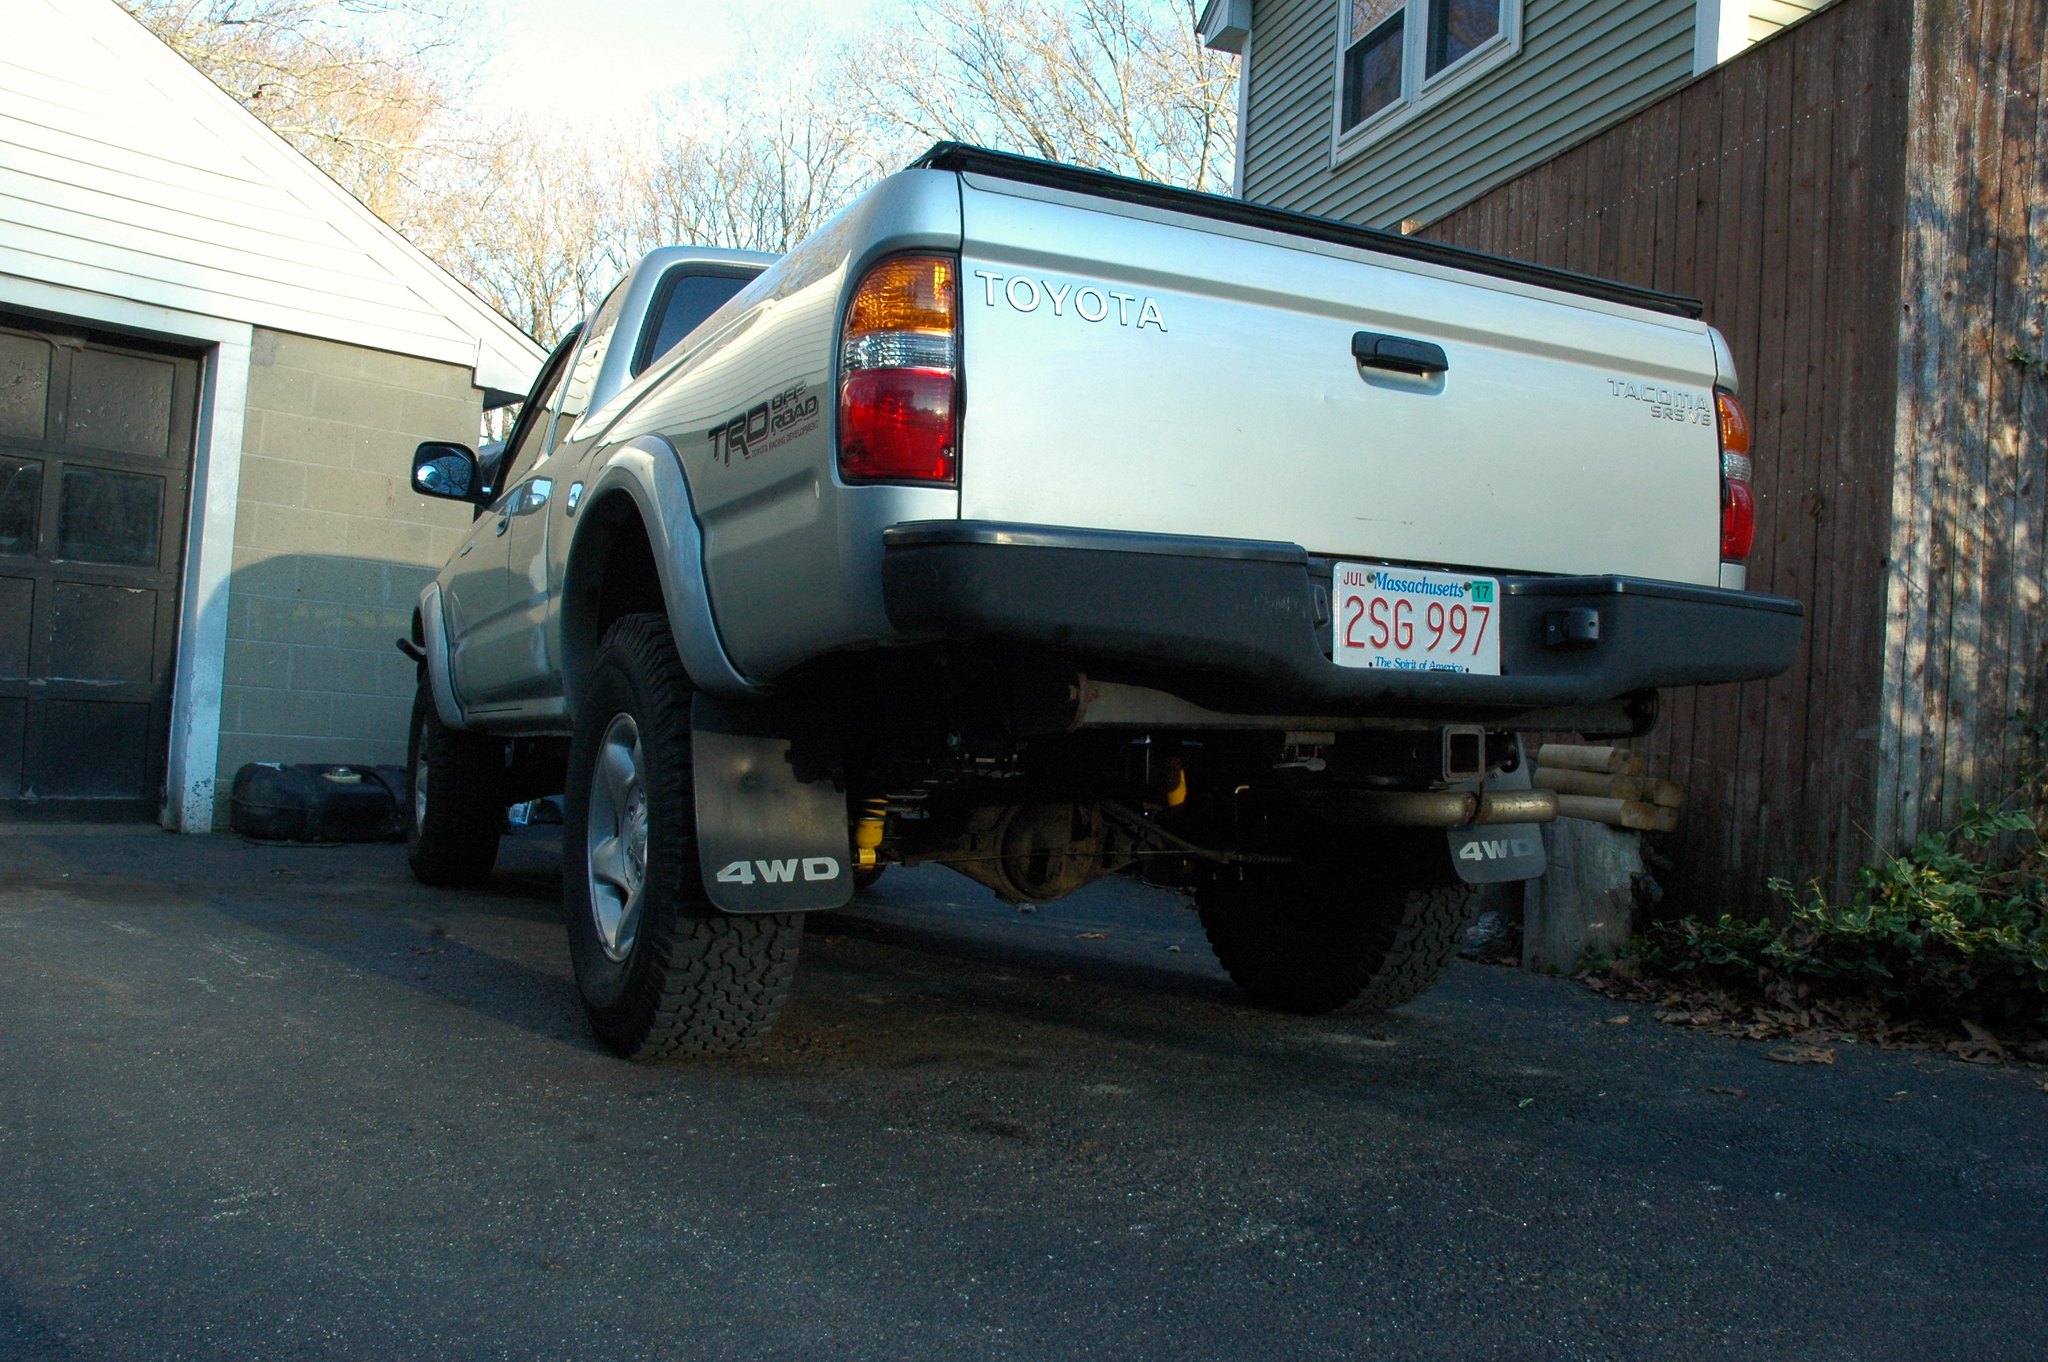
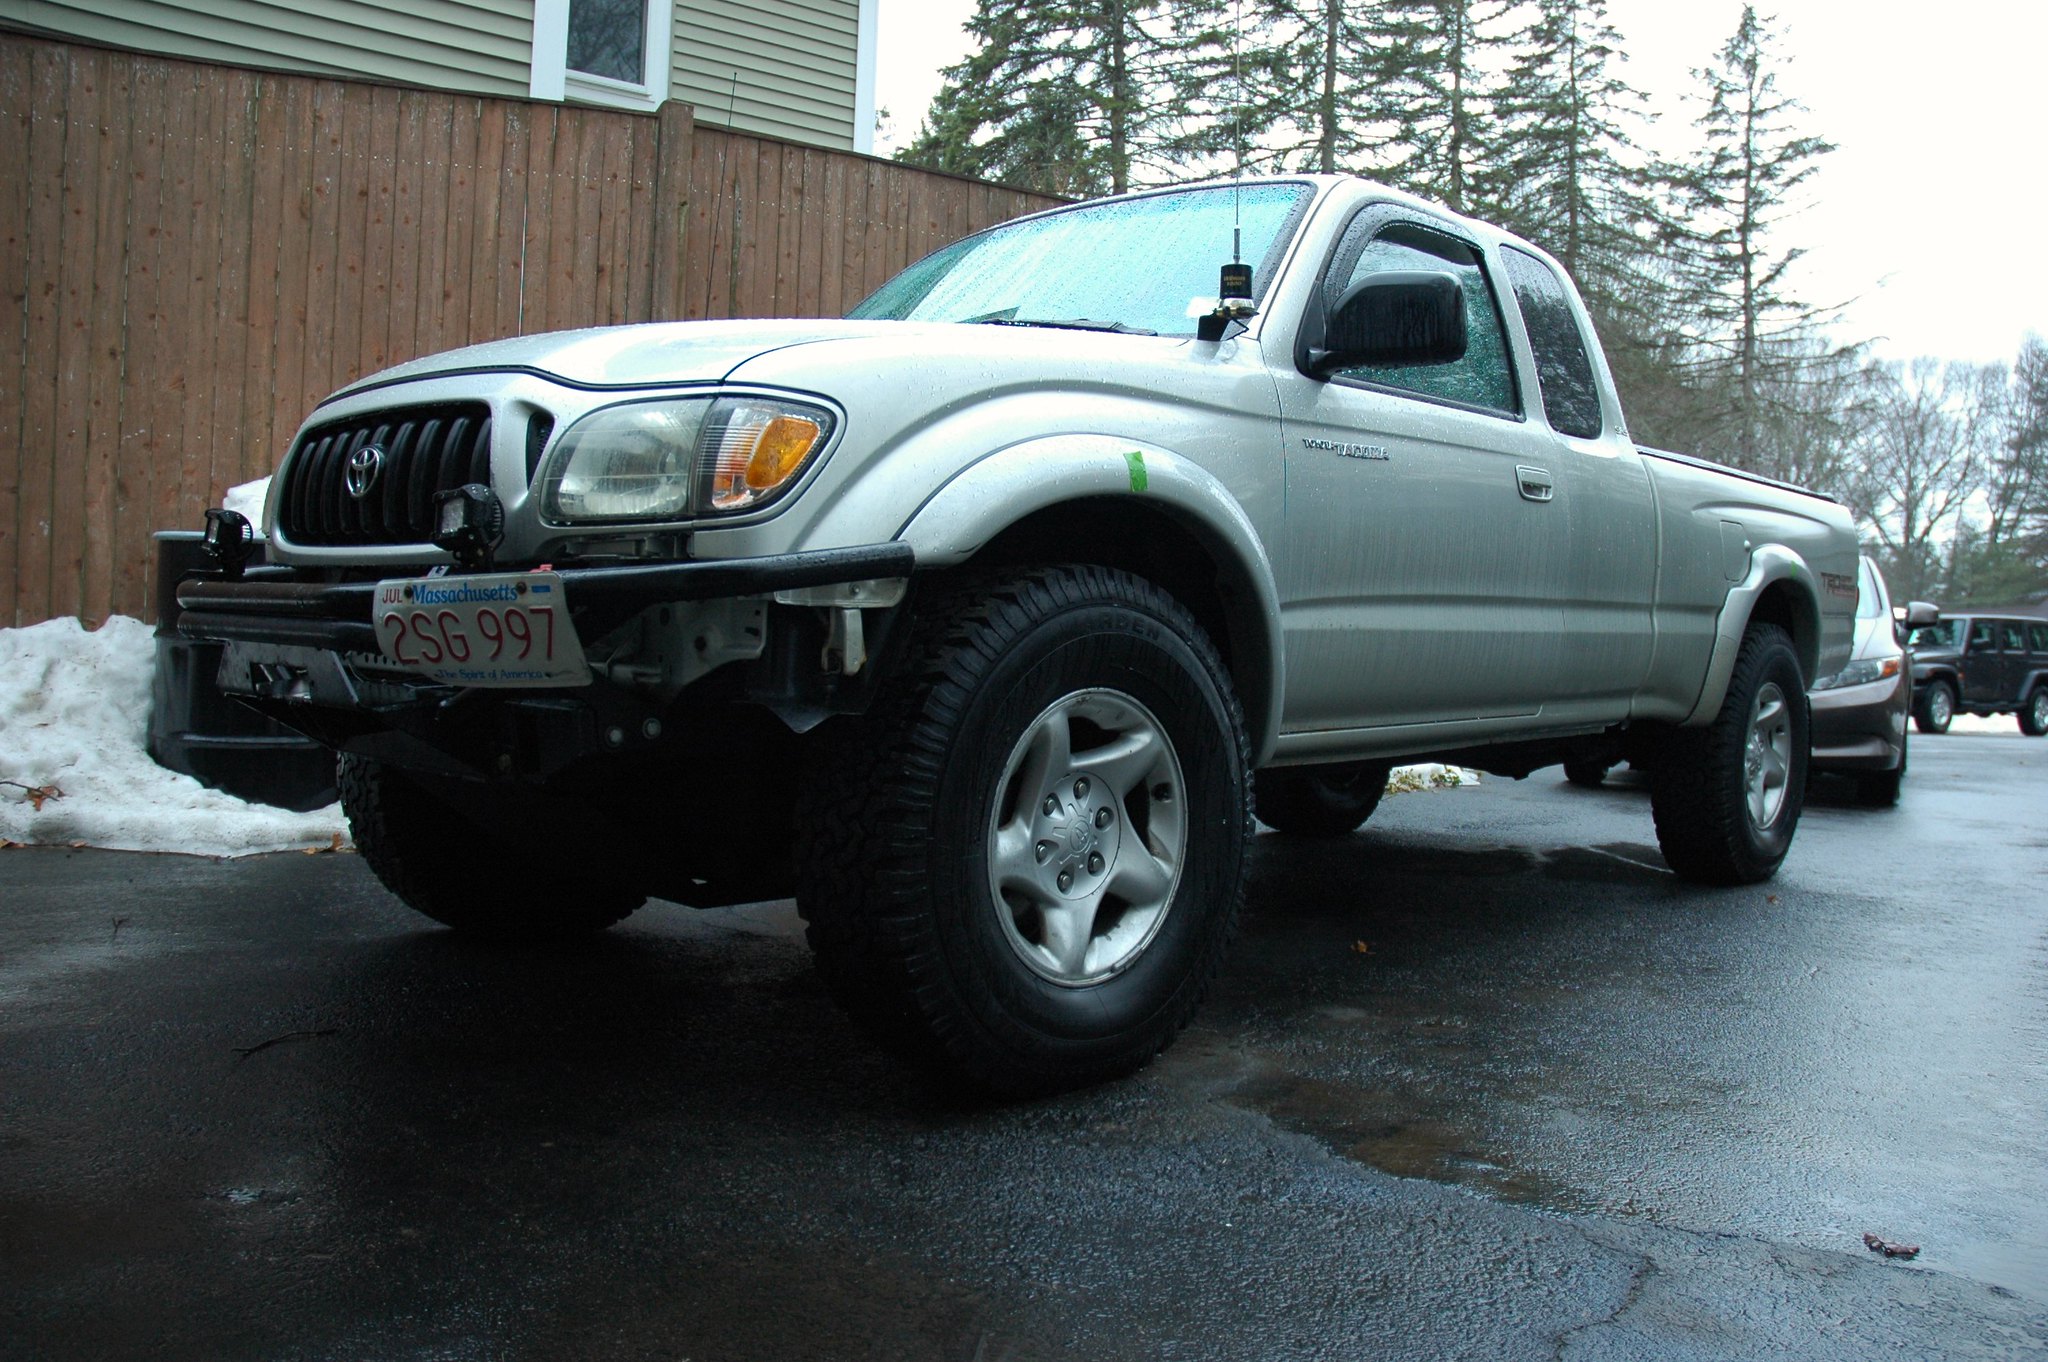
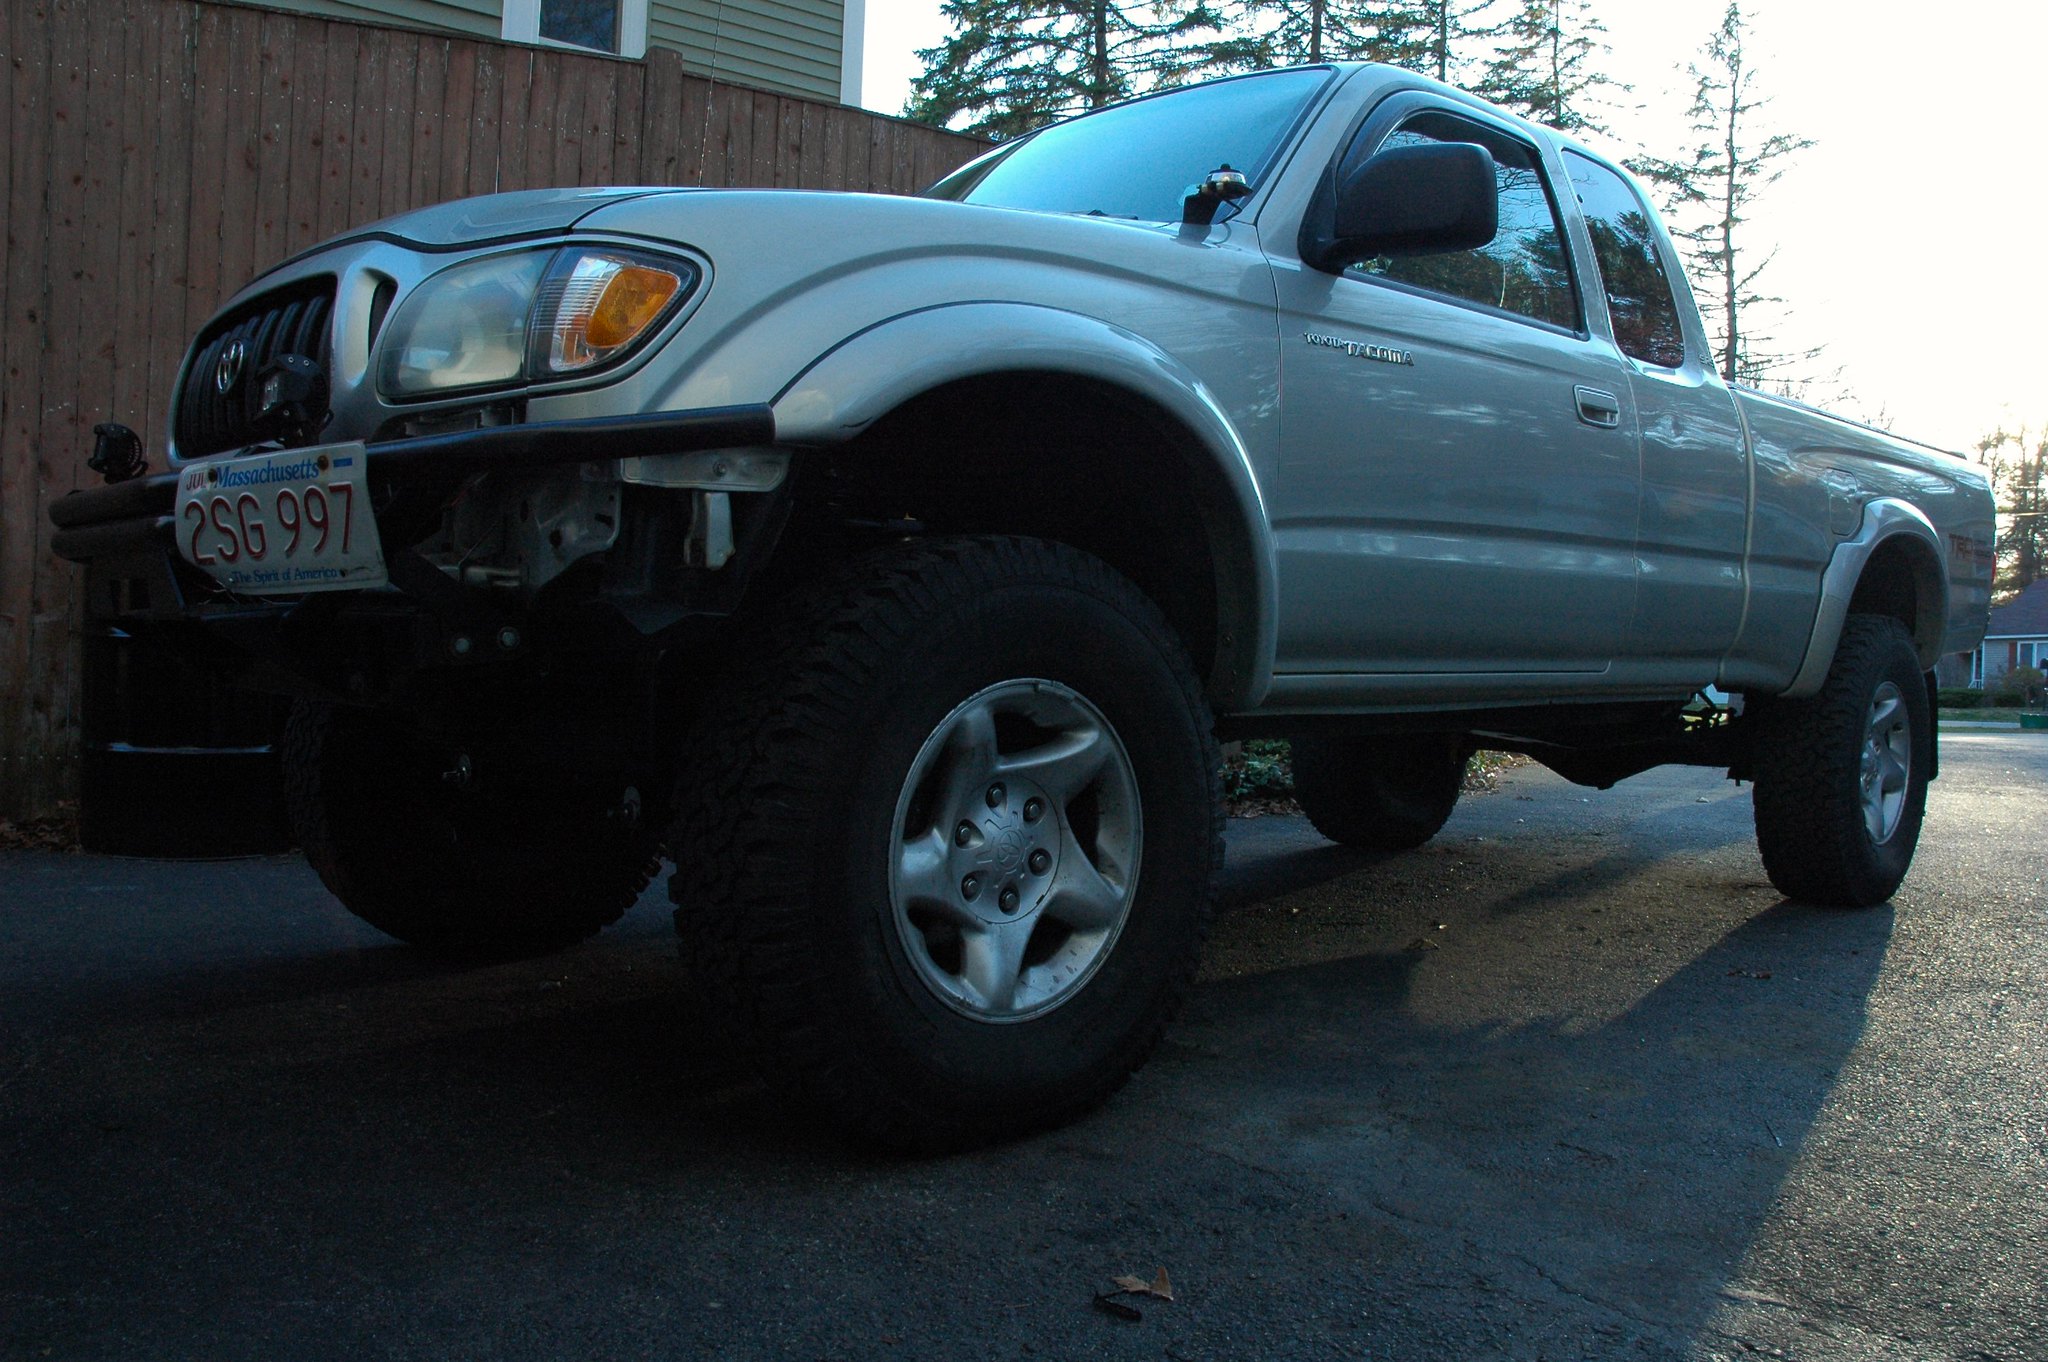
And just some random ones.
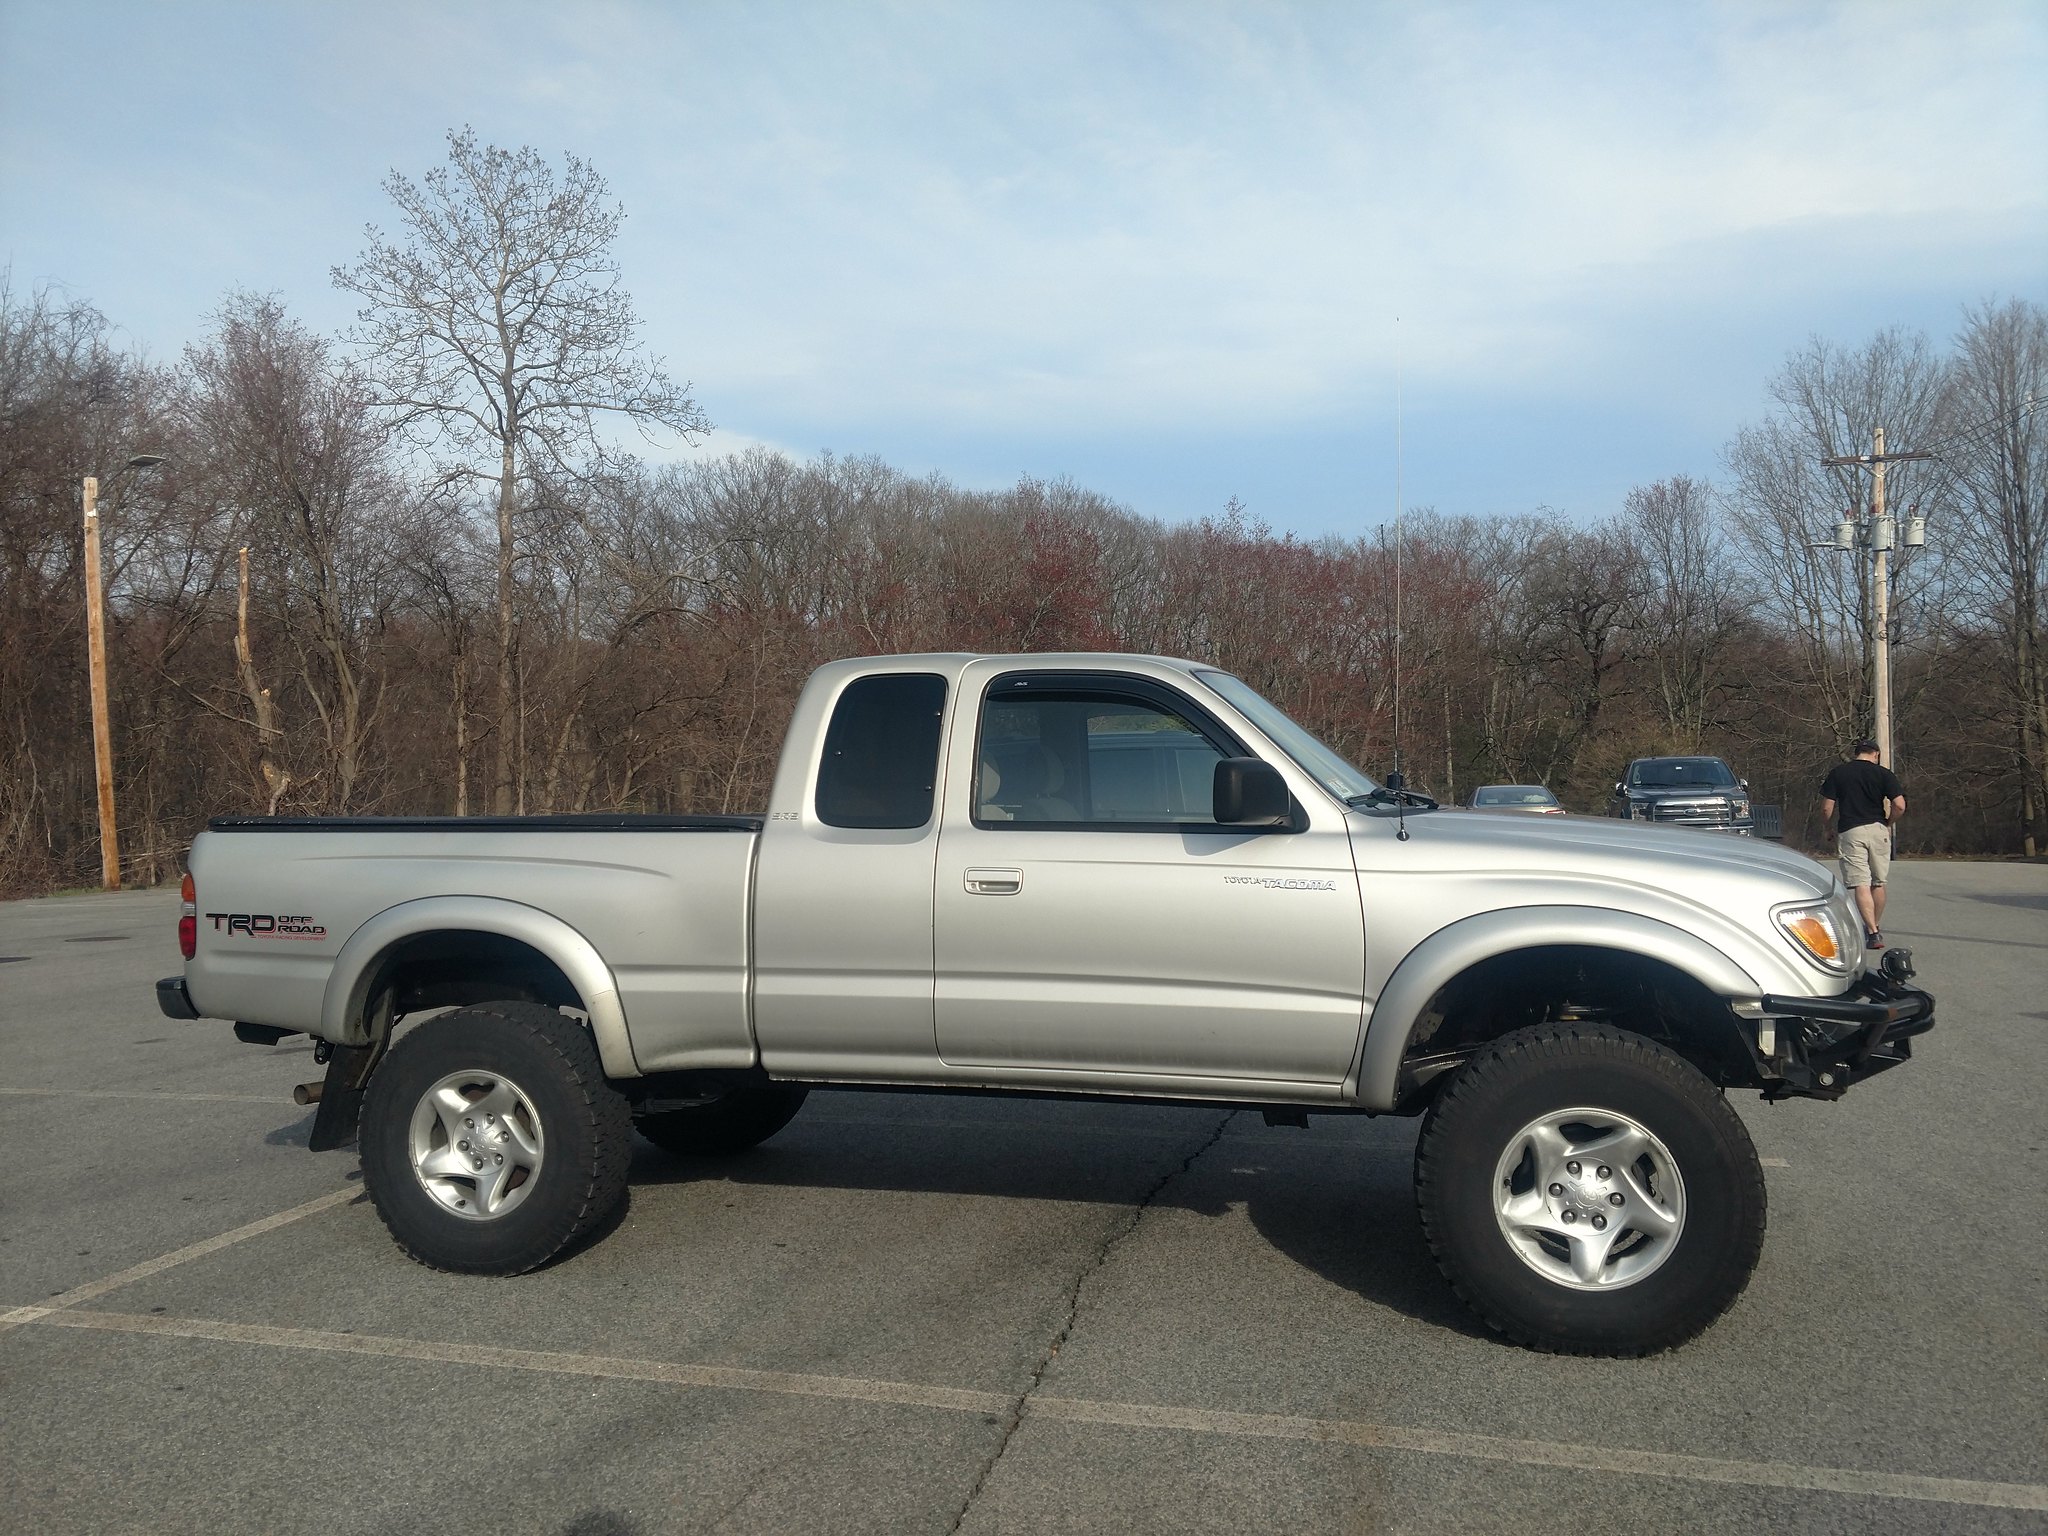
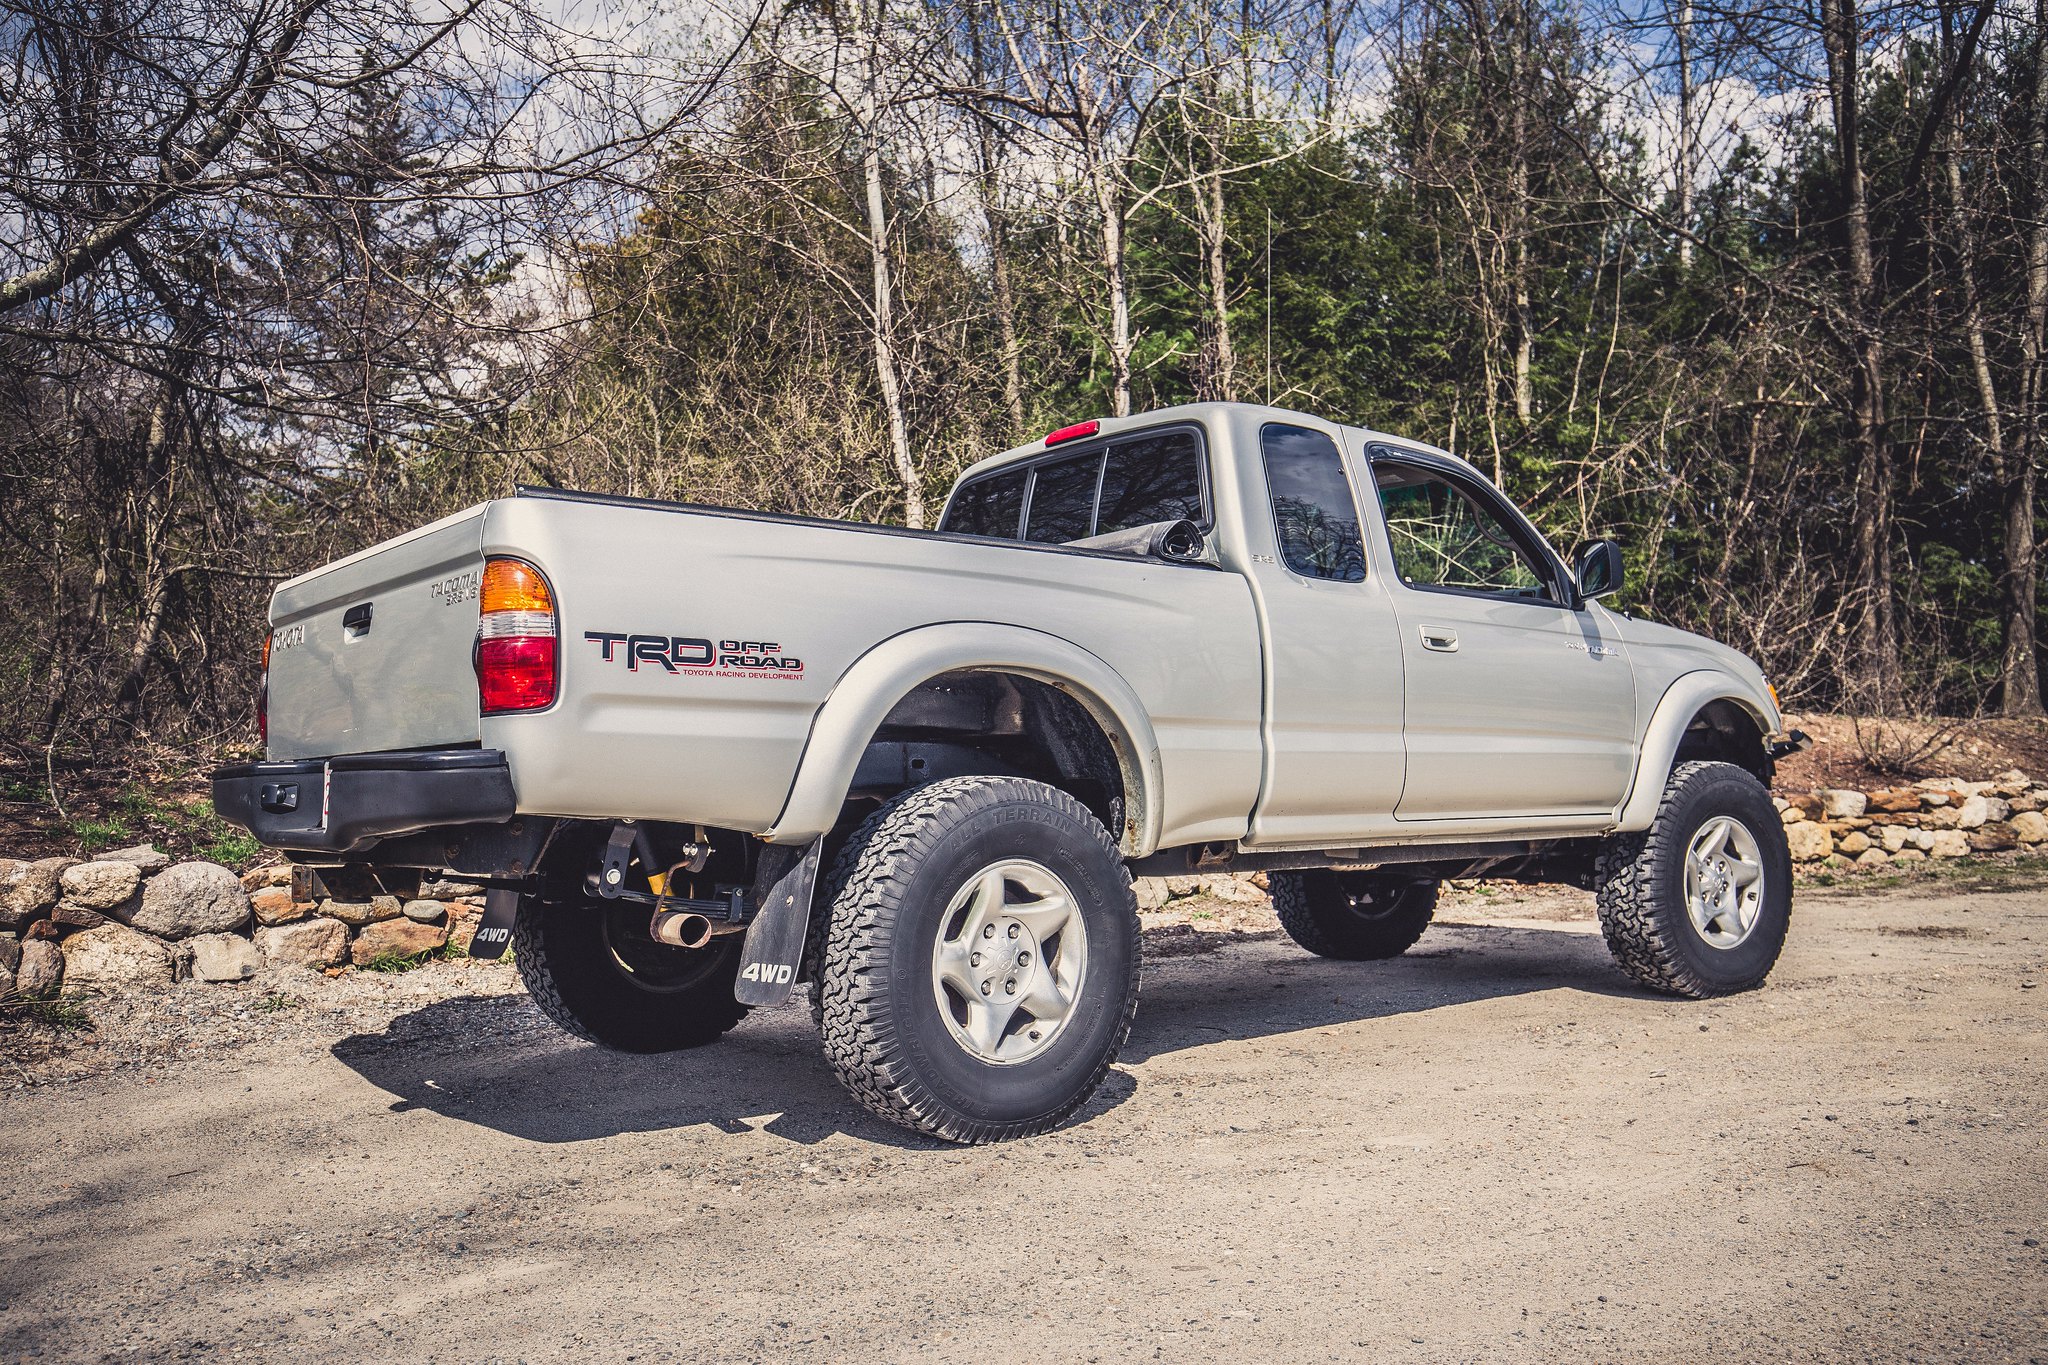
And then we hit some good weather. I was so pleased with the outcome (and I wanted to do something productive, but easier on the back) I clay bared and waxed it.
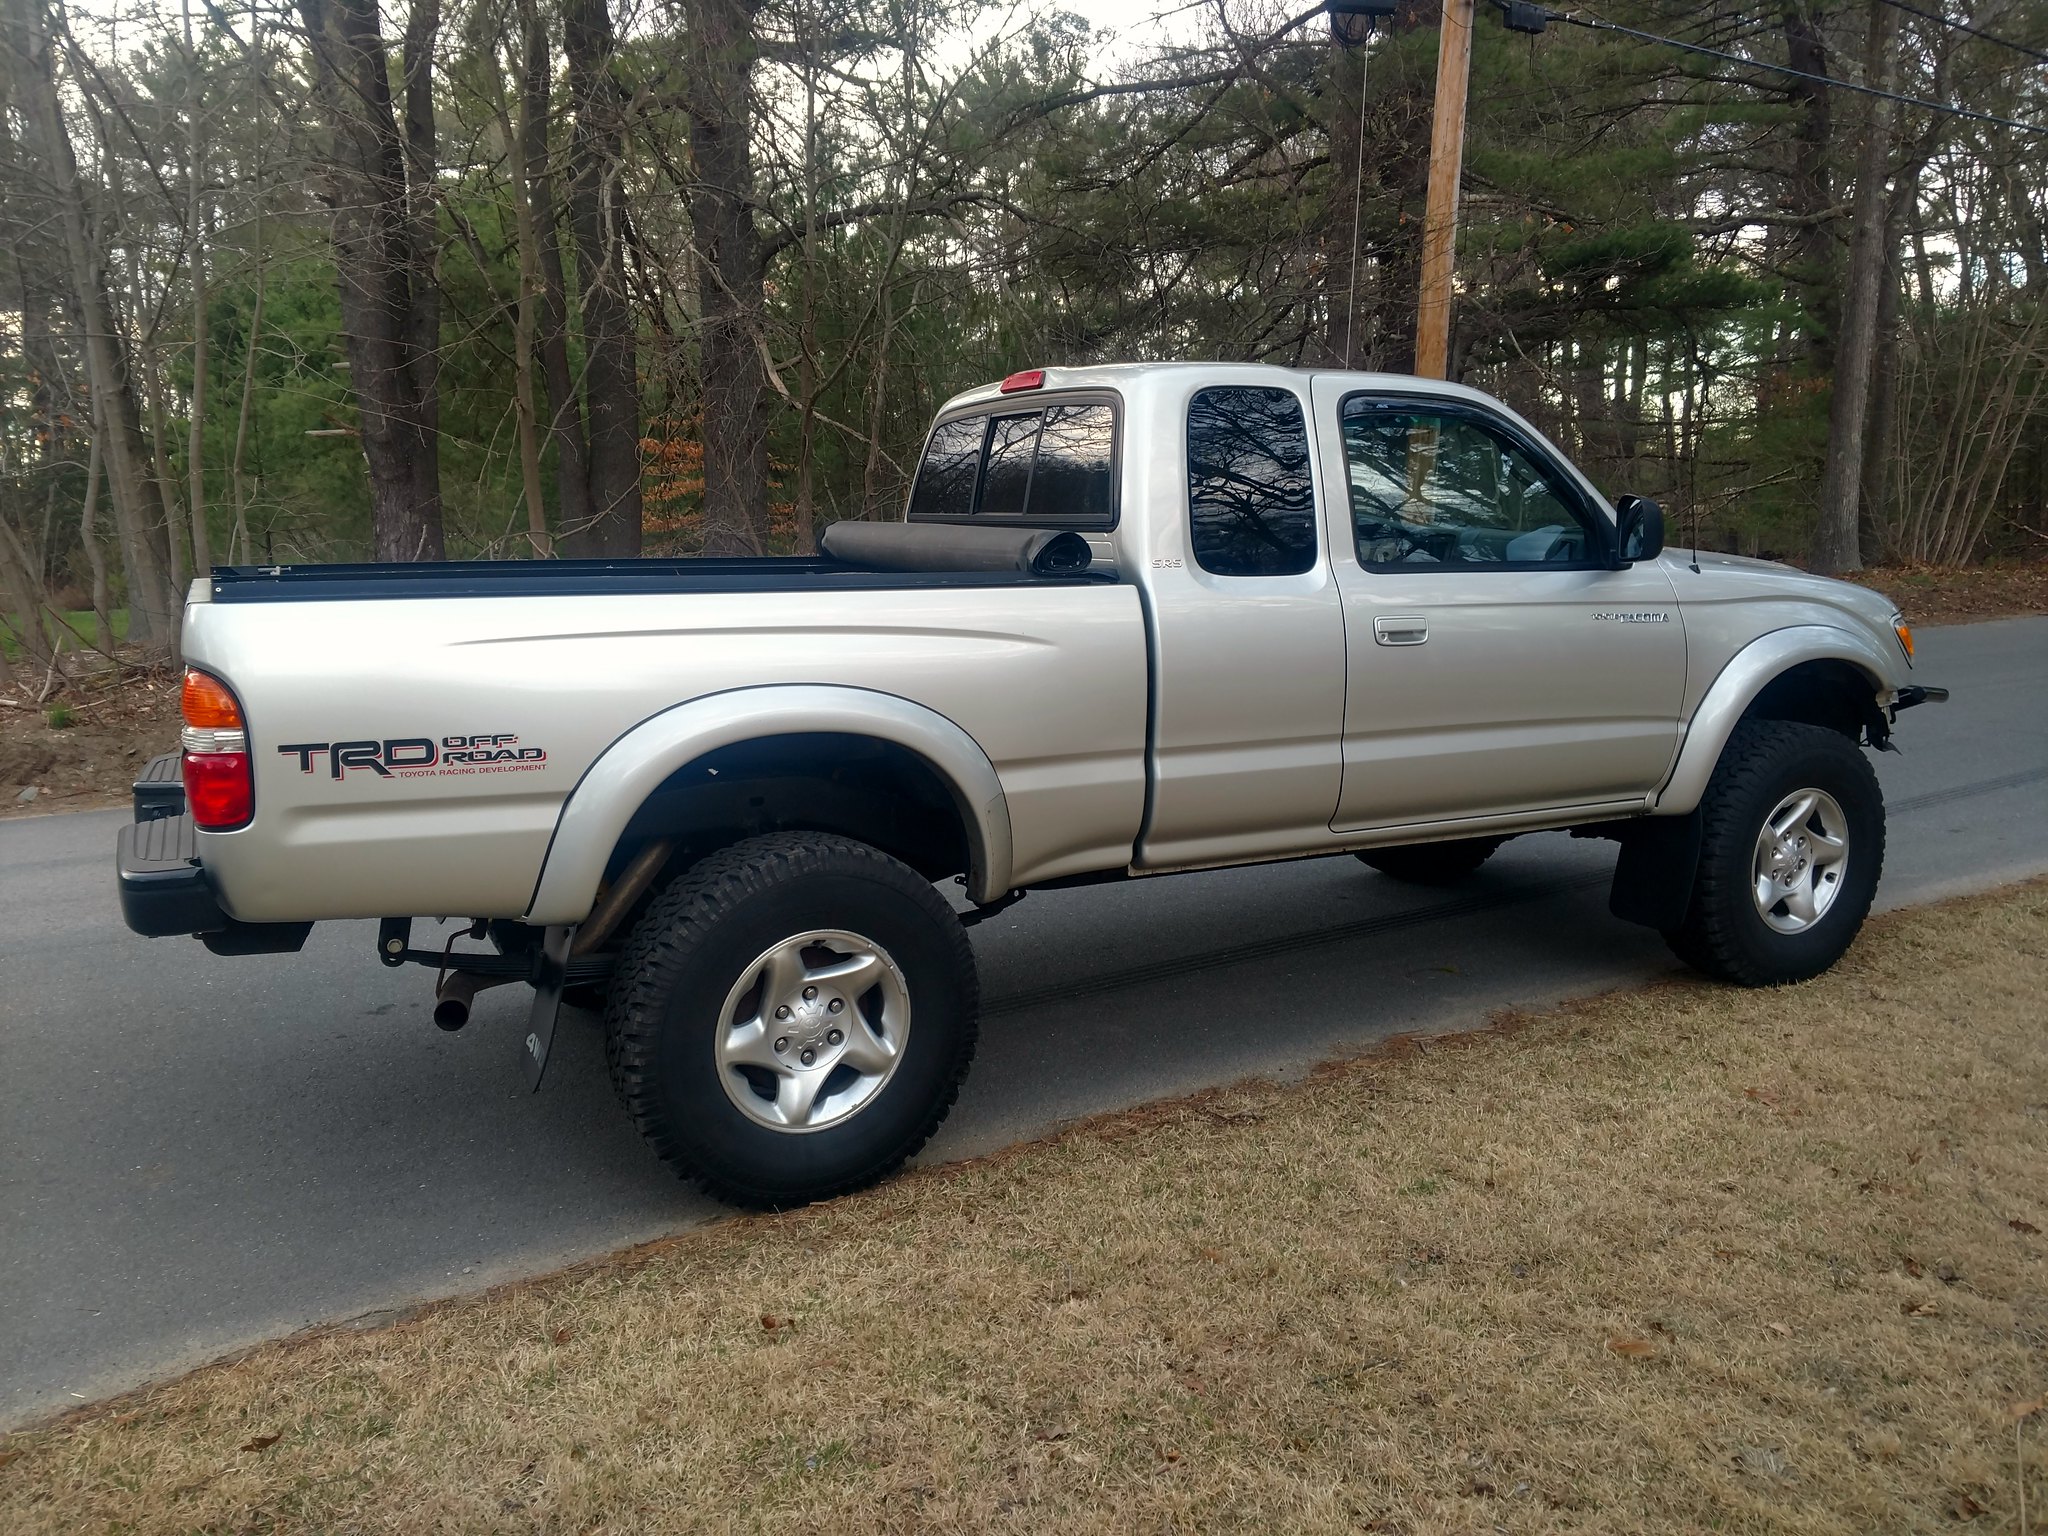
Hint: This was way more labor intensive than I remembered. It's been a while.
In the end, I measured ~4" actual lift at each corner. I also learned that the passenger's side rear corner of the bed sits high for some reason. I haven't figured that out yet. But I noticed because the truck still appears to sit crooked. And that measurement came out high both before and after. But the important thing is that the ride is 100x better. No more drifting lanes on the highway (well, after the alignment debacle). It's much stiffer, which is my preference. It doesn't rub anymore. I was able to reinstall the mudflaps. All in all, 10/10. I would definitely not recommend. Pay a professional. Lol. It sucked to do, but I am so glad it is done. Parts grand total including Home Depot paint and wire wheel was $2013.23. Timeline was 20 days from the before pictures to the wheels-down-late-night finished picture. To be clear, I had a couple minor issues to get sorted after that. I hinted at the alignment ordeal, that ended up taking a couple weeks to sort. I installed a wheel seal backwards by accident, so I had to do that twice, that added a few days to order the part and an afternoon to do it. So, all told...a month ish?
Of course, as soon as it was offically done complete finished 100%, the check engine light came on. :laugh: About 10 days before the inspection sticker expired too. Classic. :thumbup:
The truck has about 180,000 miles at the time of the lift. The suspension was probably not original? But I don't really know. It was tired, but not 180k-miles-tired. The rear leafs were curved down on flat ground with no load in the bed. I had previously replaced the tires with what I had read was the largest size that would fit on stock suspension without rubbing. The front tires rubbed. I had removed the front mud flaps so the tires wouldn't rub on the bolt heads that hold them in, but it didn't entirely eliminate the issue. On the highway, bumps and bridge expansion joints were sketchy. The truck had a tendency to drift half a lane over bumps at speed. It was also very....squishy, for lack of a more descriptive word. The shocks weren't totally spent; they did dampen the bumps, just not as much as I wanted.
So I pieced together a kit. I sourced parts from all over; Toytec, Amazon, Rock Auto, Toyotapartsdeal.com, Autozone, and Home Depot. Home Depot was just some consumables stuff; primer and a wire wheel. Initially, I just wanted it to be a bit taller, and to have better shocks. There's a few ways to do this. Since the rear leafs were so old, and some are prone to breaking, I ruled out spacers and Add-A-Leaf kits as viable options. I decided I'd replace the entire leaf packs with Dakar leaf packs from Old Man Emu. Here's how UPS delivered them :laugh::

This required longer U-bolts to be ordered. And I'd read great reviews of Old Man Emu with regard to their front springs as well as their shocks, so I went with them for all 4 corners. That was the basic plan. As I started shopping (and again later, after I started working), the "lift kit" grew in scope. I figured that the leaf shackles might be a pain to remove (or possibly require cutting), so I wanted to have new ones on hand in case. There was a set of shackles that were 3-position-adjustable and incorporated ~1" lift for cheap, so I ordered those. That required bushings; I decided to go with polyurethane and deal with the squeaking. Well that pretty much rounded out everything in the rear end. The front saw a lot more scope creep...
See, when you put a lift in these trucks, it's pretty common to run into alignment issues if you retain the stock upper control arms. I wanted to have adjustment there to get it dialed in proper because I intended to do this right. I found a pretty awesome set from SPC that I added to my shopping list. These include poly bushings and upper ball joints.


Well, since the upper ball joints would be replaced, and the lowers were reasonably cheap, it felt weird NOT doing them, so those got added. Then I figured if it was all going to be apart anyways I'd be a fool not to do the wheel bearings. Besides, the passenger's side one was making noise already. I found a set of weld-on gussets to help beef up the steering knuckles for cheap, too, so I figured what the hell, right? Besides, although they are forged parts, the design of the knuckles seems to have a questionable area near the upper ball joint. It probably wouldn't break, but it would be catastrophic if it ever did. The gussets give me some peace of mind. I don't intend to baby the truck. To help preserve the front CV joints and boots, it is recommended to lower the front differential, so I ordered spacers and hardware for that. Old Man Emu also makes an exhaust drop bracket for the exhaust pipe end near the leafs. I've read mixed reviews on this part; some say it works, some say it's a waste. Again, I'm trying to do everything "right", and it's about ten bucks, so I opted to give it a shot. I also ordered a 5mm spacer for the driver's side front coil spring. This is supposed to help level the truck side-to-side, to compensate for driver and fuel weight. I also noted that the driver's side sat a little low before beginning the work. "Lastly", I threw in lower control arm bushings because what the ****, everything else will be new. All told, this is what I set to work with:

So I got to work on documentation. Keep in mind that this truck has probably spent its whole life in New England. The pictures that follow show some pretty gruesome imagery of rust. I was aware of the state things were in before I set out, and I attempted to abate it wherever possible, to the best of my ability, while I was in there. This also meant that I set aside a few weeks to accomplish the work. First I documented the height of the truck. I marked each wheel arch with a line on tape to get a consistent before/after measurement. I also marked the ground and my tripod to try to get similar before/after photos, for comparison. I think I'll post those at the end for easier visualization.
Here's what I was up against when the wheels came off and the truck went up into the air:


****ing gory. But the important bits are solid. The frame in this truck was replaced under the infamous recall. It's in great shape. I took the first "real" part off (the dust cap) and was shocked:

It was so clean! I have never wrenched outside of New England. Sometimes I get really frustrated. I start to think that I have no idea wtf I am doing, even after 20+ years, because it takes for.ev.er. to get anything done. Rust is a serious issue; I feel so sorry for local mechanics. I couldn't do this full time; no way. I worked this project evenings and some weekends after my "real job". I could do maybe a couple hours a night. Working outside because the trailer is inside the garage, and it's not weather-ready yet.
So, I've done a lot of reading about various penetrating lubricants at this point, of course. I always have a few cans of PB Blaster in the garage. Before this project, though, I have always had a suspicion that it doesn't do anything to battle rust. I wanted to put it to some sort of test. I understand this is not at all scientific, and the results should be taken heavily salted. But I figured, knowing what I was up against, it would be a perfect opportunity to really be diligent about using it, and give it a fair try. I also have read that a 50/50 blend of acetone and ATF is supposed to be the holy grail of penetrant, better even than Kroil. So I made a batch of that too. I wanted to put them head to head and see if there was any truth to it.
After a few days, maybe a week, I got "everything" out:

I say "everything", because it was about this stage that I learned it is very common for the lower control arm hardware to seize in these trucks. This renders them essentially un-adjustable. Well that's a problem. It's also a problem because I wanted to take them out to clean them up a bit and they were just in the way of putting the new stuff in. Also, the top spring mount nuts were being difficult. Access is hard to show, but it's not that great:

The height is the issue; you can't really get a deep well socket on there. And my ratcheting wrenches are too "fat" to fit between the nut and the center "ring" thing. Anyway. Perfect application for PB blast and the 50/50 acetone/ATF mix. I put one product on one nut, and the other on a second. The third got both. If I remember correctly, these received the application at least a few days before attempting to remove them. Based on my research, most people recommend letting hardware soak overnight, at minimum, and longer seems generally accepted as better. When I finally got the nuts off, the threads of the studs were all dry. Neither product, nor the mixture of both, worked. Apparently rust is impenetrable. That said, I still wanted to give each a fair shake, like I said. I had up to this point used either and/or both on every threaded fastener. I continued to use them after as well. Every single bolt or nut came apart dry. Like I said before, I understand that the results are not really quantitative, there was no control, etc. etc. I did not apply the scientific method. But my anecdotal evidence shows that rust is impenetrable.
Anyway, frustrated, I continued. Thoughtfully, Toyota put a hex socket in the ends of the sway bar end link studs. That's great because the rust makes them round, and useless. As such, these had to be cut off:

So I added those to the list. So, previously I showed that the upper control arms and spindles were out. I wasn't reusing the upper control arms, which was great, but I needed to separate them. This was an epic battle for the ages. I knew this would be tough going in, so I had a ball joint press on hand. Brilliant, right? What a joke, that thing was useless. It's functionally a glorified C-clamp. Well, I actually "opened" the C from cranking on it too hard. It was very slight, but still noticeable. I bathed it in penetrating lubricant. I torched it innumerable times:

I smashed it with a sledge hammer so much that I bent the forging:

But as you can see there, the ball joint actually began moving. I was so happy I did a ****ing jig on the work bench. Many more sledgehammer swings and success:

My back was so inflamed I laid down and cried. Finally, I could prep for installing the gussets:

The bend made this one slightly funky, but it's fine. The ball joint has more than enough flexibility to compensate for the discrepancy.

Off-screen, I took it to the neighbor's and, with his gracious help, pressed out the bearing and then pulled the inner race off the hub. Part of that process required cutting off what was left of the brake dust shield, so I shopped around for a reasonable price on those (they were hard to find online, but Toyota gave me an astronomical price and a part number. shopping by part number was much more fruitful) and got them on order. It was about this time that I realized the seals are separate from the wheel bearings. So I got those on order also. The steering knuckle was crusty AF:

After a quick sandblast:

I threw in the upper control arms with minimal hassle:

The shock tower looks....shocked. :laugh: The order of operations is a little wonky here because of the way parts were arriving and such. I chipped away at what I could when I was able to and/or when I felt up to the challenge. The next order of business was removing the lower control arm. I put this off for a few days because I knew it was going to suck. The mounting hardware is a little funky; I was unfamiliar until I saw it all apart. There is the bushing, obviously, with its integral metal sleeve. Then through that sleeve and the frame-side ears, passes another sleeve, with an eccentric cam washer attached to it, and a nut. Then, from the other side of the mount, installs a bolt, also with a cam washer on it. So when it's not seized, you can loosen the bolt to adjust the camber by rotating the sleeve/nut thing, then snug the bolt down. It's hard to picture, I'm sure, but the way it's designed allows the bolt to be tightened without throwing off the camber adjustment. It's pretty slick, actually. Except that the bushing sleeve and the camber sleeve like to seize together. So I thought I was home free when the bolt came out easily. Joke was on me though. For two reasons, actually. First, I soon realized the sleeve was stuck. Second:


For whatever reason I don't understand, Toyota installed the bolts from the rear instead of the front. So you can loosen them no problem. But you can't remove them (and subsequently can't remove the control arm) without removing the steering rack. I rage quit that day. When I calmed down, I got a set of poly steering rack bushings on order because I may as well, right? So I set about removing the steering rack. No big deal, right? I forgot to mention that I DO have the proper service manual for this truck, and I referenced it heavily for everything. I don't mean to give the impression I'm just some hack with no idea what I'm doing. I just didn't "believe" it when it said remove the steering rack in the control arm procedure. But yeah, so, here we are:

The flip side of rusty fasteners. The darker side. Most often, rust makes stuff stick together. And that sucks. But sometimes, it makes stuff spin free that isn't supposed to. For that, I absolutely despise when hidden weld-nuts are used. Because it's pretty much inevitable that they will come loose and **** you over. That's what you see here. It's a captive nut inside the engine/differential subframe/crossmember thingy, into which threads one of the steering rack bolts. Though not completely hidden (I was able to see it through that hole by sticking my phone up in there and taking a picture), access was limited to "oo I can just barely touch it with the tip of my finger!". The kicker was that the bolt started to come loose before the nut spun. So my options were have an eternally-loose rack (heh) or cut it and hope to the old gods and the new that I could find this definitely special fastener somewhere and be able to install it. Just before I quit for the day, I noticed that there was a hex socket in the stud end. Thinking back to the sway bar end link ordeal, I thought, "No way this will work, but I have to try it." I was so shocked that it actually worked, that I stopped to take a picture to send to a friend:

So with the rack out of the way, I was able to get the control arm bolt out and get a better picture of the sleeve that was stuck in there:


Maybe it's a little clearer for you now. I dunno. Lots of delicate cutoff wheel work later, I did another small victory dance. I finally got the control arm out. It didn't last too long, as next I was faced with the challenge of getting the bushings out. Again, thanks Toyota, they used flanged bushings, so it's not a straightforward process of pressing them out (well, not without special fixturing that I don't have, anyway). After I torched, pressed, hammered, and screamed at the bushing centers, they politely fell out.

My Sawzall battery sucks, so I hack-sawed the outer sleeve by hand. Then I torched and hammered and hammered and hammered the sleeves out. I did a quick wire-wheel-over both parts before priming and painting them black:

Once all the second-round-order parts came in, I was able to install the brake dust shield, wheel bearing, seals, and hub and it was finally ready to go back in.

I was pretty pleased once it was all together. It was a drastic improvement over what came out. At reassembly, I found a problem. I wish. AFTER reassembly, I found the problem when I put everything together and the brake rotor would not spin. What I found was that the axle was contacting the new lower ball joint. At the time, I had no idea the depth of the rabbit hole I was falling into. I thought this was odd that there would be an interference there, because it was a result of the lower ball joint casting being clearly wrong. I had ordered Detroit Axle brand ball joints from Amazon. They were cheap, they were greasable, and they had a good quality finish on them. I want to make it clear that, aside from the issue with the part dimensions, it seemed like a great product. Which is really unfortunate, for reasons that will become clear in a moment.
I scratched my head a bit, and sent off a polite email through Amazon to the vendor to say, "Hey this part doesn't fit, but I think the issue is systemic, not just a one-off screwed up part." Or something to that effect. Because if a casting is wrong, they must all be bad parts, right? Anyways, I wanted to help them out, because it seems like a great part, and I wanted exactly that, but in a version that would fit my truck. I was put in contact with (what I think was) a Detroit Axle employee (instead of an Amazon person), and I sent a long-winded, but professional e-mail explaining what exactly the issue was, and attached a few pictures of the ball joint, so they could understand, because it's hard to explain in 240 characters that Amazon permits or whatever. So they got back to me and they were apologetic and they explained that I must have been sent ball joints for a 2WD, and I have a 4WD. They sent out replacements quickly. Great, thank you. So what I received shortly thereafter were definitely 2WD ball joints. They have a completely different design, with a different number of fasteners. Not even close to working for me. So I called Detroit Axle and (obviously connected with someone other than whom I sent the e-mail to) I was like look this is what has happened so far, and today I received what I'm positive are 2WD joints. I have 4WD joints, and they install, but they don't fit. I was struggling to explain the issue, but I felt like if I could just get them to understand then they would realize what's going on. So they told me, threateningly, their solution. They requested I send back the latest set of joints (I'd already sent back the first set), and they would send me a third set. If this third set still didn't work, it would be up to me to pay for all the shipping costs. The whole thing left a really bad taste in my mouth, and so I decided to just go with AutoZone ones. Held side-by-side (AutoZone is on the left, Detroit Axle on the right) you can see the ball socket "well" is too tall on the Detroit Axle part:

I sent them this, and many other images with a ruler and etc. etc. They just didn't get it. I didn't want to be on the hook for their incompetence, so I gave up. I moved on. I ordered greasable lower control arm bolts IIRC, made by Moog. My hope is that they don't seize like the OEM ones. They aren't quite on par with the OEM ones, but, whatever. I'd rather be able to remove them in the future if the need arises. I installed them from the forward side, so that if I DO need to remove them, I can do so without touching the steering rack:

I had to trim ~1/4" off the end of the bolt, to eliminate the interference with the steering rack boot. No big deal. Oh, yeah, since I replaced literally every other bushing up front at this point, I ordered and installed sway bar bushings:

It felt wrong to leave them untouched. :laugh: At this point, finally, it was just a matter of reassembly. And it was actually quite easy. When I had everything apart, I chased every thread for which I had an appropriate tap or die, and I applied anti-seize compound before putting them back in. PLZ don't hate on my booger welds:


The steering rack went back in with its new bushings once I got the passenger's side control arm hardware out of the way:


Annnnd another ****ing captive nut broke loose. Another inaccessible one. I hate these things, did I mention that?
Here's a terrible picture of it:

Whatever, I was angry, sue me. :laugh: I used the wrench to pry the subframe slit opening a little wider, and shoved the wrench in and luckily was able to catch the nut with it. IDFK. Whatever, it tightened. Success. Then I jizzed all over it:

Just kidding, that's Fluid Film. I'm not sure if it's worth it or not yet. :thumbup::thumbdown:? I've received only great reviews from others, but to be honest, a few weeks after applying it, everything appears dry again. I've used it on my Jeep, too. Do you have to apply it that frequently?

I used a higher-power welder for the other gusset and the welds came out a little better:

Then I dropped it off for sandblasting (which never happened; the guy who said he'd do it is a total slacker) and started on the rear. I was a little scared of the rear because of the crustiness, but I was hopeful.

Here you can see that I've already replaced the gas tank skid. The OEM one was hardly there when I bought the truck.


For those of you from elsewhere in the world, this is pretty typical New England:


I nearly completed disassembly and reassembly in one evening. It was amazing.


I was so distraught when I saw that the new leaf packs curved down like this. It was one of the major motivators for embarking on this adventure in the first place.

I later realized that it was just doing that because the other side was jacked up. I'm an idiot. The shackles were kind of a bear to tighten because the bushings were so tight, but I greased the **** out of them and cranked them down.
Then I moved on to the passenger's side front. This part's kinda boring. We already went over all the major sticking points. It was pretty much the same on this side, only I at least had a better idea of what to expect at each point in the process. Go straight for the big guns each time, and don't waste time trying to get things apart with the "right" tool.

Here's all the new stuff ready to go in:

Once you get to this point, wrenching is easy. Probably what I imagine it's like in the rest of the world. It's getting to this point that can be an absolute nightmare. I ended up going late that night because I was so close I could taste it. I wanted to be done. I didn't necessarily rush, but I just kept going. I was so pumped, and also pretty pleased with my phone's night-shot-no-flash-handheld capability:

Here's the final pile of carnage:

And here's the before/afters:


And just some random ones.


And then we hit some good weather. I was so pleased with the outcome (and I wanted to do something productive, but easier on the back) I clay bared and waxed it.

Hint: This was way more labor intensive than I remembered. It's been a while.
In the end, I measured ~4" actual lift at each corner. I also learned that the passenger's side rear corner of the bed sits high for some reason. I haven't figured that out yet. But I noticed because the truck still appears to sit crooked. And that measurement came out high both before and after. But the important thing is that the ride is 100x better. No more drifting lanes on the highway (well, after the alignment debacle). It's much stiffer, which is my preference. It doesn't rub anymore. I was able to reinstall the mudflaps. All in all, 10/10. I would definitely not recommend. Pay a professional. Lol. It sucked to do, but I am so glad it is done. Parts grand total including Home Depot paint and wire wheel was $2013.23. Timeline was 20 days from the before pictures to the wheels-down-late-night finished picture. To be clear, I had a couple minor issues to get sorted after that. I hinted at the alignment ordeal, that ended up taking a couple weeks to sort. I installed a wheel seal backwards by accident, so I had to do that twice, that added a few days to order the part and an afternoon to do it. So, all told...a month ish?
Of course, as soon as it was offically done complete finished 100%, the check engine light came on. :laugh: About 10 days before the inspection sticker expired too. Classic. :thumbup:

Rob Cote- Moab Dessert
- Posts : 673
Join date : 2012-07-11
Age : 36
Location : Ipswich, MA
 Re: Tacocat is a palindrome
Somebody has had their hands full! Great job Rob it looks soooo much better.
Easy with the torch there Sparkey!! hahaha
Easy with the torch there Sparkey!! hahaha

Mark- Rubicon Trail
- Posts : 1300
Join date : 2011-12-10
Location : Haverhill, MA
Page 3 of 3 •  1, 2, 3
Page 3 of 3
Permissions in this forum:
You cannot reply to topics in this forum|
|
|

 Home
Home