
 Portal
The Oreo (T.J.'s YJ)
Page 4 of 11 •  1, 2, 3, 4, 5 ... 9, 10, 11
 ![]()
Re: The Oreo (T.J.'s YJ)
![]() THOOPY3 5/24/2013, 8:42 am
THOOPY3 5/24/2013, 8:42 am
Slight update: drove it to work again a little while ago, no steam to report of. I checked the heater hoses and they are both hot as well, so everything seems normal there. The gauge did climb to right about 210 and then cycle back down while driving around 60-65 the whole way. I checked the bottom hose and it still isn't getting warm, and with the gauge cycling I'm moving away from the thermostat being the cause.

THOOPY3- Moab Dessert
- Posts : 626
Join date : 2012-03-13
Age : 34
Location : Woburn, MA -

Re: The Oreo (T.J.'s YJ)
![]() Mark 5/24/2013, 1:35 pm
Mark 5/24/2013, 1:35 pm
When you say lower hose is not hot, you mean not as hot as upper?
Mark- Rubicon Trail
- Posts : 1300
Join date : 2011-12-10
Location : Haverhill, MA
Re: The Oreo (T.J.'s YJ)
![]() THOOPY3 5/24/2013, 1:54 pm
THOOPY3 5/24/2013, 1:54 pm
I'm praying it's not the core and that maybe a door somewhere is broken, as my heater control lever has never worked since I've owned the Jeep. You have to move the control over by hand when moving from hot to cold, so it's possible whatever that issue might be is what's causing the erratic flow issue and everything else now that the weather is getting warmer.
Last edited by THOOPY3 on 5/28/2013, 12:13 pm; edited 1 time in total
THOOPY3- Moab Dessert
- Posts : 626
Join date : 2012-03-13
Age : 34
Location : Woburn, MA -
Re: The Oreo (T.J.'s YJ)
![]() THOOPY3 5/27/2013, 11:29 pm
THOOPY3 5/27/2013, 11:29 pm
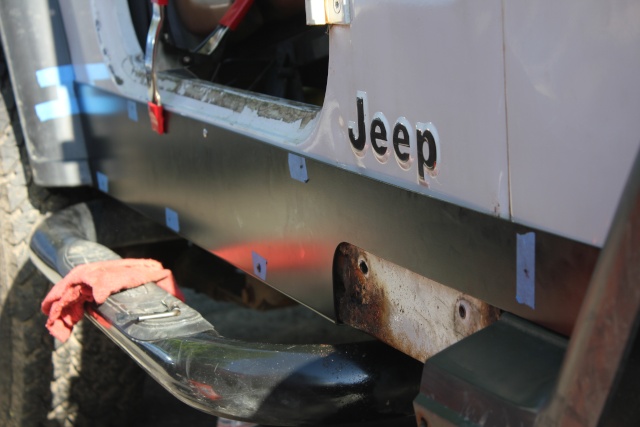
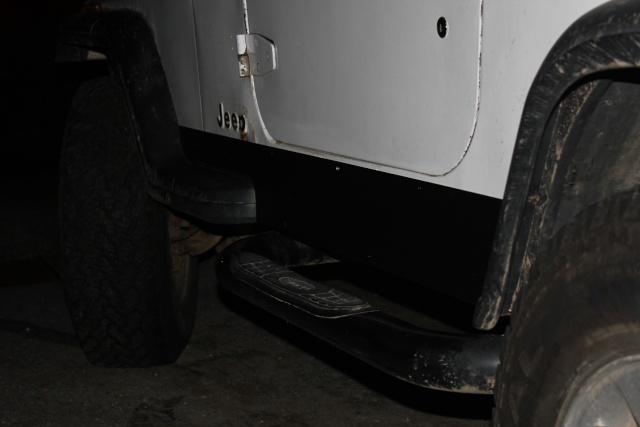
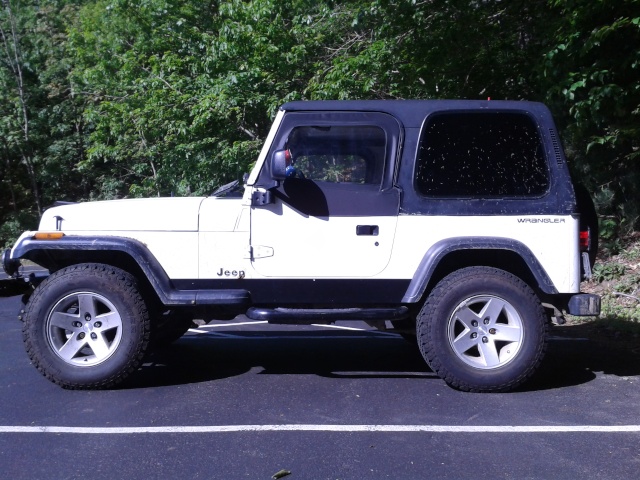
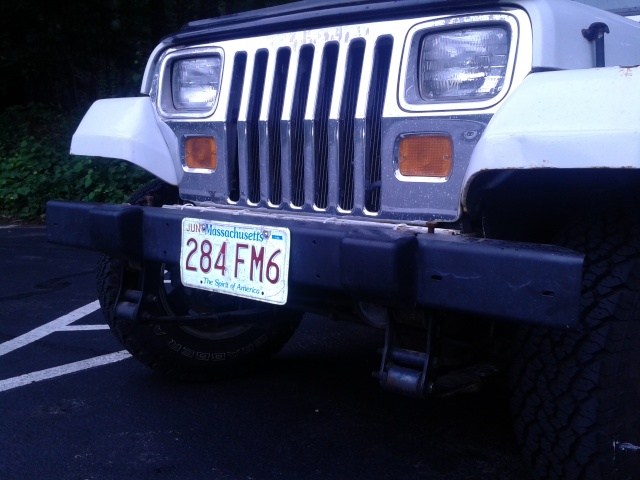
Here we have her in all her glory, with the lovely character-giving rust spots lining the rockers on both sides:

And here we have the end product. My girlfriend says she looks 10 years younger now; I say she looks like $4500 firm:
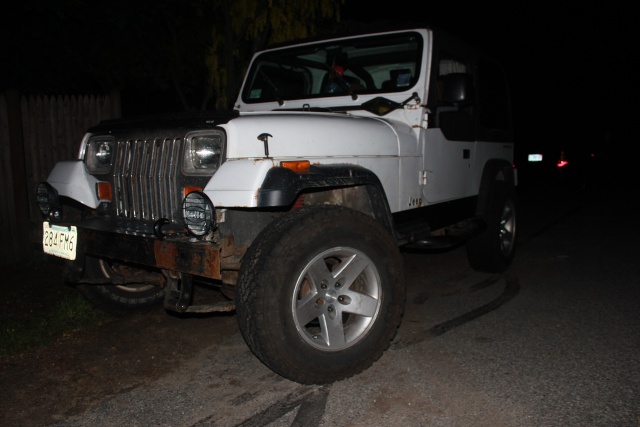
Now this of course doesn't really "fix" the problem, but I'm realistic and know that this thing is only going to go so far being 21 years old, so most importantly it guarantees me an inspection sticker in a few months. The added bonus is that she looks damn good if you ask me. I'll take some clearer shots during the day tomorrow, but since me and my old man finished up around 9:30 those latter ones are the best I could do.
EDIT: here's a clearer shot now that the sun is up
THOOPY3- Moab Dessert
- Posts : 626
Join date : 2012-03-13
Age : 34
Location : Woburn, MA -
Re: The Oreo (T.J.'s YJ)
![]() THOOPY3 7/2/2013, 9:36 am
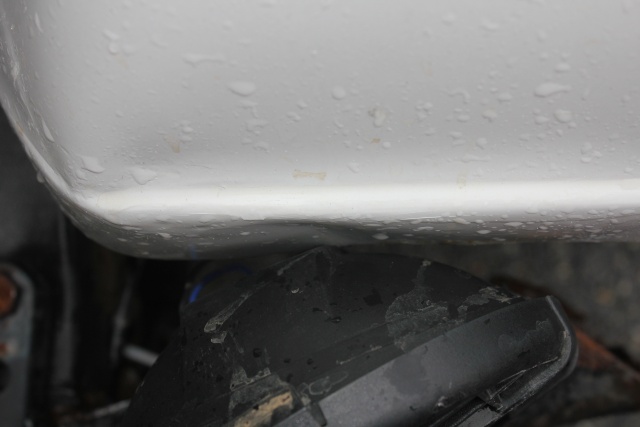
THOOPY3 7/2/2013, 9:36 am
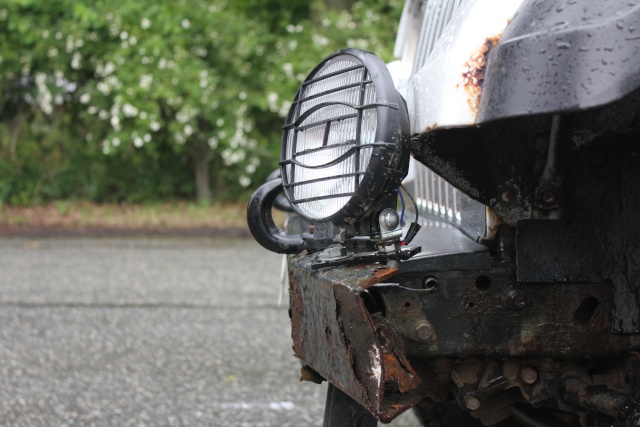
I know it's not the best picture, but you can kinda make out the little ding the accident caused to my fender (the driver side one), which in my mind isn't worth repairing at all. The other person's insurance company is still dicking me around, and when the appraiser came he "put" my fog light back together and claimed it was good in his report, which wouldn't have been possible if I didn't have the protective guard over it keeping it from falling apart completely. I was at work when he appraised it (with a different vehicle), but had I been there I wouldn't have let that one fly. Her company says $333 worth of damage and labor, after a $100 deductible because my fender is already in "questionable condition" or some crap like that. Took it to an independent place about an hour and a half after he left, and their appraisal came in at around $1,000. Me likey that one much better. Meeting somewhere in the middle sounds like a nice rear bumper and some other goodies to me.
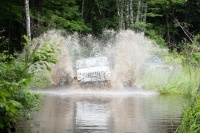
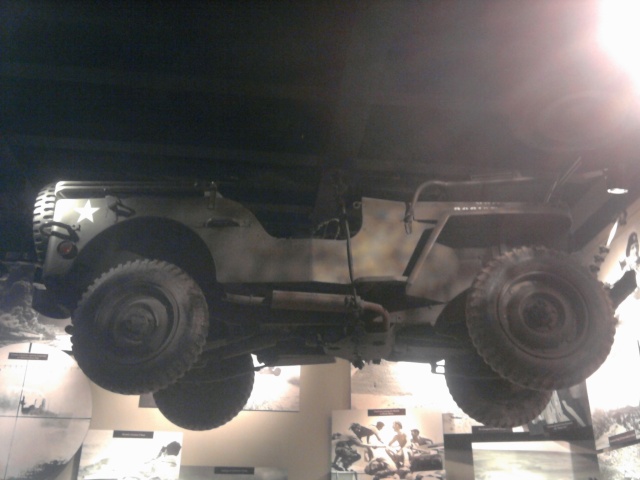
Anyhoo, I leave bright and early tomorrow morning and I should hopefully be in the D.C. area around dinner-time, making a few stops to let the old girl rest every now and then, and should be returning late next Monday. I'm expecting to run into various monsoons along the way as this terrible weather doesn't seem to want to go away, so hopefully you guys won't see me and the Jeep on the news floating down a river somewhere. I'm stocking up on extra necessities after work tonight (oil, coolant, brake fluid, gas, energy drinks) and should be good to go. This will be my first major road trip in the thing aside from a haul up to Laconia from Amherst a few years ago to go wheeling and camping, so hopefully she does my proud. Weather permitting, I will hopefully be taking photos along the way, and will take plenty down in D.C. I've been there a few times before to stay with my girlfriend's family, but have ridden on Megabus to get there. For anyone that's never been, I recommend you take the trip. I'm not really a history junkie, but it's such a nice area with lots to do besides visit the Smithsonian. Though I will say it was all worth it when I saw this bad boy hanging from the ceiling there the last time I went. Never forget the real reason we won the war.
As always, I plan for the worst but hope for the best. Hopefully I'll see you all on the other side.
THOOPY3- Moab Dessert
- Posts : 626
Join date : 2012-03-13
Age : 34
Location : Woburn, MA -
Andrew Miller- Admin
- Posts : 398
Join date : 2011-12-19
Location : Harvard Ma
Re: The Oreo (T.J.'s YJ)
![]() THOOPY3 7/10/2013, 9:45 am
THOOPY3 7/10/2013, 9:45 am
Also it figured that on my pre-trip check the night before I left my heater hose let go and spewed coolant everywhere. That being said, I'm much happier it happened in my driveway than on the road to D.C., because that would have been catastrophic. It would also figure that the replacement hose is a factory-order specialty part, with the end attaching to the thermostat measuring 11/16 and the end attaching to the heater core measuring 5/8. Nothing 5/8 hose from Advance Auto and some elbow grease couldn't solve. I'll be ordering a legitimate hose soon.
Lastly, justice has been served and I have been found not at fault for my accident a few weeks ago. Now comes the part where we haggle with the insurance company. I just want a payout, but they want me to get the thing fixed, which to me is pointless seeing as its 21 years old and I can buy a new fender for the amount they appraised the damage at. We'll see how things play out.
THOOPY3- Moab Dessert
- Posts : 626
Join date : 2012-03-13
Age : 34
Location : Woburn, MA -
Re: The Oreo (T.J.'s YJ)
![]() THOOPY3 7/14/2013, 7:05 pm
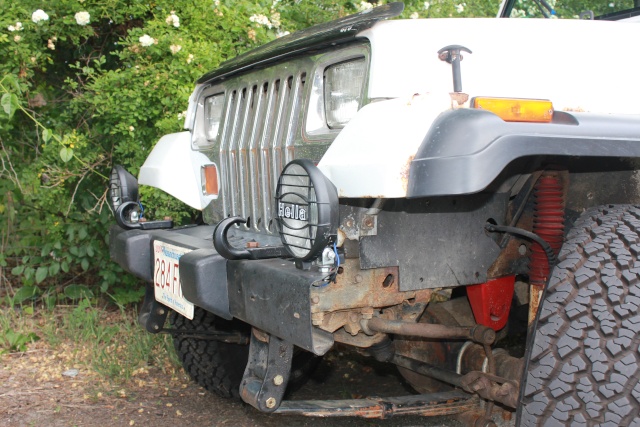
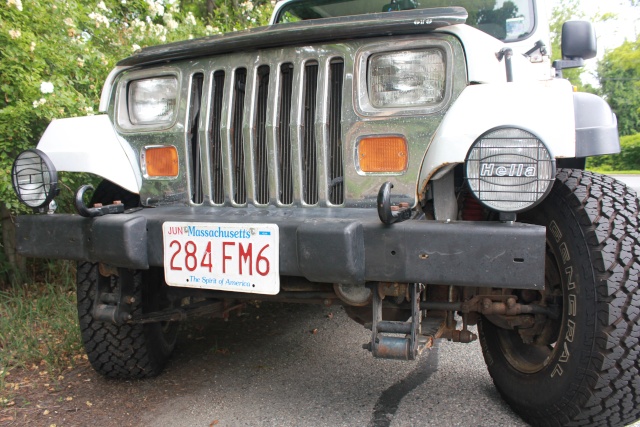
THOOPY3 7/14/2013, 7:05 pm
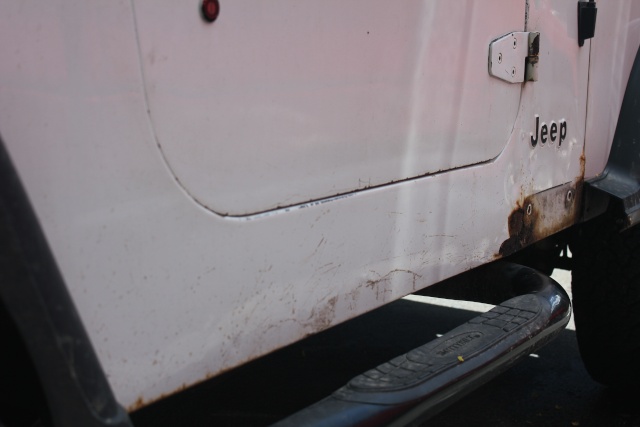
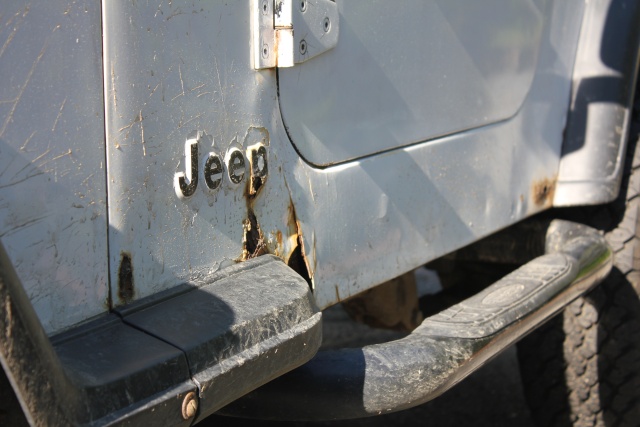
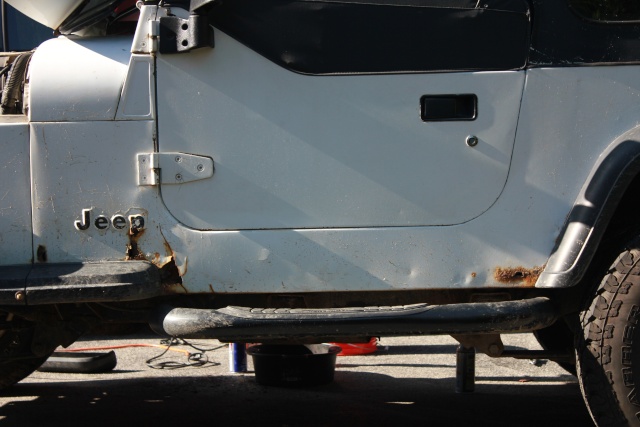
Below are some shots of just after the accident and what things look like now. Like I posted before, it really wasn't a big accident, just enough to greatly inconvenience me.
Post-accident:

After my handy work:
THOOPY3- Moab Dessert
- Posts : 626
Join date : 2012-03-13
Age : 34
Location : Woburn, MA -
Re: The Oreo (T.J.'s YJ)
![]() CrawlingForward 7/14/2013, 8:48 pm
CrawlingForward 7/14/2013, 8:48 pm
p.s. I have you doors, but I still have yet to pay for them, ha ha. Just let me know the paypal account and I'll get on that!

CrawlingForward- Moab Dessert
- Posts : 822
Join date : 2011-12-09
Age : 38
Location : Flushing, MI -
Re: The Oreo (T.J.'s YJ)
![]() THOOPY3 7/21/2013, 2:58 pm
THOOPY3 7/21/2013, 2:58 pm
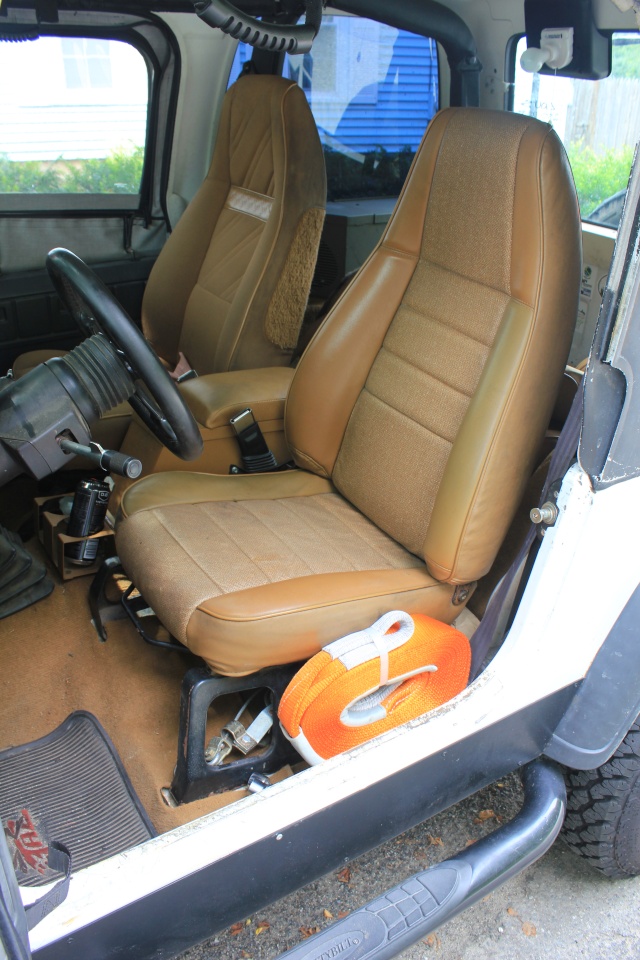
And that leads me to these items. I got the bright idea to swap my old vinyl passenger seat for my worn out driver cloth seat, instead of buying a seat from a donor car like I previouslymentioned. The cloth was nice, but (as us YJ guys know) those driver seats don't last long before they start doing the fat boy lean, and it got the best of me finally. Using my old passenger seat accomplished two things:
1. The seat no longer leans, nor does it have the mechanism for it to fold like the driver seat does, meaning it shouldn't wear out nearly as fast as the driver one (or hopefully at all)
2. I no longer have to worry about sitting on a soaked cloth seat if it rains, which is especially nice since I've been doing a lot of door-less/window-less driving lately and there's always the chance it rains in the afternoon around here in the summer
So for any of you who are wondering, yes you can swap your driver seat with your passenger seat, at least in a YJ. And here it is:
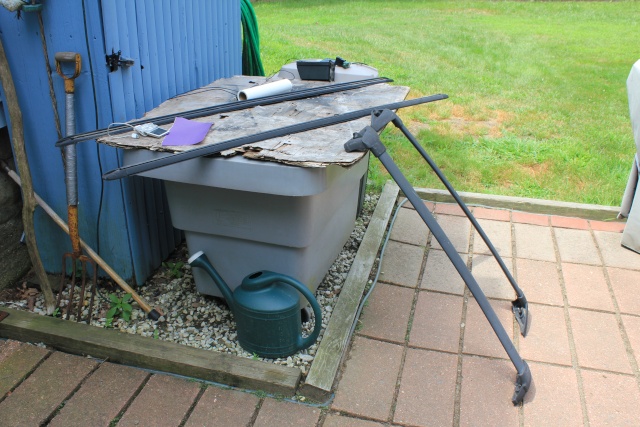
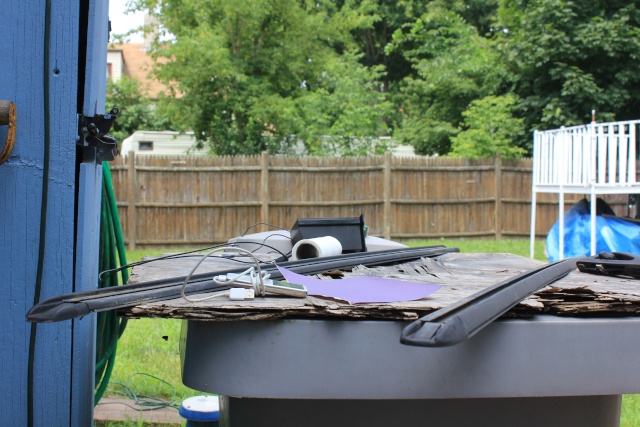
I've also embarked on a project very much inspired by this thread on JF. The one problem I always have when I go camping with my buddies is that we have no room to keep anything. I'm hoping this system helps solve that issue. I went to Holland's yesterday and picked up a roof rack system from a '99 Explorer for $50. Unlike in the thread above, the system fits perfectly on my top without any cutting, and to be honest I'm not sure why that poster felt the need to cut his down. Here's what I bought:
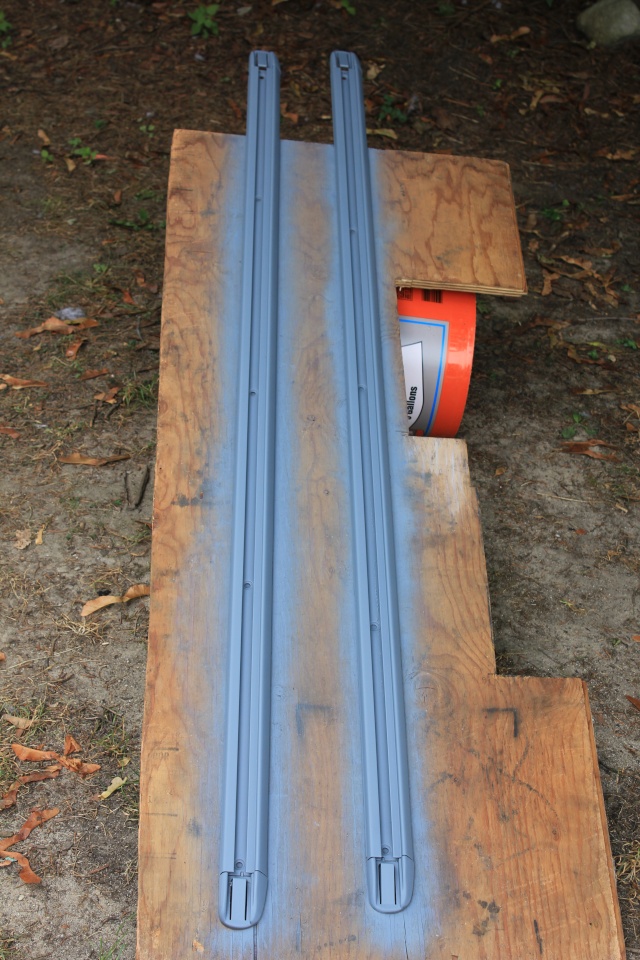
And here are the rails today after I sanded them and put down the first coat of primer:
I plan to use different hardware than what came off the Explorer, but I plan to do the same thing the original poster did with plates of steel on the inside to help with rigidity. The reason I'm comfortable with this system is because I won't be putting much weight on the top; the heaviest item would be a cooler filled with food, drinks, and ice. The cross rails are also removable and will not be permanently attached, meaning I'll only have them on when I use them for camping purposes. I have no interest in buying a rack system that attaches to the windshield and rear of the tub because my windshield hinge bolts are completely stripped and would need to be drilled out and the holes tapped (which I've done enough for a lifetime already on this thing) and those rack systems cost at minimum $350. For something that I'll only use a few times a year, that isn't worth the money or the aggravation, not to mention the terrible wind drag I've heard they create. I'm trying to come up with a creative paint scheme for the cross rails just to make them unique, and I'm taking suggestions. I'm going to sand and prime those the next free weekend I have.
THOOPY3- Moab Dessert
- Posts : 626
Join date : 2012-03-13
Age : 34
Location : Woburn, MA -
Re: The Oreo (T.J.'s YJ)
![]() THOOPY3 8/11/2013, 8:43 pm
THOOPY3 8/11/2013, 8:43 pm

I also picked up a steering column upper bearing, as my current one has gotten bad enough to the point that on occasion the steering wheel nearly locks up while turning. Luckily it only ever happens on very sharp turns at very low speeds, so it doesn't overly affect driveability. The column has always made a grinding noise since I've owned the thing, but I think the lift and bigger tires have finally caught up to it. Not sure if I'll be taking on that task or having a shop do it.
Last weekend I finished painting the roof rack mounting rails with bedliner so they match the color and texture of the hard top. My hope is to get the whole system mounted this upcoming weekend, weather permitting. Also last weekend, I decided to mess around with my emergency gas can to see if I could spice it up a bit. I have a strange obsession with wanting to put camo items on my Jeep, but for fear of looking like a total hick I have thus far resisted. My gas can was the perfect thing to mess with, as I only use it when wheeling or camping. So I hit it with a white base coat and went to town. I'm a little biased but I think it turned out damn good. I bet this is something no one was expecting to see in a build thread.


THOOPY3- Moab Dessert
- Posts : 626
Join date : 2012-03-13
Age : 34
Location : Woburn, MA -
Re: The Oreo (T.J.'s YJ)
![]() Mark 8/12/2013, 4:29 pm
Mark 8/12/2013, 4:29 pm
I's that winter camo? Looks good.
It's better to look HICK THAN HACK!
Mark- Rubicon Trail
- Posts : 1300
Join date : 2011-12-10
Location : Haverhill, MA
Re: The Oreo (T.J.'s YJ)
![]() THOOPY3 8/13/2013, 9:34 am
THOOPY3 8/13/2013, 9:34 am
Too true Mark. Yeah it's winter/arctic, depends on who you talk to. I had all the paint kicking around my parents' house so it was worth the like hour of work I put in. I just cut the shapes out of cardboard and oversprayed them to give it that real camo look. And it goes with the black-on-white theme I have going with the Jeep, which was the ultimate goal. Now if I really wanted to be bold, I'd paint my front bumper like that and watch my girlfriend try to pretend that she's never seen me before in her life.Mark wrote: It's better to look HICK THAN HACK!
THOOPY3- Moab Dessert
- Posts : 626
Join date : 2012-03-13
Age : 34
Location : Woburn, MA -
Re: The Oreo (T.J.'s YJ)
![]() THOOPY3 8/15/2013, 8:44 pm
THOOPY3 8/15/2013, 8:44 pm
$4,000:

$4,500:

Tomorrow I'm heading to the Depot to grab some nuts, bolts, and washers, and on Saturday the roof racks are going on. I'm also planning on re-routing my CB antenna and attaching it to the new bumper, as it has a hole pre-drilled for it to be installed there. Hopefully by Sunday afternoon I'll have some more updates to report on here.
THOOPY3- Moab Dessert
- Posts : 626
Join date : 2012-03-13
Age : 34
Location : Woburn, MA -
Re: The Oreo (T.J.'s YJ)
![]() CrawlingForward 8/16/2013, 12:01 pm
CrawlingForward 8/16/2013, 12:01 pm
I think I just found a quick weekend project....
CrawlingForward- Moab Dessert
- Posts : 822
Join date : 2011-12-09
Age : 38
Location : Flushing, MI -
Re: The Oreo (T.J.'s YJ)
![]() Mark 8/16/2013, 1:29 pm
Mark 8/16/2013, 1:29 pm
Mark- Rubicon Trail
- Posts : 1300
Join date : 2011-12-10
Location : Haverhill, MA
Re: The Oreo (T.J.'s YJ)
![]() THOOPY3 8/18/2013, 2:40 am
THOOPY3 8/18/2013, 2:40 am

So after cutting them down, I mocked them up and began making the incisions. It was extremely straightforward and as you would imagine the top is very easy to drill. I used a multi-bit process to ensure that the top didn't spider-web, which would have quickly ruined my day.


After all the holes were drilled out, I threw rubber washers in between the mounting rail gaskets and the top where the holes were drilled (to really make sure it won't leak) and placed 1.25" fender washers on the inside, and tightened everything down with lock nuts. Mission accomplished.


So no more trying to cram all the camping gear and three or more people in the Jeep, more commonly known as trying to fit ten pounds of shit in a five pound bag. The great part is the cross rails are completely removable, so they won't be creating any wind drag when I don't need them or prevent me from cleaning snow off the top in the winter. For a grand total of about $75 for all the pieces and the hardware, and about 9 hours of work including picking them up from the junkyard and painting them, it sure beats the $400 I could have spent on a rack that would have to stay permanently attached and that would have required much more work.
Up next I will be relocating the CB antenna; the quick disconnects will be installed on Monday; and I will be exploring the idea of an external mounting system to be used when wheeling for my newly purchased Hi Lift jack. Preliminary thoughts are the unused bolts/nuts from my old spare tire stop located on the back right of the tub. All other times I'll have it mounted either to the roll cage (muffler clamp mod) or chilling at home.
THOOPY3- Moab Dessert
- Posts : 626
Join date : 2012-03-13
Age : 34
Location : Woburn, MA -
Re: The Oreo (T.J.'s YJ)
![]() CrawlingForward 8/18/2013, 10:42 pm
CrawlingForward 8/18/2013, 10:42 pm
If I ever end up putting my hard-top into frequent use again, you better believe I'll do this.
CrawlingForward- Moab Dessert
- Posts : 822
Join date : 2011-12-09
Age : 38
Location : Flushing, MI -
Re: The Oreo (T.J.'s YJ)
![]() THOOPY3 8/19/2013, 9:11 am
THOOPY3 8/19/2013, 9:11 am
Definitely a cheap, easy, and beneficial mod, and my friends and family who have seen it all say it looks factory, so I'm quite pleased. I will probably be adding rubber covers or cap nuts to the bolts on the inside, both for looks and to ensure that in the off chance my head somehow is launched back and to the left JFK-style I don't put a hole in it like...well you get the idea.
THOOPY3- Moab Dessert
- Posts : 626
Join date : 2012-03-13
Age : 34
Location : Woburn, MA -
Re: The Oreo (T.J.'s YJ)
![]() THOOPY3 8/26/2013, 10:11 am
THOOPY3 8/26/2013, 10:11 am

It's tough to tell, but both rear tires are on level ground higher than the fronts, and the front left still had room to be stuffed. I just ran out of rock. Kiss my ass RTI ramp.

THOOPY3- Moab Dessert
- Posts : 626
Join date : 2012-03-13
Age : 34
Location : Woburn, MA -
Re: The Oreo (T.J.'s YJ)
![]() THOOPY3 8/27/2013, 8:38 pm
THOOPY3 8/27/2013, 8:38 pm
THOOPY3- Moab Dessert
- Posts : 626
Join date : 2012-03-13
Age : 34
Location : Woburn, MA -
TJ rear flares on a YJ
![]() THOOPY3 9/1/2013, 6:11 pm
THOOPY3 9/1/2013, 6:11 pm

Not exactly what I'm looking for. A few months ago I began undertaking the task of putting TJ flares on, but it stalled out because I didn't feel like cutting any sheet metal and at the time it flexed like a brick so I didn't have these issues. In full disclosure I still don't feel like cutting any sheet metal, and as of right now still haven't, but in a few weeks I'm gonna nut up and do it. For now though, I decided to finally get the flares installed and gain the clearance I want and need. Here's how it went.
I removed the stock YJ flare from the Jeep. This, for those of you lucky enough to never have had to do this, is a bitch, and I honestly wouldn't wish the pain and suffering on anyone. After getting it off, I washed the area where it was and began mocking up the TJ flare in the position where I thought it looked best. As the photos below show, the areas at the front of the flare (toward driver) and rear of the flare (self-explanatory) are uncovered by the flare backing. In a normal install, the area in the rear would be cut out providing clearance for better flex and larger tires. As I mentioned I didn't cut this area, and instead opted to paint it black to match both the flare and the inner fender liners, just for the time being.
I opted to cut off the entire lip on the back of the TJ flares (I actually did this about four months ago), which made positioning quite easy. After getting the flare mocked up where it looked best, I drilled new mounting holes in the back lip of the flare in the position where the stock YJ flares mount. I did this with the flare clamped in position and used a 3/16 drill bit in order to reuse the stock mounting hardware. I drilled the flare instead of the tub because reusing the factory holes meant I wouldn't have to remove the inner fender liner, which also would have been a bitch, and because one of the new holes would have been positioned in an unreachable area in the tub, meaning I couldn't have gotten any hardware onto it. I made sure to mock the flare so that when the time comes to trim the tub, I wouldn't run into issues of cutting into a joint at the rear of the tub where two sections meet. This is an area that has given a lot of people who have done this mod issues (according to various online write-ups) so I wanted to stick clear of it.
Once all the holes were drilled, I installed the flare using the old hardware and marveled at what I had done, which by that point was eight hours into the process once the second flare was installed. By my own admission I did take a few breaks, and off and on rain showers didn't help things. I decided to leave the painting for the next day. All it required was a little sanding of the exposed areas, and a few quick shots of Krylon black. Badda-bing badda-boom, TJ flares on a YJ. I honestly wish I had done it years ago. They open up the wheel wells nicely for the added flexibility, and quite frankly I think they make my 31s look small, which isn't a bad thing in my mind. I may also do a little trimming of the stock front flares to mimic the added clearance out back, but for now I have no intention of putting TJ flares up front. Function over form at this point. Photos of the process are below.
Stock YJ flare removal:

Mocking the TJ flare:

New mounting holes drilled in the TJ flare:


Installed without paint:

The final product after painting exposed areas:


Before and after:


THOOPY3- Moab Dessert
- Posts : 626
Join date : 2012-03-13
Age : 34
Location : Woburn, MA -
Re: The Oreo (T.J.'s YJ)
![]() CrawlingForward 9/4/2013, 2:05 pm
CrawlingForward 9/4/2013, 2:05 pm
I've got the same flexing (and sagging because of hardtop and excessively weighty trailers) in the rear of mine. I think my plan will be to install an $80 add-a-leaf from BDS because I just can't bear to hack my wheel-wells.
CrawlingForward- Moab Dessert
- Posts : 822
Join date : 2011-12-09
Age : 38
Location : Flushing, MI -
Re: The Oreo (T.J.'s YJ)
![]() THOOPY3 9/4/2013, 2:58 pm
THOOPY3 9/4/2013, 2:58 pm
Also related is that this little bit of trimming will save me from needing a larger lift, and therefore needing to add a SYE kit. I'm in favor of keeping a LCOG if I was to go bigger so this falls in line with that as well. I'm no fool though and know there's lots to be done before bigger tires are thrown on, plus I'm quite happy with my <6 month old 31s. They serve me just fine for getting me to the 9-5 and hitting the trails.
THOOPY3- Moab Dessert
- Posts : 626
Join date : 2012-03-13
Age : 34
Location : Woburn, MA -
TJ rear flares on a YJ (the final product)
![]() THOOPY3 9/7/2013, 10:04 pm
THOOPY3 9/7/2013, 10:04 pm
First thing done was removing the flares. I had put some thought into doing the cutting with them on but ultimately decided against it, and it was the best way to go. After getting them off, I took my trusty Dremel and began to make the first incisions. Tearing into her was easier than I expected, both physically and emotionally. I followed the outline created by the spray paint up until basically the middle of the wheel well. After the sheet metal was taken care of, I then trimmed the fender liner to match the new wheel well shape. This is another spot where reusing the factory mounting holes paid off, because had I not done that there would be nothing to hold the fender liner snugly to the body and prevent crud from getting underneath it.
Once the fender liners were taken care of, I once again used the Dremel and sanded down the rough edges on both the sheet metal and the fender liner to prevent any tire-shredding mishaps. Once everything was smooth, I hit the trimmed edge of the sheet metal with some spray paint to prevent (yeah right) rust from forming since there is no longer a lip to protect it from road grime and such. After letting the paint dry, I then ran strips of Gorilla Tape along the trimmed edge, again as a precaution against tire-shredding. Final step was re-installing the flares, and I was golden. I also decided to trim a little bit of the back edge of the front factory flares to better match the contour of the TJ ones. No sheet metal work involved there, simply plastic. I may do some more trimming of those to better match the TJ flares in the future, but for now I'm satisfied. Photos are below.
Flare removed:

Sheet metal trimmed and edge painted:

Tape attached:

Flare re-installed:

Front flare trimmed:

The finished product:


THOOPY3- Moab Dessert
- Posts : 626
Join date : 2012-03-13
Age : 34
Location : Woburn, MA -
Page 4 of 11 • 1, 2, 3, 4, 5 ... 9, 10, 11 ![]()
|
|
|