River Raider Armor Install
+3
CrawlingForward
Ryan McKee
ArticRubi
7 posters
Page 1 of 1
 River Raider Armor Install
I've been done with this for a few weeks now but I figured I'd do a quick write up of the install. The object here obviously was to protect the body as much as possible from damage before it happens. I gotta say its a major pain to take on any job that's more than a day's work without having a garage. First welding job for me also, so take it easy on me 
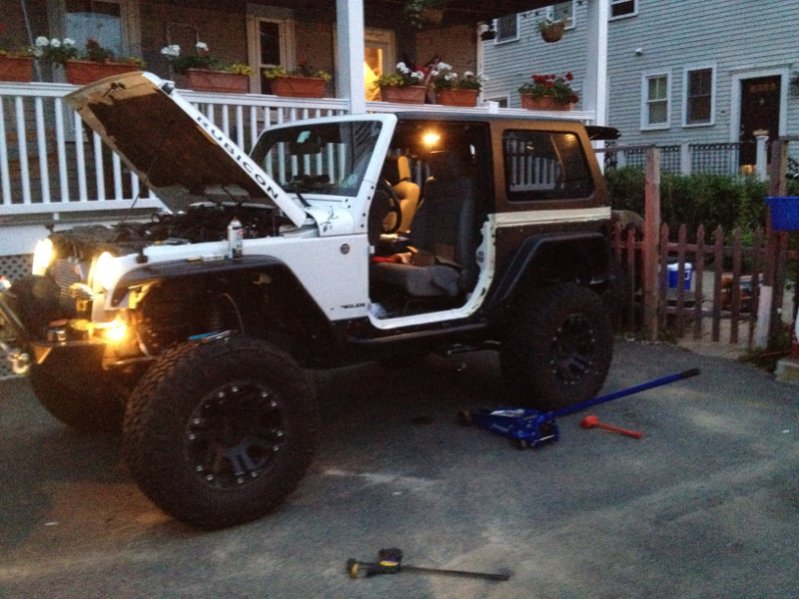
First step was to rip off the JK tupper-flares and inner fender liners. Pretty easy process, just grab and snatch (if you're not worried about snapping the "T" clips that hold them on.) Then remove the stock rubi rock rails.
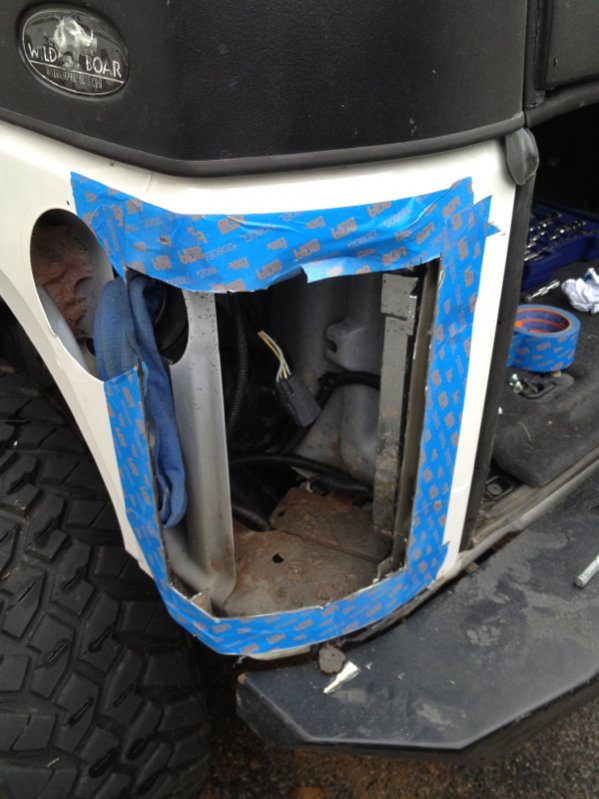
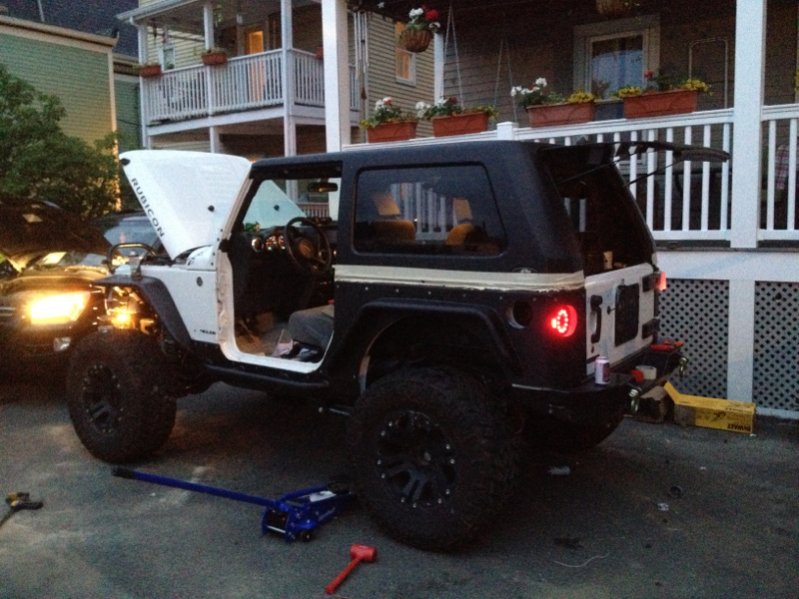
Next I had a nice big hole to cut where the old tail lights used to sit. Has to be done for the corners to properly fit to the body with minimal gap due to the JK's compound body curve at this point.
Then I test fit the new boat side sliders. Really sturdy, they bolt to the frame in two locations through the body mount, and have about 8 well nuts on each of them. After fitting, I marked and center punched all the holes for the well nuts.

After fitting the sliders, it was time to fit the corners on. I used a number of C clamps, and of course the handy Irwin Quick Grips. Love 'em.
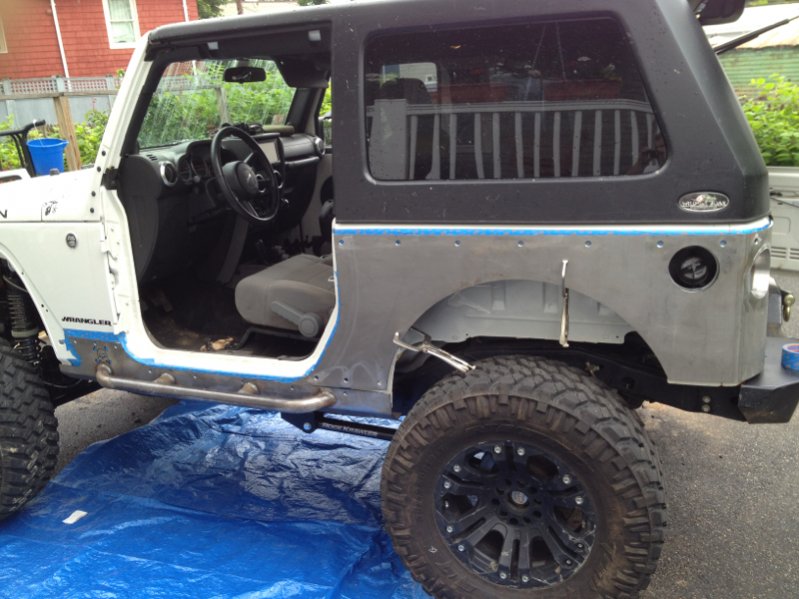
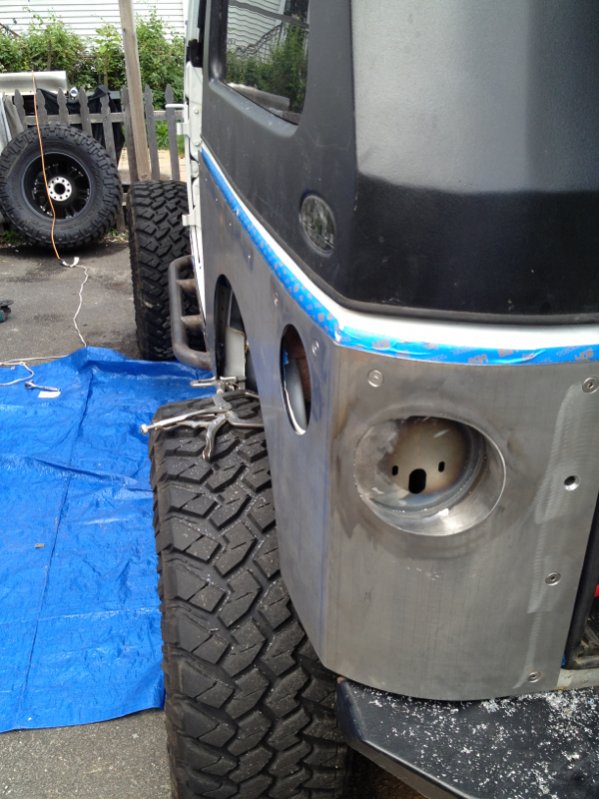
With the corners fitted I marked and center punched for well nuts.
After securing the corners to the body with the well nuts I had to weld on the fender flares. The corners come with a "builder's kit" including 2 pre-bent tubes, 2 sheet metal skins to make the flares with, and 2 support brackets for each side. They ship as a pretty wide flare, I decided to make them a good bit narrower and went with 3.5" from the corner to the center of the tube at its widest point. I did the driver's side first to make sure the flare location would clear the gas filler.

After welding the tube in place, I started working with the 16 gauge skin and trimming it down to fit.
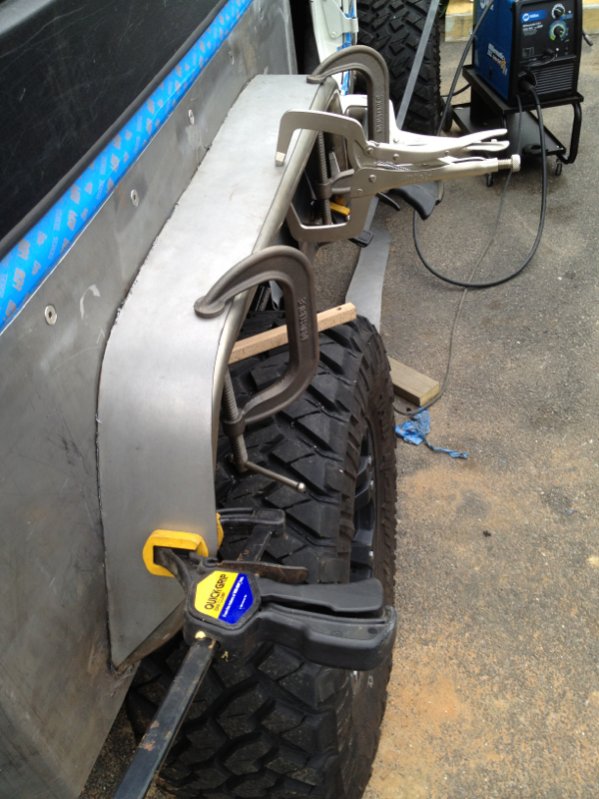
This one show about how much I took off...
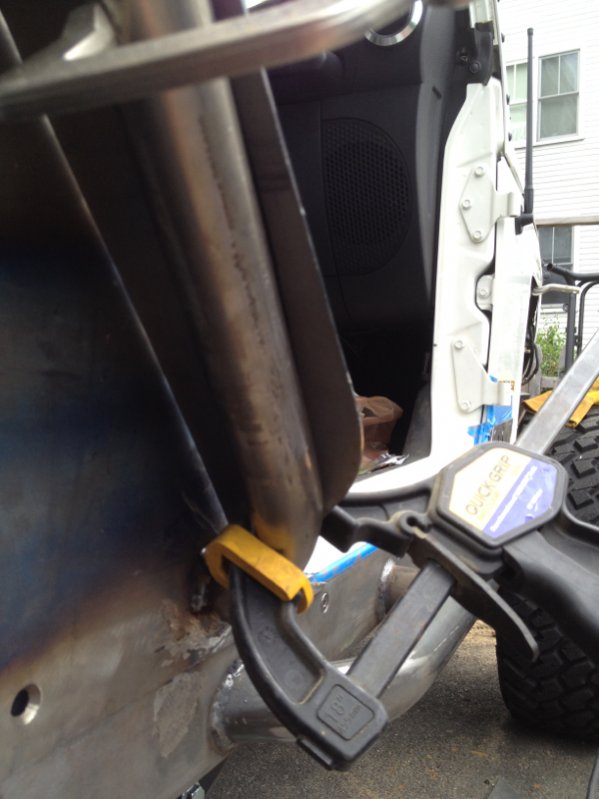
Then used the first one I did as a template for the second. If I had half a brain, or half as many beers at that point, I would have used CARDBOARD to mock up the fender skin first. Still worked out for me though.

Then tack welded the skins to the tubes.
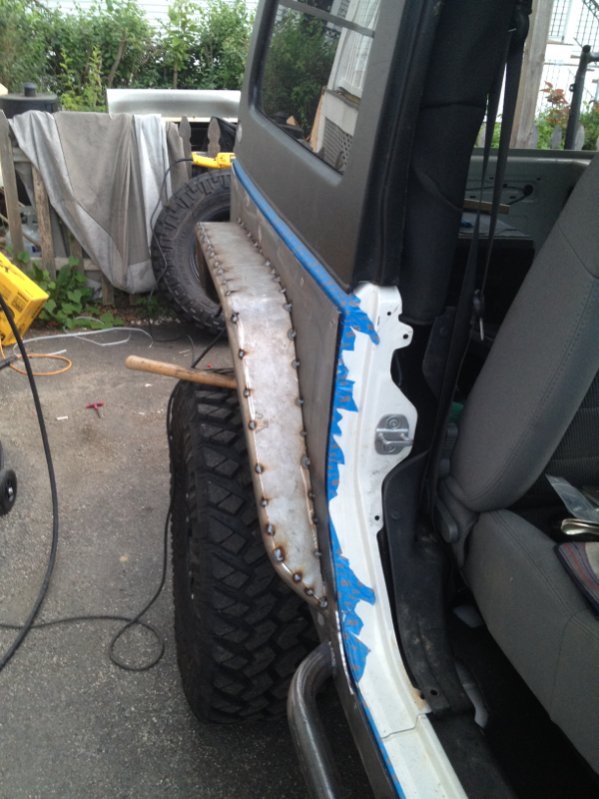
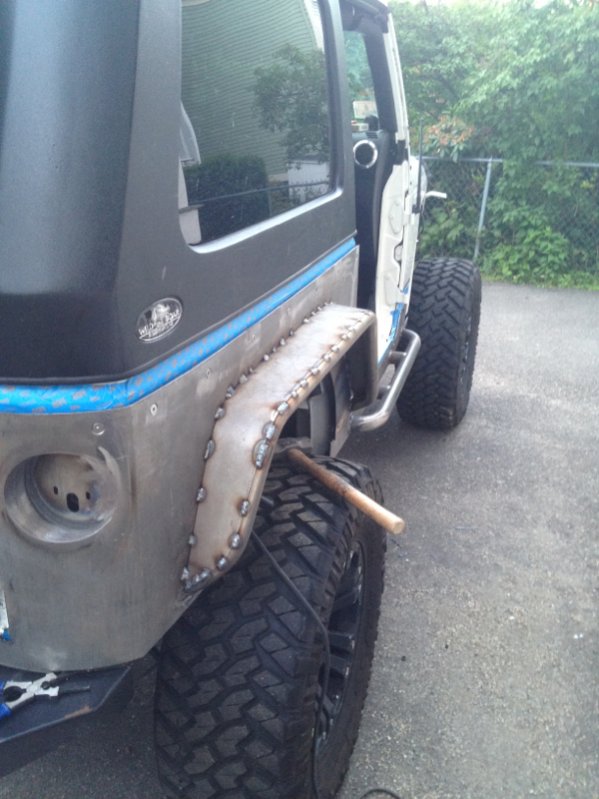
And brought them down to the basement and finish welded everything. I know. Ugly. I spent so much time grinding my welds I couldn't feel my hands for a day

Then I hit them with a few coats of primer after prepping them with a wire wheel to get any surface rust off.

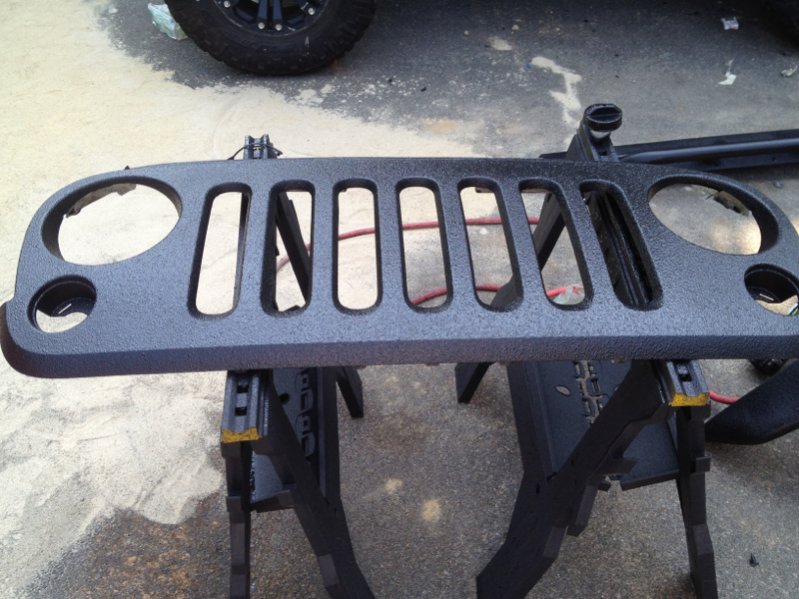
Went crazy with the bed liner. Sprayed my armor, rear inner fender wells, and then hit the grille with it too. This stuff is very scratch resistant and my grille was pretty beat up.
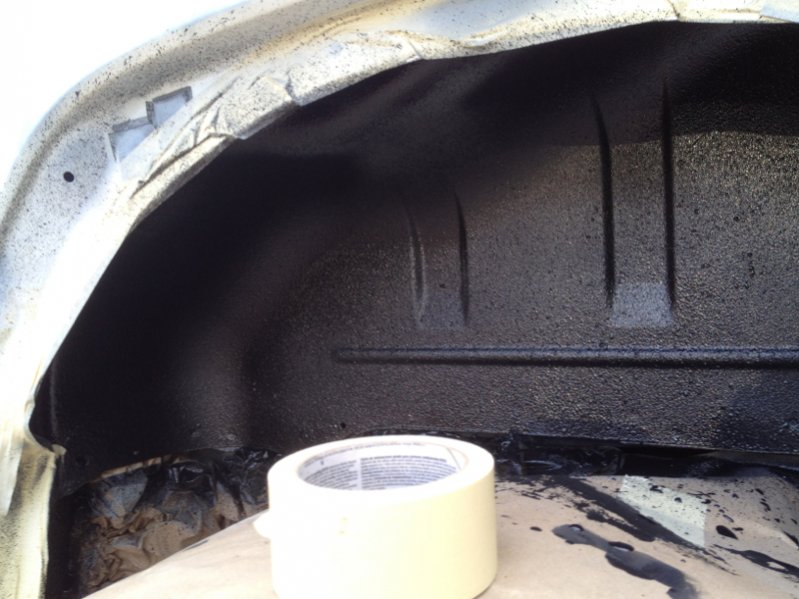
Finally bolted everything back on.


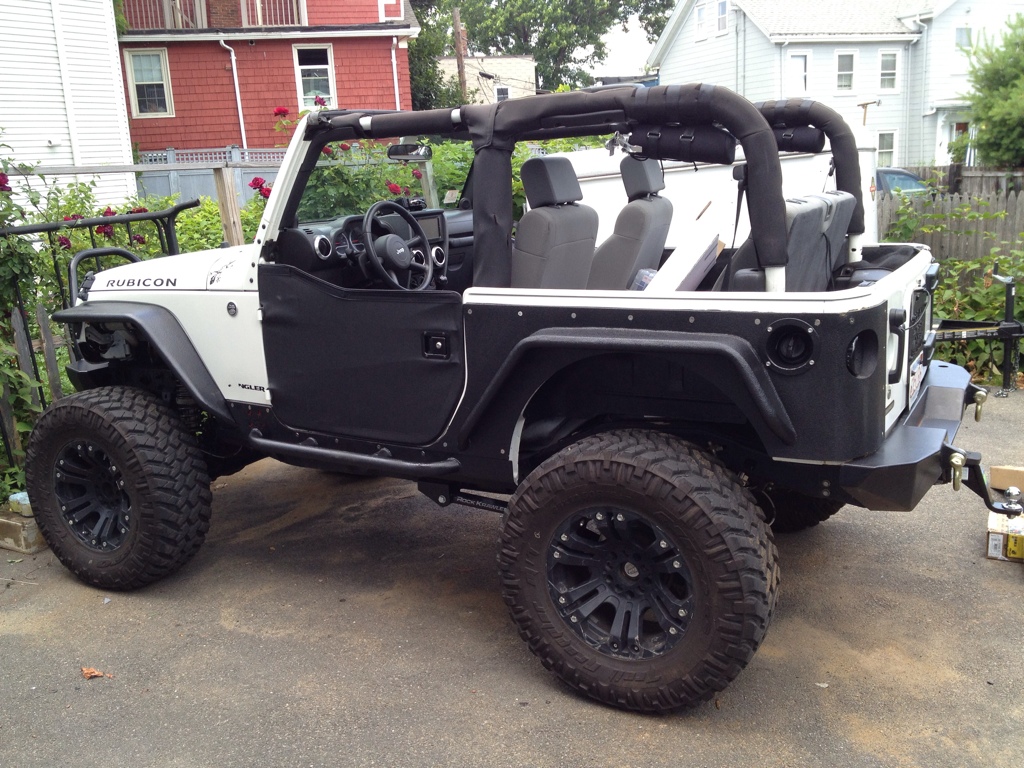
Yes, haters, that's a 7" touch screen DVD/Nav in the dash

Not much to write up on the front fender install, just a simple bolt on job. Really nice thing about them is they have a number of bolts that go through the sub frame so they're extremely sturdy...I was showing a buddy how strong they were, climbed my 235 pound on top of one and dance a little jig...they never even budged.
First step was to rip off the JK tupper-flares and inner fender liners. Pretty easy process, just grab and snatch (if you're not worried about snapping the "T" clips that hold them on.) Then remove the stock rubi rock rails.
Next I had a nice big hole to cut where the old tail lights used to sit. Has to be done for the corners to properly fit to the body with minimal gap due to the JK's compound body curve at this point.

Then I test fit the new boat side sliders. Really sturdy, they bolt to the frame in two locations through the body mount, and have about 8 well nuts on each of them. After fitting, I marked and center punched all the holes for the well nuts.

After fitting the sliders, it was time to fit the corners on. I used a number of C clamps, and of course the handy Irwin Quick Grips. Love 'em.


With the corners fitted I marked and center punched for well nuts.
After securing the corners to the body with the well nuts I had to weld on the fender flares. The corners come with a "builder's kit" including 2 pre-bent tubes, 2 sheet metal skins to make the flares with, and 2 support brackets for each side. They ship as a pretty wide flare, I decided to make them a good bit narrower and went with 3.5" from the corner to the center of the tube at its widest point. I did the driver's side first to make sure the flare location would clear the gas filler.

After welding the tube in place, I started working with the 16 gauge skin and trimming it down to fit.

This one show about how much I took off...

Then used the first one I did as a template for the second. If I had half a brain, or half as many beers at that point, I would have used CARDBOARD to mock up the fender skin first. Still worked out for me though.

Then tack welded the skins to the tubes.


And brought them down to the basement and finish welded everything. I know. Ugly. I spent so much time grinding my welds I couldn't feel my hands for a day

Then I hit them with a few coats of primer after prepping them with a wire wheel to get any surface rust off.

Went crazy with the bed liner. Sprayed my armor, rear inner fender wells, and then hit the grille with it too. This stuff is very scratch resistant and my grille was pretty beat up.


Finally bolted everything back on.


Yes, haters, that's a 7" touch screen DVD/Nav in the dash

Not much to write up on the front fender install, just a simple bolt on job. Really nice thing about them is they have a number of bolts that go through the sub frame so they're extremely sturdy...I was showing a buddy how strong they were, climbed my 235 pound on top of one and dance a little jig...they never even budged.
ArticRubi- Mall Crawler
- Posts : 64
Join date : 2011-12-12
Location : Somerville
 Re: River Raider Armor Install
Granted i've been commenting on JF, but this seriously came out awesome Duncan. That Jk looks freaking badass. Any issues with the rear body panels when you were tacking the flares to the corner armor? Also, what kind of Berliner did you use?
 Re: River Raider Armor Install
Ryan M wrote:Granted i've been commenting on JF, but this seriously came out awesome Duncan. That Jk looks freaking badass. Any issues with the rear body panels when you were tacking the flares to the corner armor? Also, what kind of Berliner did you use?
It did scorch the paint a bit where I did the tack welds as I expected...I just sanded it down, primed it, and painted it with rattle can to keep it from rusting. Didn't really bother me much seeing as you have to drill so many holes in it for nutserts, there's no chance of it ever being a "regular" fender again without some serious body work.
I used Raptor Bed Liner by U-Pol. Its awesome except for the 5-7 day time for full curing. Its hard to the touch after 5 or 6 hours but it will peel is you try and run nuts and bolts through it. $125 come with a gallon (4 quart bottles) of bed liner, hardener, and the gun you use to spray it via compressed air. I got best results at 65 psi @ 4 cfm.
http://www.tptools.com/p/2600,233_U-Pol-Raptor-Spray-On-Truck-Bed-Liner-Kit.html
Last edited by ArticRubi on 6/21/2012, 5:04 pm; edited 1 time in total

ArticRubi- Mall Crawler
- Posts : 64
Join date : 2011-12-12
Location : Somerville
 Re: River Raider Armor Install
CrawlingForward wrote:*drool* Boatsides *drool*
Looks great, man! Really nice job!
Thanks! It was a damn rewarding job I have to say. Lots of headaches, major pain in the ass doing it in the driveway, but when it was all over I was happy as hell I did it myself.
This forum needs a multi-quote function

ArticRubi- Mall Crawler
- Posts : 64
Join date : 2011-12-12
Location : Somerville
 Re: River Raider Armor Install
Very nice! Definitely one of the most badass Jk's I've seen!
janesy- Rausch Creek
- Posts : 330
Join date : 2012-04-03
Age : 38
Location : Beverly, MA
 Re: River Raider Armor Install
Hey Duncan, that looks great good job.
Mark- Rubicon Trail
- Posts : 1300
Join date : 2011-12-10
Location : Haverhill, MA
 Re: River Raider Armor Install
Looks good.
dongalonga- Rubicon Trail
- Posts : 1047
Join date : 2012-03-20
Age : 40
Location : Lowell, MA
 Re: River Raider Armor Install
Thanks fellas! I'll have a writeup for the RR full skids done sometime soon, should be installing them this week.

ArticRubi- Mall Crawler
- Posts : 64
Join date : 2011-12-12
Location : Somerville
 Similar topics
» Freetown/Fall River State Forest
» Wanted, YJ body armor, fenders, seat,
» Wanted YJ 4wd Actuator or Posi-Lock/YJ body armor
» My JKuR build
» SYE Install Party
» Wanted, YJ body armor, fenders, seat,
» Wanted YJ 4wd Actuator or Posi-Lock/YJ body armor
» My JKuR build
» SYE Install Party
Page 1 of 1
Permissions in this forum:
You cannot reply to topics in this forum
 Home
Home