Steves 98 XJ build
+4
blue55
Mark
Tonellin
lasemase72
8 posters
Page 2 of 3
Page 2 of 3 •  1, 2, 3
 Re: Steves 98 XJ build
Is the t case loose where the bolts/studs are where they mate.
If so then I would think that the trans fluid would be leaking where they mate.
The stud/nuts are easy to tighten up.
I would not weld the cross member to frame as it will bite you in the end if it needs to be disassembled in the future,, repair/replace the broken stud/bolt would be better.
The t case to trans studs are not known to loosen up unless they were left loose by the last person to work on it.
Eye ball it and you can tell if you can tighten the studs while cross member is in place,,can't see it from here,,
Are you sure you do not have a weak/broken trans mount?

Mark- Rubicon Trail
- Posts : 1300
Join date : 2011-12-10
Location : Haverhill, MA
 Re: Steves 98 XJ build
There is some wetness that could be trans fluid. After what I have seen so far, I would not put it past the PO to leave it loose. The transfer case moves and the transmission doesn't so I figured its the bolts. I guess I will just get another mount for the hell of it.
lasemase72- Class 6A
- Posts : 101
Join date : 2013-10-01
Age : 38
Location : winthrop
 Re: Steves 98 XJ build
Loosen/ remove trans mount bolts/nuts and jack up trans and you will be able to move t case around if it is loose.
If there is fluid leaking then you will need to remove t case and replace the trans output shaft seal and the t case input shaft seal.
If there is fluid leaking then you will need to remove t case and replace the trans output shaft seal and the t case input shaft seal.
Last edited by Mark on 10/8/2013, 9:38 am; edited 1 time in total

Mark- Rubicon Trail
- Posts : 1300
Join date : 2011-12-10
Location : Haverhill, MA
 Re: Steves 98 XJ build
watching this
Rob Cote- Moab Dessert
- Posts : 673
Join date : 2012-07-11
Age : 36
Location : Ipswich, MA
 Re: Steves 98 XJ build
I can move the Tcase around now without the trans jacked up and the mount bolts tight. No transmission movement at all. So it sounds like loose bolts AND a bum mount.

lasemase72- Class 6A
- Posts : 101
Join date : 2013-10-01
Age : 38
Location : winthrop
 Re: Steves 98 XJ build
Bummerrrrrrrrr.

Mark- Rubicon Trail
- Posts : 1300
Join date : 2011-12-10
Location : Haverhill, MA
 Re: Steves 98 XJ build
Whatever.. it is what it is. Bought it on the cheap so I had to expect this stuff. At least it is really just a matter of turning some bolts and Im not tearing and engine down. Next time I post pictures hopefully I will have this done along with the long arms mounted.

lasemase72- Class 6A
- Posts : 101
Join date : 2013-10-01
Age : 38
Location : winthrop
 Re: Steves 98 XJ build
The chance we all take when we buy someone elses rig, you will get it straightened out.

Mark- Rubicon Trail
- Posts : 1300
Join date : 2011-12-10
Location : Haverhill, MA
 Re: Steves 98 XJ build
Seriously. Bringing this thing back from the dead

lasemase72- Class 6A
- Posts : 101
Join date : 2013-10-01
Age : 38
Location : winthrop
 Re: Steves 98 XJ build
IT'S ALIVE IT'S ALIVE!!!!

Mark- Rubicon Trail
- Posts : 1300
Join date : 2011-12-10
Location : Haverhill, MA
 Re: Steves 98 XJ build
Definitely interested to how this goes! I've had my XJ for about 5 months now, first vehicle I've ever really worked on and I've been fixing as much as I can. Got some frame rail damage where the hitch mounts up/shackle boxes are from the PO, check out my thread in the members wrenching thread if you're interested. Ordered the HD offroad shackle relocation boxes last night both to beef up that area as well as correct my 90* shackle angle. Looks like something you might want as well when you go to fix those shackle boxes.
Jake- Rausch Creek
- Posts : 323
Join date : 2013-05-19
Location : Beverly
 Re: Steves 98 XJ build
hobhayward - I actually just painted my HD shackle boxes last night. I bought the no lift shackle and plan on getting them in next week. I will def check you your build!
So I dropped the cross member again and checked out my transfer case situation. It was bolted up to the tranny with 2 bolts and they were both loose. Awesome. Got everything buttoned back up then went to throw the long arms on.. Kit didnt come with bolts for my control arms and mine were totally corroded so I tossed em. Hoping to pick up bolts tomorrow. Then a new bushing comes Thursday and the front axle goes on.. finally.
So I dropped the cross member again and checked out my transfer case situation. It was bolted up to the tranny with 2 bolts and they were both loose. Awesome. Got everything buttoned back up then went to throw the long arms on.. Kit didnt come with bolts for my control arms and mine were totally corroded so I tossed em. Hoping to pick up bolts tomorrow. Then a new bushing comes Thursday and the front axle goes on.. finally.

lasemase72- Class 6A
- Posts : 101
Join date : 2013-10-01
Age : 38
Location : winthrop
 Re: Steves 98 XJ build
So this is how my transfer case sat.


Was held together with two bolts at the top two bolt hole locations. Unreal. I started to worry when I dropped the original cross member and found a bolt stuck in a a 1/4" of grim on top of it. But, I then convinced myself it was a random non issue because the transfer case has studs and not bolts. Well he pulled all the studs and either he forgot to put all the bolts in or forgot to tighten them.
At this point the cross member was in so I could attach the long arms. Wrong. I hucked the original flagged control arm bolts since they were necked down with corrosion and figured a 1400 dollar long arm kit would come with shiny new high grade control arm bolts. Wrong. So, I have to stop by fastenall and pick some up today. After that, all I am missing is a control arm bushing (comes in Thursday) on the axle end and I can button up the front axle!!

lasemase72- Class 6A
- Posts : 101
Join date : 2013-10-01
Age : 38
Location : winthrop

lasemase72- Class 6A
- Posts : 101
Join date : 2013-10-01
Age : 38
Location : winthrop
 Re: Steves 98 XJ build
I don't know whether my jaw should be on the floor or I should be laughing uncontrollably, ha ha.
Only 2 bolts holding it together?
Wow.
Just....wow.
Only 2 bolts holding it together?
Wow.
Just....wow.

lasemase72- Class 6A
- Posts : 101
Join date : 2013-10-01
Age : 38
Location : winthrop
 Re: Steves 98 XJ build
NO MATTER WHERE YOU GO,, THERE YOU ARE,, OVER AND OVER AGAIN.

Mark- Rubicon Trail
- Posts : 1300
Join date : 2011-12-10
Location : Haverhill, MA
 Re: Steves 98 XJ build
I went by after work to help Steve out today. We made decent progress, but god damn. This thing is fighting tooth and nail.

Rob Cote- Moab Dessert
- Posts : 673
Join date : 2012-07-11
Age : 36
Location : Ipswich, MA
 UPDATES!!!!!!
So it has been an interesting weekend. Rob came by to borrow a compressor and ended up wrenching with me for a solid few hours. What a huge help. It took an hour and a half just to get the quick disconnects in. He had to use a pitman arm puller to press out the studs that held the original sway bar links after he cut the heads off. We were able to get the front end completely back together minus and alignment.
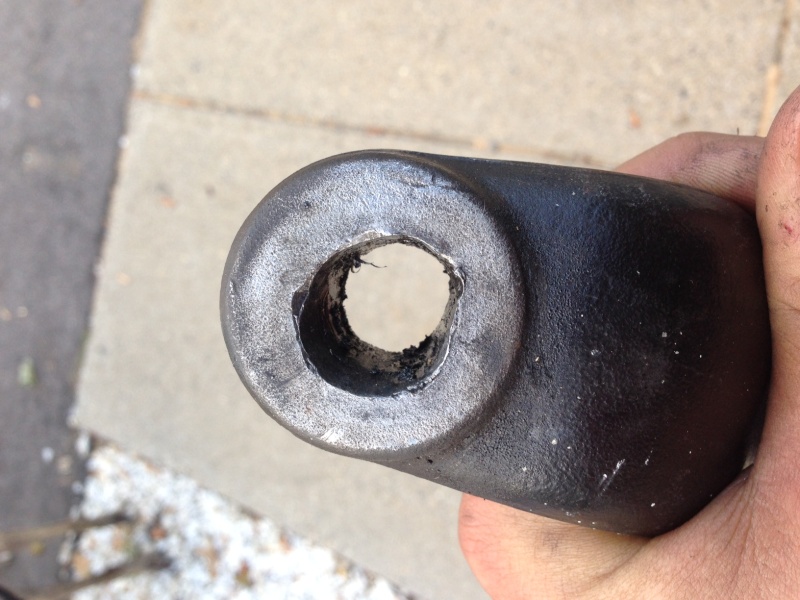
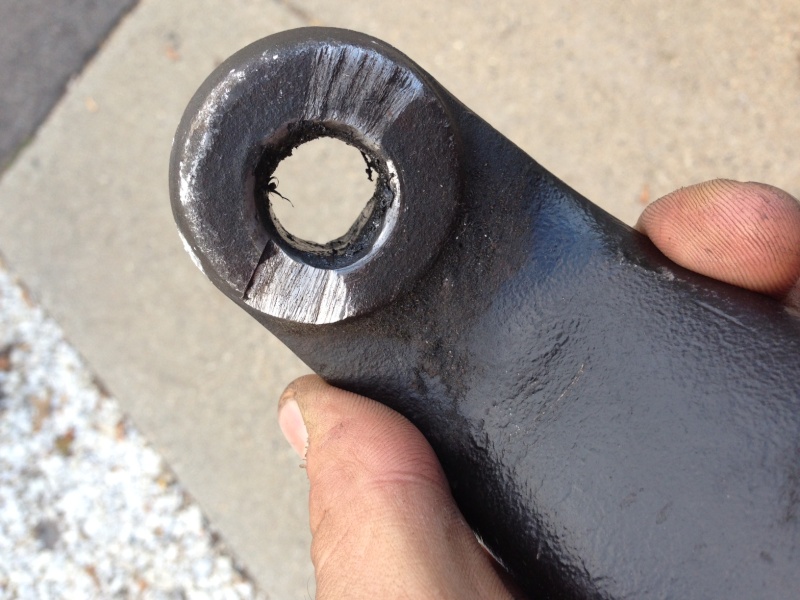
This was not without it's surprises though. I replaced the pitman arm with a drop arm the owner never installed. Idk why I bothered.. it looked ok..

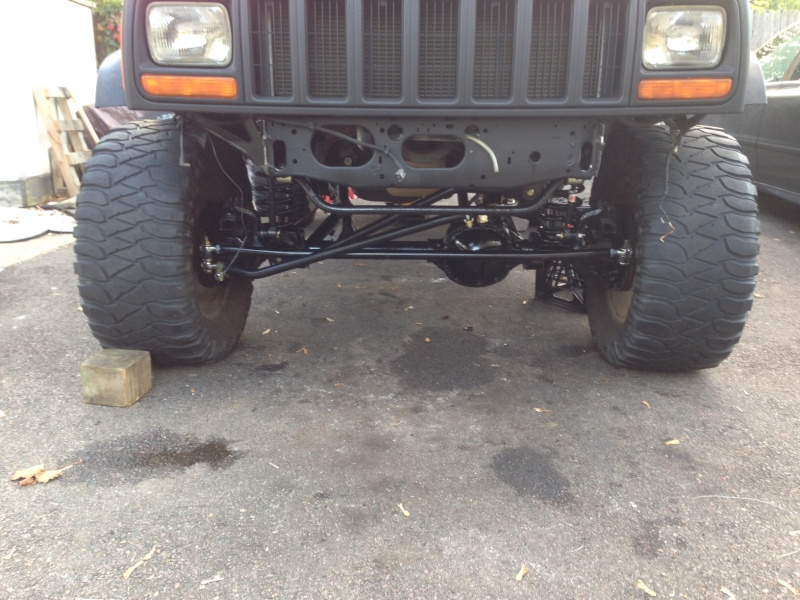

Boom! Sitting on springs!! https://youtu.be/p8-rGAM_KeA?t=58s
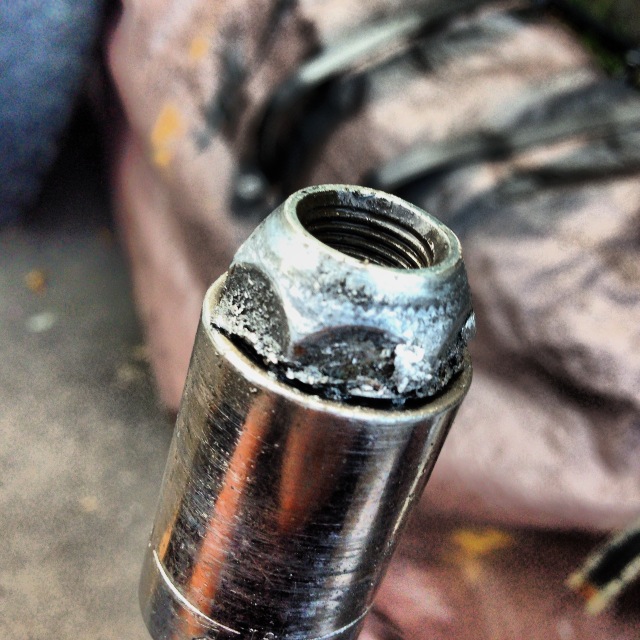
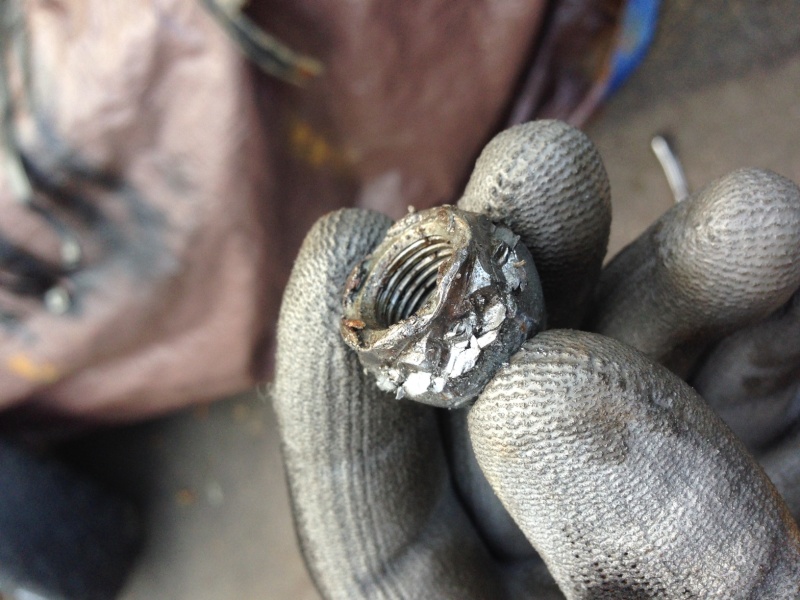
Time to jack up the rear and get it on jack stands. Better loosen up the rear lug nuts before I get the tires off the ground. WRONG. All 9 lug nuts came off without an issue.. except the last one. Totally stripped round. And of course these lugs are in a 2 inch deep hole so none of my bolt extractors will fit. Rob and I called it a day from there since he had to leave and I was about to burst a blood vessel in my eye. So I picked it up again on Monday.
Ended up using a framing hammer to hammer on a 20mm 6 point socket which was a little too small for a fresh lug nut. Figured it would bite on. Ended up rounding it off more.
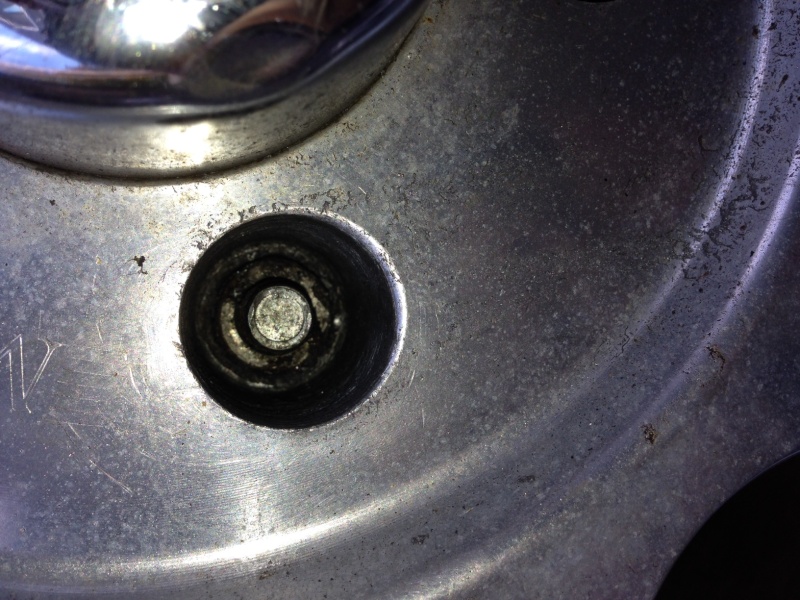
So, I brought out my trim hammer... my 12 lb trim hammer. I took a 12 point 3/4 inch socket and tapped it on.. then beat the bag out of it until it was totally locked into the nut. The results:
Well.. with that behind me.. I could now drop the axle.. This luckly went very easy since I didnt have to save the U-bolts. Just cut em off. Check out these sweet aluminum blocks:
Time to pull the leaf springs.
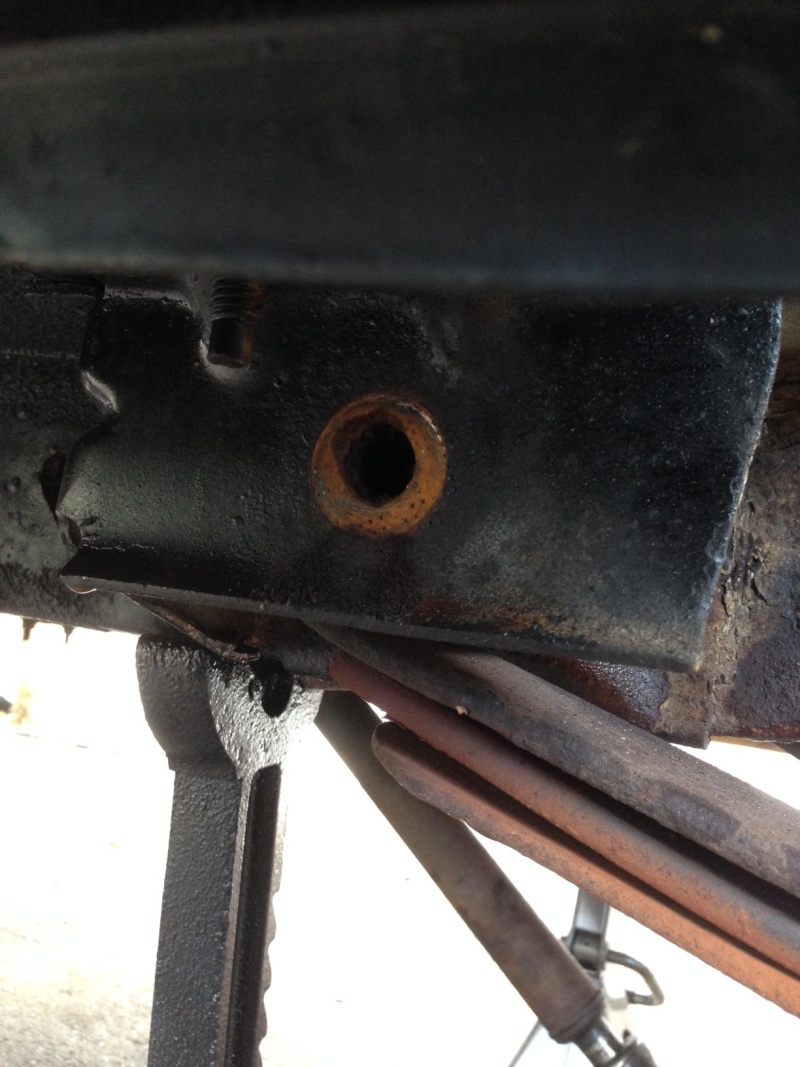
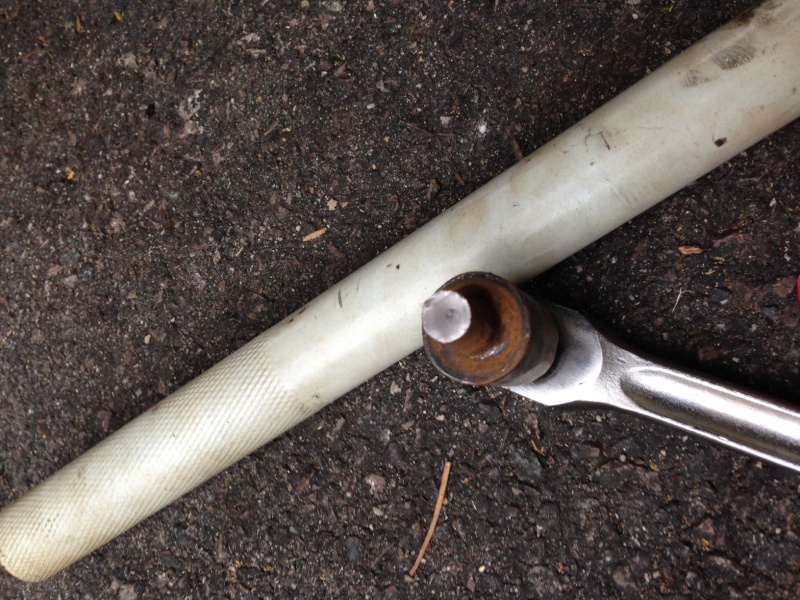
So I snapped the first bolt I pulled (front drivers side) halfway through the bushing. I cannot drop the spring and there is no access to the weld nut. I have read that the fix is to cut the bolt with a sawzall, drill the hole out and retap. Will most likely do this.
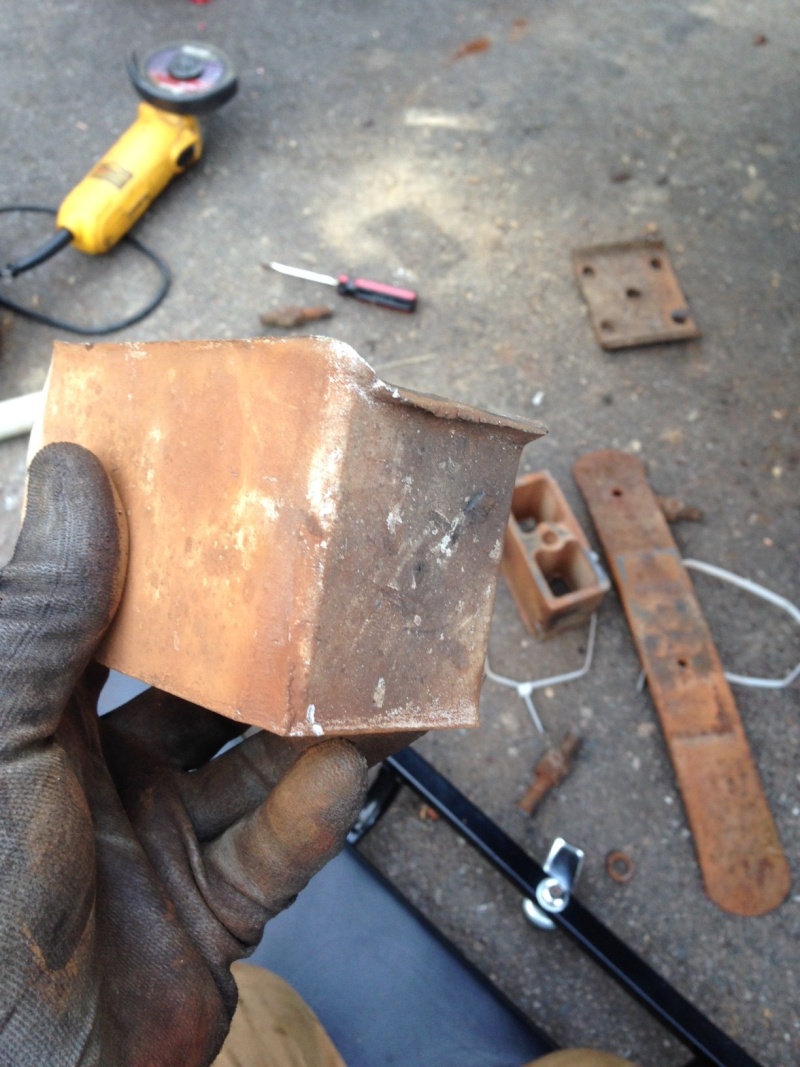
Next. Luckly none of the following will really effect the final product. This is purely for hilarity. Remember this picture?
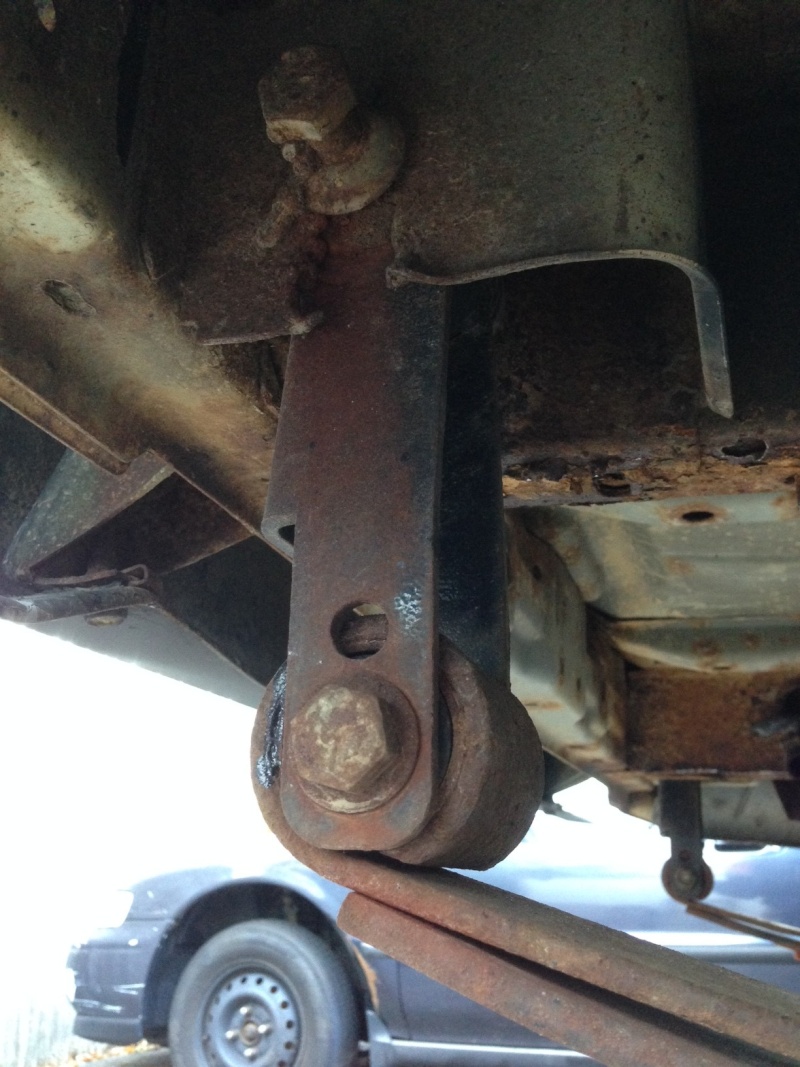
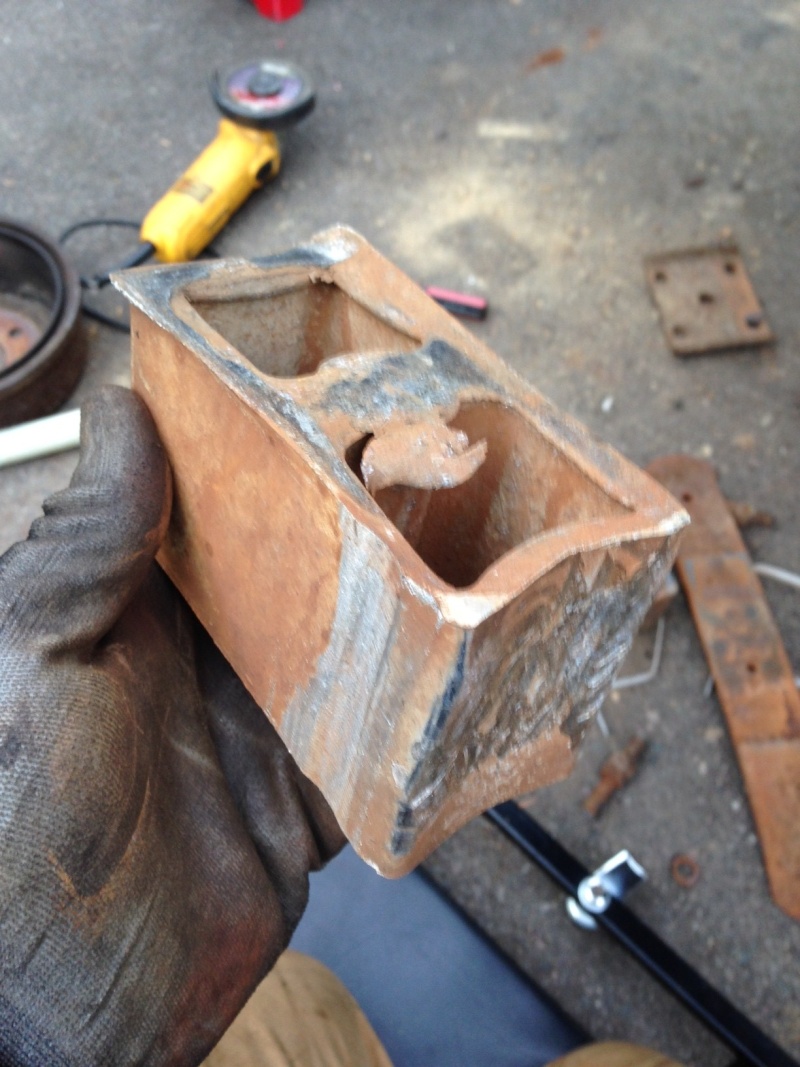
Well. I cut that well with my grinder and went to back out the bolt. Just spun freely. I yanked it out and found this:
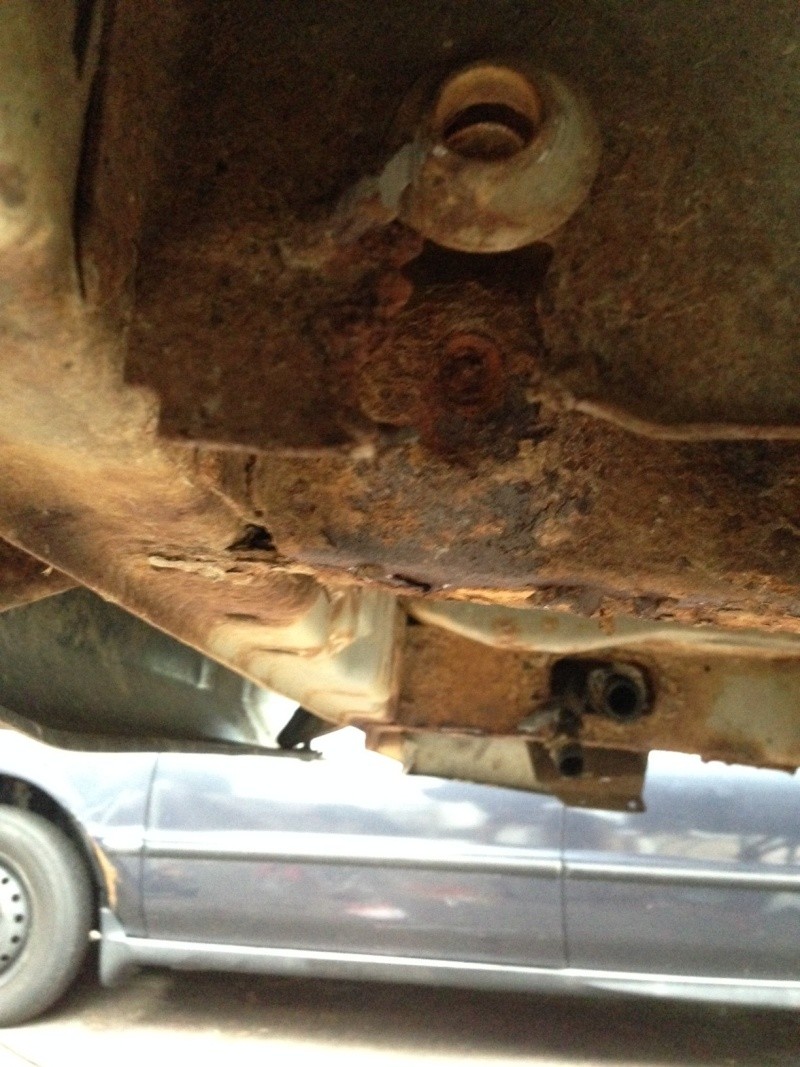
The original owner snapped a bolt off in there. My CSI skills tell me that he couldnt get the bolt out of the bushing so he cut a path through the bracket so he drop the shackle out. The he TACKED this bolt into place. This tack weld was the only thing keeping the axle from dropping out.
So with the springs unloaded.. and bolts "tight" check out this lateral play.
https://youtu.be/8nqEV-iy3z4
So I got one of the springs totally out. I still need to get the other one out.
For now, I will work on prepping the axle. Going to start the disc brake swap, install new lines and give it a shiny new paint job.
Also, I will install my sweet HD Offroad shackle relocation brackets. I may end up doing a separate writeup on those. I spoke with the people there and their customer service couldnt be better. So I told them I would do a writeup on my local forum. Onward and upward!
This was not without it's surprises though. I replaced the pitman arm with a drop arm the owner never installed. Idk why I bothered.. it looked ok..


Boom! Sitting on springs!! https://youtu.be/p8-rGAM_KeA?t=58s
Time to jack up the rear and get it on jack stands. Better loosen up the rear lug nuts before I get the tires off the ground. WRONG. All 9 lug nuts came off without an issue.. except the last one. Totally stripped round. And of course these lugs are in a 2 inch deep hole so none of my bolt extractors will fit. Rob and I called it a day from there since he had to leave and I was about to burst a blood vessel in my eye. So I picked it up again on Monday.
Ended up using a framing hammer to hammer on a 20mm 6 point socket which was a little too small for a fresh lug nut. Figured it would bite on. Ended up rounding it off more.

So, I brought out my trim hammer... my 12 lb trim hammer. I took a 12 point 3/4 inch socket and tapped it on.. then beat the bag out of it until it was totally locked into the nut. The results:


Well.. with that behind me.. I could now drop the axle.. This luckly went very easy since I didnt have to save the U-bolts. Just cut em off. Check out these sweet aluminum blocks:


Time to pull the leaf springs.


So I snapped the first bolt I pulled (front drivers side) halfway through the bushing. I cannot drop the spring and there is no access to the weld nut. I have read that the fix is to cut the bolt with a sawzall, drill the hole out and retap. Will most likely do this.
Next. Luckly none of the following will really effect the final product. This is purely for hilarity. Remember this picture?

Well. I cut that well with my grinder and went to back out the bolt. Just spun freely. I yanked it out and found this:

The original owner snapped a bolt off in there. My CSI skills tell me that he couldnt get the bolt out of the bushing so he cut a path through the bracket so he drop the shackle out. The he TACKED this bolt into place. This tack weld was the only thing keeping the axle from dropping out.
So with the springs unloaded.. and bolts "tight" check out this lateral play.
https://youtu.be/8nqEV-iy3z4
So I got one of the springs totally out. I still need to get the other one out.
For now, I will work on prepping the axle. Going to start the disc brake swap, install new lines and give it a shiny new paint job.
Also, I will install my sweet HD Offroad shackle relocation brackets. I may end up doing a separate writeup on those. I spoke with the people there and their customer service couldnt be better. So I told them I would do a writeup on my local forum. Onward and upward!

lasemase72- Class 6A
- Posts : 101
Join date : 2013-10-01
Age : 38
Location : winthrop
 Re: Steves 98 XJ build
Buahahahaha. This just keeps getting better and better.
Your patience is impressive. I would have shoved it off a cliff by now, making sure the previous owner was inside.
Your patience is impressive. I would have shoved it off a cliff by now, making sure the previous owner was inside.
 Re: Steves 98 XJ build
Lol yeah well.. It is almost over. Keeping me on my toes and I am learning a lot.. that is for sure.

lasemase72- Class 6A
- Posts : 101
Join date : 2013-10-01
Age : 38
Location : winthrop
 Re: Steves 98 XJ build
Just double checking here, but you said you *installed* a drop pitman? Any reason? I'd really advise against running it with a DPA. If you spend some time on JeepForum you'll read steering horror stories that come from Drop Pitmans.
And to echo Geoff, I admire your patience. I would have given up as well.
And to echo Geoff, I admire your patience. I would have given up as well.
 Re: Steves 98 XJ build
The lower pass side of the steering linkage looks like it is saying HIT ME WITH A ROCK.
The angle between the pitman arm and track bar does not look correct ,, maybe it's just the picture angle but ,I dunno.
Did all of that steering linkage come as a kit with the drop pitman arm included ?
Are those the factory lug nuts there?
If you have the factory ones with the sheet metal covering on them do not use an IMPACT gun to tighten or loosen them, It distorts the cover and you end up with the hassle you just had.
Use a 6 point socket with a torque wrench set at 100- 110 foot lbs to tighten them and a breaker bar to loosen them.

Mark- Rubicon Trail
- Posts : 1300
Join date : 2011-12-10
Location : Haverhill, MA
 Re: Steves 98 XJ build
Ryan - The PO had an extra brand new drop pitman arm in the cab when I bought it. It was a 1-1.5 inch drop from the one that was in there when I bought it. Not sure what you are referring to as a "drop pitman". Are you saying people have had trouble with drop pitman arms? Or are you talking about some sort of extension?
Mark - The steering linkage is installed exactly per what the instructions from IRO say.. I see what you mean though. Rob Cote has the same steering setup and it is installed the same way. Maybe the drag link is backwards? Maybe it could have something to do with the DPA? Also, it has not been aligned yet and could very well be waaaay out. May also have something to do with it. Either way, thanks for the good looks.. I will check this out.
The factory lug nuts were used in the spacer/adapters behind the wheels. They have the steel cover on them. The lug nut that got all mushed was definitely not stock.. I don't even think they were compatible with the wheels he had either. They were so large that the sockets I was using just barely fit down the hole to get to them. I am buying a whole new set to replace them.
Last edited by lasemase72 on 10/16/2013, 11:22 am; edited 1 time in total

lasemase72- Class 6A
- Posts : 101
Join date : 2013-10-01
Age : 38
Location : winthrop
Page 2 of 3 •  1, 2, 3
Page 2 of 3
Permissions in this forum:
You cannot reply to topics in this forum
 Home
Home


