Third Time's the Charm LJ
+6
CrawlingForward
Jake
Tonellin
Mark
desertzj
AquilesT
10 posters
Page 2 of 8
Page 2 of 8 •  1, 2, 3, 4, 5, 6, 7, 8
 Re: Third Time's the Charm LJ
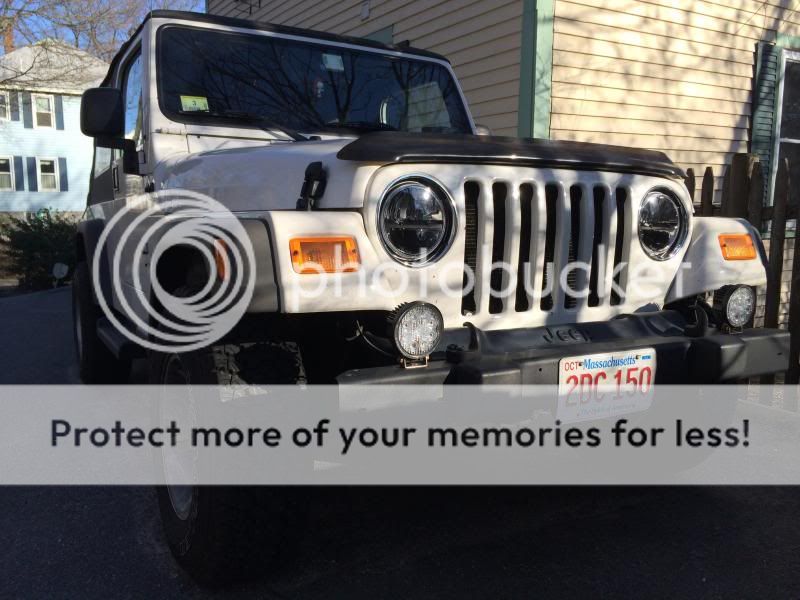
Thanks guys. The headlights will be very nice and not obnoxious once stage 2 gets completed.
I keep waffling on 35s. There are so many more things to consider to run them. I may just build everything other than the tires and lift in anticipation of the 35s.
I keep waffling on 35s. There are so many more things to consider to run them. I may just build everything other than the tires and lift in anticipation of the 35s.
dongalonga- Rubicon Trail
- Posts : 1047
Join date : 2012-03-20
Age : 40
Location : Lowell, MA
 Re: Third Time's the Charm LJ
Today's Jeeping
Genright Rear Crossmember Bumper
First things first. This rig has had a rear end collision on the drivers side courtesy of the previous owner. What did that mean in terms of this install? It means it was a total pain in my ass....that's what it means! :brickwall
Now that we have a basis for the install, here is how it went down.
Rust sucks and it will not be tolerated:


The entire crossmember was cleaned up with a wire brush followed by cleaning with mineral spirits:


Then the entire thing was given a nice shellacking with Rustoleum:
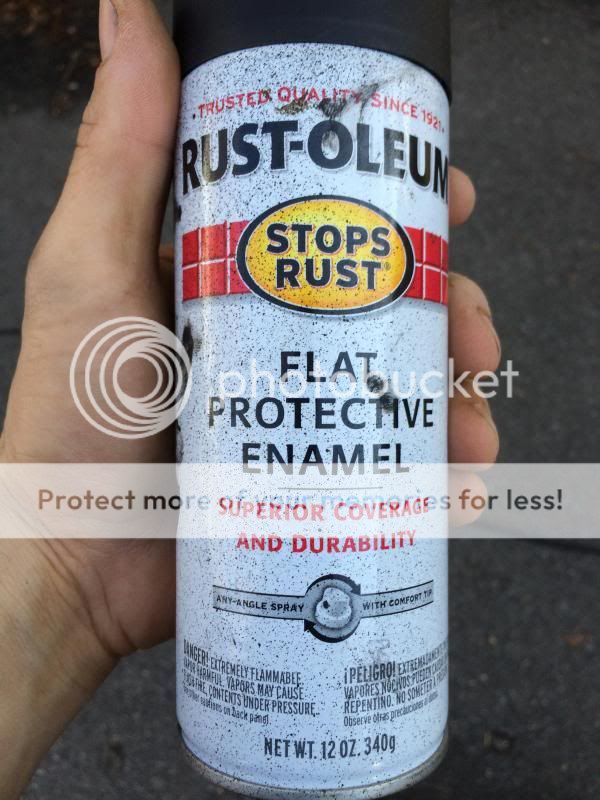
Mmmm so clean:
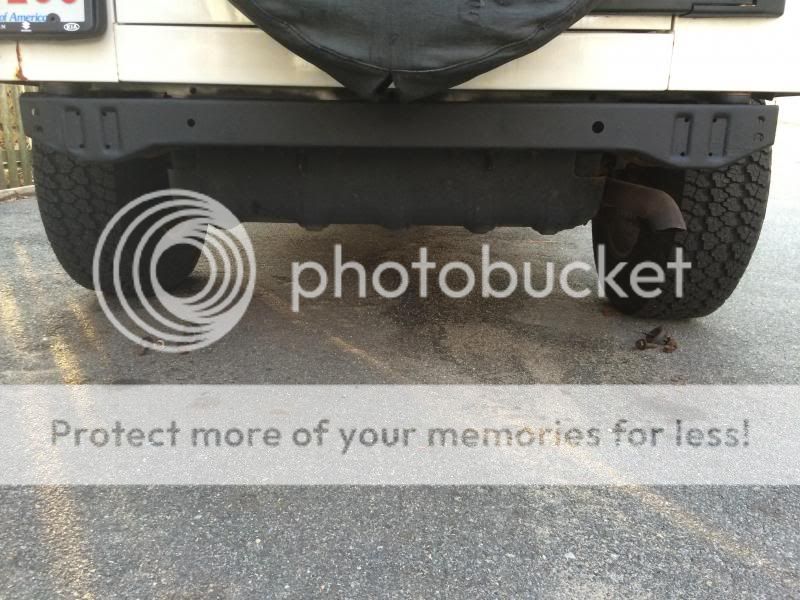
Too bad it didn't stay that way. I allowed the surface to dry for several hours before attempting to fit the bumper. That's when things got interesting. The entire crossmember was out of square and the bumper didn't not want to go over the drivers side end at all.
After much massaging with a cornucopia of hammers, vice grips, pliers, and c clamps I got the damn thing on. I threw in a couple of bolt and nuts I had laying around to keep things in place and called it a night. Sorry there are no pics of this amazing fun process as it was dark and work was done by flashlight at this point.
I have to give a big thanks to my lovely little lady for her help. She was very patient through the whole fitting process. She was an extra pair of hands, a light holder, and even a tool wielding helper at points. I could not have finished this project without her help. She will be rewarded for her hard work don't you worry :kiss:
With all that being said, I went out today to get the necessary hardware. I drilled the four holes in the center section of the crossmember for 3/8" hardware (mostly because my crappy drill won't accept my 7/16" drill bit). The outer holes were predrilled for 7/16" hardware. All grade 8 hardware was used to secure the bumper. As you may have guessed not all of the holes lined up perfectly. No worries a quick hit with the Dremel and grinding stone make quick work of any offending holes.
I made sure to spray behind the bumper to recoat any areas rubbed off during the fitting process. Then I hit the bumper with a quick coat of black wrinkle finish paint. Unfortunately it got really windy after the first coat, so I will have to wait until another day to finish off the paint work.
Here is the end result:

I will eventually make a bike carrier that mounts to the brackets normally used for a tire carrier. I think that monstrous D Ring will do the job when I eventually get myself stuck. The only stinker is I could not use the frame tie ins due to the crossmember being so out of square. I may try to tackle that's somewhere down the road.
Genright Rear Crossmember Bumper
First things first. This rig has had a rear end collision on the drivers side courtesy of the previous owner. What did that mean in terms of this install? It means it was a total pain in my ass....that's what it means! :brickwall
Now that we have a basis for the install, here is how it went down.
Rust sucks and it will not be tolerated:


The entire crossmember was cleaned up with a wire brush followed by cleaning with mineral spirits:


Then the entire thing was given a nice shellacking with Rustoleum:

Mmmm so clean:

Too bad it didn't stay that way. I allowed the surface to dry for several hours before attempting to fit the bumper. That's when things got interesting. The entire crossmember was out of square and the bumper didn't not want to go over the drivers side end at all.
After much massaging with a cornucopia of hammers, vice grips, pliers, and c clamps I got the damn thing on. I threw in a couple of bolt and nuts I had laying around to keep things in place and called it a night. Sorry there are no pics of this amazing fun process as it was dark and work was done by flashlight at this point.
I have to give a big thanks to my lovely little lady for her help. She was very patient through the whole fitting process. She was an extra pair of hands, a light holder, and even a tool wielding helper at points. I could not have finished this project without her help. She will be rewarded for her hard work don't you worry :kiss:
With all that being said, I went out today to get the necessary hardware. I drilled the four holes in the center section of the crossmember for 3/8" hardware (mostly because my crappy drill won't accept my 7/16" drill bit). The outer holes were predrilled for 7/16" hardware. All grade 8 hardware was used to secure the bumper. As you may have guessed not all of the holes lined up perfectly. No worries a quick hit with the Dremel and grinding stone make quick work of any offending holes.
I made sure to spray behind the bumper to recoat any areas rubbed off during the fitting process. Then I hit the bumper with a quick coat of black wrinkle finish paint. Unfortunately it got really windy after the first coat, so I will have to wait until another day to finish off the paint work.
Here is the end result:

I will eventually make a bike carrier that mounts to the brackets normally used for a tire carrier. I think that monstrous D Ring will do the job when I eventually get myself stuck. The only stinker is I could not use the frame tie ins due to the crossmember being so out of square. I may try to tackle that's somewhere down the road.

dongalonga- Rubicon Trail
- Posts : 1047
Join date : 2012-03-20
Age : 40
Location : Lowell, MA
 Re: Third Time's the Charm LJ
Today's Jeeping
Removed the HIDs. I had Ddm Tuning send me a return label for the H4 conversion housings. I couldn't deal with the glare I was throwing at people. Phase 2 should be right around to the corner, as I can't deal with the stock lights for too long
Removed the HIDs. I had Ddm Tuning send me a return label for the H4 conversion housings. I couldn't deal with the glare I was throwing at people. Phase 2 should be right around to the corner, as I can't deal with the stock lights for too long

dongalonga- Rubicon Trail
- Posts : 1047
Join date : 2012-03-20
Age : 40
Location : Lowell, MA
 Re: Third Time's the Charm LJ
I have a confession to make. I'm a sucker for a great product at a great price...I ordered TruckLites today from NAPA for $320.
Best part is its in NH so no sales tax or shipping costs. I love me a bargain.
I pilfered the 55w ballasts from the Jeep's now defunct HID kit and put them in the Prius C. I wasn't happy with the 35w output and was going to upgrade them anyways. The only waste from the HID kit will be the bulbs, which I can always pass on to someone else.

dongalonga- Rubicon Trail
- Posts : 1047
Join date : 2012-03-20
Age : 40
Location : Lowell, MA
 Re: Third Time's the Charm LJ
I was considering trucklites a couple weeks ago, then I saw the price... My stock headlights work great anyways, maybe someday down the road. They are going to look sweet!
Andrew Miller- Admin
- Posts : 398
Join date : 2011-12-19
Location : Harvard Ma
 Re: Third Time's the Charm LJ
BTW, the Genright rear bumper looks great! Clean look

Andrew Miller- Admin
- Posts : 398
Join date : 2011-12-19
Location : Harvard Ma
 Re: Third Time's the Charm LJ
Thanks Andrew. I need to throw another coat of paint on it. I'm pretty bummed the frame tie ins won't work. Maybe my body guy can get them in next week.

dongalonga- Rubicon Trail
- Posts : 1047
Join date : 2012-03-20
Age : 40
Location : Lowell, MA
 Re: Third Time's the Charm LJ
Today's Jeeping
I put together a Useful Things Kit today. This is not to be confused with the mythical Girly Things Kit. However, it is no less awesome to have on hand. Jenny isn't high maintenance and has a purse full of the few things she could ever need. It is, however, a good idea to be prepared for some of life's curveballs.
Size constraints are ever present in the Jeep. I made sure to keep it compact:

What's inside:

A little of this and a little of that. There are a few categories.
-Hygiene-
Waterless tooth brush x2
Travel size toothpaste
Floss sticks
Chap stick x2
Hair ties
Nail clippers
Nail files x2
QTips
-First Aid-
Coban
Transpore
Micropore
Nitrile Gloves
Band Aids
Alcohol wipes
Gauze Pads
Scissors
Naproxen
I'm sure there are things in the future I may add or delete, but this is a solid start.
I put together a Useful Things Kit today. This is not to be confused with the mythical Girly Things Kit. However, it is no less awesome to have on hand. Jenny isn't high maintenance and has a purse full of the few things she could ever need. It is, however, a good idea to be prepared for some of life's curveballs.
Size constraints are ever present in the Jeep. I made sure to keep it compact:

What's inside:

A little of this and a little of that. There are a few categories.
-Hygiene-
Waterless tooth brush x2
Travel size toothpaste
Floss sticks
Chap stick x2
Hair ties
Nail clippers
Nail files x2
QTips
-First Aid-
Coban
Transpore
Micropore
Nitrile Gloves
Band Aids
Alcohol wipes
Gauze Pads
Scissors
Naproxen
I'm sure there are things in the future I may add or delete, but this is a solid start.

dongalonga- Rubicon Trail
- Posts : 1047
Join date : 2012-03-20
Age : 40
Location : Lowell, MA
 Re: Third Time's the Charm LJ
Today's Jeeping
-CB Install-
I used the Rugged Ridge CB mount. Went it very easily. Nice snug fit for the CB so it doesn't bounce all around and rattle.

The CB mount also came with a mic mount that attaches slightly below and to the right of the steering column.
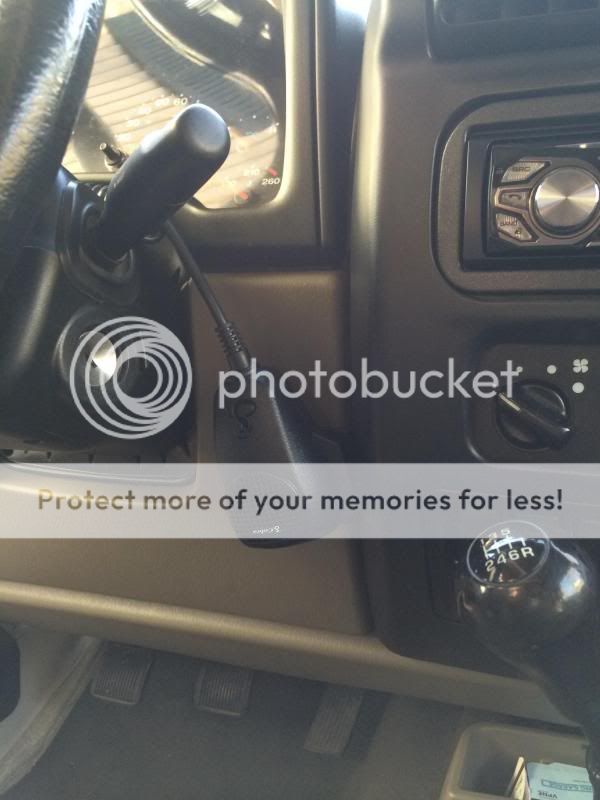
I used an add-a-lead that tapped into the radio fuse. I used a 5amp fuse and the provided 2amp inline fuse to protect everything. I used one of the the bolts from the now removed radio security bar for the ground. I ran all of the wiring under the upper dash panel so it is nice and clean looking. Then I ran the coax to the back following the wiring harness on the underside of the tub rail. I zip tied everything to keep it tight and clean looking. Installed the Teraflex CB mount, wiring and antenna.

Overall it was a very straightforward and easy install. I will tune the antenna before my trip next weekend.
-CB Install-
I used the Rugged Ridge CB mount. Went it very easily. Nice snug fit for the CB so it doesn't bounce all around and rattle.

The CB mount also came with a mic mount that attaches slightly below and to the right of the steering column.

I used an add-a-lead that tapped into the radio fuse. I used a 5amp fuse and the provided 2amp inline fuse to protect everything. I used one of the the bolts from the now removed radio security bar for the ground. I ran all of the wiring under the upper dash panel so it is nice and clean looking. Then I ran the coax to the back following the wiring harness on the underside of the tub rail. I zip tied everything to keep it tight and clean looking. Installed the Teraflex CB mount, wiring and antenna.

Overall it was a very straightforward and easy install. I will tune the antenna before my trip next weekend.

dongalonga- Rubicon Trail
- Posts : 1047
Join date : 2012-03-20
Age : 40
Location : Lowell, MA
 Re: Third Time's the Charm LJ
Thats a great CB mount!

Andrew Miller- Admin
- Posts : 398
Join date : 2011-12-19
Location : Harvard Ma
 Re: Third Time's the Charm LJ
Yeah I really like the location. Does anyone have a SWR meter they can bring Sunday?

dongalonga- Rubicon Trail
- Posts : 1047
Join date : 2012-03-20
Age : 40
Location : Lowell, MA
 Re: Third Time's the Charm LJ
Today's Jeeping
The Trucklites are in. Took all of 5 minutes to take out the old and put in the new. Waiting for it to get darker to aim them and get some output shots.
I also ordered one of these today:
http://www.moparamerica.com/oe-mopar/5166003ab?search_str=5166003ab
I am slowly going through the rig to find all of the little issues that need my attention.
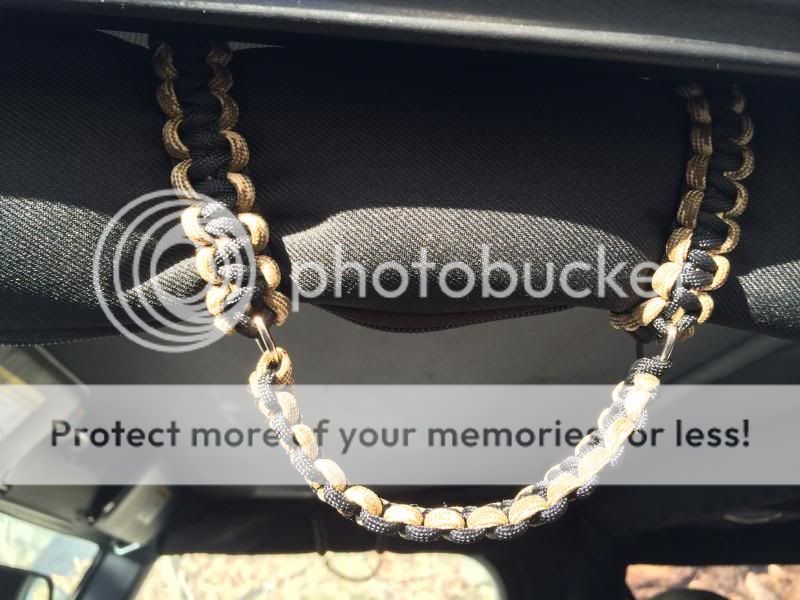
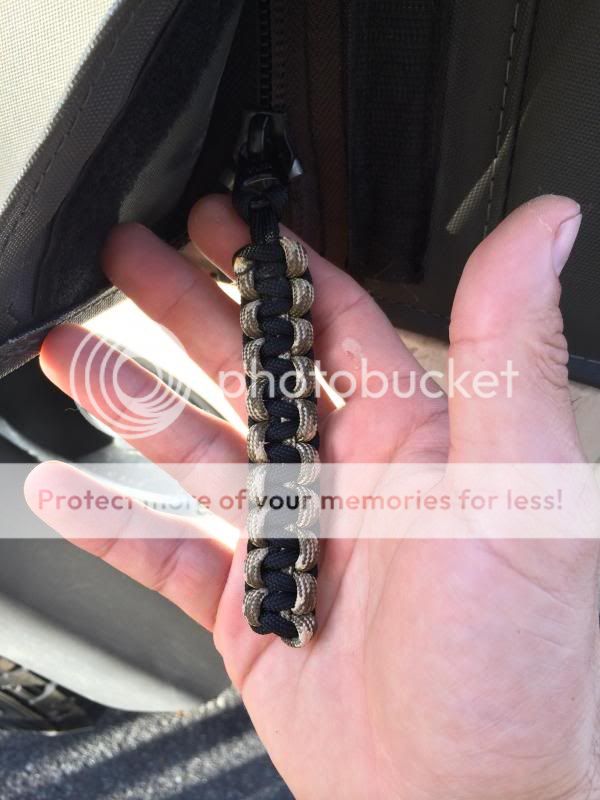
Finally, I wanted to post some pics of the 550 cord grab handles and zipper pulls a buddy of mine made up for me.
550 Cord Porn:


dongalonga- Rubicon Trail
- Posts : 1047
Join date : 2012-03-20
Age : 40
Location : Lowell, MA
 Re: Third Time's the Charm LJ
Trucklite Install and First Impressions
Install almost isn't even worth noting as it is that simple. If you have replaced a stock sealed beam, you have essentially done the most difficult part of this install. The reason I say this is because aiming them is far easier than a sealed beam headlight. Why you ask? Ultra crisp cutoff that's why silly:
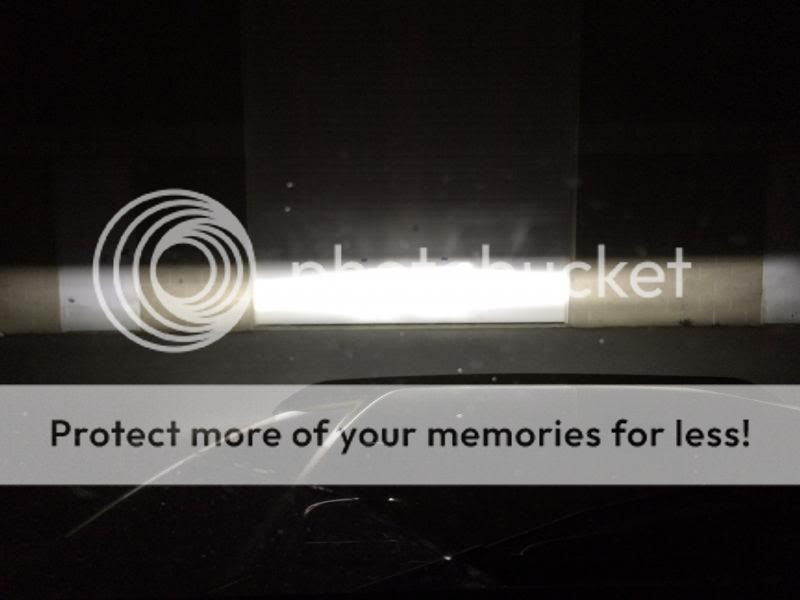
I seriously think it took me 1 minute to aim both sides. I always cover one light and aim the other to eliminate bleed over from the other light.
The beam pattern on these things is friggin WIDE!
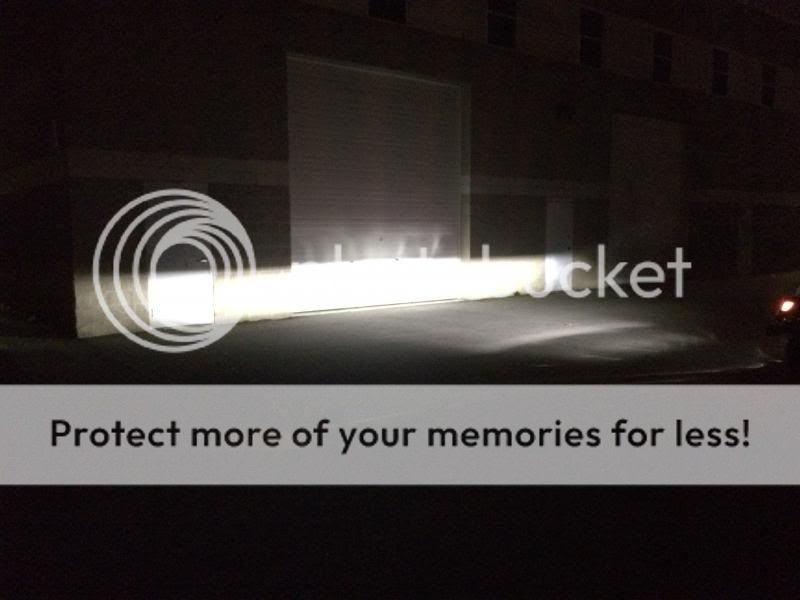
The high beam has a very nice fill and controlled cutoff:
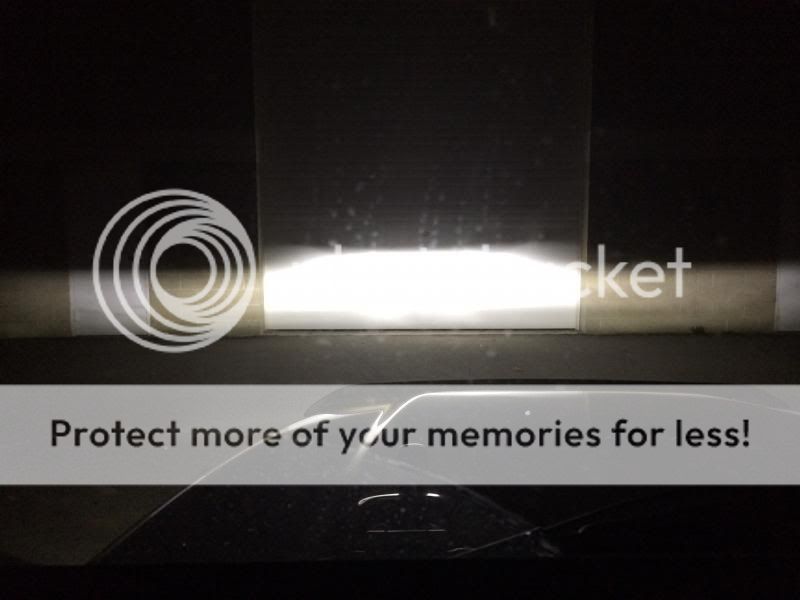
And look at that beautifully wide light spread:
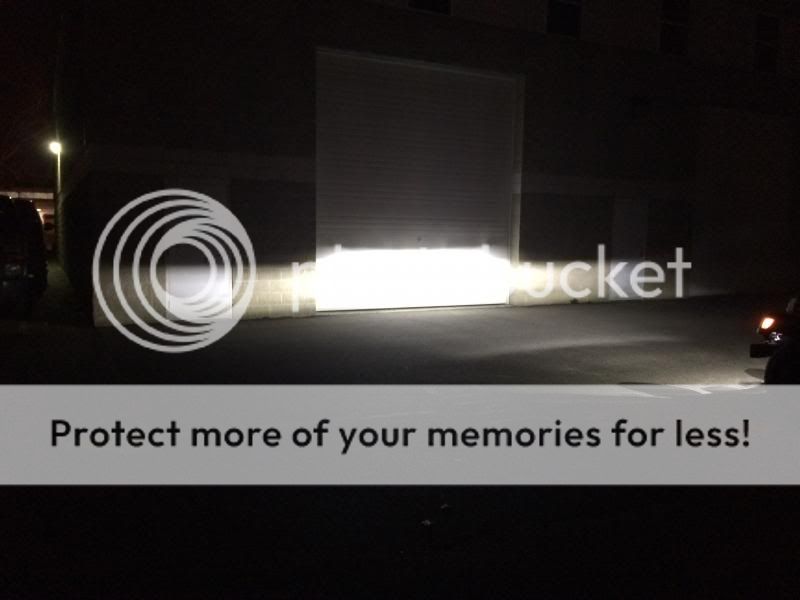
Low beams + LED Flood Lights:

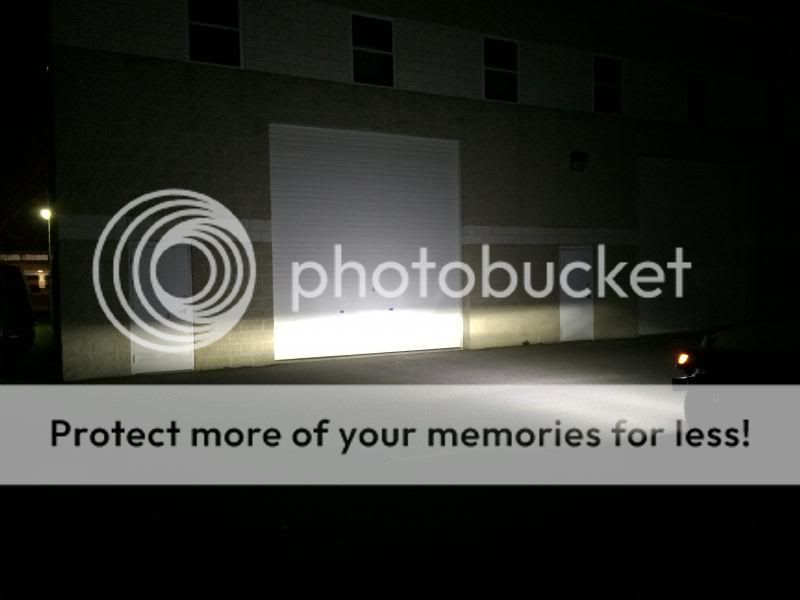

LED Flood Lights alone:

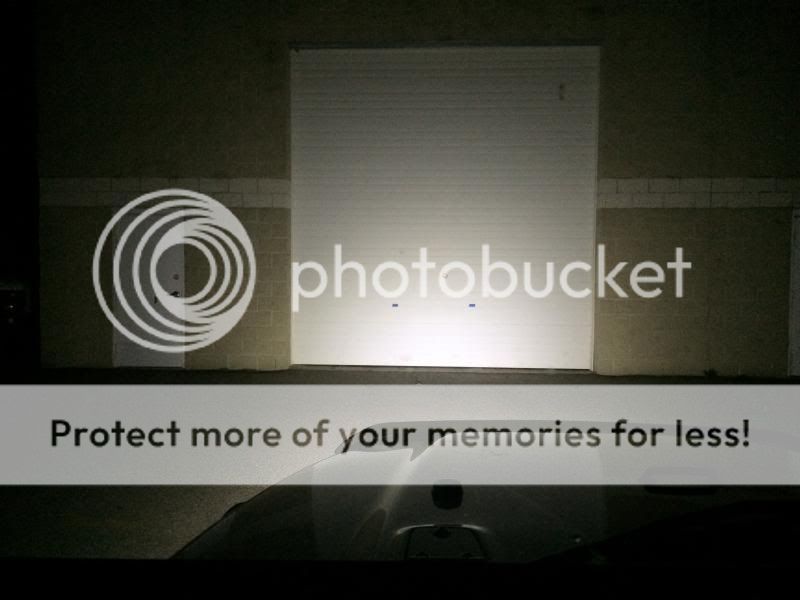
Some road shots (a little blurry sorry):



And a shot of the output in a completely unlit area:
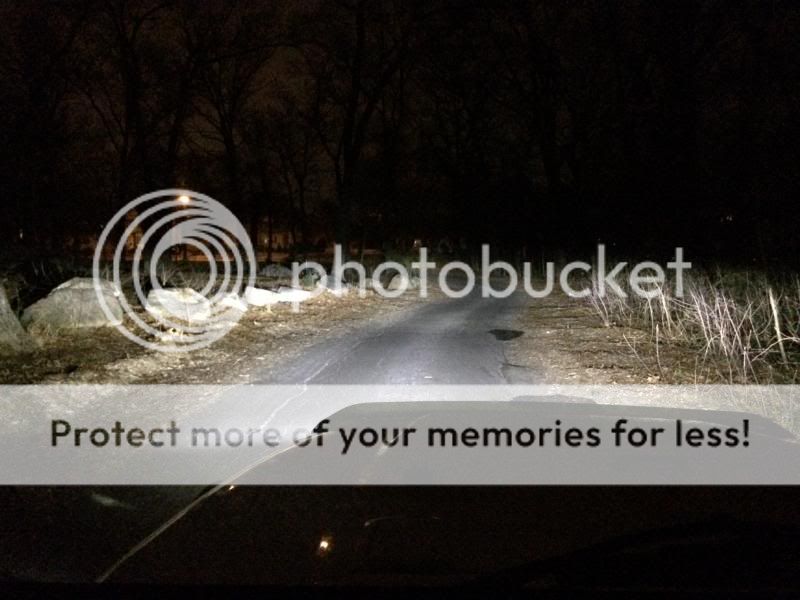
Now for my first impressions:
-They are adequately bright but nowhere near the output of a HID projector.
-They have a stepped pattern as can be seen in the road pics.
-They have the X artifact you have most likely read about (I don't believe this will be a showstopper though).
-They have a very wide pattern which allows you to see the shoulders of the road.
-The color is good. Not really sure how to describe it. They are not pure white but a mixture of colors (easy on the eyes).
For the money spent, the warranty, the ease of installation, and the performance I feel these are a good not great investment. For my budget and needs, they are all I can expect and then some. If you are looking for maximum output and pattern, you should look into JW Speakers (LED projector) or some form of HID Projector retrofit (many sources).
Install almost isn't even worth noting as it is that simple. If you have replaced a stock sealed beam, you have essentially done the most difficult part of this install. The reason I say this is because aiming them is far easier than a sealed beam headlight. Why you ask? Ultra crisp cutoff that's why silly:

I seriously think it took me 1 minute to aim both sides. I always cover one light and aim the other to eliminate bleed over from the other light.
The beam pattern on these things is friggin WIDE!

The high beam has a very nice fill and controlled cutoff:

And look at that beautifully wide light spread:

Low beams + LED Flood Lights:


LED Flood Lights alone:


Some road shots (a little blurry sorry):


And a shot of the output in a completely unlit area:

Now for my first impressions:
-They are adequately bright but nowhere near the output of a HID projector.
-They have a stepped pattern as can be seen in the road pics.
-They have the X artifact you have most likely read about (I don't believe this will be a showstopper though).
-They have a very wide pattern which allows you to see the shoulders of the road.
-The color is good. Not really sure how to describe it. They are not pure white but a mixture of colors (easy on the eyes).
For the money spent, the warranty, the ease of installation, and the performance I feel these are a good not great investment. For my budget and needs, they are all I can expect and then some. If you are looking for maximum output and pattern, you should look into JW Speakers (LED projector) or some form of HID Projector retrofit (many sources).

dongalonga- Rubicon Trail
- Posts : 1047
Join date : 2012-03-20
Age : 40
Location : Lowell, MA
 Re: Third Time's the Charm LJ
Wow, looks seriously bright in those pictures!
Jake- Rausch Creek
- Posts : 323
Join date : 2013-05-19
Location : Beverly
 Re: Third Time's the Charm LJ
The camera really picks up the light well. Honestly, there was too much ambient lighting for me to really have to rely on the headlights. I cant wait to see them on a completely unlit back road!

dongalonga- Rubicon Trail
- Posts : 1047
Join date : 2012-03-20
Age : 40
Location : Lowell, MA

dongalonga- Rubicon Trail
- Posts : 1047
Join date : 2012-03-20
Age : 40
Location : Lowell, MA
 Re: Third Time's the Charm LJ
Today's Jeeping
The rig has been dropped off at the body shop. He going through the whole thing, pulling dents, and touching up all the bad spots. He is also going to straighten out the rear crossmember so I can install the frame tie ins for the bumper. Can't wait to see how it all turns out.
I also ordered a few things from Amazon. I signed up for an Amazon CC, which in turn got me a $50 gift card. Total for the order $0! Can't beat that.
The order consisted of a HD CB antenna spring. I accidentally ordered a medium duty, which flopped around like crazy. I also ordered these:
http://www.amazon.com/gp/product/B00JM22GHW/ref=oh_details_o01_s00_i00?ie=UTF8&psc=1
They look pretty trick and I have never seen anyone run them before.

dongalonga- Rubicon Trail
- Posts : 1047
Join date : 2012-03-20
Age : 40
Location : Lowell, MA
 Re: Third Time's the Charm LJ
Today's Jeeping
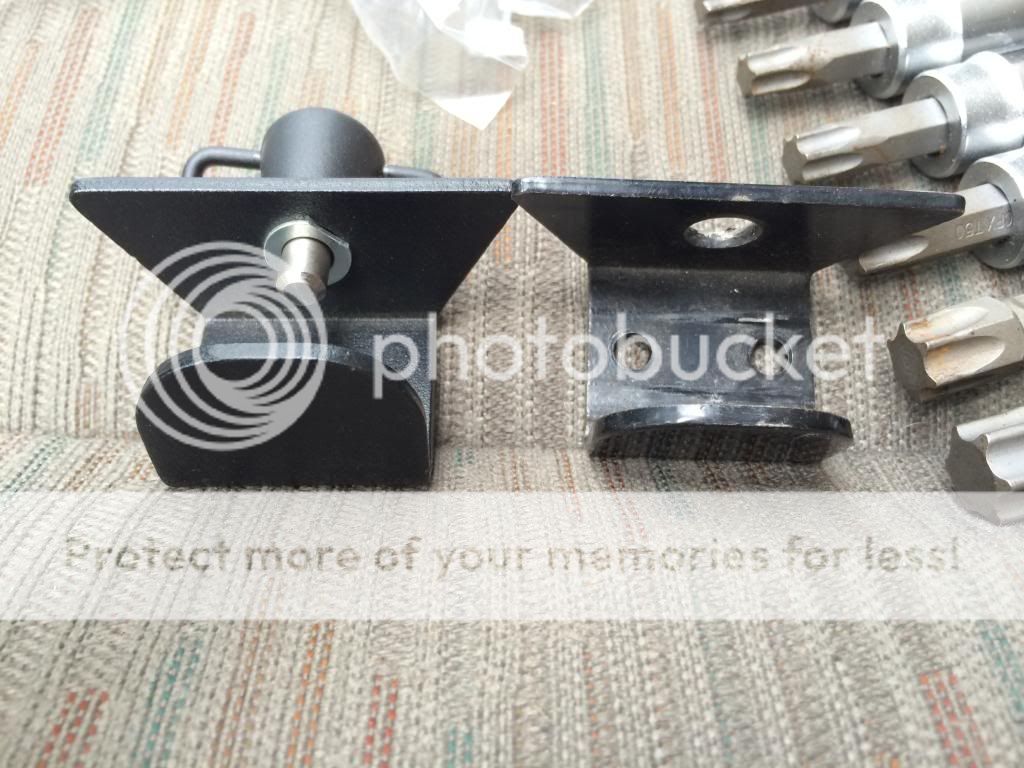
I received my light mounts today. Not so sure about the FU for a company's initials:
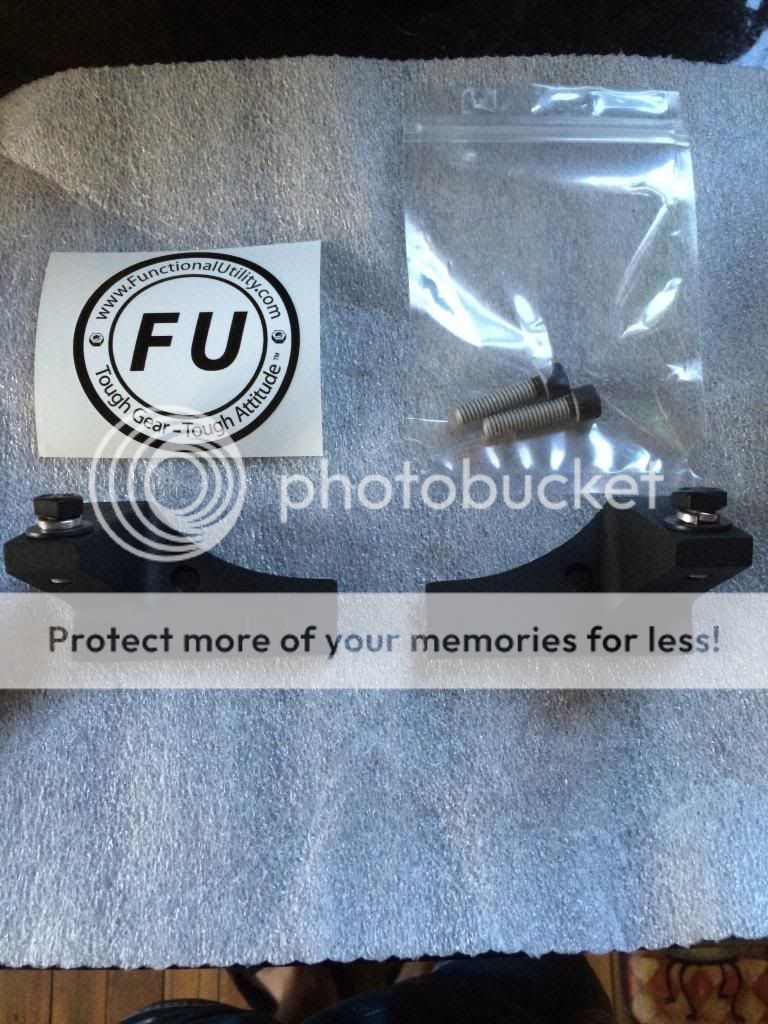
These things are slim and trim. Lightweight is always something I take into account.
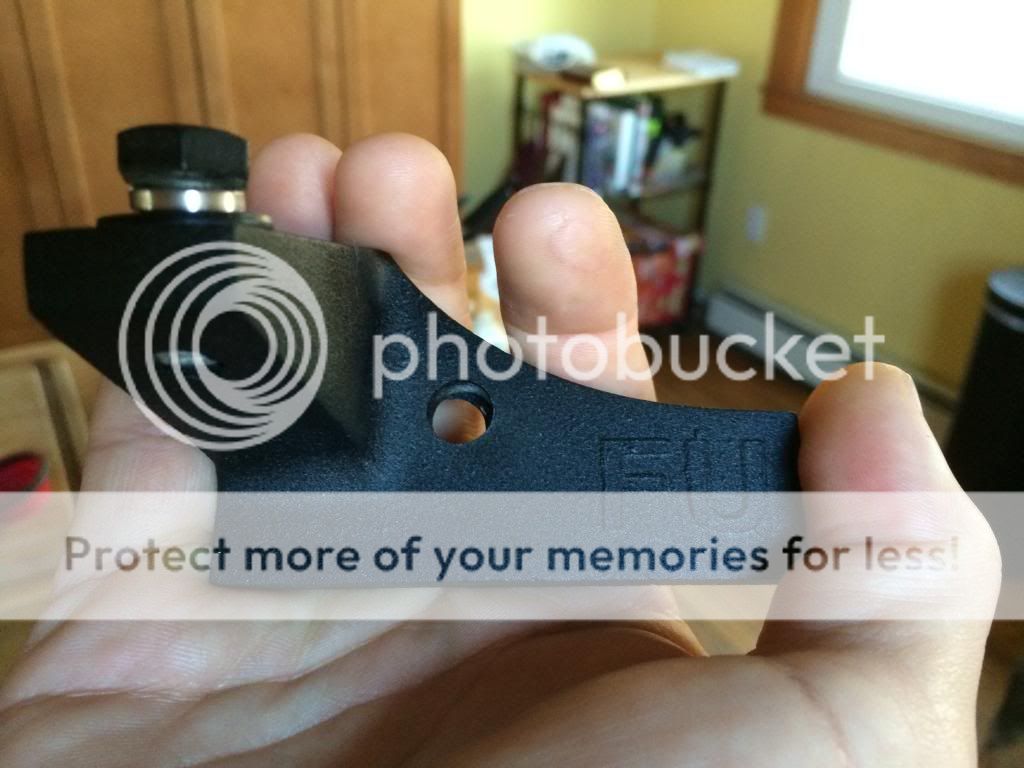
I thought this was a nice touch. A little anti seize should alleviate any rust issues or stuck bolt.

Another nice touch is the per installed neoprene backing.

I will be picking up the LJ tomorrow and get these installed this weekend.
I received my light mounts today. Not so sure about the FU for a company's initials:

These things are slim and trim. Lightweight is always something I take into account.

I thought this was a nice touch. A little anti seize should alleviate any rust issues or stuck bolt.

Another nice touch is the per installed neoprene backing.

I will be picking up the LJ tomorrow and get these installed this weekend.

dongalonga- Rubicon Trail
- Posts : 1047
Join date : 2012-03-20
Age : 40
Location : Lowell, MA
 Re: Third Time's the Charm LJ
Today's Jeeping
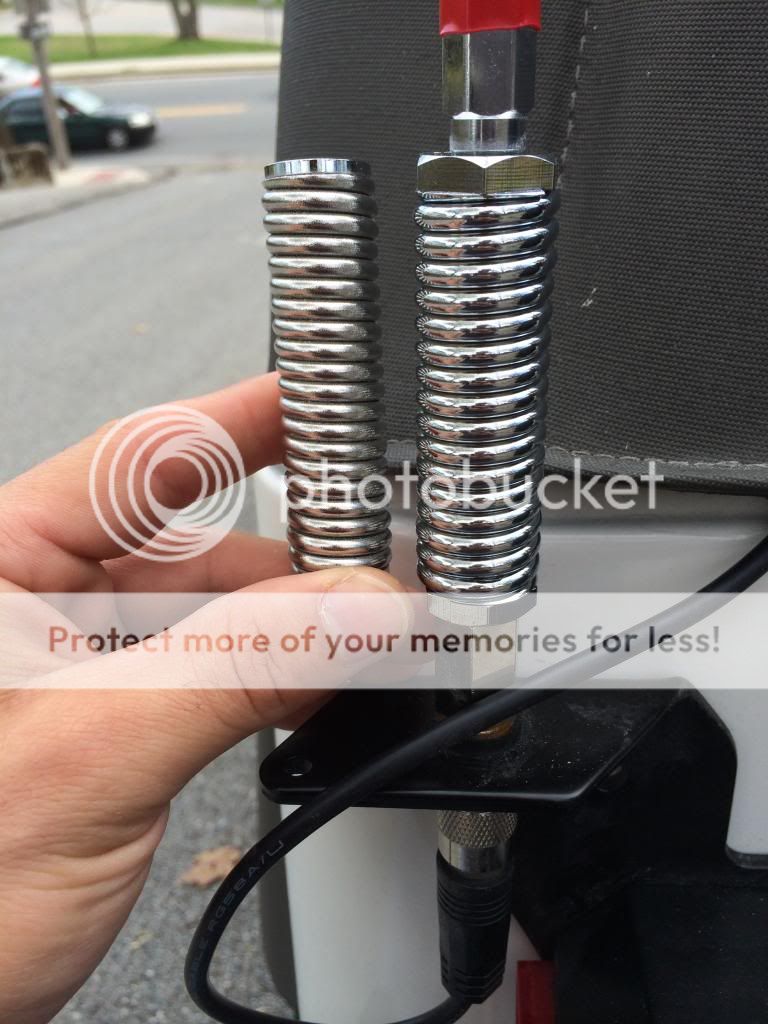
Replaced the whimsy medium duty (why do they even make these) spring with a proper man spring:
Picked up the Jeep from the body shop and it looks....well brand new!
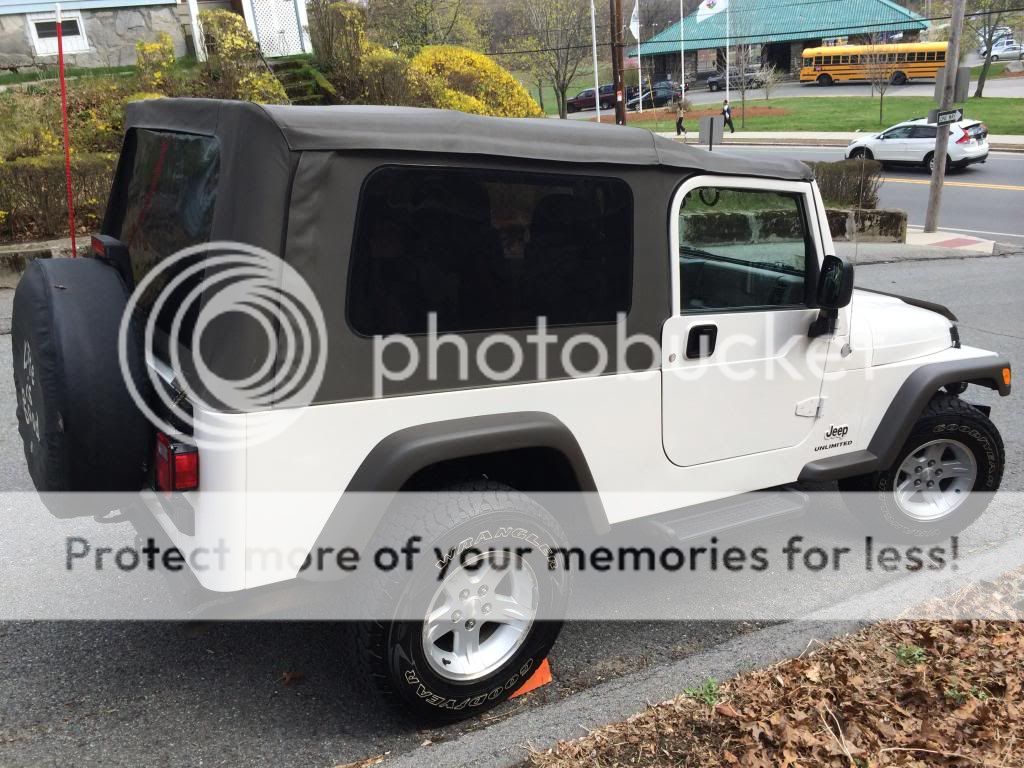
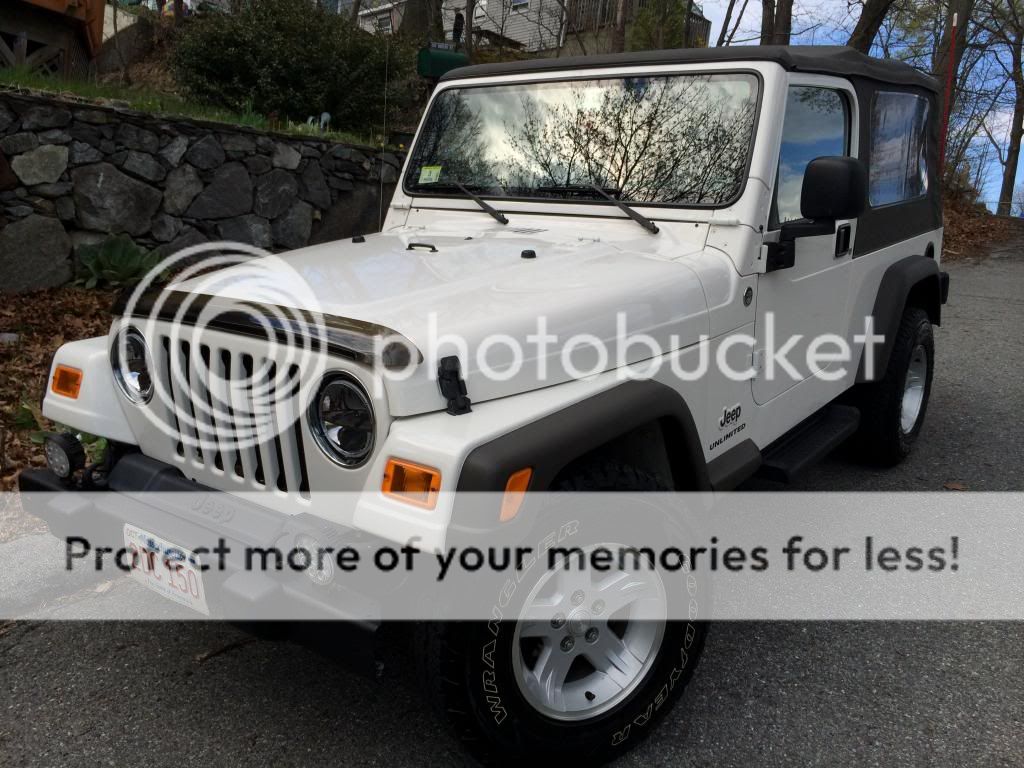
Before and after:


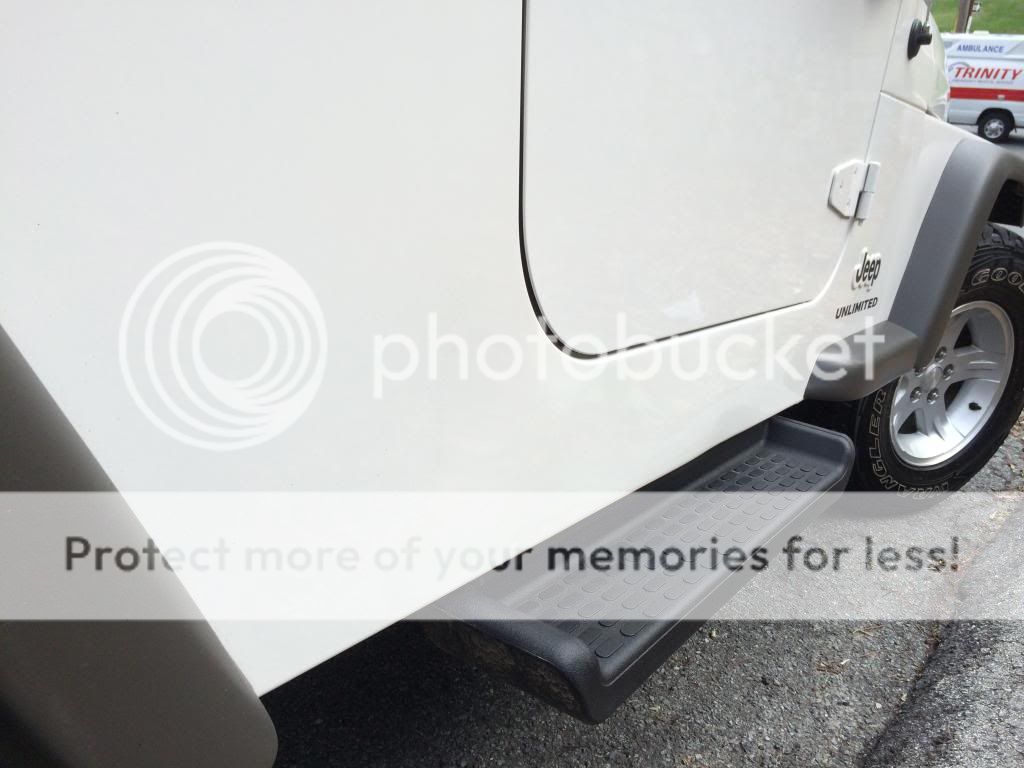
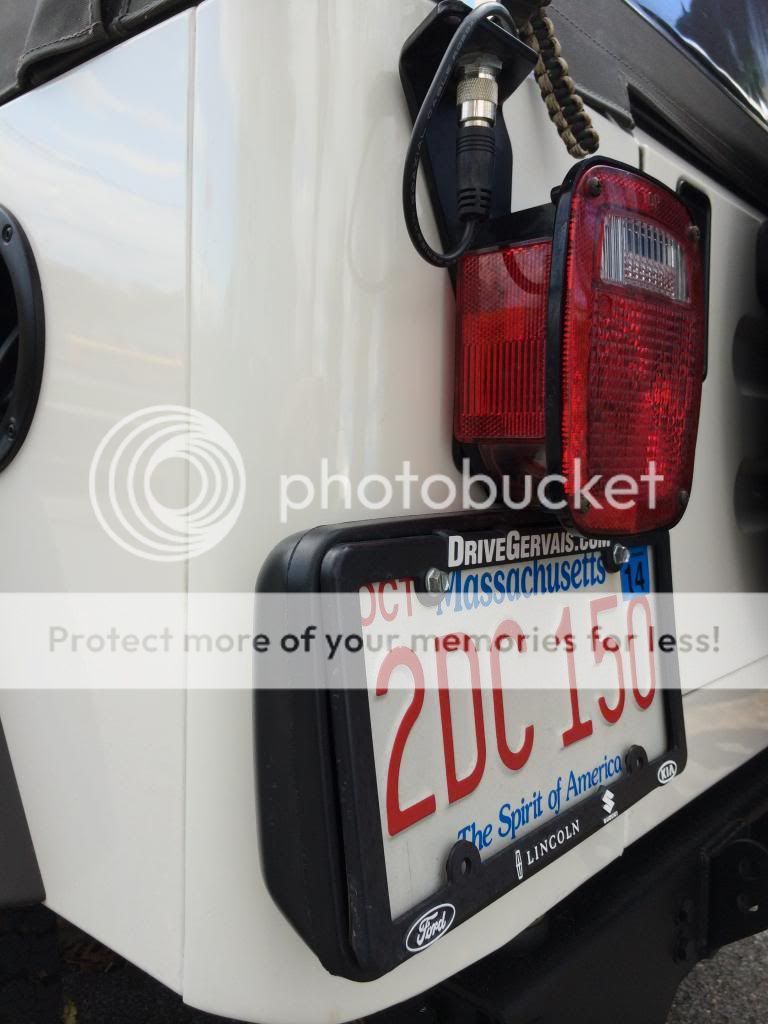
He also went through and touched up all the rust spots on the fenders, hinges, hood, and grill. He buffed out the wheels and soft top windows. And he also straightened, re-painted, and installed the rear bumper and frame tie ins:


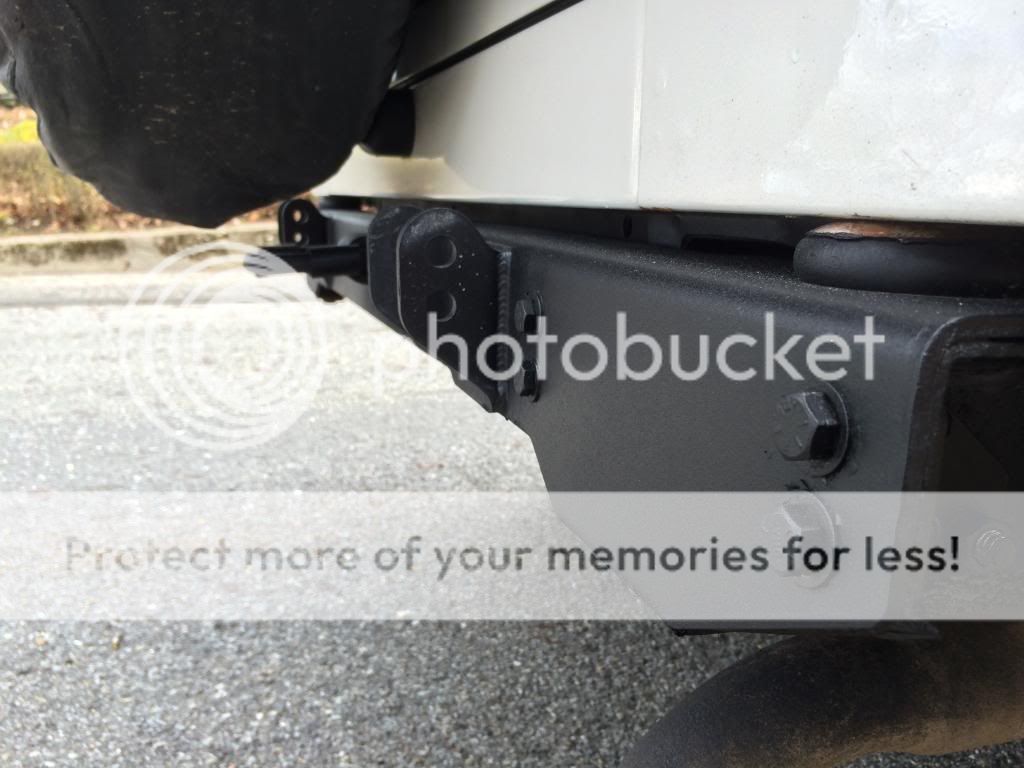
The overspray on the tail pipe is from me painting the frame rail. Overall, I am ecstatic and so is Jenny. She said the Jeep looks like it isn't more than a couple of years old now. Money well spent IMHO.
Replaced the whimsy medium duty (why do they even make these) spring with a proper man spring:

Picked up the Jeep from the body shop and it looks....well brand new!


Before and after:


He also went through and touched up all the rust spots on the fenders, hinges, hood, and grill. He buffed out the wheels and soft top windows. And he also straightened, re-painted, and installed the rear bumper and frame tie ins:


The overspray on the tail pipe is from me painting the frame rail. Overall, I am ecstatic and so is Jenny. She said the Jeep looks like it isn't more than a couple of years old now. Money well spent IMHO.

dongalonga- Rubicon Trail
- Posts : 1047
Join date : 2012-03-20
Age : 40
Location : Lowell, MA
 Re: Third Time's the Charm LJ
Wow that looks great, where did you go and do you mind saying what you paid? I've never had and body work done so I literally have no clue what things cost.

Jake- Rausch Creek
- Posts : 323
Join date : 2013-05-19
Location : Beverly
 Re: Third Time's the Charm LJ
I only use one shop. Noel's Autobody in Pelham NH. I can't say what I paid, because I get a better than average rate as I've known him since I was born. He doesn't charge as much as the average guy and does well above average work.

dongalonga- Rubicon Trail
- Posts : 1047
Join date : 2012-03-20
Age : 40
Location : Lowell, MA

dongalonga- Rubicon Trail
- Posts : 1047
Join date : 2012-03-20
Age : 40
Location : Lowell, MA
 Re: Third Time's the Charm LJ
Well folks here is the news. Jenny gave me a line of credit to build the Jeep. I was stunned and scrambled to put a build list together with the allocated funds. Here is the shakedown of what was ordered today:
MetalCloak 3.5" Gamechanger ARB Edition
MetalCloak Stocker Rockers
JKS BL
Savvy MML (Beasley)
Novak Shifter
Rugged Ridge SYE
Rubicon Driveshaft (Beasley)
1.5" Wheel Spacers
Teraflex Spare Tire Spacer
ZJ Tie Rod Conversion
31 Tooth Speedo Gear
33x12.50R15 Goodyear Duratracs
Looks like July 4th at Rausch Creek is my deadline to get everything installed and ironed out. It is going to be a fun summer!

dongalonga- Rubicon Trail
- Posts : 1047
Join date : 2012-03-20
Age : 40
Location : Lowell, MA
 Re: Third Time's the Charm LJ
Received a call from Matson himself today. The suspension and rockers are 4-6 weeks out. Looks like I won't have the rig build for the 4th. Not a big deal as Rausch Creek will be fun either way.

dongalonga- Rubicon Trail
- Posts : 1047
Join date : 2012-03-20
Age : 40
Location : Lowell, MA
 Re: Third Time's the Charm LJ
Break the mold and wheel the snot out of a stock LJ with 33s. Up-travel be damned!
Page 2 of 8 •  1, 2, 3, 4, 5, 6, 7, 8
Page 2 of 8
Permissions in this forum:
You cannot reply to topics in this forum
 Home
Home