Third Time's the Charm LJ
+6
CrawlingForward
Jake
Tonellin
Mark
desertzj
AquilesT
10 posters
Page 4 of 8
Page 4 of 8 •  1, 2, 3, 4, 5, 6, 7, 8
 Re: Third Time's the Charm LJ
I may be interested in the wheel spacers. I'm leaning more towards 1.25" size but I'll put some thought into it. When the spacers hit the market let me know.
 Re: Third Time's the Charm LJ
I should be able to sell you all 5 as the spare should fit perfectly with the new wheels. I will text you a price.
dongalonga- Rubicon Trail
- Posts : 1047
Join date : 2012-03-20
Age : 40
Location : Lowell, MA
 Re: Third Time's the Charm LJ
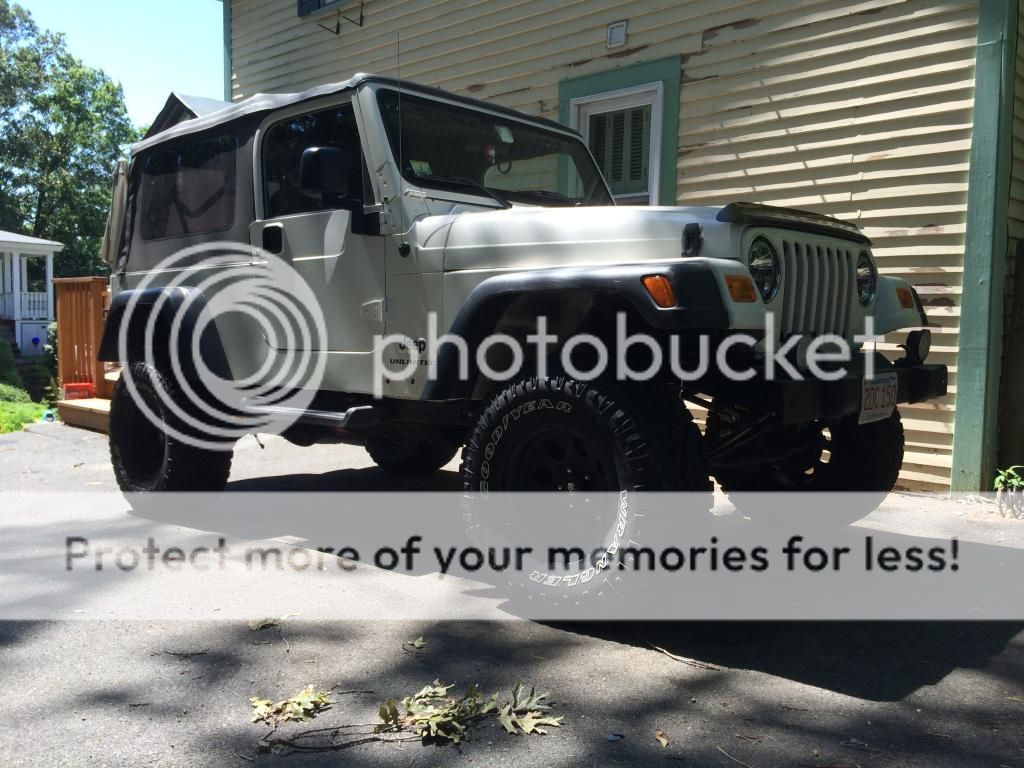
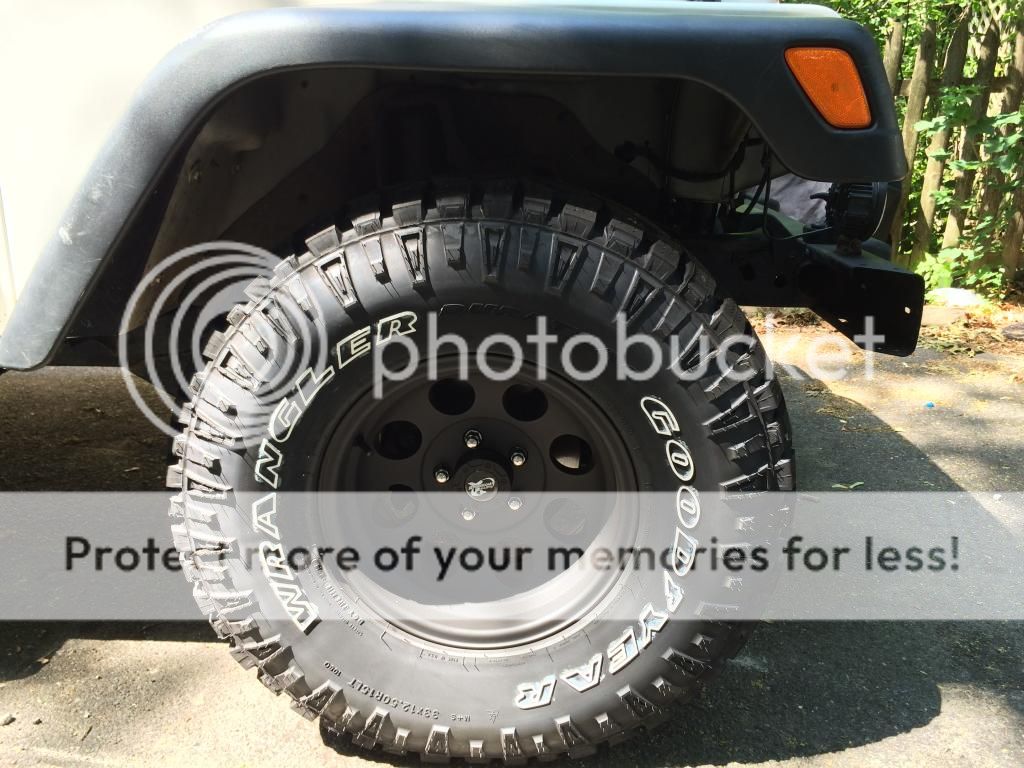
I wasn't planning to put the 33s on until after Rausch, but things move quickly here. The wheels came in and I immediately brought them to Sullivan to have the tires mounted. I figured worst case I would throw them in the basement. I should know myself better than that. I came home and threw them on right away.

With the addition of some 2" coil spacers up front I should be good to go at Rausch.
To address the issue of the spare tire bumper pads I dug out my old JK ones. They have a nipple on them for mounting as opposed to a pass through bolt like the TJ/LJ. I cut it off to reveal a perfectly sized hole for the stock bolt with the addition of a washer.

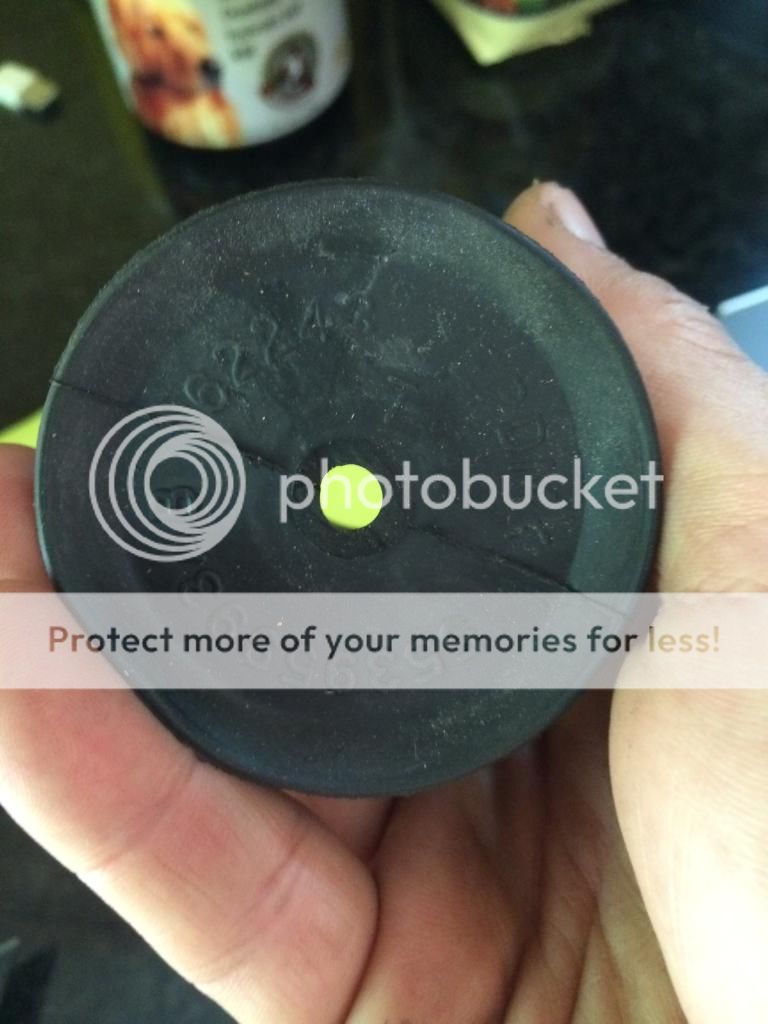
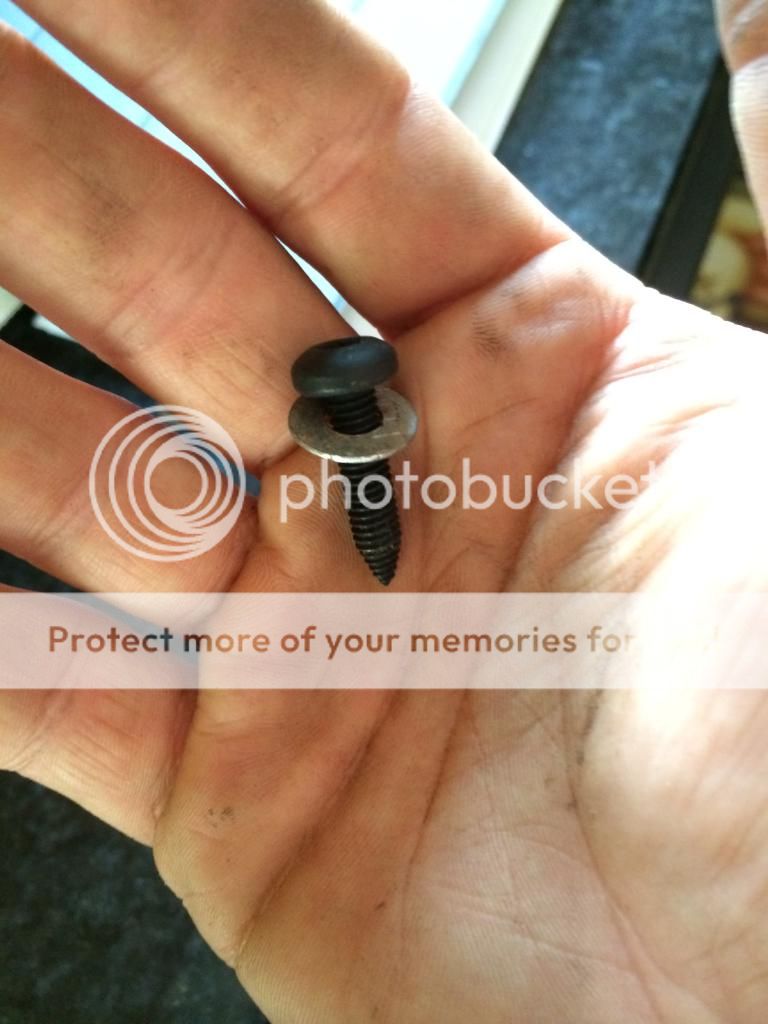
I have to say these are perfectly sized for a 33x12.5R15 on a 15x8 3.75" BS wheel.


A beautiful day calls for no top!


With the addition of some 2" coil spacers up front I should be good to go at Rausch.
To address the issue of the spare tire bumper pads I dug out my old JK ones. They have a nipple on them for mounting as opposed to a pass through bolt like the TJ/LJ. I cut it off to reveal a perfectly sized hole for the stock bolt with the addition of a washer.


I have to say these are perfectly sized for a 33x12.5R15 on a 15x8 3.75" BS wheel.


A beautiful day calls for no top!


dongalonga- Rubicon Trail
- Posts : 1047
Join date : 2012-03-20
Age : 40
Location : Lowell, MA
 Re: Third Time's the Charm LJ
Today's Jeeping:
Changed the engine oil/filter and transmission fluid.
Damn near stripped the head of the trans drain plug. Luckily I was paying attention and it didn't. I was able to get it out with the impact no problem. I will order a new plug tomorrow for the next fluid change. I applied anti seize to be extra sure it will come out. Damn dissimilar metals!
I will pick up an air filter tomorrow and change that before the road trip. I will also check the spark plugs while I'm in there. The Jeep should be running at peak condition.

dongalonga- Rubicon Trail
- Posts : 1047
Join date : 2012-03-20
Age : 40
Location : Lowell, MA
 Re: Third Time's the Charm LJ
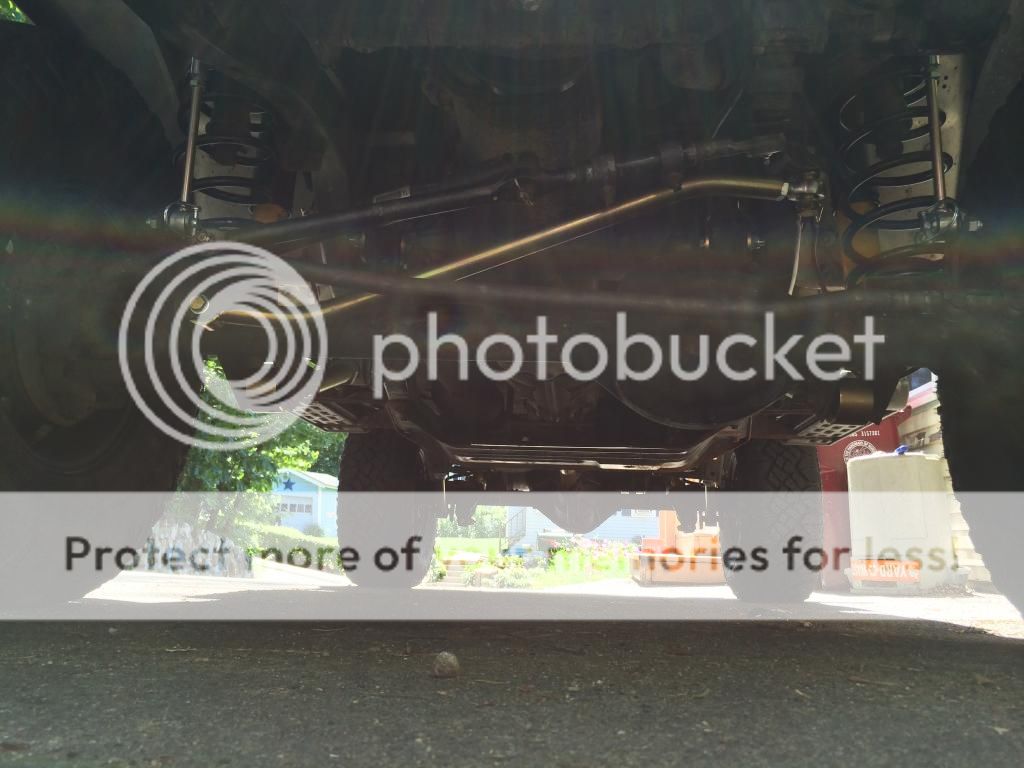
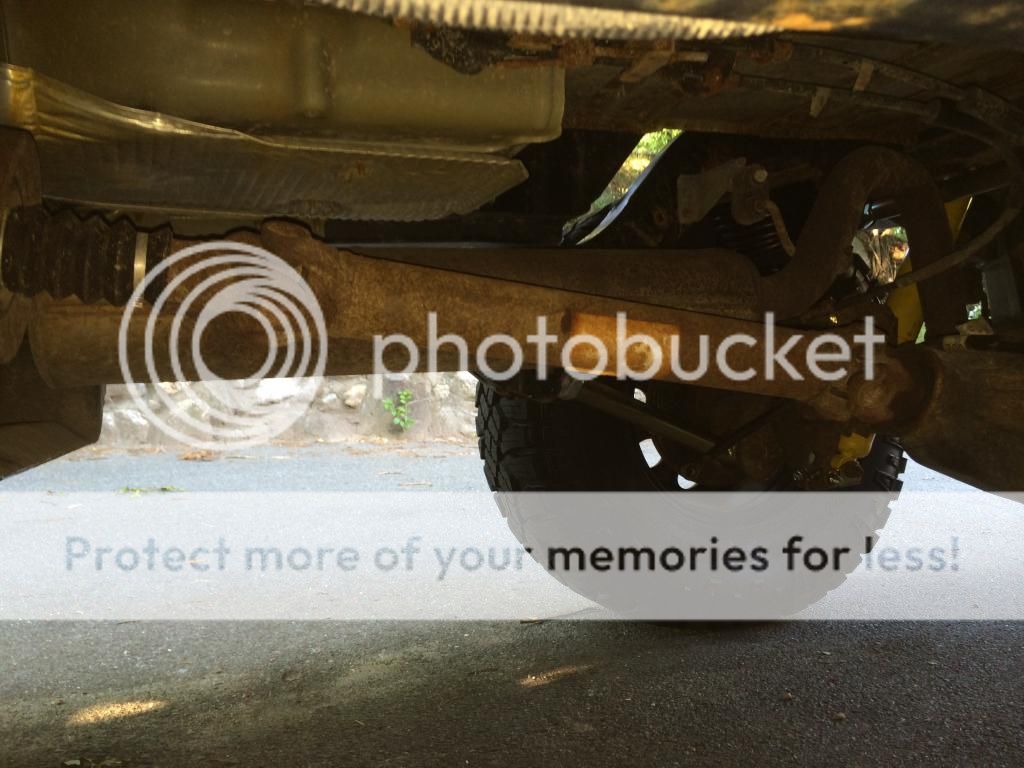
So the routine maintenance turned into front coil spacers and and entire steering system upgrade...
Topher was gracious enough to lend me a set of 2" coil spacers for the trip. They went in with no real problems.
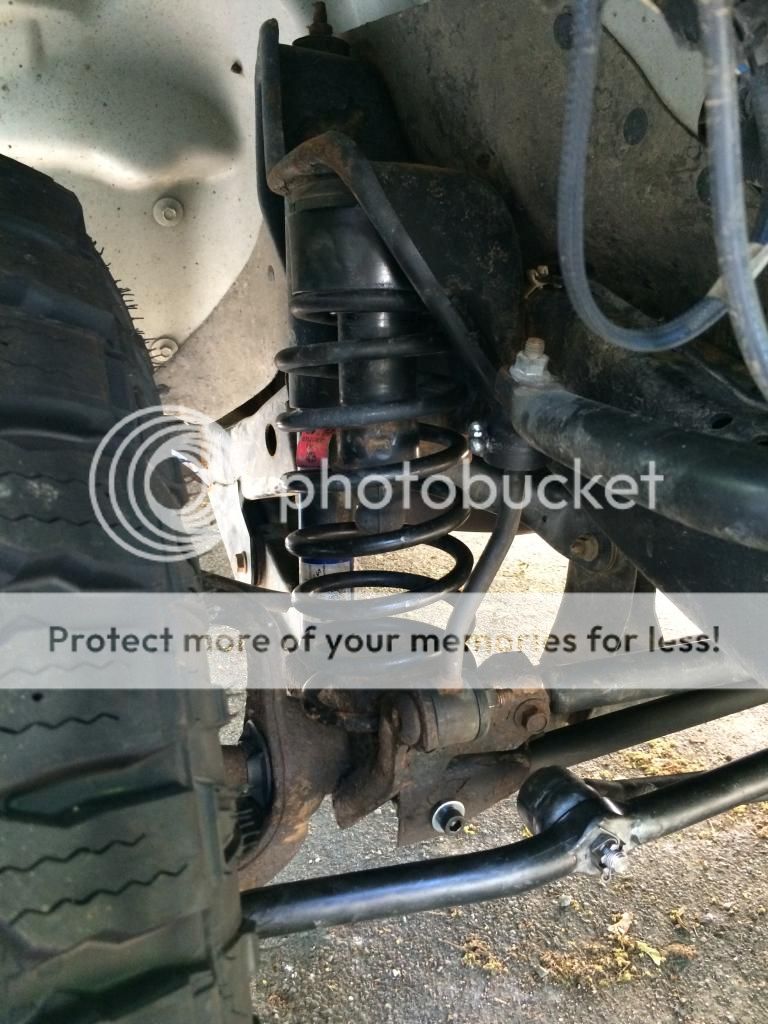
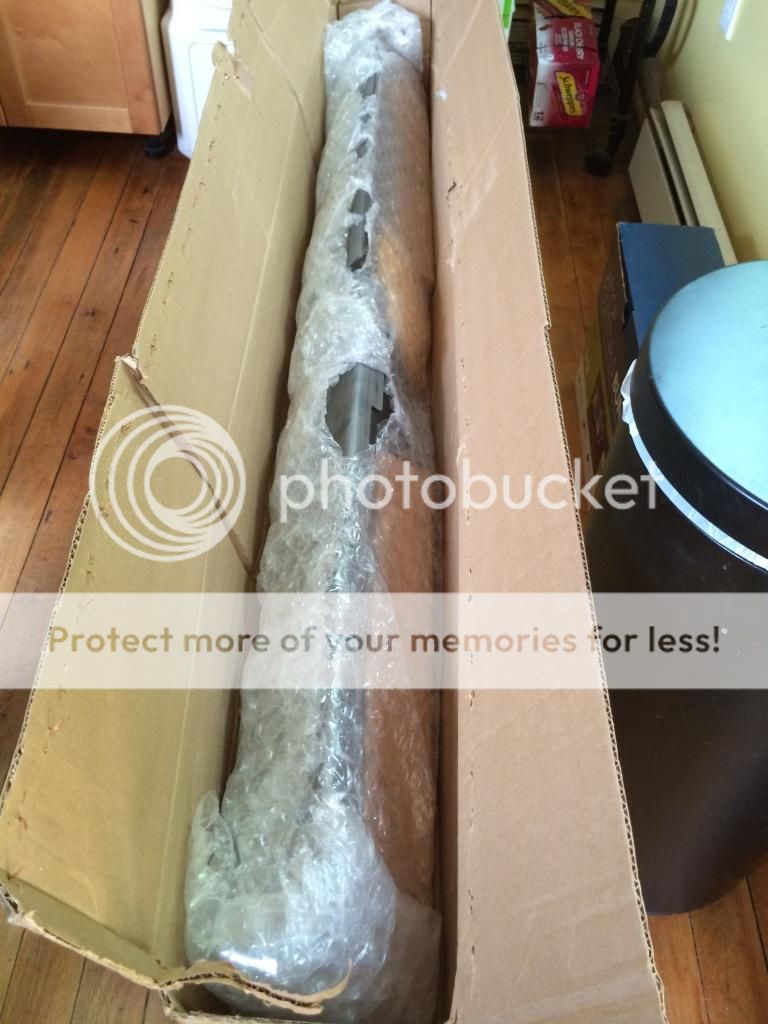
However, I found the tie rod end at the pitman arm to be bad/torn boot while I was in there checking everything. I also decided to replace the crappy track bar bolt at the axle end and the entire track bar. I had a brand new one sitting in my basement from my last TJ.
That fun little project set me back an entire day. I already had the ZJ steering upgrade and was planning to put it in while doing the spacers. However, I wasn't planning to mess with the center link. I am glad I found it though as a bad TRE in a road trip could end badly.
The track bar bolt was upgraded to a Class 12.9 hex cap M10-1.5x75mm. Cheap insurance in my eyes. The stock track bar was a bit worn for my liking as well, hence the replacement.

I think I will have plenty of clearance for Rausch Creek now.
Finally, I went for a test ride and that slight dead spot in the steering I had noticed is now gone. Everything is smooth and tight. It even tracks perfectly. Not bad for Jenny and I doing an alignment in the driveway. Luckily, I have a free alignment at the tire shop that will get done on Thursday just to make sure.
I also got the basic maintenance done that lead to all of this to include:
Oil and Filter
Transmission Fluid
Air Filter
Spark Plugs (APP985)
The rig should be good to go for the trip once I tune the CB tomorrow.
Topher was gracious enough to lend me a set of 2" coil spacers for the trip. They went in with no real problems.

However, I found the tie rod end at the pitman arm to be bad/torn boot while I was in there checking everything. I also decided to replace the crappy track bar bolt at the axle end and the entire track bar. I had a brand new one sitting in my basement from my last TJ.
That fun little project set me back an entire day. I already had the ZJ steering upgrade and was planning to put it in while doing the spacers. However, I wasn't planning to mess with the center link. I am glad I found it though as a bad TRE in a road trip could end badly.
The track bar bolt was upgraded to a Class 12.9 hex cap M10-1.5x75mm. Cheap insurance in my eyes. The stock track bar was a bit worn for my liking as well, hence the replacement.

I think I will have plenty of clearance for Rausch Creek now.

Finally, I went for a test ride and that slight dead spot in the steering I had noticed is now gone. Everything is smooth and tight. It even tracks perfectly. Not bad for Jenny and I doing an alignment in the driveway. Luckily, I have a free alignment at the tire shop that will get done on Thursday just to make sure.
I also got the basic maintenance done that lead to all of this to include:
Oil and Filter
Transmission Fluid
Air Filter
Spark Plugs (APP985)
The rig should be good to go for the trip once I tune the CB tomorrow.

dongalonga- Rubicon Trail
- Posts : 1047
Join date : 2012-03-20
Age : 40
Location : Lowell, MA

dongalonga- Rubicon Trail
- Posts : 1047
Join date : 2012-03-20
Age : 40
Location : Lowell, MA
 Re: Third Time's the Charm LJ
Your Rig is looking Great!
AquilesT- Class 6A
- Posts : 198
Join date : 2013-08-15
Location : Roslindale
 Re: Third Time's the Charm LJ
Thanks. It's about to get a whole lot better too.

dongalonga- Rubicon Trail
- Posts : 1047
Join date : 2012-03-20
Age : 40
Location : Lowell, MA
 Re: Third Time's the Charm LJ
The Jeep is looking great Shaun! Can't wait to see what you have in store for it when you get back from Rausch!
Andrew Miller- Admin
- Posts : 398
Join date : 2011-12-19
Location : Harvard Ma
 Re: Third Time's the Charm LJ
Unfortunately rausch was a no go. Between TJs jeep breaking and me being sick as a dog, it wasn't meant to be. Camping in the rain didn't sound too appealing right now.

dongalonga- Rubicon Trail
- Posts : 1047
Join date : 2012-03-20
Age : 40
Location : Lowell, MA
 Re: Third Time's the Charm LJ
I was almost finished today when I noticed I really messed up. I threw away my stock rear end links with the hardware still on them. Apparently these are impossible to get anywhere other than the dealer at $5 a pop. I am not happy.
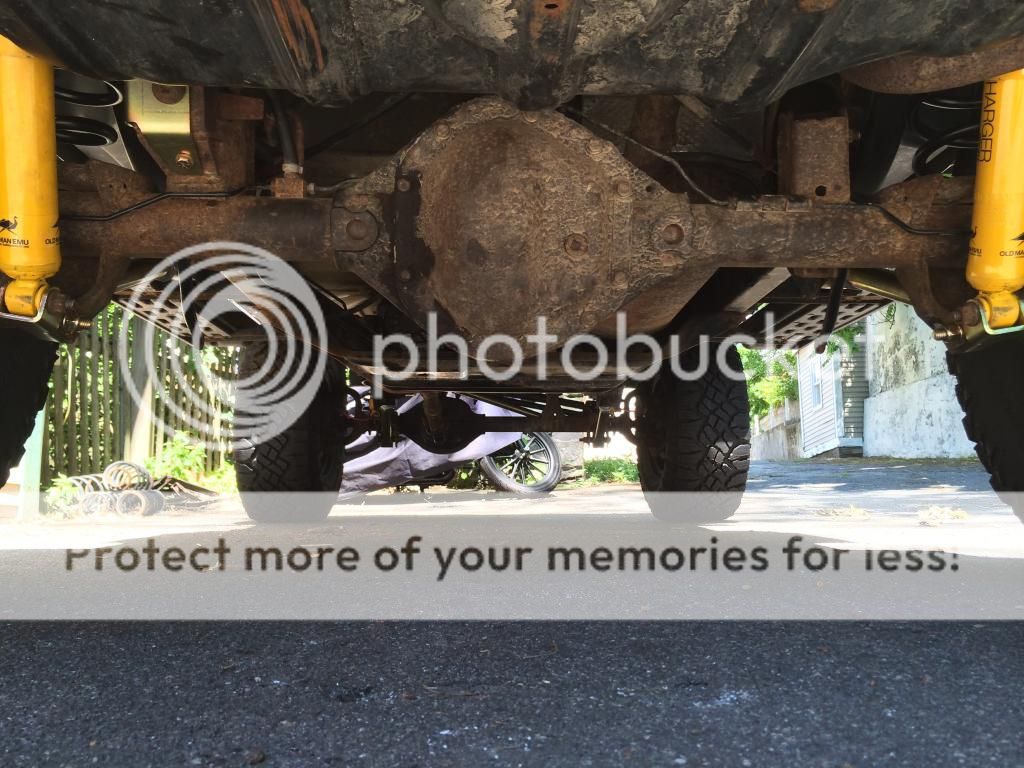
Other than that, I got everything installed. No pics today as I ran right up against the end of the day due to a few snags. A call to metalcloak solved all but the rear end link dilemma.
A couple of notes for anyone thinking about getting the metal cloak lift:
-You no longer need to drill the upper control arm mounting holes (positive)
-Metal cloak provides properly sized hardware for the upper but it strips out right before 60ft lbs (negative)
-I simply reused the stock hardware for the uppers that can easily handle the proper torque (positive)
-Metal cloak provides not torque specs at all for anything (extremely negative)
-A call to metal cloak got me the torque specs (positive)
-The directions metal cloak offers are insanely bad. No details and some things skipped completely (extremely negative)
-A call to metal cloak solved most of those issues except me throwing away the end links with the hardware I didn't know I had to reuse (neutral)
The install went well other than the notes above. So well infact, I was able to get all four rear upper shock mount bolts out without a single broken fastener. Yeah I know you don't believe this, but it definitely happened. I replaced them all with new bolts and plenty of anti seize to hopefully continue the streak for the next removal.
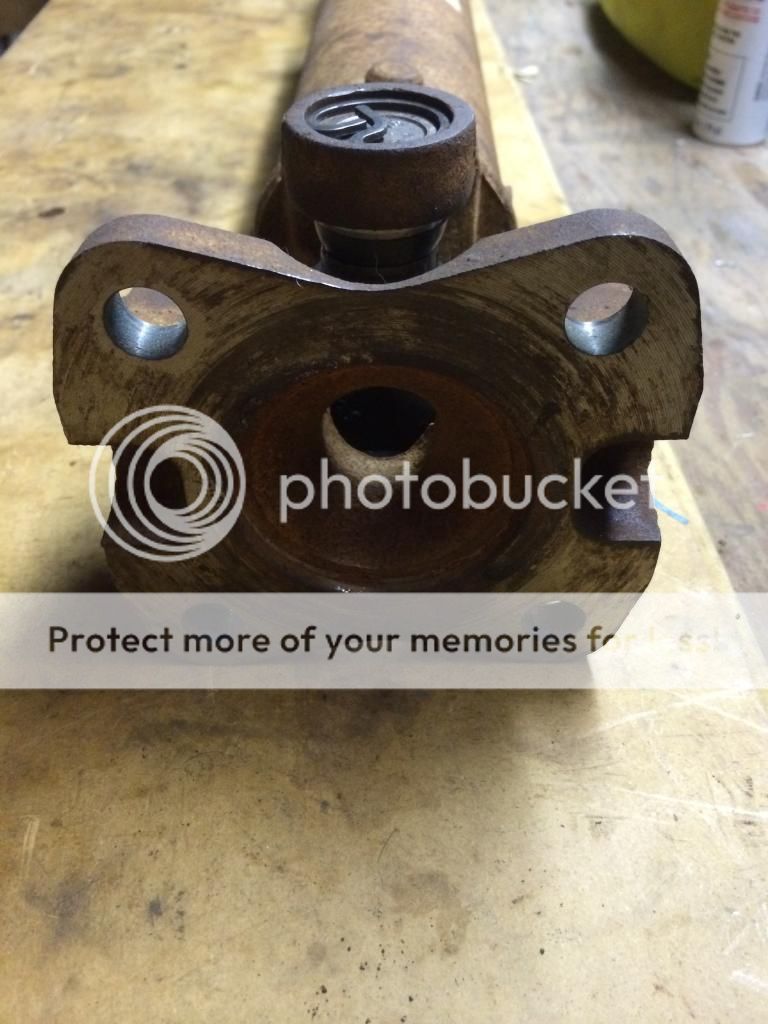
At this point all I have left before I can drive the rig is bump stops, rear sway bar, SYE, and driveshaft. This brings me to my next dilemma. The stock rubicon driveshaft Beasley was generous enough to send my way isn't going to work. At least not that I can see. It has the flanged mount from the rubicon and the SYE has a cupped flange that accepts what I'm assuming is a 1310 style UJoint. Not sure if anyone knows a way I can make this work?
I am going to check the dealer tomorrow for bolts, but if anyone has some laying around they aren't using I would be happy to buy them from you. I will take some pics tomorrow before work.

dongalonga- Rubicon Trail
- Posts : 1047
Join date : 2012-03-20
Age : 40
Location : Lowell, MA
 Re: Third Time's the Charm LJ
Looking forwards to the results of your work!
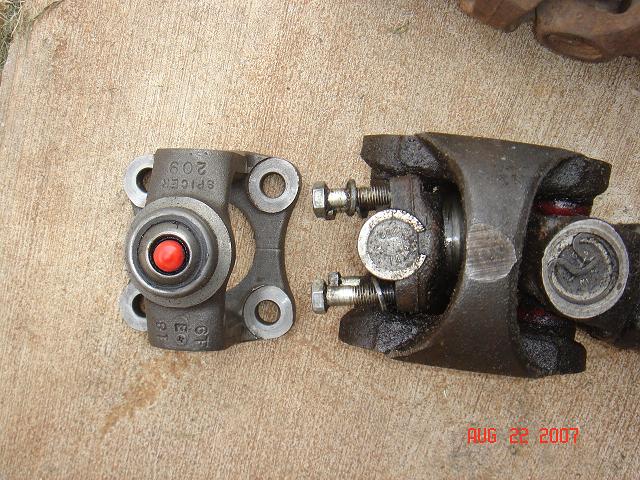
As to the ds, can you use a flange style SYE instead of the cup style? If not.. perhaps you can remove the flange adapter and simply use straps like on the other end of the DS (preferably the beefy u bolt kind)? Looking at the rubicon DS I couldn't see the centering ball if there is one, so not sure how that works out. But if it does have a standard centering ball setup and its the same size as the 1310 double cardan centering ball, you can get the part on the left in this picture, which if compatible with the DS is what you want to mate up with the SYE. All of this assuming it takes a 1310 joint, otherwise all bets are off. Unless of you don't mind running an adapter u-joint like the 1330/1310 or 1350/1310.
edit: goofed on that, the one on the left is probably what you have, you want whats on the right, but I'm sure you already know that. Point is, you might be able to just swap out the centering ball you have with the correct one. Not sure on the specific model but that's what mates up the 1310 SYE on my rear shaft. http://www.dennysdriveshaft.com/p425_spicer_211355x_jeep_cv_greaseable_centering_yoke_1310_series.html
Also, you don't need a rsb, just leave it off . JK, I totally get the desire for a vehicle that doesn't roll around like crazy.
Sucks the metalcloak documentation is so bad, I don't know much about other than that they make some nice looking flares.
As to the ds, can you use a flange style SYE instead of the cup style? If not.. perhaps you can remove the flange adapter and simply use straps like on the other end of the DS (preferably the beefy u bolt kind)? Looking at the rubicon DS I couldn't see the centering ball if there is one, so not sure how that works out. But if it does have a standard centering ball setup and its the same size as the 1310 double cardan centering ball, you can get the part on the left in this picture, which if compatible with the DS is what you want to mate up with the SYE. All of this assuming it takes a 1310 joint, otherwise all bets are off. Unless of you don't mind running an adapter u-joint like the 1330/1310 or 1350/1310.
edit: goofed on that, the one on the left is probably what you have, you want whats on the right, but I'm sure you already know that. Point is, you might be able to just swap out the centering ball you have with the correct one. Not sure on the specific model but that's what mates up the 1310 SYE on my rear shaft. http://www.dennysdriveshaft.com/p425_spicer_211355x_jeep_cv_greaseable_centering_yoke_1310_series.html
Also, you don't need a rsb, just leave it off
Sucks the metalcloak documentation is so bad, I don't know much about other than that they make some nice looking flares.
Jake- Rausch Creek
- Posts : 323
Join date : 2013-05-19
Location : Beverly

dongalonga- Rubicon Trail
- Posts : 1047
Join date : 2012-03-20
Age : 40
Location : Lowell, MA
 Re: Third Time's the Charm LJ
Oooooo its not a double cardan, not sure why I assumed it was. My bad. In that case, pick up a spice 1330-> 1310 adapter joint and run it without the flange adapter. Should be able to bolt up with the same style straps you find on the differential end of the shaft? Are you sure you can get away with a single cardan style DS after the lift? From the look of it the rubicon tcase output runs a harmonic balancer that the ds flange bolts up to, that might be one way they get away with steeper angles without vibes. Not sure though.
Regardless, I'd say give tom woods a call and see if they know of a way to make it work. From what people say they're really helpful.
Regardless, I'd say give tom woods a call and see if they know of a way to make it work. From what people say they're really helpful.
Last edited by hobhayward on 7/8/2014, 11:55 pm; edited 1 time in total

Jake- Rausch Creek
- Posts : 323
Join date : 2013-05-19
Location : Beverly
 Re: Third Time's the Charm LJ
There is no other side. That's the end of the driveshaft. The other end of the driveshaft is the pinion end for the rear differential.

dongalonga- Rubicon Trail
- Posts : 1047
Join date : 2012-03-20
Age : 40
Location : Lowell, MA
 Re: Third Time's the Charm LJ
Whoops, updated that last post by accident instead of posting down here.

Jake- Rausch Creek
- Posts : 323
Join date : 2013-05-19
Location : Beverly
 Re: Third Time's the Charm LJ
Thanks for the input. I will call tomorrow.

dongalonga- Rubicon Trail
- Posts : 1047
Join date : 2012-03-20
Age : 40
Location : Lowell, MA

dongalonga- Rubicon Trail
- Posts : 1047
Join date : 2012-03-20
Age : 40
Location : Lowell, MA
 Re: Third Time's the Charm LJ
I picked up end link bolts at the dealer. $6 a piece ouch
I didn't really mind as long as the rig was going to be complete. Then I hit a new snag...
This is a little game I like to call, One Of These Things Is Not Like the Other
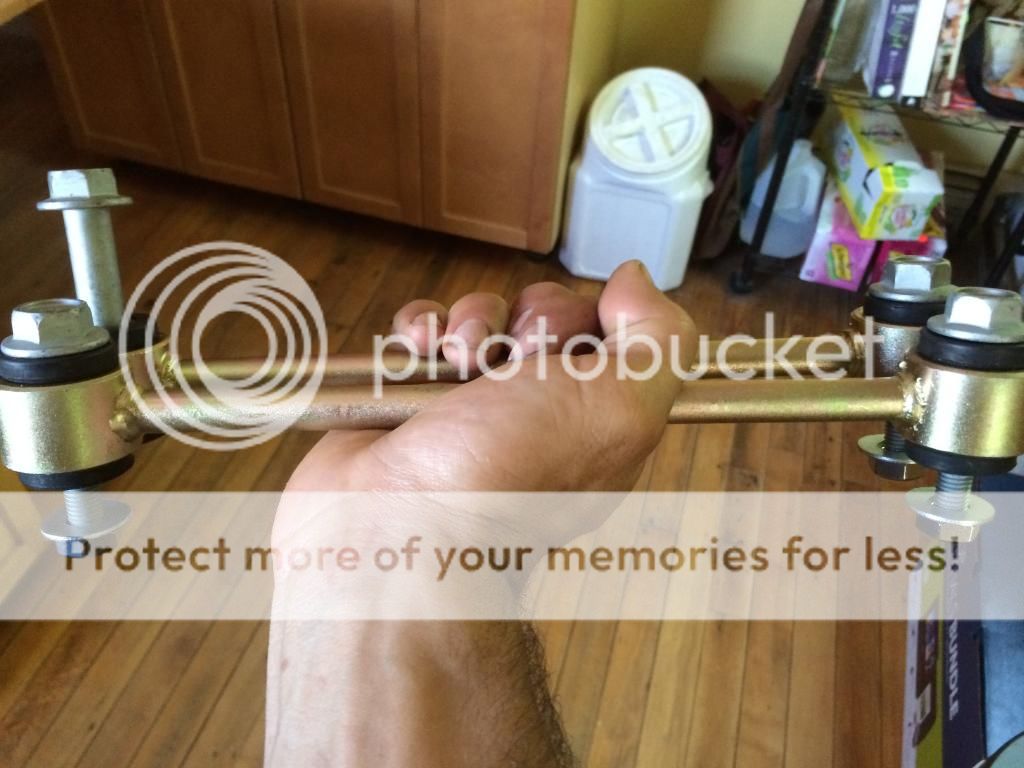
That's right folks one of the four end link sleeves is the incorrect inner diameter. This is a critical dimensions as the bolt shanks are meant to fit very snugly. The lack of fitment you see is despite me opening the hole to 1/2". It is clearly a metric diameter and is a micrometer off.
I called metal cloak and they were stunned. They are sending a new link two day. I hope this concludes the surprises.
I didn't really mind as long as the rig was going to be complete. Then I hit a new snag...
This is a little game I like to call, One Of These Things Is Not Like the Other

That's right folks one of the four end link sleeves is the incorrect inner diameter. This is a critical dimensions as the bolt shanks are meant to fit very snugly. The lack of fitment you see is despite me opening the hole to 1/2". It is clearly a metric diameter and is a micrometer off.
I called metal cloak and they were stunned. They are sending a new link two day. I hope this concludes the surprises.

dongalonga- Rubicon Trail
- Posts : 1047
Join date : 2012-03-20
Age : 40
Location : Lowell, MA

dongalonga- Rubicon Trail
- Posts : 1047
Join date : 2012-03-20
Age : 40
Location : Lowell, MA
 Re: Third Time's the Charm LJ
Nice! Lookin good.
How does the pinion angle compare to the tcase output angle? Pretty sure you want those to be parralel in addition to being under 3*.
How does the pinion angle compare to the tcase output angle? Pretty sure you want those to be parralel in addition to being under 3*.

Jake- Rausch Creek
- Posts : 323
Join date : 2013-05-19
Location : Beverly
 Re: Third Time's the Charm LJ
That's a good question. I will have to take a look tomorrow.

dongalonga- Rubicon Trail
- Posts : 1047
Join date : 2012-03-20
Age : 40
Location : Lowell, MA
 Re: Third Time's the Charm LJ
Looks great Shaun!

Andrew Miller- Admin
- Posts : 398
Join date : 2011-12-19
Location : Harvard Ma

dongalonga- Rubicon Trail
- Posts : 1047
Join date : 2012-03-20
Age : 40
Location : Lowell, MA
 Re: Third Time's the Charm LJ
I assume you're going black with them? If so, I've had good luck (quite surprisingly) with Rust-Oleum spray-on bed liner. It's only like six bucks a can from the Depot (maybe even cheaper), and it's shockingly durable. I've used it on my brush bar up front, gas tank skid, the TJ rear bumper I previously had on, and the diff covers and couldn't be happier.
Full disclosure, there is some rust now on the tank skid and the brush bar, but that's because I was a lazy asshole and didn't bother to properly sand either of those things before painting (both of which had rust on them before I sprayed the bed liner). This is something you obviously would not do. I did properly sand and paint the diff covers and the rear bumper, and I've banged those covers off some nice rocks at Ma-Bell and elsewhere and the paint didn't even nick, and the old bumper has been sitting in my parents' backyard for almost a year and no real sign of rust yet. The stuff's cheap, gives a nice textured look (like a powder coat), and it's readily available for you to make any touch-ups if/when you knock them. The nice thing about it too is that you can lay the stuff on heavy or light and it doesn't really affect the look of whatever it is you paint, i.e. no dark spots or light spots depending on the angle you look at it or differences in sunlight.
I'd say you wouldn't need more than two cans for a proper paint job, and that's being quite liberal. One can of that stuff goes pretty damn far. Just some food for thought for you.
Page 4 of 8 •  1, 2, 3, 4, 5, 6, 7, 8
Page 4 of 8
Permissions in this forum:
You cannot reply to topics in this forum
 Home
Home