Chili Pepper TJ Build
+15
nsjbill
ArticRubi
THOOPY3
AngryTJ
Andrew Miller
oathkeeper4freedom
ol'blue
Mark
janesy
CrawlingForward
Tobit
dongalonga
angri
wayne07jk
Ryan McKee
19 posters
Page 6 of 6
Page 6 of 6 •  1, 2, 3, 4, 5, 6
 Re: Chili Pepper TJ Build
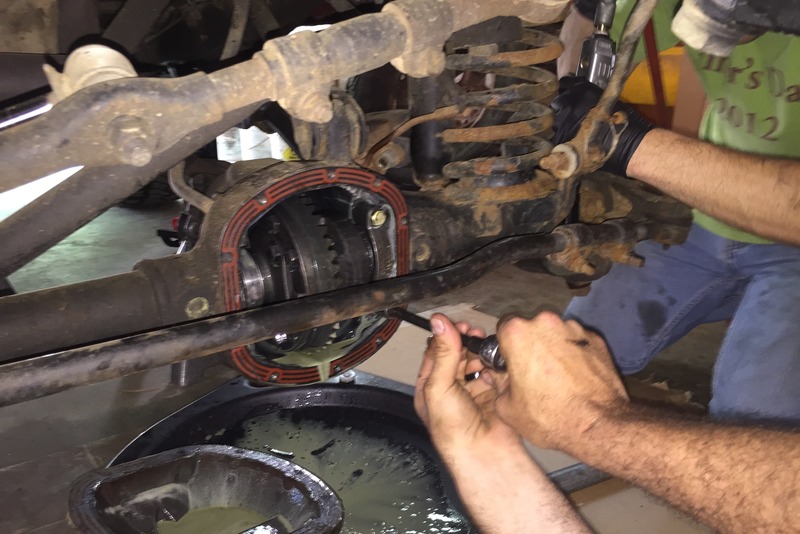
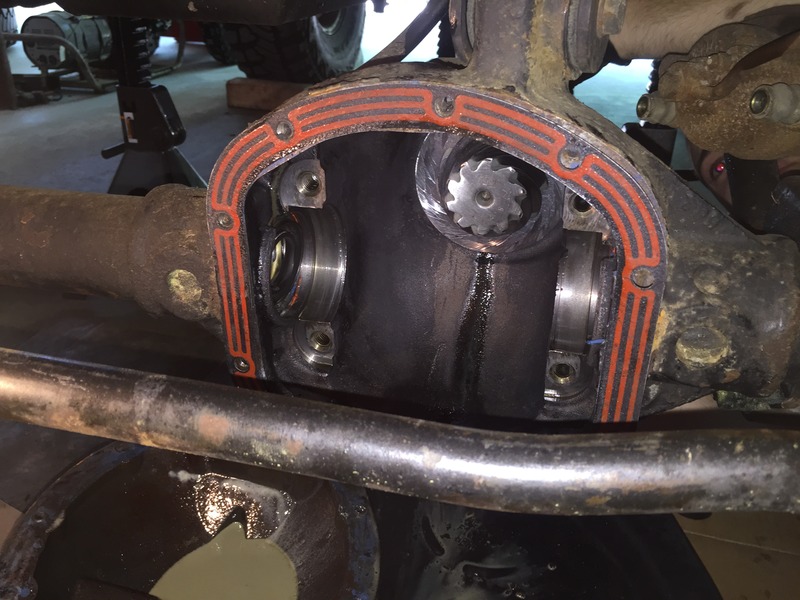
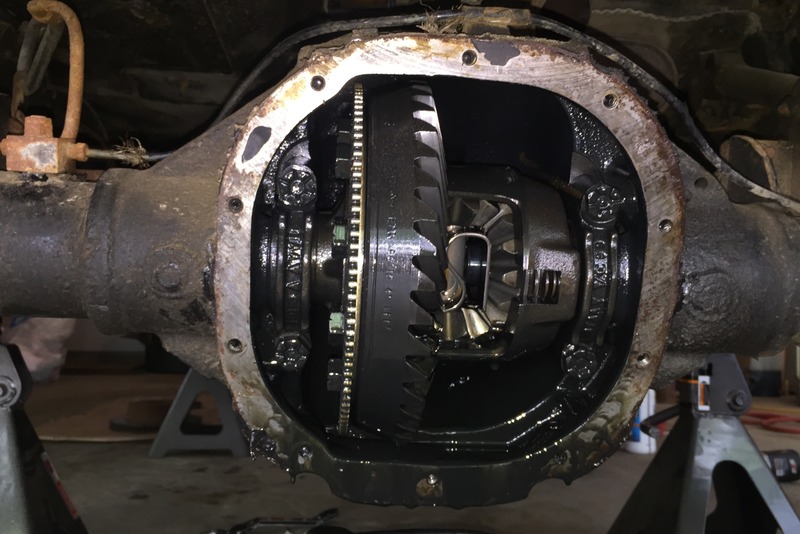
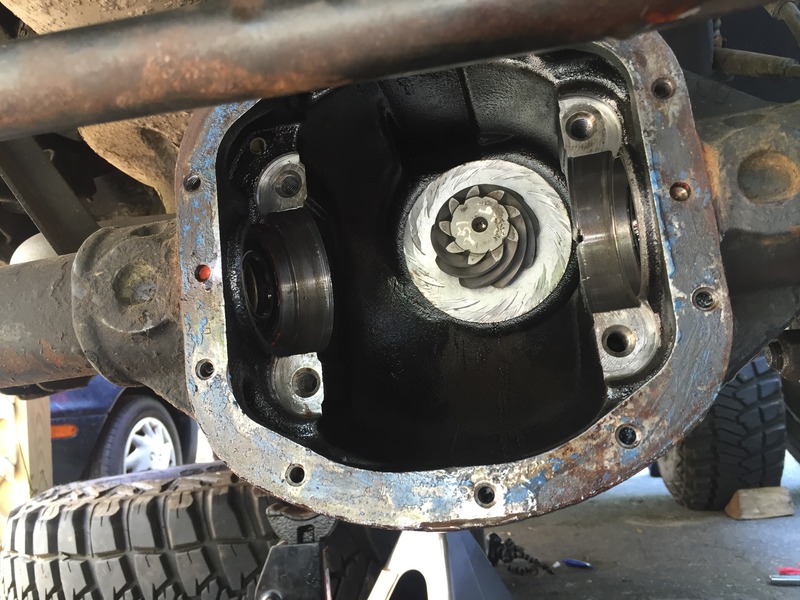
So after MaBell I discovered that there was play in my front driveshaft... at the pinion. So I ordered up a master rebuild kit for the HP30, after taking the diff cover off and checking the gears (which looked great and there was a complete absence of metal in the diff) deciding against buying a new ring & pinion. The gear oil had been leaking out of the axle tubes for a while after my swimming incident in NH a month ago, and so I also picked up replacement inner axle seals to fix that.
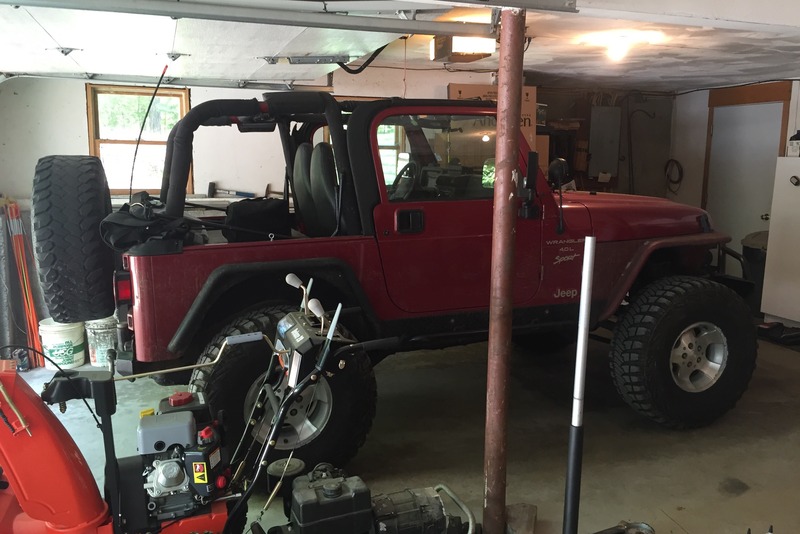
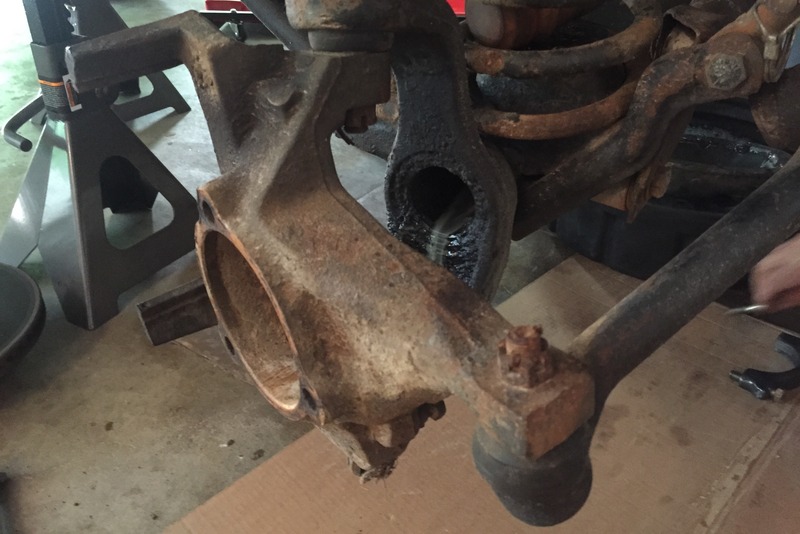
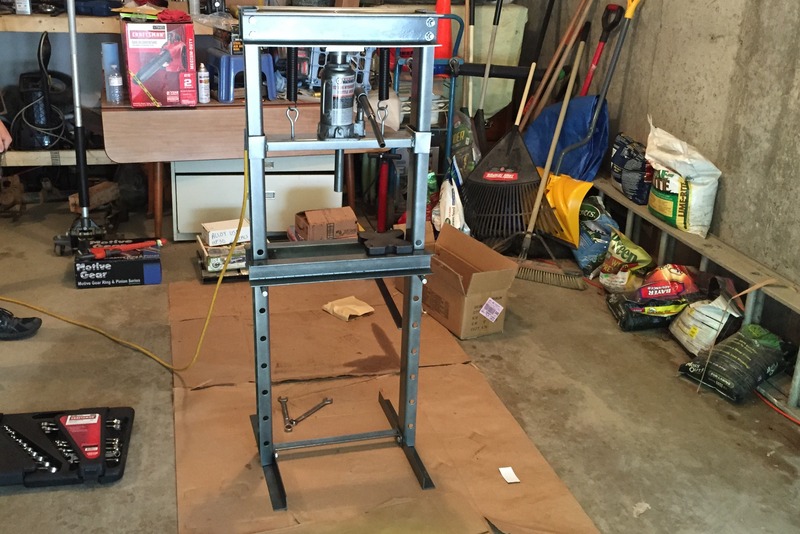
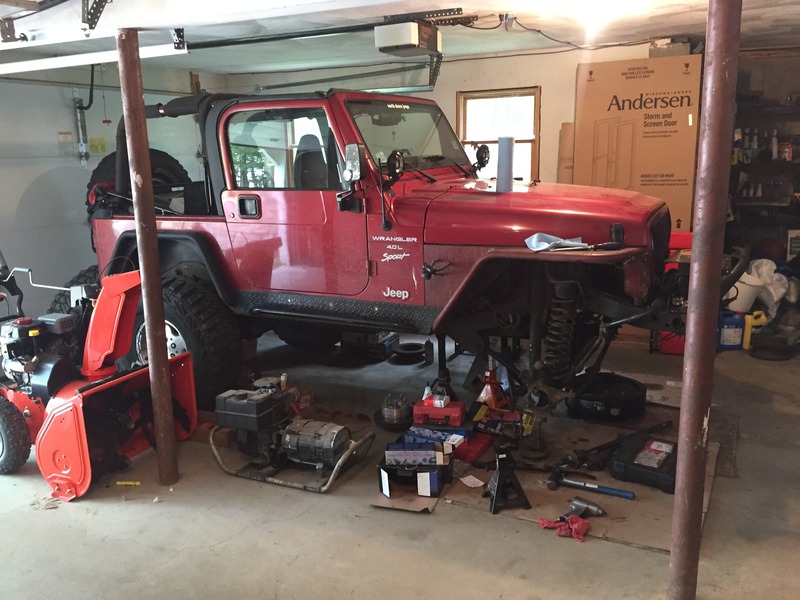
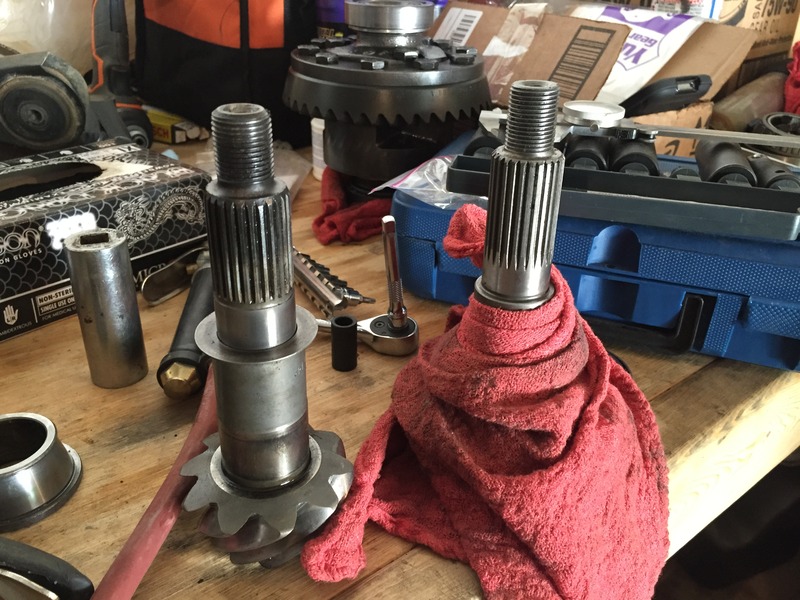
On Saturday I drove up to my friend's in Harvard, MA and parked the Jeep in his garage, being joined by Andrew, Mike LeBlanc, and Shaun. We stripped the front axle down pretty quickly, having it completely void of hubs/bearings/carrier/pinion/etc in about an hour's time. As we ate lunch and called the local Harbor Freight to check on the status of a 12+ ton press to getting the new bearings on the pinion, Shaun noticed that though the pinion gear hadn't chipped or anything major, it was slightly shaved down, and likely on course for complete internal destruction. It was at that point that I decided against moving forward with putting the 4.10 gear set back in, and we cleaned up the garage, leaving the Jeep on jack stands for the week.
Since I'm buying new gears anyway the debate came in as to whether or not it'd be worth it to re-gear with a better ratio for my tire/tranny/engine combination. 5 years ago when I built the Jeep from 31s to 35s, I picked up the 8.8 from ECGS and HP30 on Craigslist with the 4.10 gearing as it was semi-easy to find and wasn't costing me a fortune, a plus since I had just graduated from college. I've rocked the 4.10s since then without much complaint, only recently having started using 4th gear more on the highway simply out of convenience.
What I'm going to end up doing is buying a 4.56 ring & pinion set for the HP30 and 8.8, and we'll move the axle gear down a bit to allow for better driving on and off road.Though I'm not entirely looking forward to the idea or cost of re-gearing it, it will probably make more sense than throwing new 4.10s back inside the front axle and calling it a day... might as well use the opportunity to upgrade.
So the Jeep is sitting for the week, parts are coming in from Summit Racing, I've yet to place the order but I found Motive Gears for $350 front and rear. I've read that the Motive guys came from Alloy USA before they got bought out, and are some of the best people in the industry. A few small other parts will be delivered as well, and we'll rebuild both axles next weekend.
Before I click buy, does anyone have objections or thoughts on any of this? I picked 4.56 as an even ground between 10 and 88, allowing for better power banding and a little better gas mileage while still giving a good change in performance on and off road. And Motive seems to have great reviews from what I've read.
Pics:


 Re: Chili Pepper TJ Build
Sound like a good plan. What did you use to drive/seat the new seals in the axle?
AquilesT- Class 6A
- Posts : 198
Join date : 2013-08-15
Location : Roslindale
 Re: Chili Pepper TJ Build
eldomi809 wrote:Sound like a good plan. What did you use to drive/seat the new seals in the axle?
Rented a bearing/racer install press kit from AutoZone for the weekend... also have done it successfully with a 36mm hub socket. Basically take a shit ton of socket extensions, put the socket/press on the end, and hammer from the outside of the axle tube. This was the method we used this time, and it worked flawlessly.
In the past, installing them alone, I did as follows (copied from my JF thread):
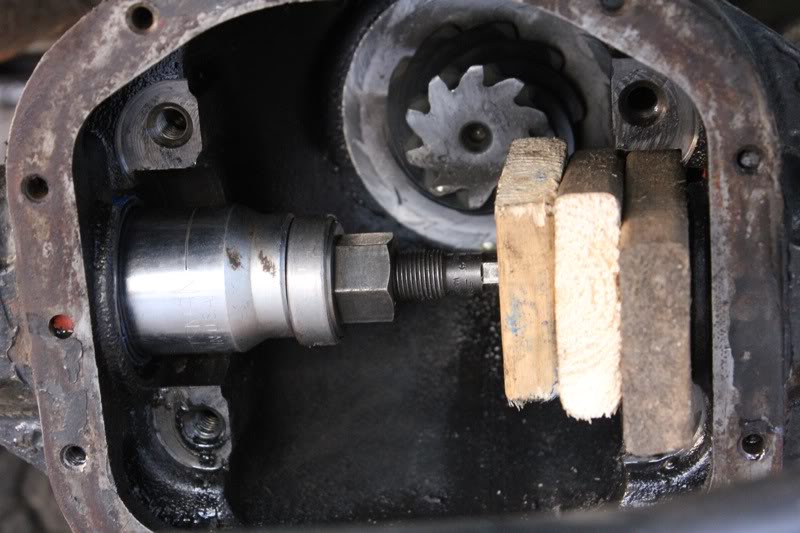
JeepForum Build wrote:"Let me be the first to say it is a complete PAIN IN THE *** to press inner axle seals. I've never been so angry towards a Jeep mod/service. That being said, I went by my mecanic friend's shop and borrowed some tools to make this a little easier. The tool was comprised of a threaded spindle with a nut on it, and a size 1 7/16" socket (3/4" drive!). The threaded spindle went through the end of the socket, until the nut hit the drive hole. The socket fits perfectly inside the seal of the D30, and the other end of the spindle goes up against 3 pieces of wood and a piece of steel (to keep the pressure on the seal and not cracking through the wood - as we did the first time!) You then simply crank down on the large nut, which presses the socket down the length of the spindle, forcing the seal into place. RTV and some grease on the seal, and it slid in relatively easy. Here's a picture of the pressing."
 Re: Chili Pepper TJ Build
To explain above, the socket was on a threaded rod with a nut, pressed against the seal and a 2x4. When I ratcheted the nut it pressed the socket into the seal, seating it evenly. It took a while but as a single man job it worked just fine up until a month or so ago (install was 12/2011, so it lasted!). With another person, the socket and blunt hammer blow method was much quicker.
 Re: Chili Pepper TJ Build
Thanks. You dont put any oil/lubricant on the outer edge of the seal right? only in the inner circle to then easily pass the shafts through, correct?

AquilesT- Class 6A
- Posts : 198
Join date : 2013-08-15
Location : Roslindale
 Re: Chili Pepper TJ Build
eldomi809 wrote:Thanks. You dont put any oil/lubricant on the outer edge of the seal right? only in the inner circle to then easily pass the shafts through, correct?
I never have. Whether or not that's the right thing to do I can't say.
 Re: Chili Pepper TJ Build
Quick update on orders I placed yesterday (Monday)...
1. $314.00 - 4.56 gears for the HP30/8.8 from Summit Racing... went with Motive Gears
2. $40.00 - 37 tooth speedometer gear / new 12"x18" American Flag for the CB from Amazon
3. $7.45 - oil slinger for 8.8 & HP30 / oil baffles for each from RockAuto
1B. Gears will be delivered Wednesday via UPS.
2B. Speedo gear / American Flag will be delivered Wednesday via USPS.
3B. Oil slingers, etc. will be delivered Friday via USPS.
The great part of this is that the new pinion/rings will be here early enough for me to take them to have the bearings pressed on the pinion gears which will alleviate having to do that at Andrew's garage on Saturday. We kind of mutually decided amongst the group that the carriers will retain their current bearings since they're working just fine.
All in all this shouldn't be terrible. Even factoring all parts, $500 total for a re-gear isn't that bad.
 Re: Chili Pepper TJ Build
Saw your post on the FB page, wish I had seen this earlier. You should be able to nail the pinion depth first try if your old and new pinions have depth markings (calculate the change in shim stack based on the markings). I would suggest having some extra baffles on hand as you can't really avoid destroying the one that's installed if you need to punch the race out to adjust the shim stack (this is where setup bearings make things really convenient). IIRC the shim stacks for the carrier are under the bearings on the carrier and thus you won't be able to adjust them--you may get lucky and be close enough but I wouldn't bank on it. A high quality bearing splitter and a press are pretty clutch for removing the bearings without damaging them. Again, setup bearings make this job a lot easier/less risky.
All this ^ applies to the D30, I haven't looked into how the 8.8 is set up.
All this ^ applies to the D30, I haven't looked into how the 8.8 is set up.
Jake- Rausch Creek
- Posts : 323
Join date : 2013-05-19
Location : Beverly
 Re: Chili Pepper TJ Build
Okay so here are some photos from the 2 days we spent last weekend working on Big Red...
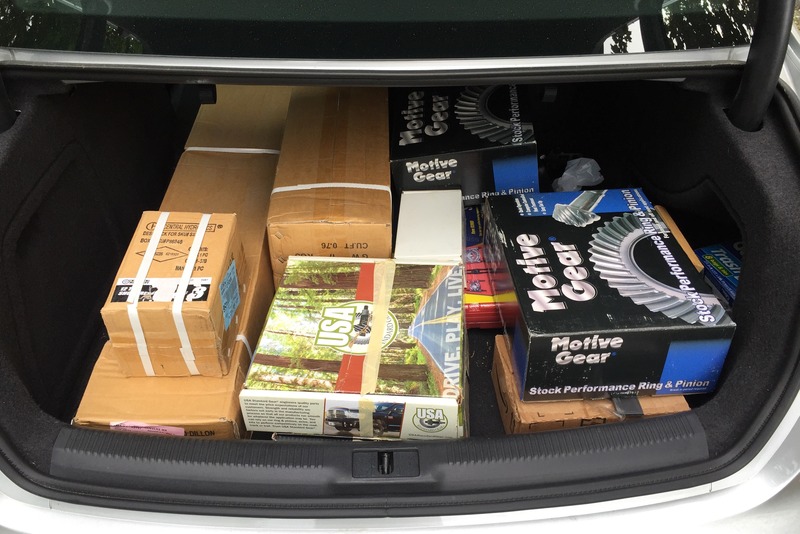
All the tools/parts/etc filling the trunk...
Stop and cut the bearing cage off before trying to remove the bearings from the pinion shaft...

Torquing the ring gear bolts on the HP

Opening the rear end up
Shafts pulled a bit

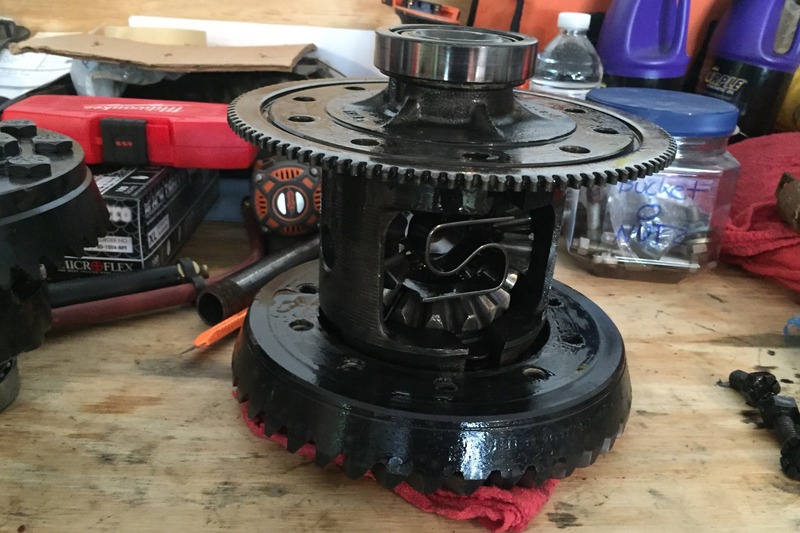
Carrier sizes

8.8 Ring gear removal... hit it with a rubber mallet
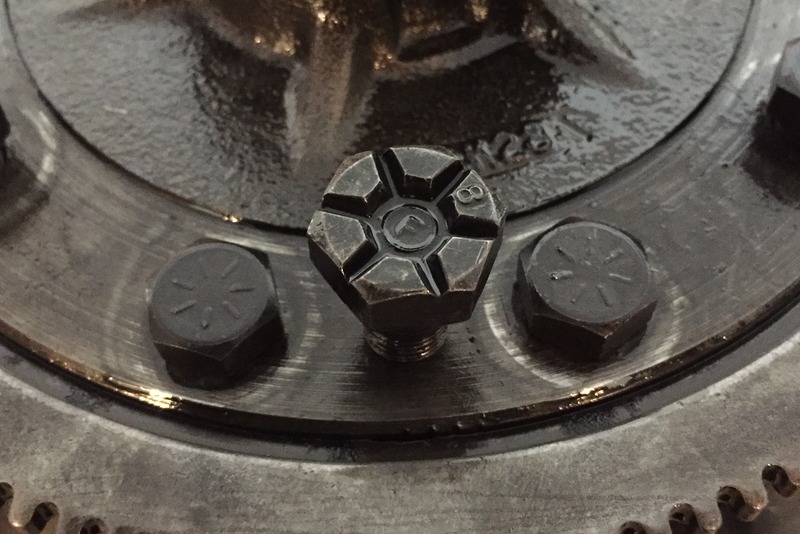
Replacement bolts installed vs OEM bolts... strange size difference...
The Tool for removing the flange... though we should have done this first.

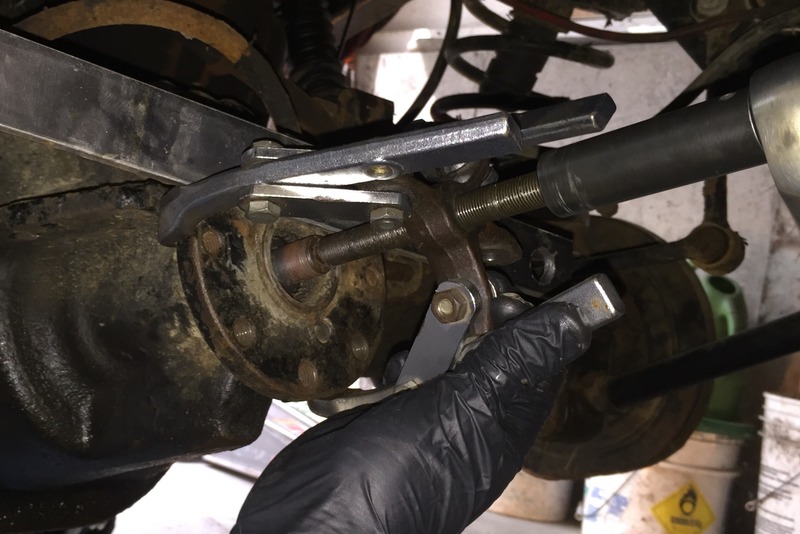
Puller
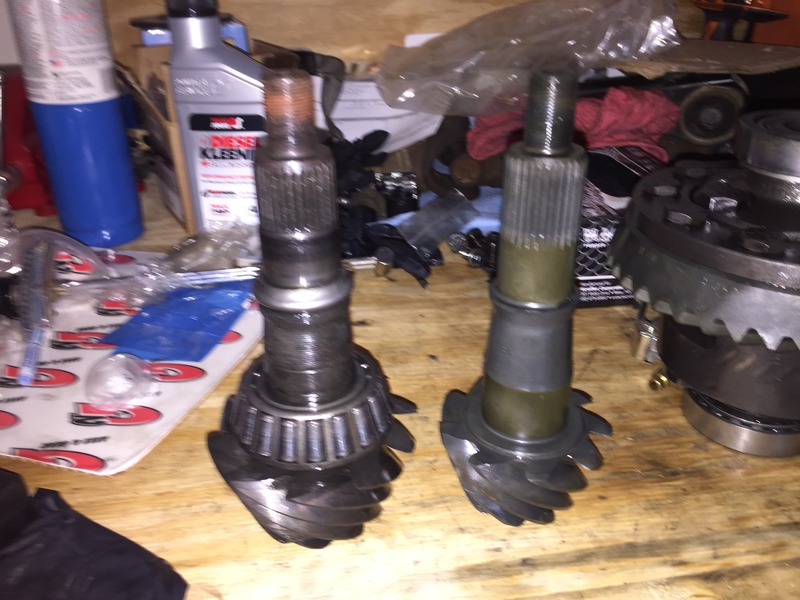
8.8 vs HP30 pinion difference
Day 2...
Heating the bearing to yank it

Grinding out the inside of a Timken to make a set-up bearing

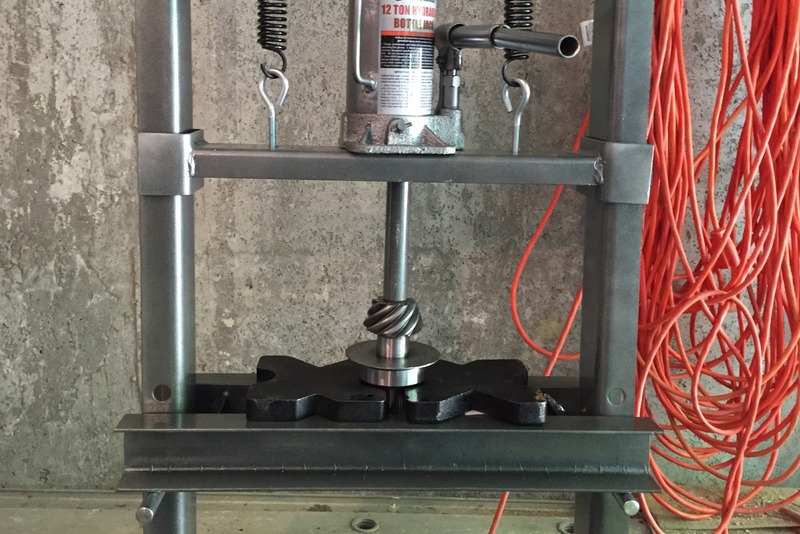
Pressing the real bearing
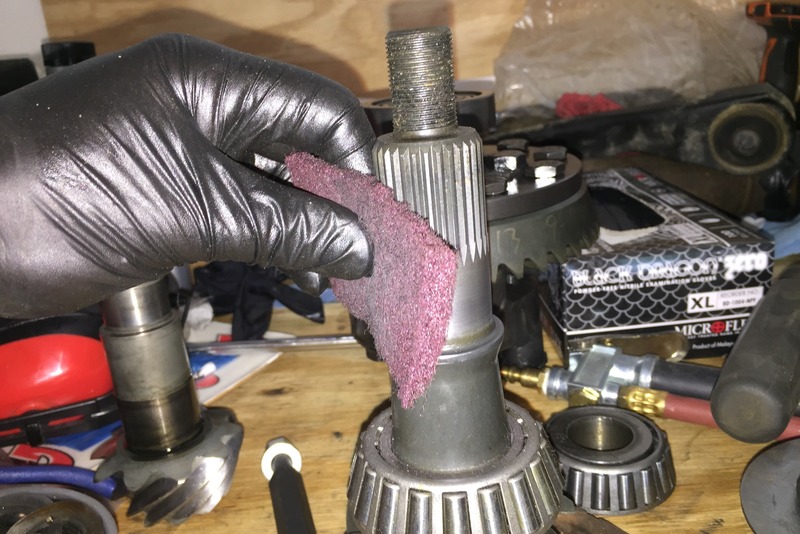
Sanding down the shaft to get the bearing slid down... the paint obstructed the ability to do so initially
Compound marking

Checking backlash
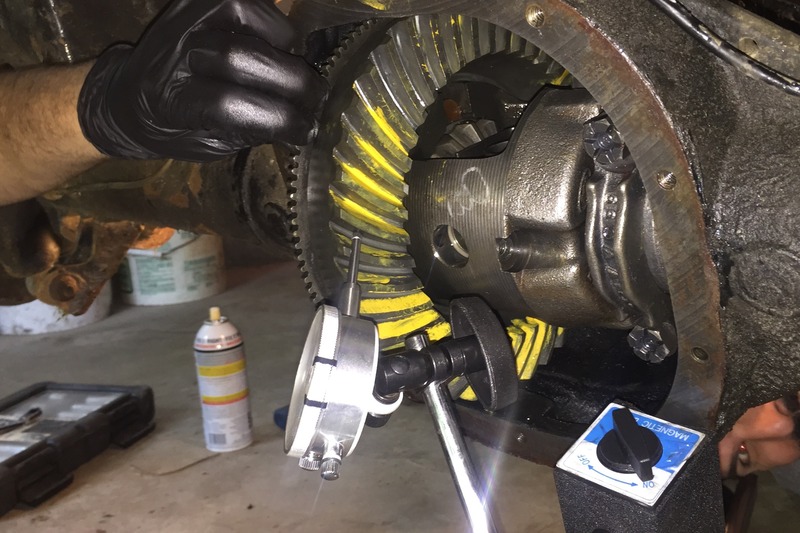
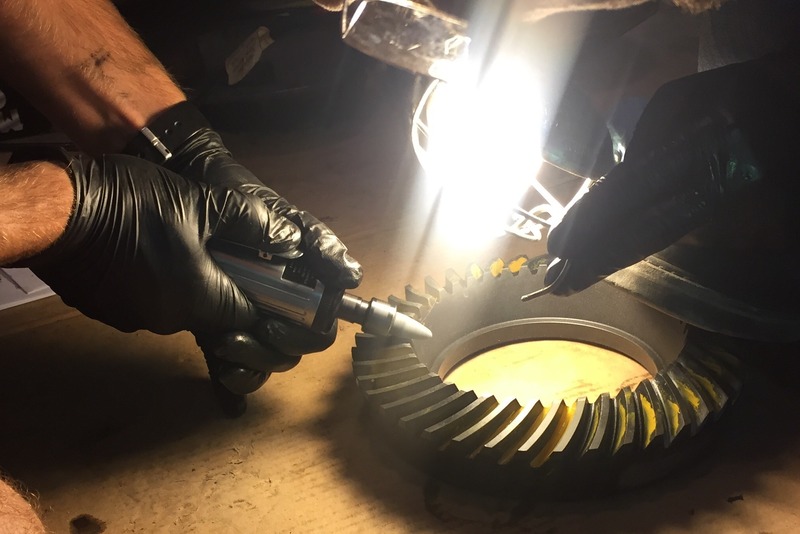
Grinding down the ring gear to get the cross pin in position
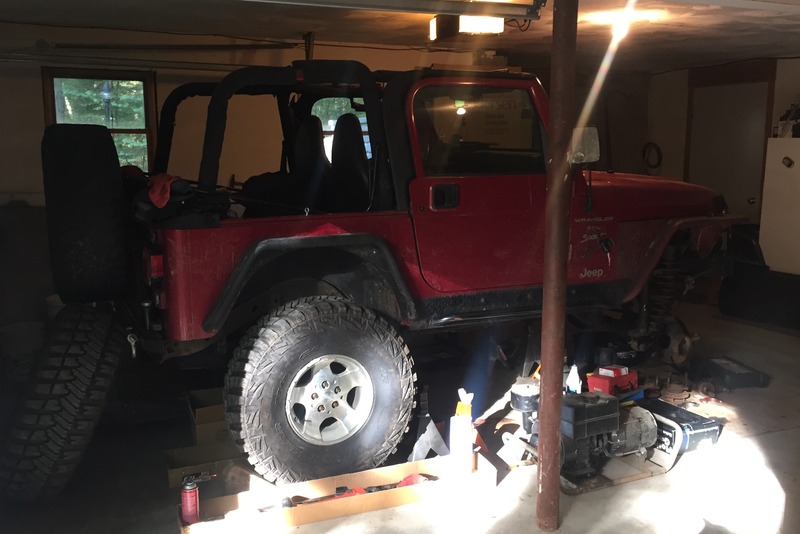
How we left her...
All the tools/parts/etc filling the trunk...


Stop and cut the bearing cage off before trying to remove the bearings from the pinion shaft...

Torquing the ring gear bolts on the HP

Opening the rear end up

Shafts pulled a bit

Carrier sizes

8.8 Ring gear removal... hit it with a rubber mallet

Replacement bolts installed vs OEM bolts... strange size difference...

The Tool for removing the flange... though we should have done this first.

Puller

8.8 vs HP30 pinion difference

Day 2...
Heating the bearing to yank it

Grinding out the inside of a Timken to make a set-up bearing

Pressing the real bearing

Sanding down the shaft to get the bearing slid down... the paint obstructed the ability to do so initially

Compound marking

Checking backlash

Grinding down the ring gear to get the cross pin in position

How we left her...

onlytopher- Mall Crawler
- Posts : 79
Join date : 2012-09-06
Location : Salem MA
 Re: Chili Pepper TJ Build
NEWS UPDATE:
MY JEEP HATES ME + FRIENDS DON'T LET FRIENDS DO THEIR OWN GEARS!
---
Now, that being said. Today was interesting.
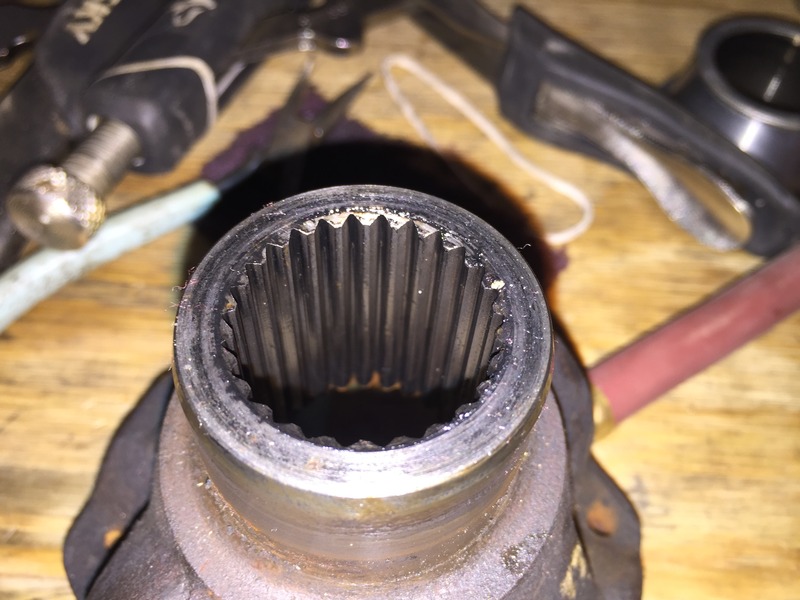
Andrew (garage friend / Jeep guy) came and picked me up this morning. Upon arriving at his house we spread out my tools across the floor and went to work on Big Red. Today's mission was the HP30 and getting the TJ home to Reading from his place an hour or so away. It took no time at all to find out that the yoke of the D30 was not fitting on the splines of the new pinion gear. We were quite intrigued by this, and after smoothly putting it back on the original pinion gear, were quite frustrated. We took a yoke off of his not-yet-built HP30 and had the same result. Motive Gears are obviously closed because it's Sunday, but I was able to get an online chat with tech support at Summit Racing who was also intrigued by this discovery, saying that I might need a new yoke with newer/less worn down teeth.
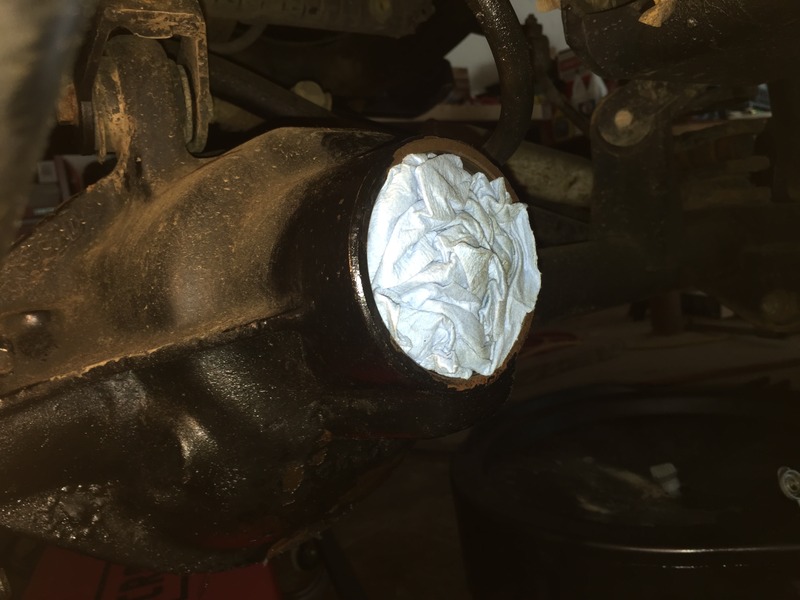
It was at this point that I very quickly made the executive decision to button up the Jeep as is and get her the hell home. First order of business here was to get the carrier back in the pumpkin and torqued down. Having debated turning the axle shafts into stubs, I decided that the carrier might as well sit in the pumpkin for storage anyways, which would allow the axle shafts somewhere to sit. I took an old oil baffle from the HP and wrapped it in duct tape, shoving it into the outer bearing race at the top of the pinion itself and stuffing behind it with shop rags. Bright green duct tape is applying pressure to hold the combination in place, keeping diff fluid from making its way out where the pinion seal would be.
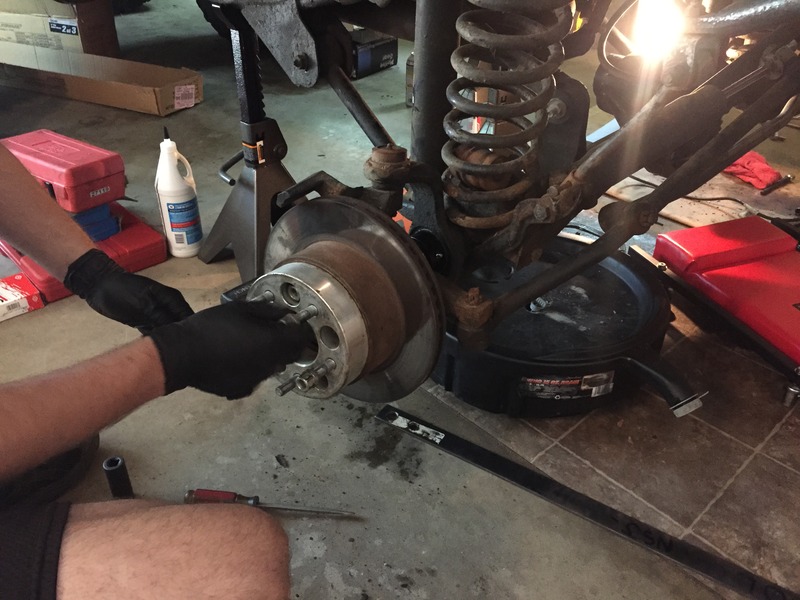
Reassembling the hubs and getting the wheels on, we put Big Red back under its own weight for the first time in 3 weeks. Torquing the lube locker/ SOLID diff cover to spec, we emptied 2 bottles of gear oil into it. This was frustrating at the cost of $12, seeing as the ring gear wouldn't generate any heat on its own, but the inner axle seals needed some kind of lubricant for the shafts to spin against.So there was that. Also took a fair bit of grease into the Alloy USA outer axle seals that we had installed last week. They had been sitting on my work bench for 3 years so I figured now was the time to install them. Last bit was removing the front driveshaft. Removing it was a bit of fun with the UCF engine & transfer case skid system installed, but we eventually got those PITA 4 bolts out and removed the shaft. Andrew is replacing his own u-joints this week and will be replacing my front DS u-joint at the same time while my press is at his shop.
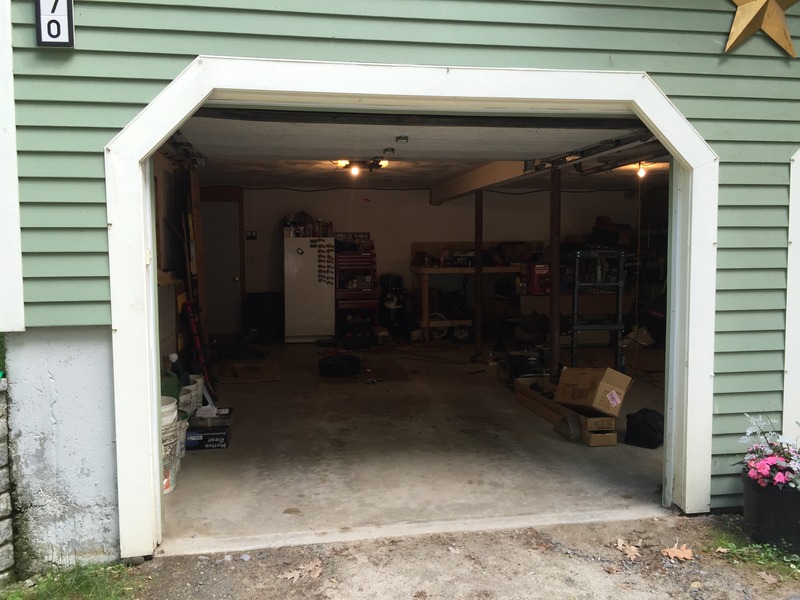
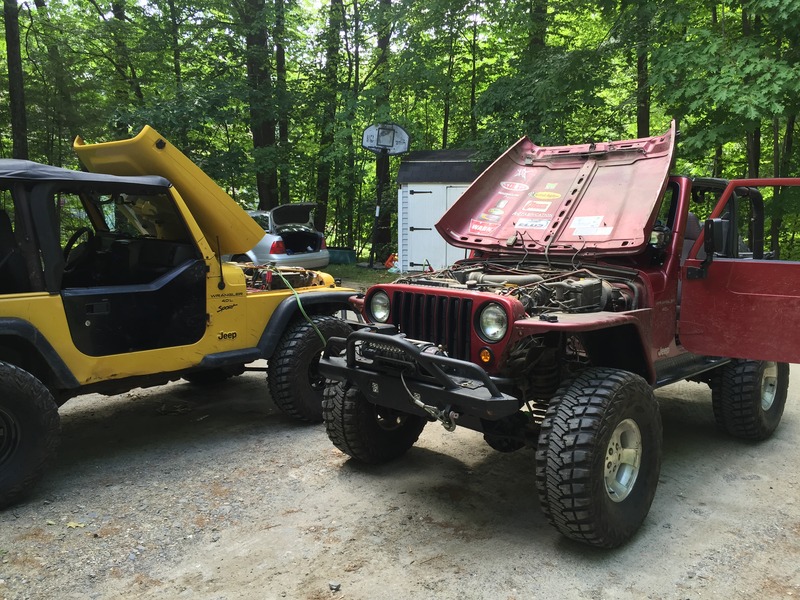
Praying to the God of Jeeps, we opened the garage door and rolled her backwards... Big Red Was Dead. Jumpstarting it we VERY cautiously backed it down his driveway and went for a short and slow drive up the street. Getting the initial nerves out of my body, I took the backroads home, Andrew following me halfway just in case. Using all 5+R gears, I traveled at sustained speeds between 15-50 mph with a break in the middle of my drive. No issues whatsoever getting it home and parked in my driveway.
I'll call the right people tomorrow and find out if I need a new pinion gear (and subsequently ring gear) or whether this is a common thing and a new yoke will solve the issue. We shall see.
It's kind of neat that I (we) regeared the Jeep. Granted it's not done yet, but I was able to drive 10 feet without the rear end exploding. Still, f*ck this. Never again. If it hadn't been in someone else's garage, I'd have burned the thing down already.
Micro differences make huge deals
Reassembly
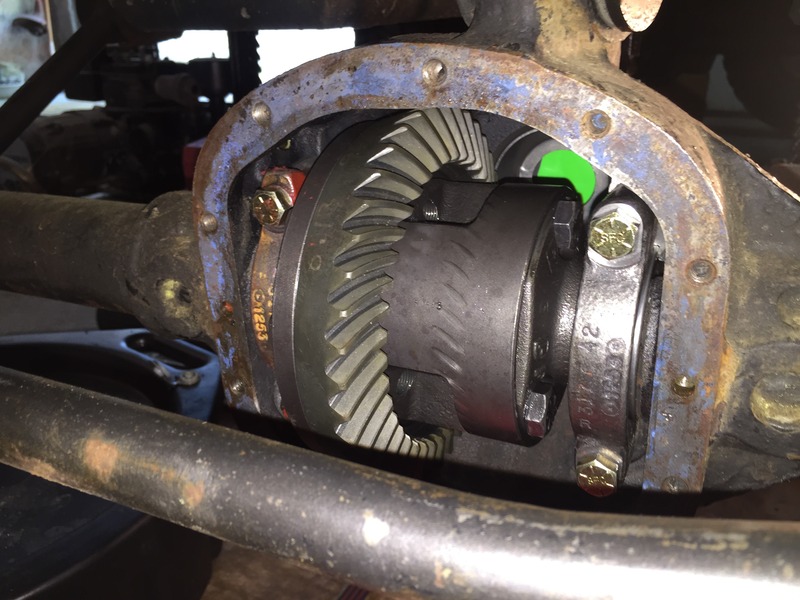
Stuffed pinion
Duct Taped


The problem yoke
Made it home

MY JEEP HATES ME + FRIENDS DON'T LET FRIENDS DO THEIR OWN GEARS!
---
Now, that being said. Today was interesting.
Andrew (garage friend / Jeep guy) came and picked me up this morning. Upon arriving at his house we spread out my tools across the floor and went to work on Big Red. Today's mission was the HP30 and getting the TJ home to Reading from his place an hour or so away. It took no time at all to find out that the yoke of the D30 was not fitting on the splines of the new pinion gear. We were quite intrigued by this, and after smoothly putting it back on the original pinion gear, were quite frustrated. We took a yoke off of his not-yet-built HP30 and had the same result. Motive Gears are obviously closed because it's Sunday, but I was able to get an online chat with tech support at Summit Racing who was also intrigued by this discovery, saying that I might need a new yoke with newer/less worn down teeth.
It was at this point that I very quickly made the executive decision to button up the Jeep as is and get her the hell home. First order of business here was to get the carrier back in the pumpkin and torqued down. Having debated turning the axle shafts into stubs, I decided that the carrier might as well sit in the pumpkin for storage anyways, which would allow the axle shafts somewhere to sit. I took an old oil baffle from the HP and wrapped it in duct tape, shoving it into the outer bearing race at the top of the pinion itself and stuffing behind it with shop rags. Bright green duct tape is applying pressure to hold the combination in place, keeping diff fluid from making its way out where the pinion seal would be.
Reassembling the hubs and getting the wheels on, we put Big Red back under its own weight for the first time in 3 weeks. Torquing the lube locker/ SOLID diff cover to spec, we emptied 2 bottles of gear oil into it. This was frustrating at the cost of $12, seeing as the ring gear wouldn't generate any heat on its own, but the inner axle seals needed some kind of lubricant for the shafts to spin against.So there was that. Also took a fair bit of grease into the Alloy USA outer axle seals that we had installed last week. They had been sitting on my work bench for 3 years so I figured now was the time to install them. Last bit was removing the front driveshaft. Removing it was a bit of fun with the UCF engine & transfer case skid system installed, but we eventually got those PITA 4 bolts out and removed the shaft. Andrew is replacing his own u-joints this week and will be replacing my front DS u-joint at the same time while my press is at his shop.
Praying to the God of Jeeps, we opened the garage door and rolled her backwards... Big Red Was Dead. Jumpstarting it we VERY cautiously backed it down his driveway and went for a short and slow drive up the street. Getting the initial nerves out of my body, I took the backroads home, Andrew following me halfway just in case. Using all 5+R gears, I traveled at sustained speeds between 15-50 mph with a break in the middle of my drive. No issues whatsoever getting it home and parked in my driveway.
I'll call the right people tomorrow and find out if I need a new pinion gear (and subsequently ring gear) or whether this is a common thing and a new yoke will solve the issue. We shall see.
It's kind of neat that I (we) regeared the Jeep. Granted it's not done yet, but I was able to drive 10 feet without the rear end exploding. Still, f*ck this. Never again. If it hadn't been in someone else's garage, I'd have burned the thing down already.

Micro differences make huge deals

Reassembly


Stuffed pinion

Duct Taped


The problem yoke


Made it home

 Re: Chili Pepper TJ Build
Called both Motive Gear and Summit today.
Dan at Motive said that he had never heard of this happening before, and plain and simply stated that the pinion gear would need to be replaced. They aren't the ones that do that, so the next phone call was to Summit Racing to talk to their C.S. department. Luckily the girl there was amazingly helpful, and she mailed out new 4.56 gears for the HP30 this afternoon, which will be here Wednesday or Thursday. At that point I'll have time to install the new stuff, and UPS will pick up the bad gear set on Tuesday to get them back to Summit for exchange.
Pretty smooth process all things considered, just frustrating that it was necessary in the first place.
 Re: Chili Pepper TJ Build
Glad to hear replacement is that easy, still super weird that the pinion wasn't right..
Great that you got the rear end buttoned up though!
Really if I learned anything from doing gears was to be overprepared, really really overprepared. Also not to fuck with budget quality tools.. That said, I'm pretty sure the next set of gears I do will go much smoother, hopefully you feel that way lol.

Jake- Rausch Creek
- Posts : 323
Join date : 2013-05-19
Location : Beverly
 Re: Chili Pepper TJ Build
Jeep's done!!!
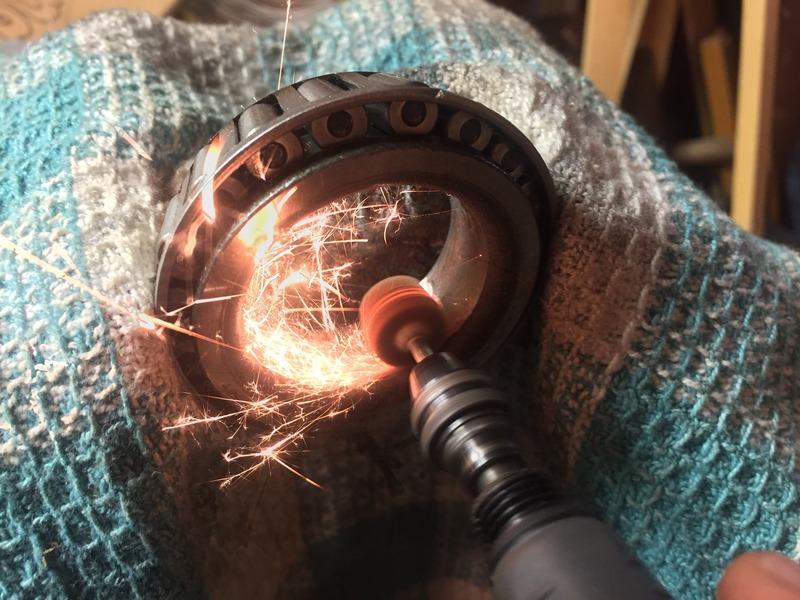
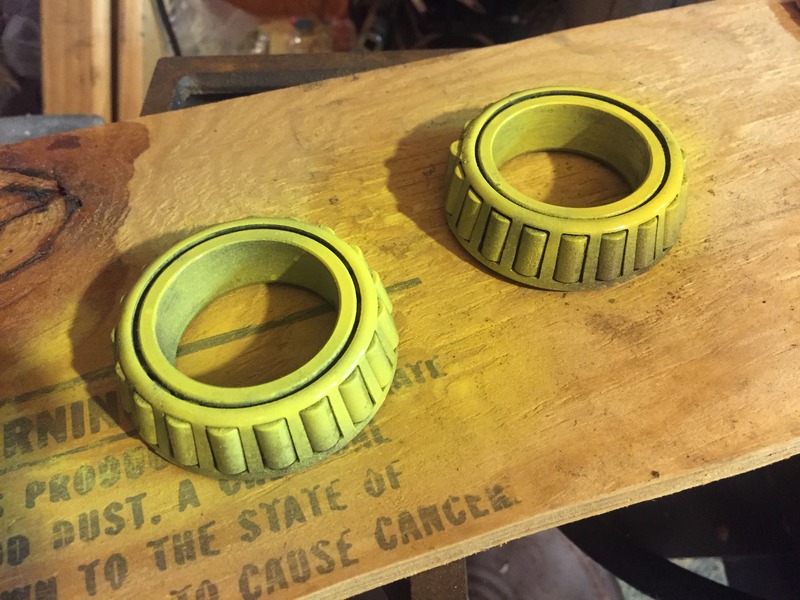
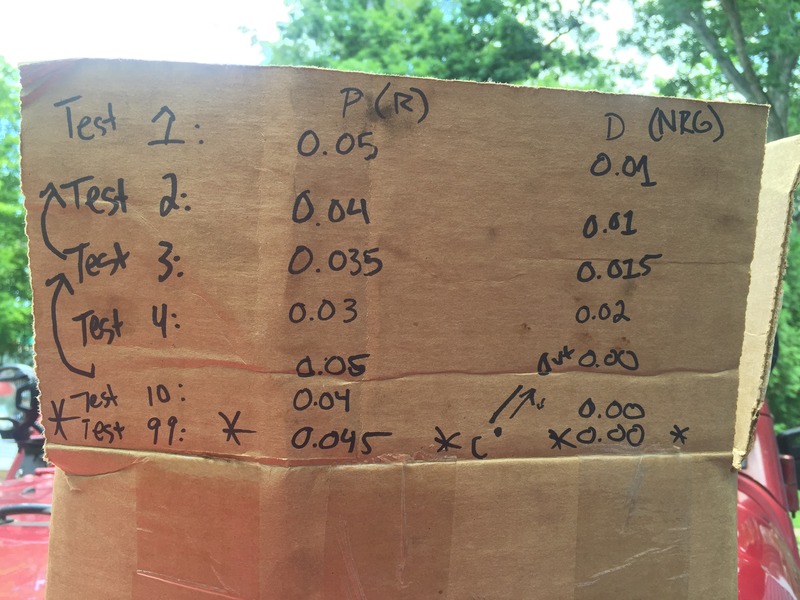
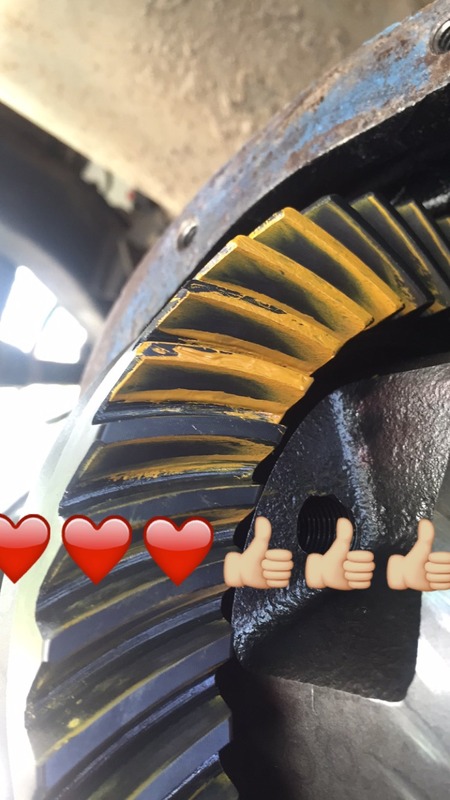
Is what I would like to say. But I cannot. Because It is not. After grinding out starter bearings for the carrier, Shaun and I began testing the shim configuration. As it came out of the differential, there were (4) 0.01" shims on the RGS (ring gear side) and (2) 0.01" on the Non-RGS. The method of working with this is to add the same amount to the opposite side you subtract it from. So if I removed 0.01" from the RGS, I have to add 0.01" to the Non-RGS. So we messed around with shims. It ended up taking 15 different set-ups before we got the best gear markings on the ring teeth, with a final number of RGS 0.045" and Non-RGS 0.00"... what a hoot it was to put the carrier in and remove it so many times. But, I do have to say that taking the time to do it so thoroughly was good both for the practice, and also to see how insanely small measurements, 0.005 inch shims, can make such a massive difference in the placement of the carrier in relation to the pinion. It's really quite amazing.
Grinding bearings
Painted them yellow for zero confusion
Keeping track of shim changes
Best marking we got... the keeper.
So after that we removed the carrier and took it over to the Gigantic Press. It took a minute of configuration to seat the 2 bearings on the carrier, utilizing The Tool a few times for assistance, but once it was on we set the carrier aside and went back to the pinion. The pre-load was worked on with the set-up outer pinion bearing, and upon figuring that we were right where we wanted to be, we used the yoke to press on the new outer bearing. It seated perfectly with the 150 ft.lbs torque setting, after which we removed the yoke and got the pinion seal seated in... what a breeze! Man. Seriously took 4 taps with a hard rubber mallet and that baby was ready for fluid.
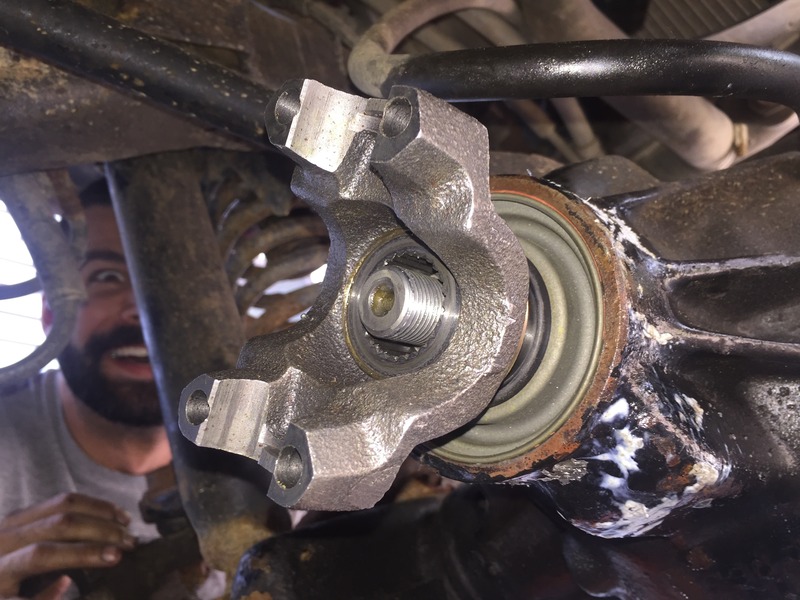
It wasn't until we had put the hubs on that things got stupid, again. My 1/2" to 3/8" adaptor broke while we were torquing the spacer lug nuts, and of course I didn't have a 19mm or 3/4" half inch drive socket here. So then we moved to at least attaching the driveshaft at which point I noticed that the NEW YOKE I BOUGHT - for a '98 XJ - came with u-bolt holes instead of the normal strap holes. So we were dead in the water for the 8th time on this re-gear since I didn't have the right part for the new yoke. $10 on Amazon and they'll be here later this week. Big thanks to Shaun though for coming down today for a few hours of wrenching. He's highlighted in a photobomb below.
It's almost done. I can see the light at the end of the tunnel. Just ain't getting there today.
Pressing bearings

Pre-loaded pinion
Yoke strap holes... and Shaun
Is what I would like to say. But I cannot. Because It is not. After grinding out starter bearings for the carrier, Shaun and I began testing the shim configuration. As it came out of the differential, there were (4) 0.01" shims on the RGS (ring gear side) and (2) 0.01" on the Non-RGS. The method of working with this is to add the same amount to the opposite side you subtract it from. So if I removed 0.01" from the RGS, I have to add 0.01" to the Non-RGS. So we messed around with shims. It ended up taking 15 different set-ups before we got the best gear markings on the ring teeth, with a final number of RGS 0.045" and Non-RGS 0.00"... what a hoot it was to put the carrier in and remove it so many times. But, I do have to say that taking the time to do it so thoroughly was good both for the practice, and also to see how insanely small measurements, 0.005 inch shims, can make such a massive difference in the placement of the carrier in relation to the pinion. It's really quite amazing.
Grinding bearings

Painted them yellow for zero confusion

Keeping track of shim changes

Best marking we got... the keeper.

So after that we removed the carrier and took it over to the Gigantic Press. It took a minute of configuration to seat the 2 bearings on the carrier, utilizing The Tool a few times for assistance, but once it was on we set the carrier aside and went back to the pinion. The pre-load was worked on with the set-up outer pinion bearing, and upon figuring that we were right where we wanted to be, we used the yoke to press on the new outer bearing. It seated perfectly with the 150 ft.lbs torque setting, after which we removed the yoke and got the pinion seal seated in... what a breeze! Man. Seriously took 4 taps with a hard rubber mallet and that baby was ready for fluid.
It wasn't until we had put the hubs on that things got stupid, again. My 1/2" to 3/8" adaptor broke while we were torquing the spacer lug nuts, and of course I didn't have a 19mm or 3/4" half inch drive socket here. So then we moved to at least attaching the driveshaft at which point I noticed that the NEW YOKE I BOUGHT - for a '98 XJ - came with u-bolt holes instead of the normal strap holes. So we were dead in the water for the 8th time on this re-gear since I didn't have the right part for the new yoke. $10 on Amazon and they'll be here later this week. Big thanks to Shaun though for coming down today for a few hours of wrenching. He's highlighted in a photobomb below.
It's almost done. I can see the light at the end of the tunnel. Just ain't getting there today.
Pressing bearings

Pre-loaded pinion

Yoke strap holes... and Shaun

 Re: Chili Pepper TJ Build
U-Bolts. I couldn't think of the word yesterday. Good thing you got that figured out. Order some 1/2" drive sockets while you're there.
dongalonga- Rubicon Trail
- Posts : 1047
Join date : 2012-03-20
Age : 40
Location : Lowell, MA
 Re: Chili Pepper TJ Build
Damn dude, wish you had posted this before you ordered the straps. I've got some and their attaching bolts just sitting on the floor of the YJ right now. I can't imagine they're different, I assume you've got 1310 just like the ones I've got kicking around.
 Re: Chili Pepper TJ Build
THOOPY3 wrote:Damn dude, wish you had posted this before you ordered the straps. I've got some and their attaching bolts just sitting on the floor of the YJ right now. I can't imagine they're different, I assume you've got 1310 just like the ones I've got kicking around.
Ah man, yeah I coulda used them
 Re: Chili Pepper TJ Build
Any time. And now that I know you can regear 8.8s and HP30s I may be calling upon your expertise in the future (way in the future). We've got all the 1/2-inch drive sockets we could possibly need.
 Re: Chili Pepper TJ Build
THOOPY3 wrote:Any time. And now that I know you can regear 8.8s and HP30s I may be calling upon your expertise in the future (way in the future). We've got all the 1/2-inch drive sockets we could possibly need.
I'm there when ya need me.
Thanks, I think I'll go by good ole HF this weekend and grab a set of 1/2"... never use them regularly but I figure no time like the present.
 Re: Chili Pepper TJ Build
I find myself never using my 3/9" stuff on the jeep anymore.

dongalonga- Rubicon Trail
- Posts : 1047
Join date : 2012-03-20
Age : 40
Location : Lowell, MA
 Re: Chili Pepper TJ Build
Having grinding / binding noises, and leaks with my 1999's NP231 transfer case after MaBell, I disassembled it and changed the RTV seals a few weeks ago. I messed around inside to try and see what was wrong inside the case itself, but it's been 6 years since I disassembled it last and I didn't see much wrong. In 2-HI it's fine, however in 4 WD it made awful noises and had no power to the wheels.... time to take it back apart and figure out what was wrong!
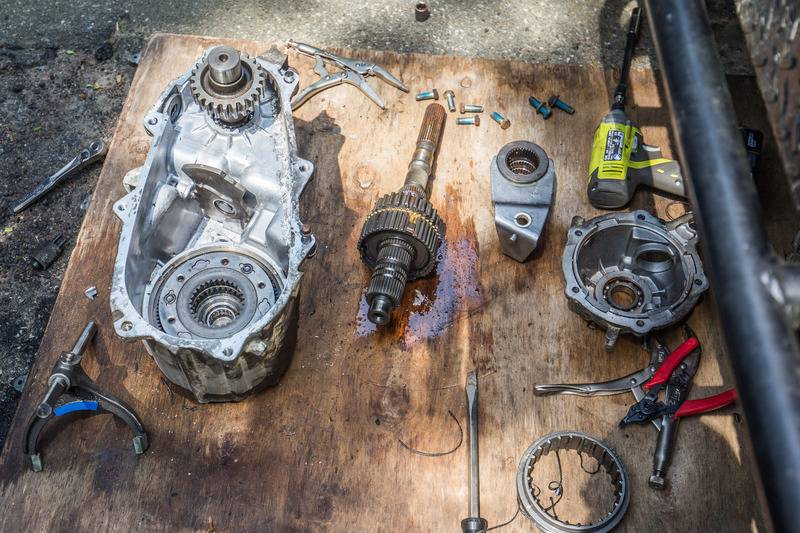
I picked up my new NP231 on Thursday of last week for $50. It's out of a 1989, which will come into play later. I stripped it down, removed what I didn't need, cleaned it out, and painted it. Not sure why, but just so it didn't look like cast aluminum anymore. On Saturday morning Rob came by and gave me a hand removing the old NP231 from under the TJ. This was infinitely easier with 2 people, as we each could work on a side in removing it. Once the unit was out from under the Jeep, we cracked it open and got to work on removing parts while the output housing was painted and drying.
An little while later we did a test-fit of the housing to make sure all was well before RTV, and realized that all in fact was not well at all. As it turns out, the shift fork on 231s was standard from 1984 or so until 1989, at which point it change from 1991 to 2006.... the 1989 TC that I picked up had a longer shift fork (by about an inch) than my 1999 unit. The length was enough to not allow the SYE output housing to sit flush against the TC rear case half. Unfortunately this stopped us in our tracks, as my '99 shift fork was absolutely demolished, due to the disintegration of pads at some point in recent days.... likely the cause of my noise problems.
I called the dealership and was informed that Chrysler actually discontinued the shift fork. Helpful. NAPA didn't stock it. Awesome. So I called Crown where the chain came from, and talked to my friend Kevin. He had one in stock for $40, but was closing for the long weekend... thankfully he's a friend and left it in the mailbox for me, so I could make the hour drive to their Canton, MA warehouse and pick it up at my leisure... aka 11 PM that night, with no traffic.
Rob came back over on Monday and helped me throw the case back together. Again, much easier with two people. We did run into a problem trying to adjust the Novak line, and I think I'll need to order a new shifter cable and shift bracket as it seems wallowed out and will not shift properly. That aside, the Jeep is capable of driving now without noise or issue, in 4HI. New rear DS should be delivered by week's end, so 2HI can be a thing. Due to the shift cable not functioning properly, the shifter position is not where it should be, and 4-LO is beyond the shifting ability of the lever, which is why I'll need to adjust the cable. Our attempts to do so yielded no success.
~3 quarts of 10w-30 into the tranny and ~1.75 of ATF into the TC and the Jeep was good to drive around the neighborhood a few times. The front locker wasn't happy with tighter turns, but once the rear DS is back in all should be well.
Thanks everyone for the input! Technically, hairline crack/new TC housing aside, this was a $120 project. $170 in total isn't bad at all.
New TC disassembled

Painted
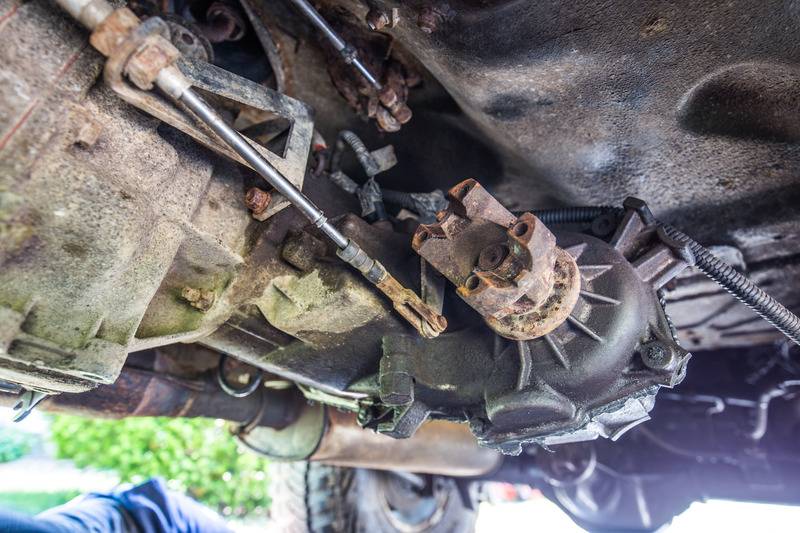
Removing the bad NP231

TC out

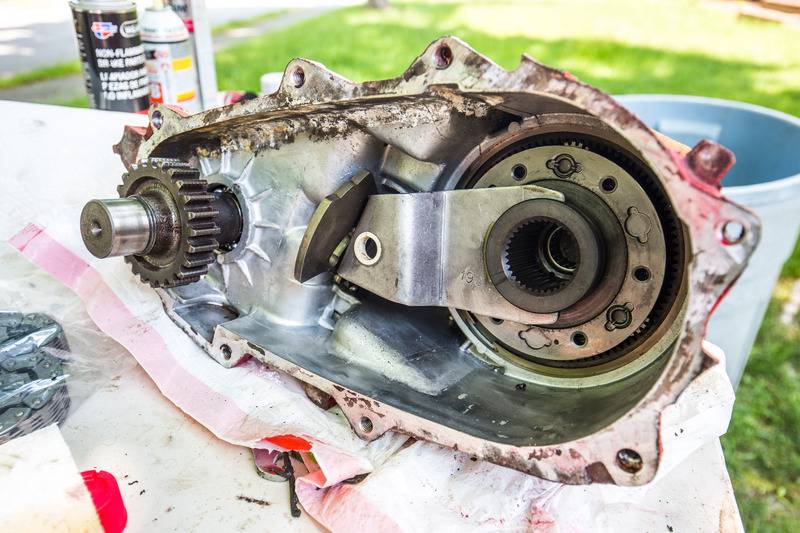
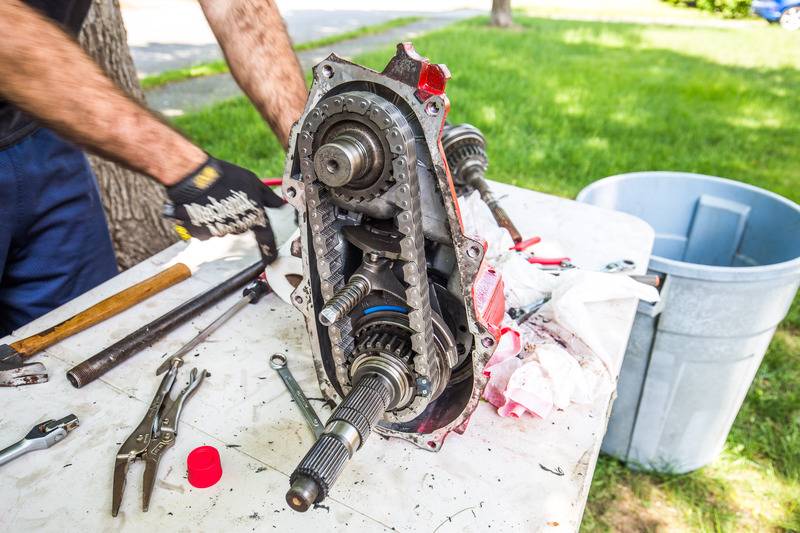
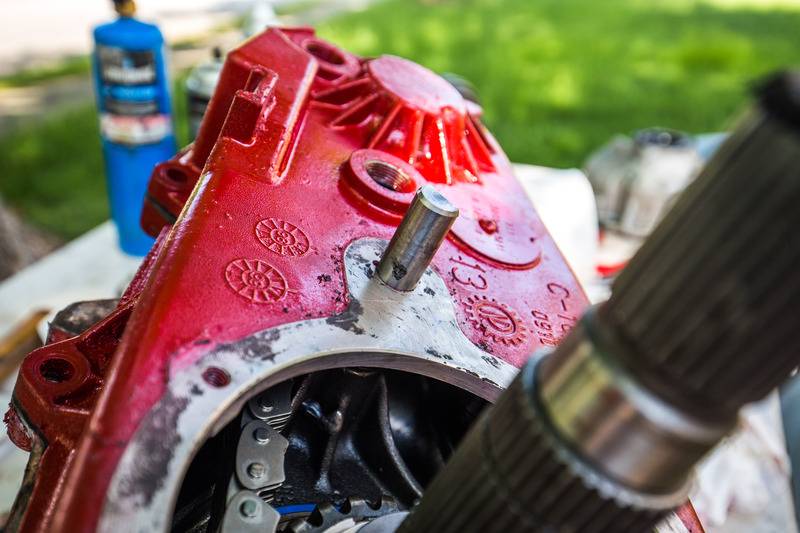
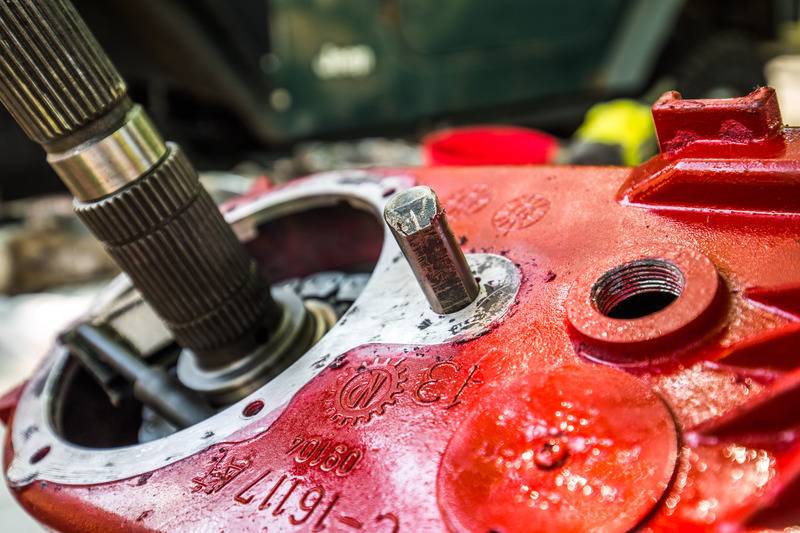
This is the bad pin length

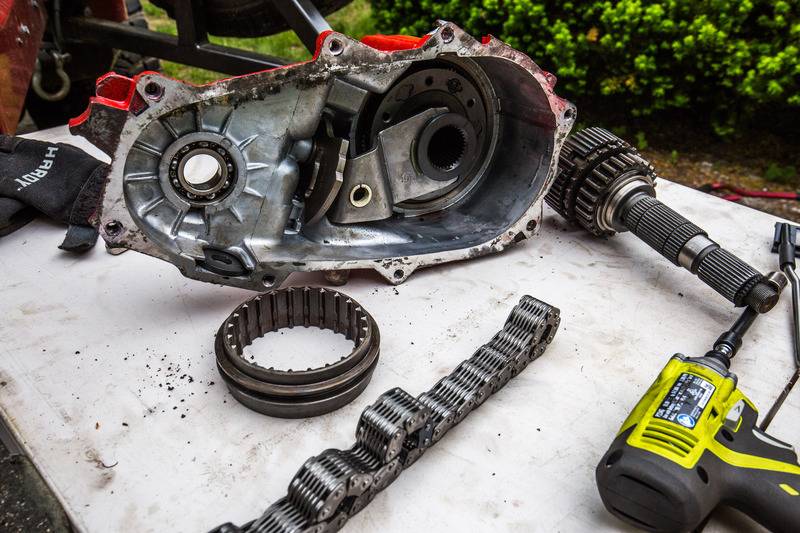
Old 4-lo shifter fork, torn up....

1989 vs 1999 fork length difference
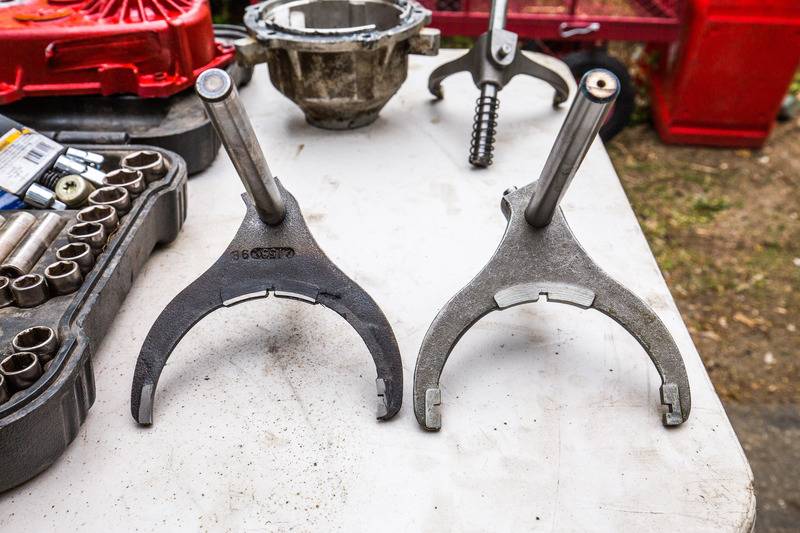
Old fork on the left... notice the lack of teeth for the fork pads... all worn down
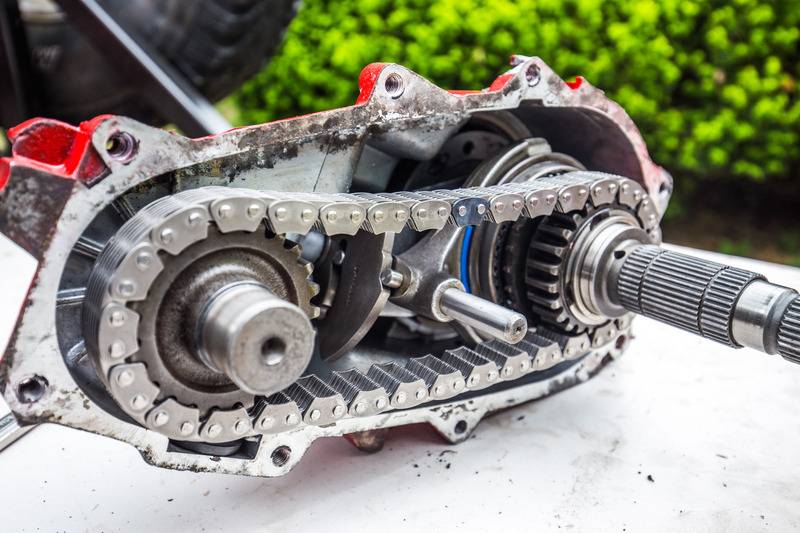
new chain is nice and tight

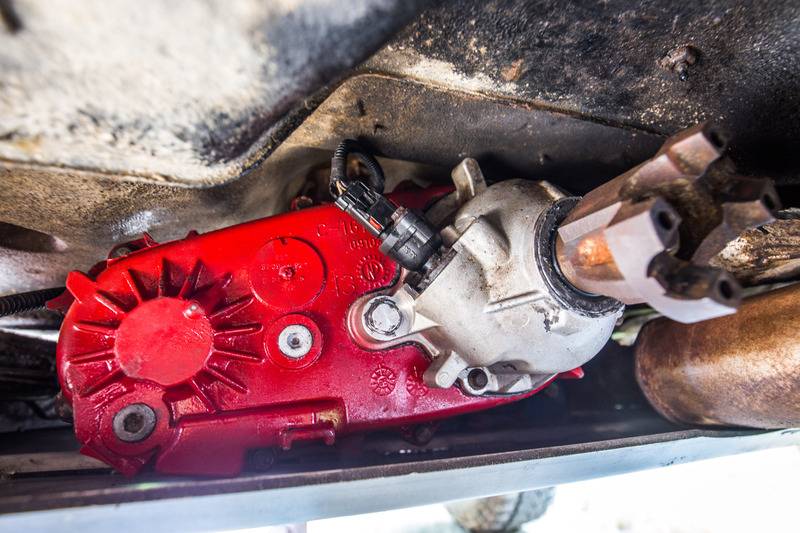
I picked up my new NP231 on Thursday of last week for $50. It's out of a 1989, which will come into play later. I stripped it down, removed what I didn't need, cleaned it out, and painted it. Not sure why, but just so it didn't look like cast aluminum anymore. On Saturday morning Rob came by and gave me a hand removing the old NP231 from under the TJ. This was infinitely easier with 2 people, as we each could work on a side in removing it. Once the unit was out from under the Jeep, we cracked it open and got to work on removing parts while the output housing was painted and drying.
An little while later we did a test-fit of the housing to make sure all was well before RTV, and realized that all in fact was not well at all. As it turns out, the shift fork on 231s was standard from 1984 or so until 1989, at which point it change from 1991 to 2006.... the 1989 TC that I picked up had a longer shift fork (by about an inch) than my 1999 unit. The length was enough to not allow the SYE output housing to sit flush against the TC rear case half. Unfortunately this stopped us in our tracks, as my '99 shift fork was absolutely demolished, due to the disintegration of pads at some point in recent days.... likely the cause of my noise problems.
I called the dealership and was informed that Chrysler actually discontinued the shift fork. Helpful. NAPA didn't stock it. Awesome. So I called Crown where the chain came from, and talked to my friend Kevin. He had one in stock for $40, but was closing for the long weekend... thankfully he's a friend and left it in the mailbox for me, so I could make the hour drive to their Canton, MA warehouse and pick it up at my leisure... aka 11 PM that night, with no traffic.
Rob came back over on Monday and helped me throw the case back together. Again, much easier with two people. We did run into a problem trying to adjust the Novak line, and I think I'll need to order a new shifter cable and shift bracket as it seems wallowed out and will not shift properly. That aside, the Jeep is capable of driving now without noise or issue, in 4HI. New rear DS should be delivered by week's end, so 2HI can be a thing. Due to the shift cable not functioning properly, the shifter position is not where it should be, and 4-LO is beyond the shifting ability of the lever, which is why I'll need to adjust the cable. Our attempts to do so yielded no success.
~3 quarts of 10w-30 into the tranny and ~1.75 of ATF into the TC and the Jeep was good to drive around the neighborhood a few times. The front locker wasn't happy with tighter turns, but once the rear DS is back in all should be well.
Thanks everyone for the input! Technically, hairline crack/new TC housing aside, this was a $120 project. $170 in total isn't bad at all.

New TC disassembled

Painted

Removing the bad NP231

TC out


This is the bad pin length


Old 4-lo shifter fork, torn up....

1989 vs 1999 fork length difference


Old fork on the left... notice the lack of teeth for the fork pads... all worn down

new chain is nice and tight


Page 6 of 6 •  1, 2, 3, 4, 5, 6
Page 6 of 6
Permissions in this forum:
You cannot reply to topics in this forum|
|
|

 Home
Home