TJ Hood pin installation & write-up.
4 posters
Page 1 of 1
 TJ Hood pin installation & write-up.
Hello everyone! Today I'm going to show you how to install hood pins on a Wrangler. But not crappy hood pins you get from Advance Auto Parts, THESE hood pins:
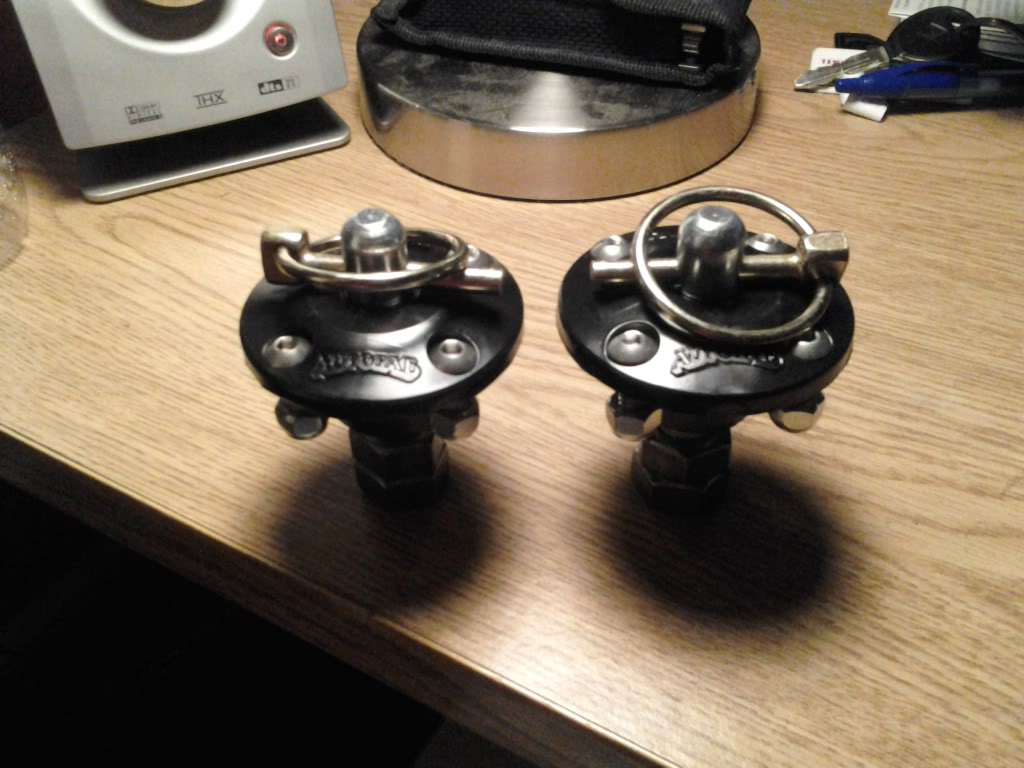
I bought these from Poly Performance. They cost about $30 for the pair. Here is a link:
http://polyperformance.com/shop/Hood-Pins-p-36.html
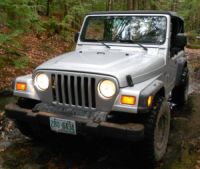
Here is the Jeep we're going to be installing them on.

Now, why install hood pins, you ask? This is why:

When I installed my tube fenders, I ordered new latches because my old ones kept spinning and weren't coming off. For some reason or another, they kept getting torn up and end up flying off my Jeep. Finally I got a good pair, but this one was on its way out, and the other one wouldn't come off when I tried to get it off either.
So these are the supplies you will need.
1/2" Drill
10 mm socket
13 mm socket
1 1/4" hole saw
2 1/8" hole saw
1/4" drill bit
5/8" drill bit
Hole punch
Tape
Grease
So here we go!
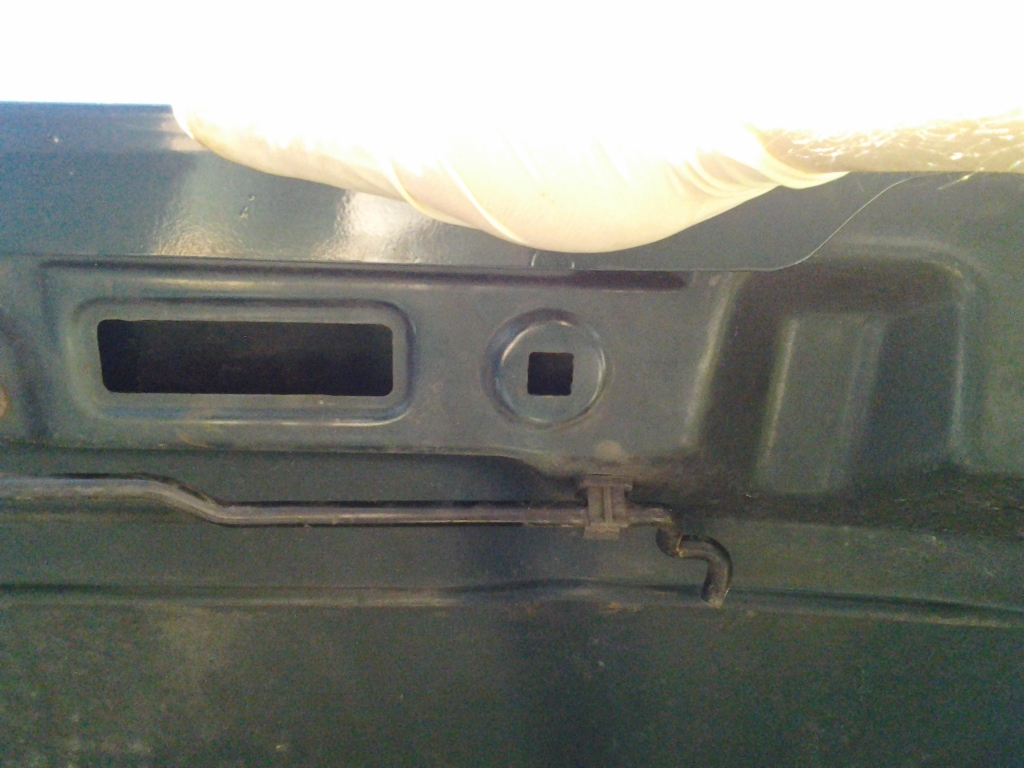
1.) Find out where you want to mount your hood pins. I looked under my hood for a good spot because I wanted to an easy spot to drill through. You can also look directly under it and see where the support is. I chose these spots.
Driver side:
Passenger side:
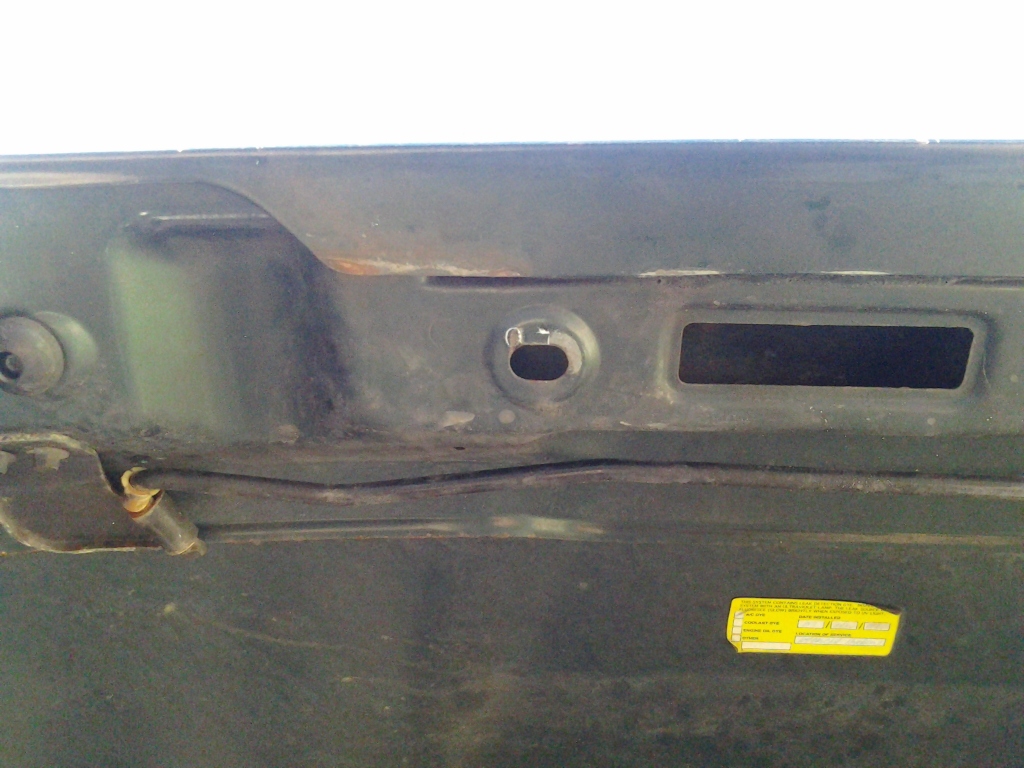
These are good spots because there is already a hole there, which will make drilling much easier.
2.) Take the pin and put some grease on the tip. Put it under the hood and close it. It will mark the grill, and therefore show you were to drill.
Driver side:

Passenger side:

The passenger side hole is a bit long, so I moved the pin towards the center, and it ended up being in line with other side.
3.) Now that you know where you're going to drill, remove your headlights.

There are plenty of write-ups on how to do that, so I won't bother with the details.
4.) Take your hole punch, give it a good WHACK (not a WOMP), and drill out the hole with your 1/4" drill bit.

5.) Then, take your 5/8" drill bit (yep, it's a biggin!) and make the hole bigger.

6.) Insert the pin into the hole you just drilled out. You can then loosely thread in the nuts that came with it. You don't want to tighten it down now because you will have to adjust the height later.

7.) Put a dab of grease on the top of the hood pin and close the hood. The bottom of your hood will then be marked for where you will drill.
Grease:

Grease on hood:

(cont. on next post)

I bought these from Poly Performance. They cost about $30 for the pair. Here is a link:
http://polyperformance.com/shop/Hood-Pins-p-36.html
Here is the Jeep we're going to be installing them on.

Now, why install hood pins, you ask? This is why:

When I installed my tube fenders, I ordered new latches because my old ones kept spinning and weren't coming off. For some reason or another, they kept getting torn up and end up flying off my Jeep. Finally I got a good pair, but this one was on its way out, and the other one wouldn't come off when I tried to get it off either.
So these are the supplies you will need.
1/2" Drill
10 mm socket
13 mm socket
1 1/4" hole saw
2 1/8" hole saw
1/4" drill bit
5/8" drill bit
Hole punch
Tape
Grease
So here we go!
1.) Find out where you want to mount your hood pins. I looked under my hood for a good spot because I wanted to an easy spot to drill through. You can also look directly under it and see where the support is. I chose these spots.
Driver side:

Passenger side:

These are good spots because there is already a hole there, which will make drilling much easier.
2.) Take the pin and put some grease on the tip. Put it under the hood and close it. It will mark the grill, and therefore show you were to drill.
Driver side:

Passenger side:

The passenger side hole is a bit long, so I moved the pin towards the center, and it ended up being in line with other side.
3.) Now that you know where you're going to drill, remove your headlights.

There are plenty of write-ups on how to do that, so I won't bother with the details.
4.) Take your hole punch, give it a good WHACK (not a WOMP), and drill out the hole with your 1/4" drill bit.

5.) Then, take your 5/8" drill bit (yep, it's a biggin!) and make the hole bigger.

6.) Insert the pin into the hole you just drilled out. You can then loosely thread in the nuts that came with it. You don't want to tighten it down now because you will have to adjust the height later.

7.) Put a dab of grease on the top of the hood pin and close the hood. The bottom of your hood will then be marked for where you will drill.
Grease:

Grease on hood:

(cont. on next post)

saxmanclay- Mall Crawler
- Posts : 79
Join date : 2011-12-10
Age : 36
Location : Hanson
 Re: TJ Hood pin installation & write-up.
8.) Now take your 1/4" drill bit and make a pilot hole. Then take the 2 1/8" hole saw and make the hole MUCH BIGGER!!! You're probably asking why you need to drill a bigger hole on the bottom. It's so you can tighten up the allen head bolts when putting on the rubber grommet.
(Please take caution when using the hole saw. Where protective goggles and drilling. And do you best to keep your hands away from the area being drilled. The when drilling this hole the hole saw jump and took a good chunk out of my thumb. So PLEASE BE CAREFUL.)

9.) Put some MOAR grease on the pins and close the hood. That will show you where to drill into the top layer of the hood. Drill from the underside of the hood.
10.) Take your 1 1/4" hole saw and drill into the topside of the hood. Use some blue painters tape protect your paint.

^Yep, that's me lookin like a BAMF!^
11.) After drilling your last big holes, again take your 1/4" drill bit and drill holes for the allen head bolts. You're almost done!
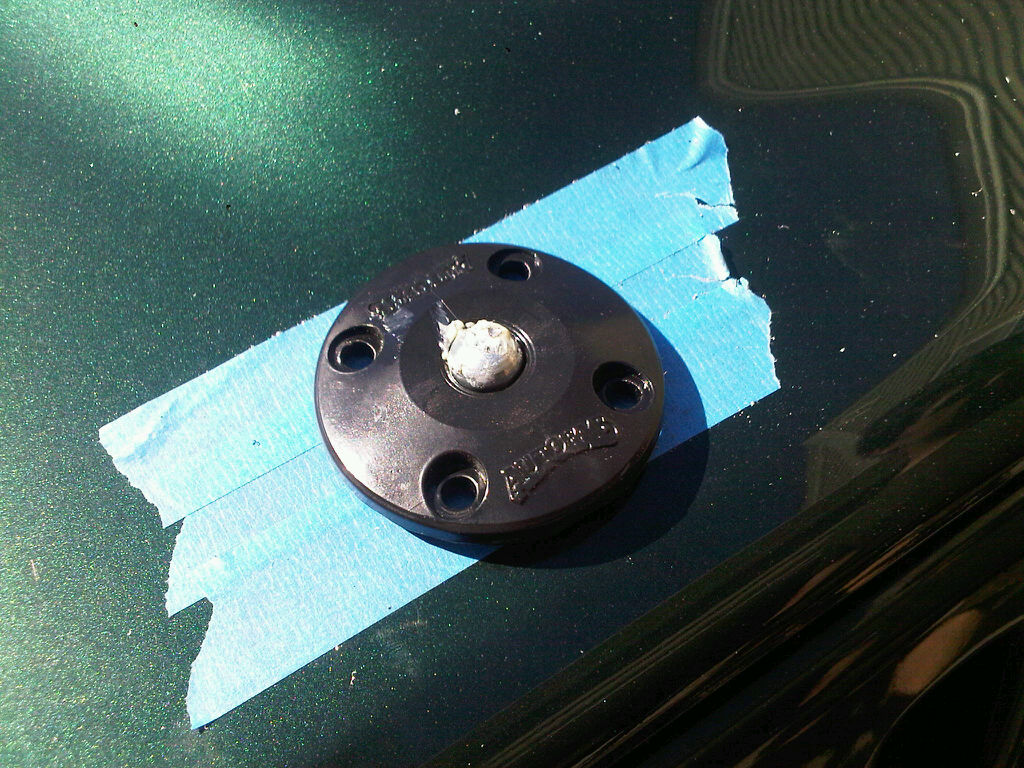
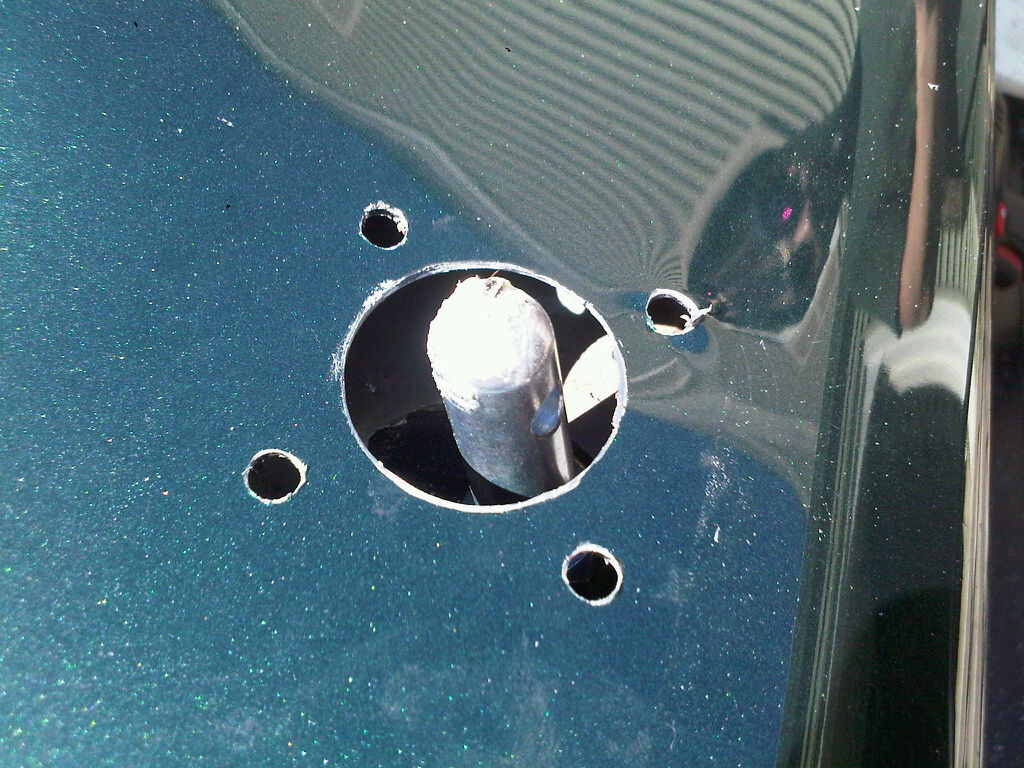
12.) Insert the grommets, and go to the underside of your hood to insert and tighten up your allen head bolts.


I had some trouble inserting the driver side allen head bolts, so what I did was I took a 7/16 wrench and covered up the closed side with tape. Then I took the nut and was able to hold it while turning the bolt to thread it in. Don't worry, you can do it!
13.) Now close it all up and admire your work!

As a side note, I also removed the side latch supports, as seen here:


It was a 10mm bolt that had to be removed. To cover up the holes I went and bought some stainless steel hardware.

After an initial test drive, the hood never flapped in the wind. And it looks killer. Hope this helps anyone that needs it. Enjoy!:2thumbsup:
AND! A big thanks to DJFLYY for coming up to help me out. His help is always greatly appreciated.
(Please take caution when using the hole saw. Where protective goggles and drilling. And do you best to keep your hands away from the area being drilled. The when drilling this hole the hole saw jump and took a good chunk out of my thumb. So PLEASE BE CAREFUL.)

9.) Put some MOAR grease on the pins and close the hood. That will show you where to drill into the top layer of the hood. Drill from the underside of the hood.
10.) Take your 1 1/4" hole saw and drill into the topside of the hood. Use some blue painters tape protect your paint.

^Yep, that's me lookin like a BAMF!^
11.) After drilling your last big holes, again take your 1/4" drill bit and drill holes for the allen head bolts. You're almost done!


12.) Insert the grommets, and go to the underside of your hood to insert and tighten up your allen head bolts.


I had some trouble inserting the driver side allen head bolts, so what I did was I took a 7/16 wrench and covered up the closed side with tape. Then I took the nut and was able to hold it while turning the bolt to thread it in. Don't worry, you can do it!
13.) Now close it all up and admire your work!

As a side note, I also removed the side latch supports, as seen here:


It was a 10mm bolt that had to be removed. To cover up the holes I went and bought some stainless steel hardware.

After an initial test drive, the hood never flapped in the wind. And it looks killer. Hope this helps anyone that needs it. Enjoy!:2thumbsup:
AND! A big thanks to DJFLYY for coming up to help me out. His help is always greatly appreciated.

saxmanclay- Mall Crawler
- Posts : 79
Join date : 2011-12-10
Age : 36
Location : Hanson
 Re: TJ Hood pin installation & write-up.
Nice job Clay!
Tobit- Daily Driver
- Posts : 49
Join date : 2012-03-09
Age : 52
Location : Manchester, NH
 Re: TJ Hood pin installation & write-up.
I feel like I've read this somewhere before......... 
Nice job Clay
Nice job Clay
 hood pins
Hey CLAYTON
Looks great, maybe you could mount some small lights on hood where latch was in the recessed area.
Some projector lights , turn signals, or small bullet style lights.
just my two cents.
Looks great, maybe you could mount some small lights on hood where latch was in the recessed area.
Some projector lights , turn signals, or small bullet style lights.
just my two cents.

Mark- Rubicon Trail
- Posts : 1300
Join date : 2011-12-10
Location : Haverhill, MA
 Re: TJ Hood pin installation & write-up.
Actually, Danielle gave me that idea yesterday. I know motorcycles have tiny lights that might look great right there. So next time I'm at a bike shop I'll take a look around.

saxmanclay- Mall Crawler
- Posts : 79
Join date : 2011-12-10
Age : 36
Location : Hanson
 Re: TJ Hood pin installation & write-up.
just a thought you never know it may work out

Mark- Rubicon Trail
- Posts : 1300
Join date : 2011-12-10
Location : Haverhill, MA
 Re: TJ Hood pin installation & write-up.
Clay... Grab 4 of these - $2.95 each for the 10mm Bolt LEDs. Hook them into your turn signals.
http://www.superbrightleds.com/cgi-bin/store/index.cgi?action=DispPage&category=ACCENTS&Page2Disp=%2Fspecs%2Fbolt_specs.htm
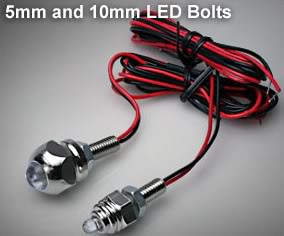
http://www.superbrightleds.com/cgi-bin/store/index.cgi?action=DispPage&category=ACCENTS&Page2Disp=%2Fspecs%2Fbolt_specs.htm

 Similar topics
» Hood pins!
» yj hood/ fenders
» PSC Steering Box Installation
» Poly Hood pin kit.
» Oil Change Write-Up
» yj hood/ fenders
» PSC Steering Box Installation
» Poly Hood pin kit.
» Oil Change Write-Up
Page 1 of 1
Permissions in this forum:
You cannot reply to topics in this forum
 Home
Home