YJ Cowl Intake Writeup (version 2.1)
4 posters
Page 1 of 1
 YJ Cowl Intake Writeup (version 2.1)
So TJs have the whole cowl intake thing easy, because they just unscrew a panel and *voila*, you can jam a whole filter in there if you please, or just grab a Ford Windstar airbox and run the end through the firewall.
The cowl for YJs, on the other hand, is actually inside the cab and you would have to drill a hole through the firewall and then a separate hole into the fresh air plenum and just leave it hanging out inside the cab.
But I was looking at the cowl drain the other day and realized that it was about the same size as the actual inlet hole on the stock YJ airbox. Now, the stock airbox is still pretty good. It's routed away from all the heat and grabs nice cool air from behind the headlight and is reasonably high up. The only issue with it is that it's right in front and you can't actually see it. That means that went you take that initial dip into a water hole, the ambiguity and angle of approach makes for a major pucker moment.
Example below:
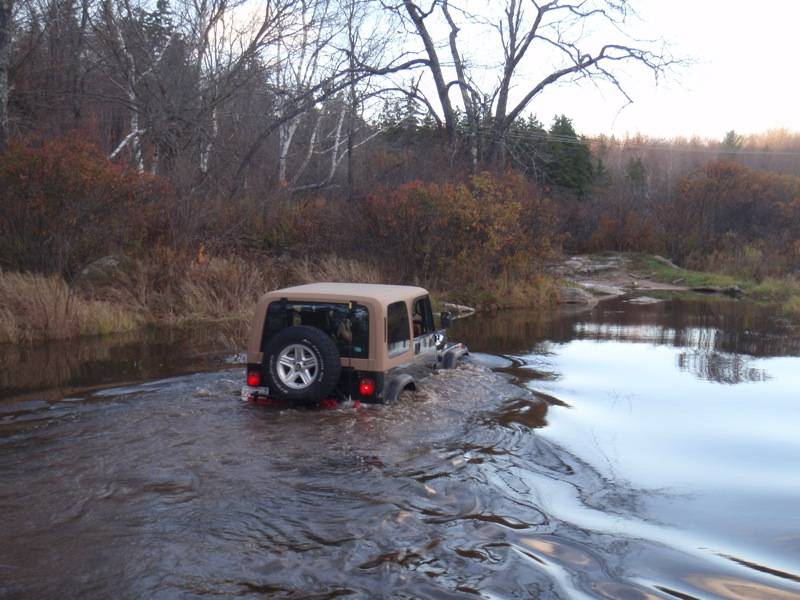
Ever since that trip I've been determined to throw in a cowl intake. Why a cowl intake vs a snorkel or CAI?
1) I want to be able to *see* my air inlet, so I can better judge water crossings.
2) Unlike a lot of Jeeps, I still put down my windshield, like, a lot.
3) I've tried to keep a sort of sleeper mentality with my Jeep. Not flashy, just practical.
So version 1.0 of this project started by picking up the usual favorite, a Ford Windstar airbox:

However, I quickly abandoned it, because it's huge, it's output faces the wrong way to be convenient, and it's horizontal layout means any water that got in it would immediately get sucked up. Not what I was looking for.
So through ebay and general searching, I found a bunch of airboxes that were better candidates and set off for my nearest junkyard to do some shopping.
The two final candidates ended up being from a Chevy Camero/Pontiac Firebird (Right) or one from a Dodge Avenger (Left). I eventually settled on the Avenger because it gave a bit more room for the inlet and was easier to seal off. The hose I went with is actually from a Buick Park Ave/LeSabre, whose airbox also would have made an excellent option.
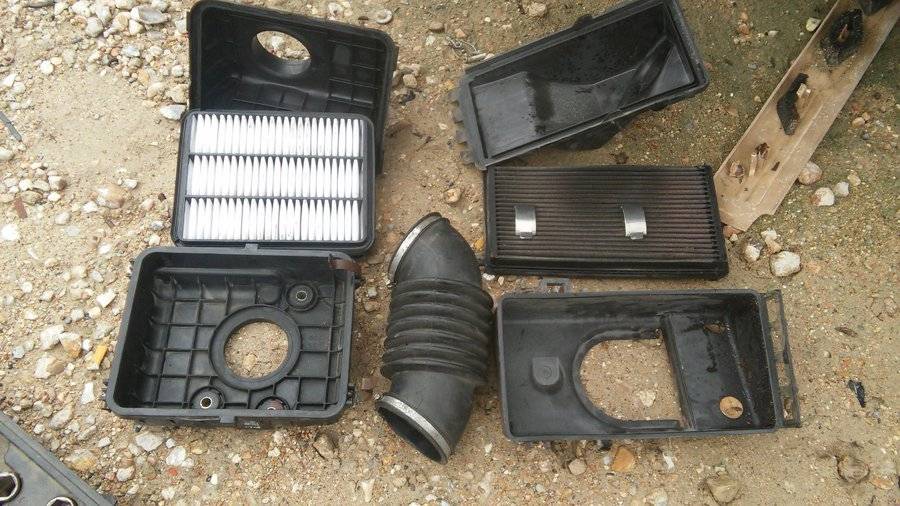
The Firebird box definitely would have been a bit shallow, as even the Avenger was a bit tight and needed some dremeling to get the PVC fittings I chose to sit neatly. Other airboxes that are a little deeper could possibly skip a couple of the dremel clearance and PVC trimming steps include (depending on year):
Daewoo Lanos
Ford Taurus 04 -07
Hundai Elantra
Buick Regal
97-99 Chevy Malibu
Pontiac GrandAm 99ish
Oldsmobile Ninety Eight
Oldsmobile Eighty Eight
Oldsmobile Alero
Oldsmobile Intrigue
Buick Park Ave (early 90s)
Honda passport
Chevy lumina
(I'll update this list if people try it out and give me feedback)
Basically, you're looking for an airbox that is flat, compact, filter above the inlet, has an air inlet that is easy to close off, and the intake outlet can be pointed towards the intake in some rotation, and preferably isn't some weird shape or size intake connection. As long as it has a 3" output, though, the connection I used should work. I'm going to try a TJ air intake tube at some point, just to try it and see if I can make all the emissions tubing still hook up, cause I'm classy like that.
So anyhow, for this project you will need:
Airbox from a Dodge Avenger or something similar as described above
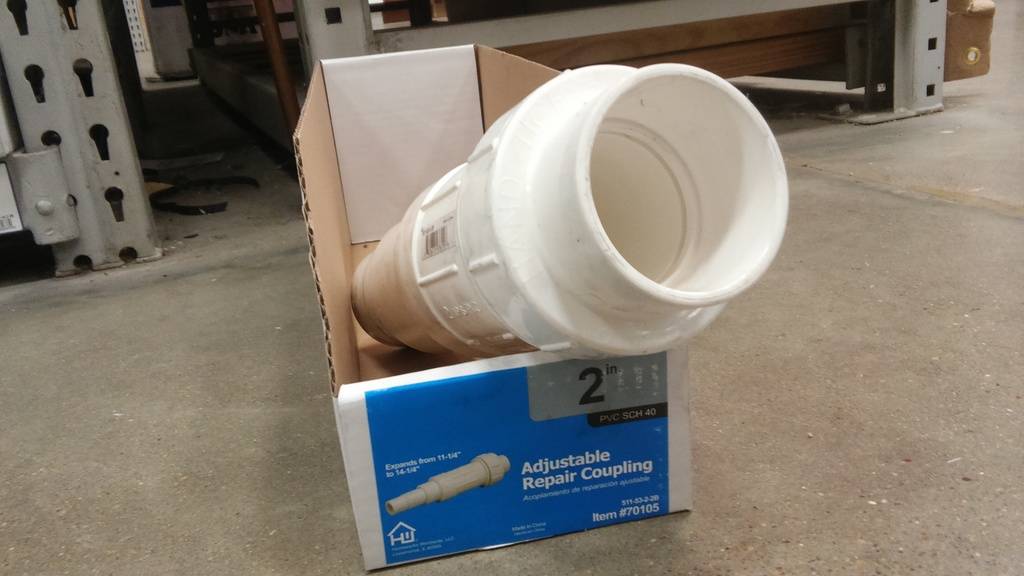
2" PVC Adjustable Repair Coupling
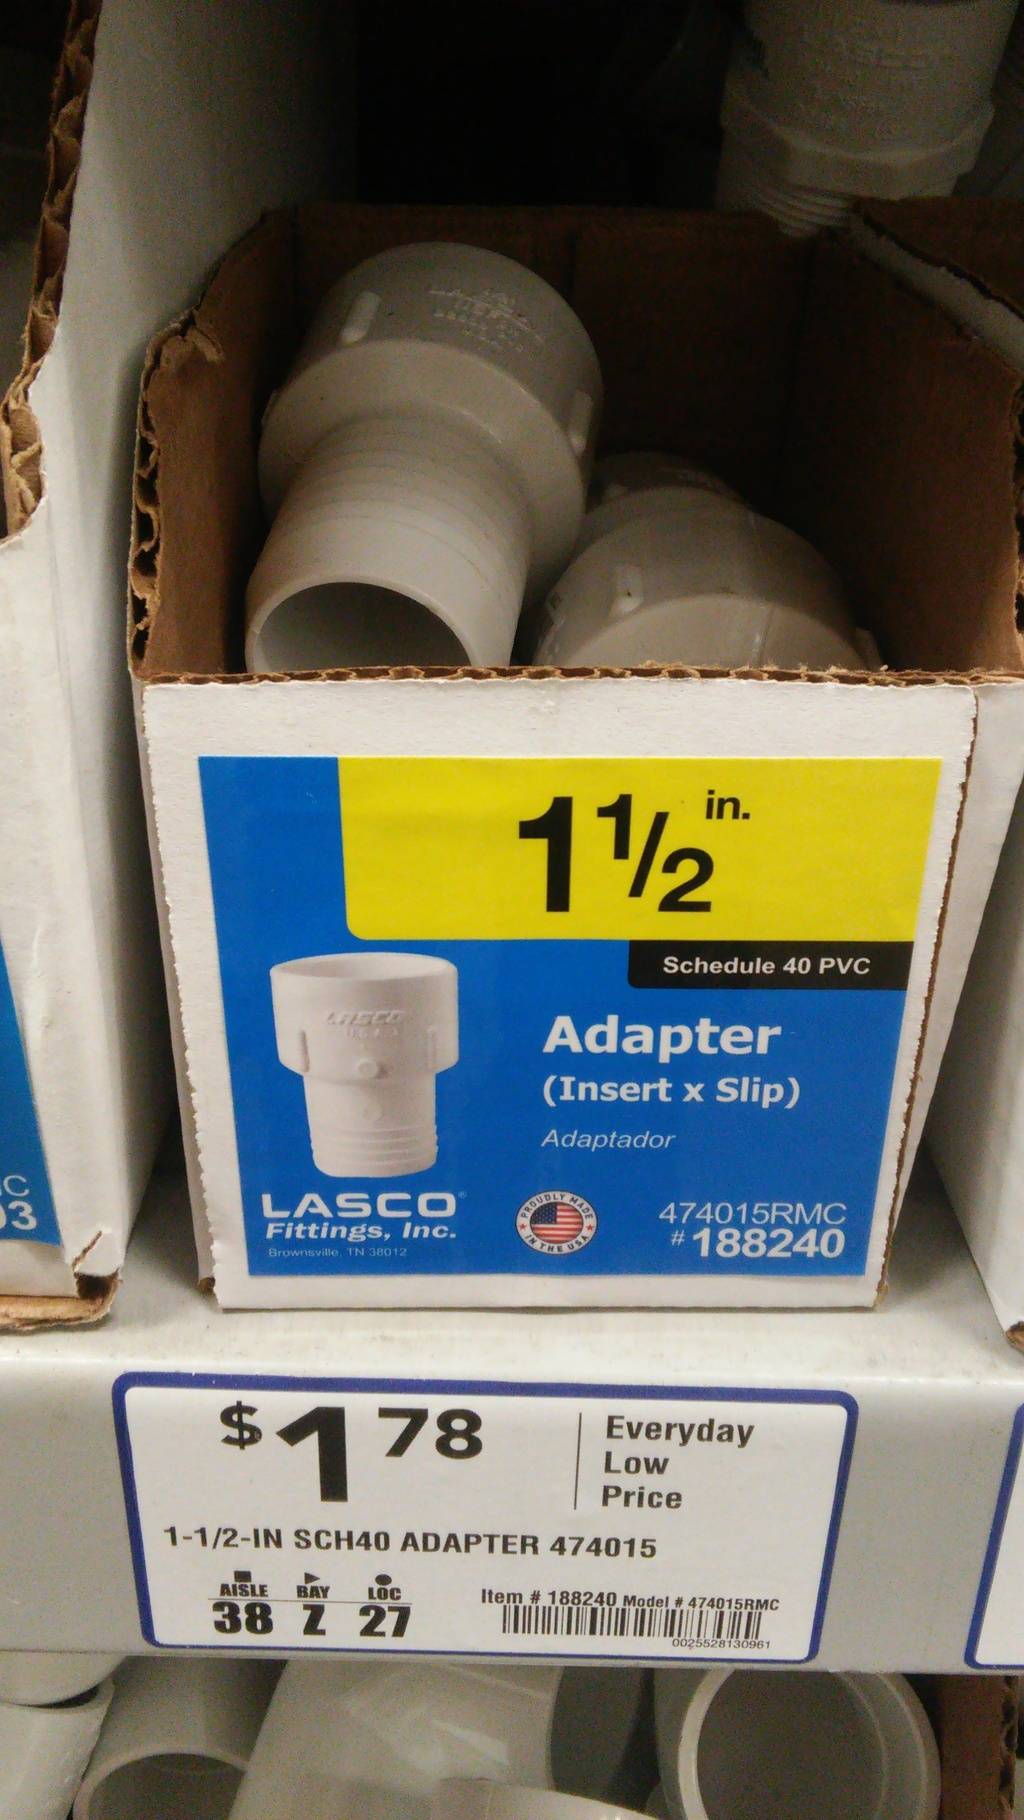
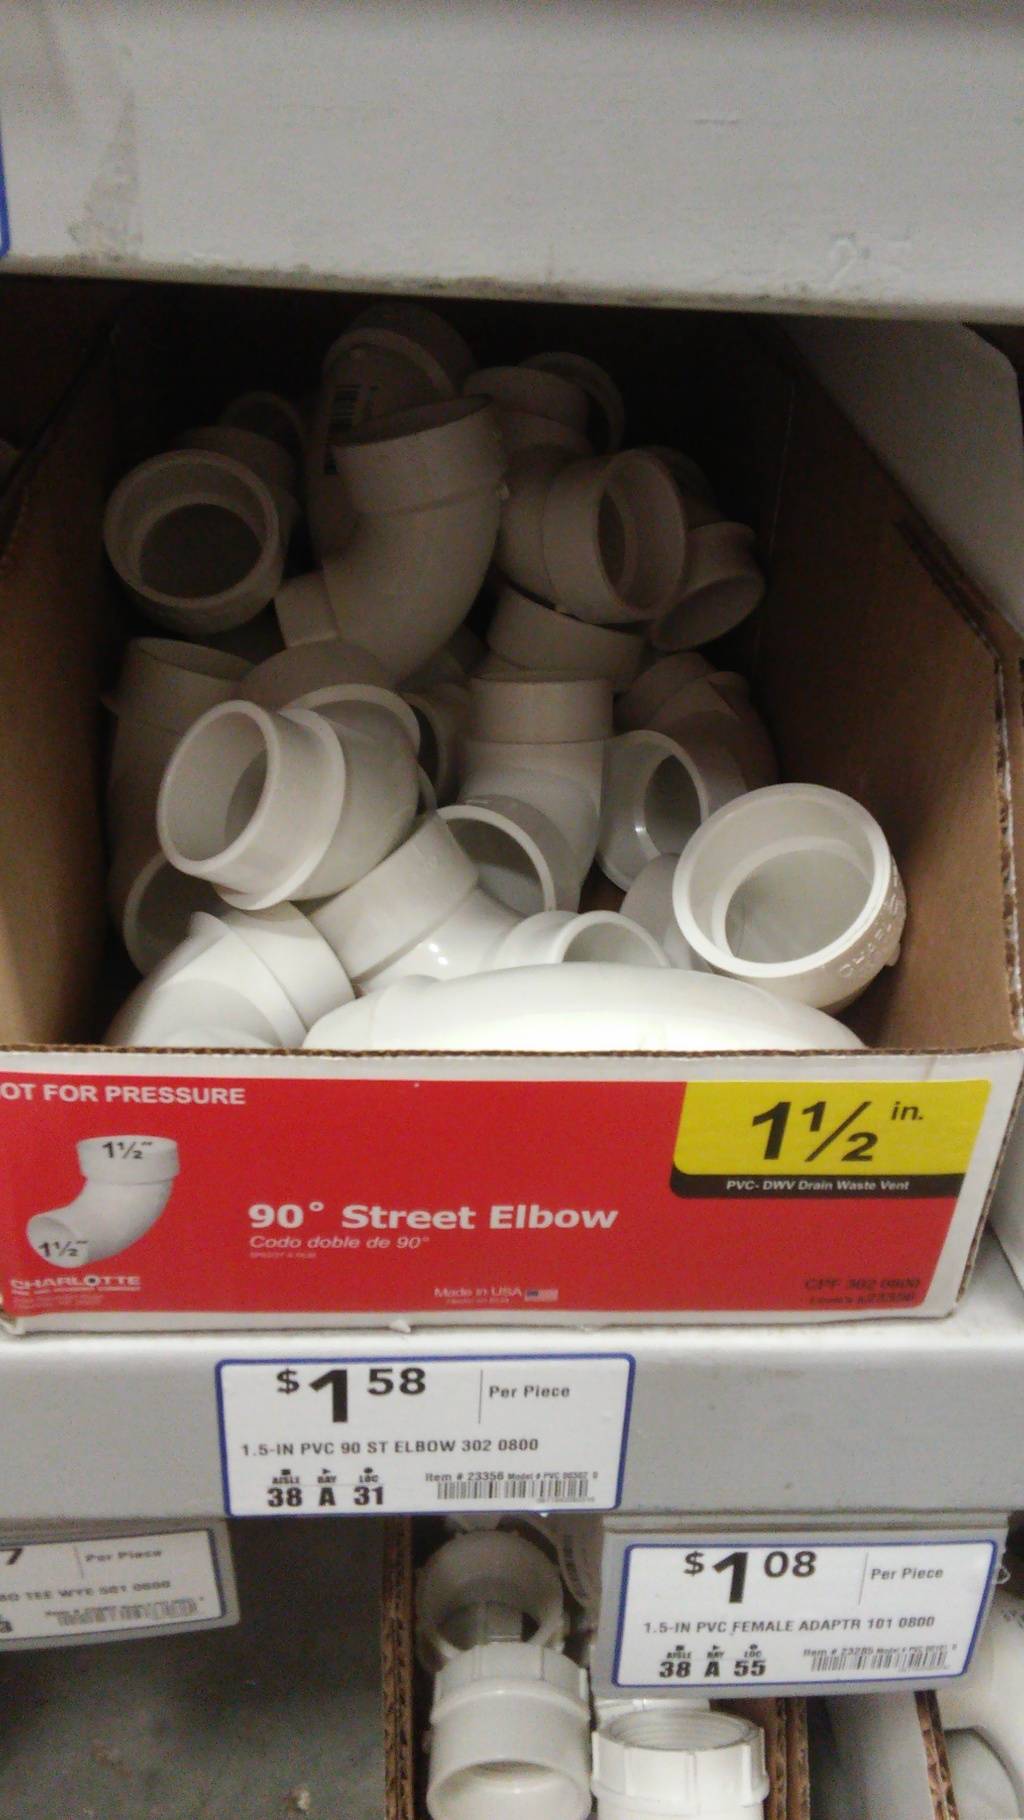
1 1/2" PVC Adapter
1 1/2" PVC 90* Street Elbow
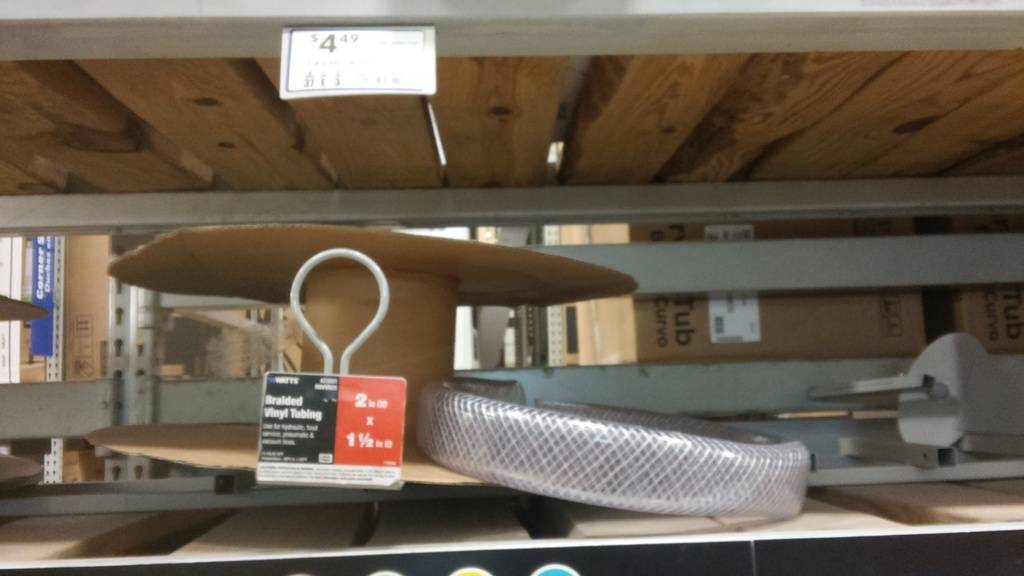
<12" 2"OD x 1 1/2" ID Braided Vinyl Tubing
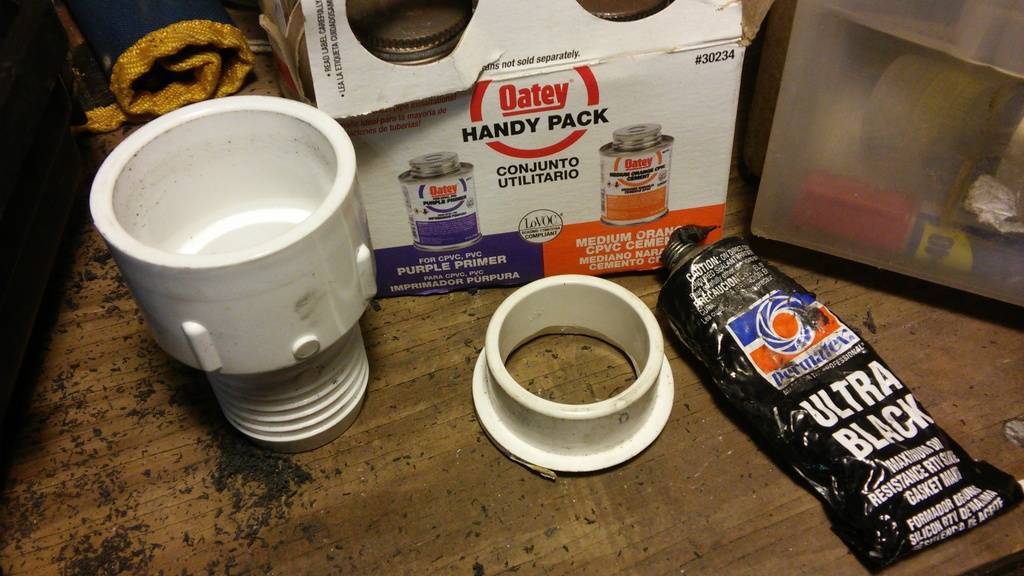
PVC Glue, RTV sealant, method of creating ~1 3/4" hole in airbox, etc.
Total cost: ~$50, including airbox
First thing needed in this specific case was I had to cut off a couple of the locating tabs on the box lid because I wanted to flip the lid 180* so the flatter wall of the box (the other side was contoured) would be facing the firewall.
The next step was to cut off the curved part of the elbow, leaving just the flanged section.
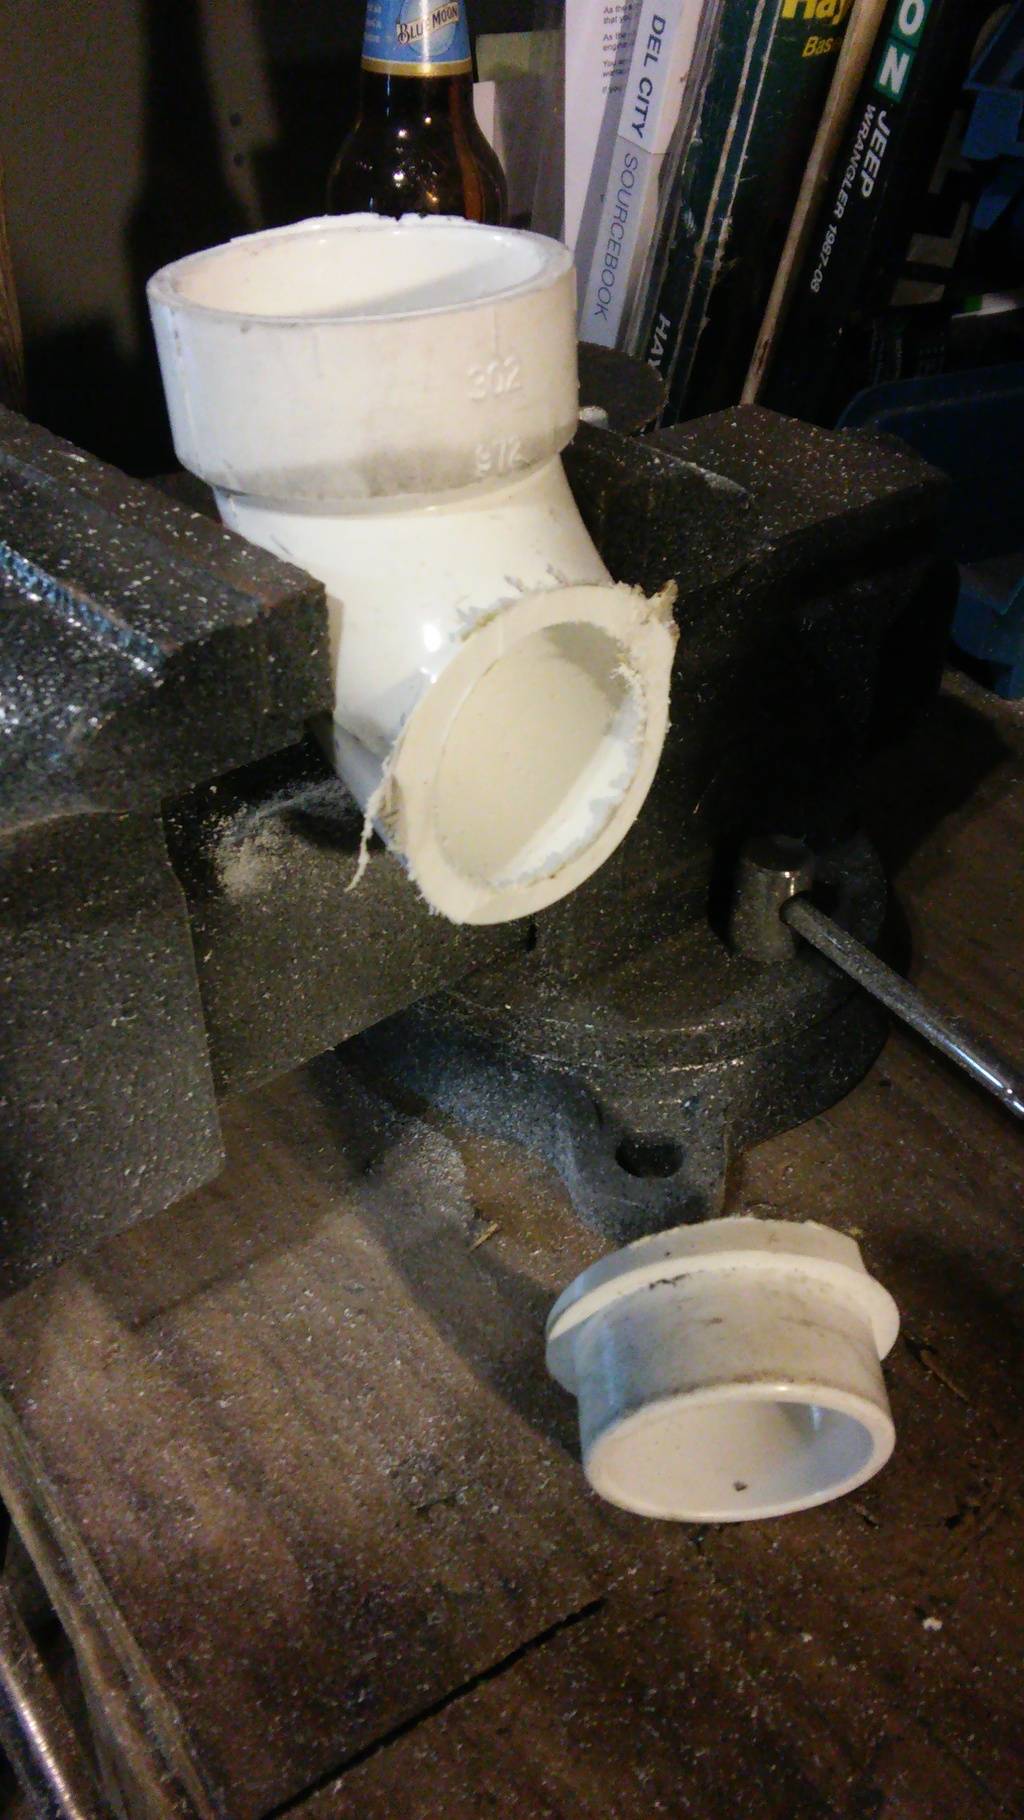
Neither of those steps would really be neccesary if you went with a deeper airbox like a Chevy Malibu or Grand Prix, but I wanted as slim a box as possible while still having a large filter area.
Next step was to make a whole in the firewall side of the box big enough to snugly fit the now-removed flanged end. I used a 1" spade bit, then englarged it with a rasp. If doesn't have to be perfect, because you'll fill the gaps with RTV eventually anyhow. Example: Mine looked terrible.
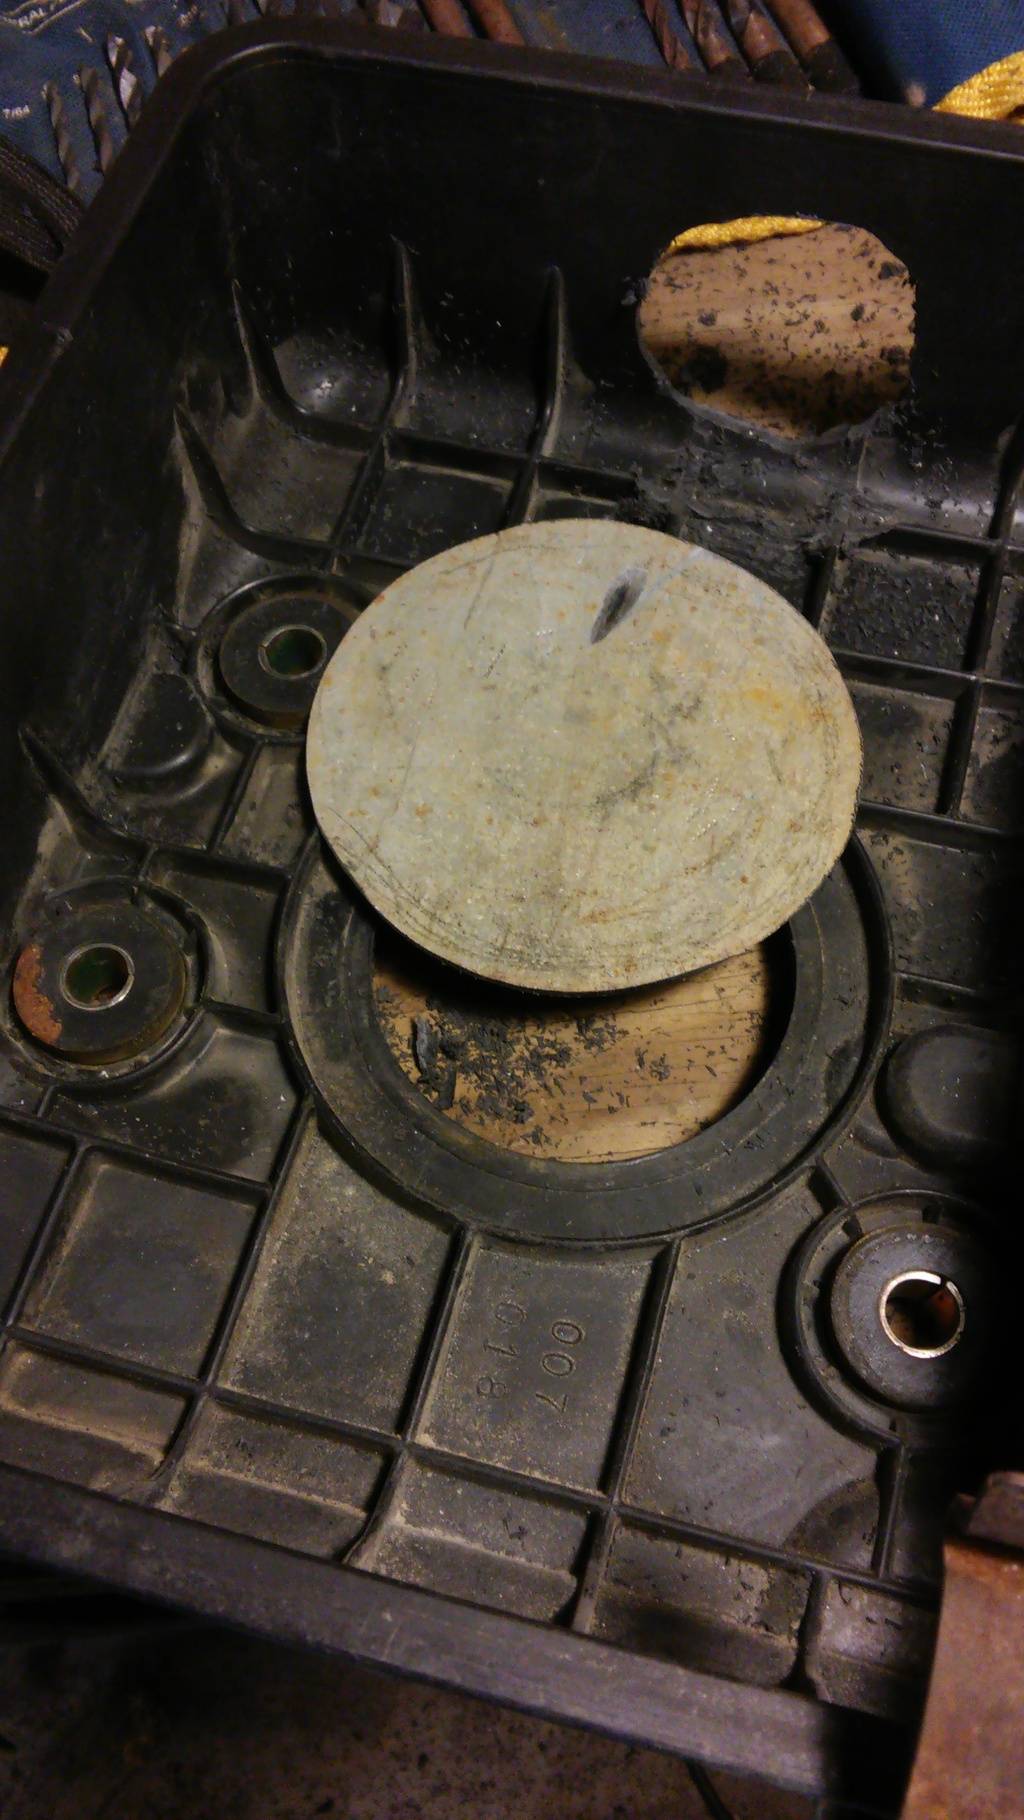
In the above photo, you will also notice the piece of metal I cut to fill in the hole. You could use anything. I used a piece of galvanized sheet I just happen to have laying around. You could attach it with glue or rivets, but I just ended up RTVing it and it's working fine.
Next you'll want to primer your PVC and add some glue to the mating surfaces. Then stick the flange through from the inside, clamp them together tightly, and smear RTV around both the inside and outside of your new inlet. While you're at it, go ahead and RTV anything else in the box that looks like it needs sealing like bolt holes, etc.
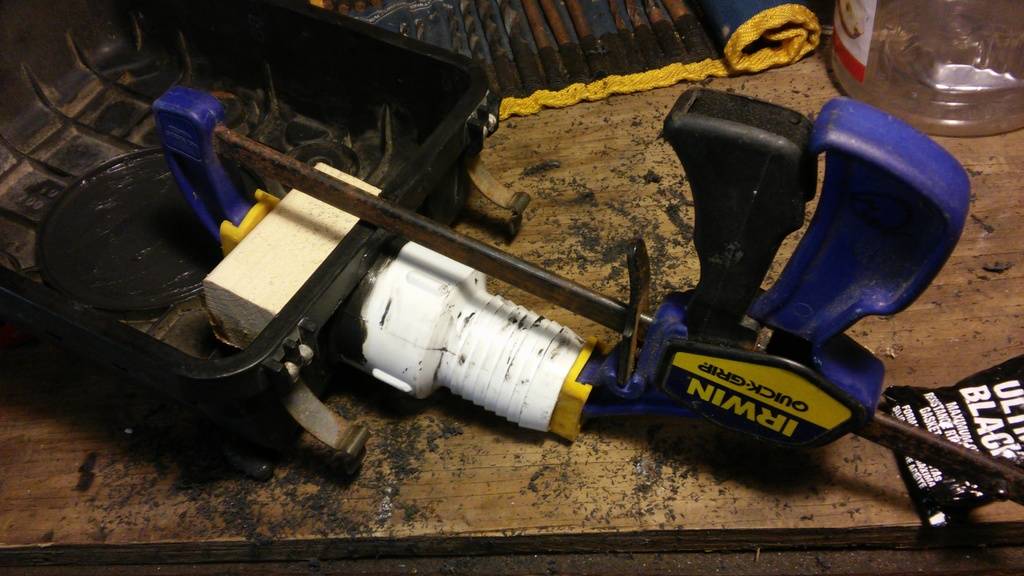
Once it's dried (or not, if you're impatient like me), you can put the tubing onto the PVC inlet. I used a heat gun to make the tubing more pliable and make it easier. When you're done, and the clamp is removed, your box lower should look like this:

Put back together with the tubing cut (~6", but start longer and shorten to your comfort) it shoud look like this:

Now just remove the cowl drain tube:

And stick your new airbox tube on it and secure with a hose clamp:
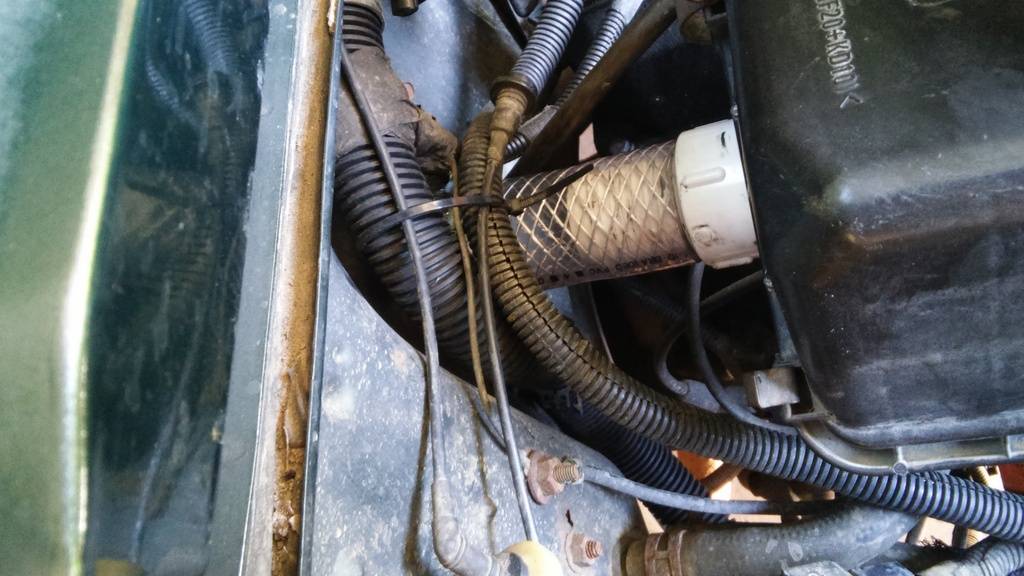
To connect the airbox to the intake, you could use a number of different methods. Pretty much any method that will take you 3" to 2" will work fine. It could be an adapter and a flexible intake tube, or a TJ intake tube with an adapter (I will be trying that eventually), but I ended up using the hose from a Buick Park Ave, the stock intake, and a PVC adapter.
Of the adapter listed in the required materials, you really only need the outer sleever (center piece in the picture)

That piece fits both the 3" and 2" side and clamps down securely, leaving the result below:

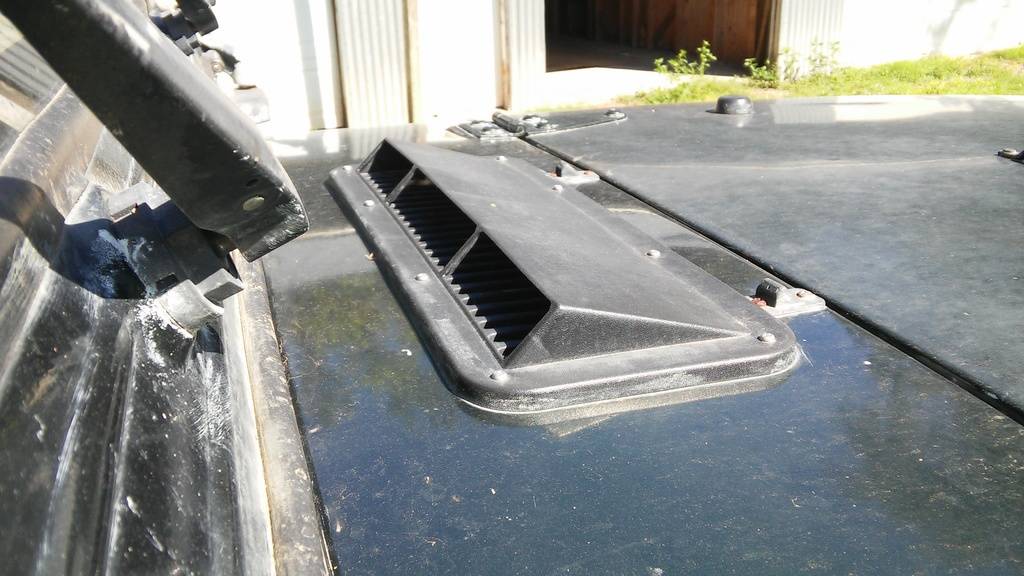
For added security against water, I already had a cowl cover, which has the added bonus of forcing more air into the intake, plus a grate and mesh beneath that as a pre-filter to prevent nuts, leaves, etc. from getting into the airbox.
I have to say, I was originally a little worried about restriction of airflow with only a 1.5" throat, but took it for a spirited drive both on-road and highway and had no issues whatsoever. If anything, she felt more lively. It passes over the engine, which heats the incoming air a bit, but it's pulling air from outside the engine compartment, so it does balance out.
The best part about this mod, though? IT'S FULLY REVERSIBLE! You can swap it back to stock at any time. Hell, you could even just throw it in for trips where you know there's going to be a deep water crossing. Or leave it in all the time and use the old airbox space for onboard air.
Next improvements:
Adding bungs for CCV vent and charcoal cannister vent
Plugging up the box drain holes and adding a duckbill drain vent for further water drainage/protection

The cowl for YJs, on the other hand, is actually inside the cab and you would have to drill a hole through the firewall and then a separate hole into the fresh air plenum and just leave it hanging out inside the cab.
But I was looking at the cowl drain the other day and realized that it was about the same size as the actual inlet hole on the stock YJ airbox. Now, the stock airbox is still pretty good. It's routed away from all the heat and grabs nice cool air from behind the headlight and is reasonably high up. The only issue with it is that it's right in front and you can't actually see it. That means that went you take that initial dip into a water hole, the ambiguity and angle of approach makes for a major pucker moment.
Example below:

Ever since that trip I've been determined to throw in a cowl intake. Why a cowl intake vs a snorkel or CAI?
1) I want to be able to *see* my air inlet, so I can better judge water crossings.
2) Unlike a lot of Jeeps, I still put down my windshield, like, a lot.
3) I've tried to keep a sort of sleeper mentality with my Jeep. Not flashy, just practical.
So version 1.0 of this project started by picking up the usual favorite, a Ford Windstar airbox:

However, I quickly abandoned it, because it's huge, it's output faces the wrong way to be convenient, and it's horizontal layout means any water that got in it would immediately get sucked up. Not what I was looking for.
So through ebay and general searching, I found a bunch of airboxes that were better candidates and set off for my nearest junkyard to do some shopping.
The two final candidates ended up being from a Chevy Camero/Pontiac Firebird (Right) or one from a Dodge Avenger (Left). I eventually settled on the Avenger because it gave a bit more room for the inlet and was easier to seal off. The hose I went with is actually from a Buick Park Ave/LeSabre, whose airbox also would have made an excellent option.

The Firebird box definitely would have been a bit shallow, as even the Avenger was a bit tight and needed some dremeling to get the PVC fittings I chose to sit neatly. Other airboxes that are a little deeper could possibly skip a couple of the dremel clearance and PVC trimming steps include (depending on year):
Daewoo Lanos
Ford Taurus 04 -07
Hundai Elantra
Buick Regal
97-99 Chevy Malibu
Pontiac GrandAm 99ish
Oldsmobile Ninety Eight
Oldsmobile Eighty Eight
Oldsmobile Alero
Oldsmobile Intrigue
Buick Park Ave (early 90s)
Honda passport
Chevy lumina
(I'll update this list if people try it out and give me feedback)
Basically, you're looking for an airbox that is flat, compact, filter above the inlet, has an air inlet that is easy to close off, and the intake outlet can be pointed towards the intake in some rotation, and preferably isn't some weird shape or size intake connection. As long as it has a 3" output, though, the connection I used should work. I'm going to try a TJ air intake tube at some point, just to try it and see if I can make all the emissions tubing still hook up, cause I'm classy like that.
So anyhow, for this project you will need:
Airbox from a Dodge Avenger or something similar as described above
2" PVC Adjustable Repair Coupling

1 1/2" PVC Adapter

1 1/2" PVC 90* Street Elbow

<12" 2"OD x 1 1/2" ID Braided Vinyl Tubing

PVC Glue, RTV sealant, method of creating ~1 3/4" hole in airbox, etc.

Total cost: ~$50, including airbox
First thing needed in this specific case was I had to cut off a couple of the locating tabs on the box lid because I wanted to flip the lid 180* so the flatter wall of the box (the other side was contoured) would be facing the firewall.
The next step was to cut off the curved part of the elbow, leaving just the flanged section.

Neither of those steps would really be neccesary if you went with a deeper airbox like a Chevy Malibu or Grand Prix, but I wanted as slim a box as possible while still having a large filter area.
Next step was to make a whole in the firewall side of the box big enough to snugly fit the now-removed flanged end. I used a 1" spade bit, then englarged it with a rasp. If doesn't have to be perfect, because you'll fill the gaps with RTV eventually anyhow. Example: Mine looked terrible.

In the above photo, you will also notice the piece of metal I cut to fill in the hole. You could use anything. I used a piece of galvanized sheet I just happen to have laying around. You could attach it with glue or rivets, but I just ended up RTVing it and it's working fine.
Next you'll want to primer your PVC and add some glue to the mating surfaces. Then stick the flange through from the inside, clamp them together tightly, and smear RTV around both the inside and outside of your new inlet. While you're at it, go ahead and RTV anything else in the box that looks like it needs sealing like bolt holes, etc.

Once it's dried (or not, if you're impatient like me), you can put the tubing onto the PVC inlet. I used a heat gun to make the tubing more pliable and make it easier. When you're done, and the clamp is removed, your box lower should look like this:

Put back together with the tubing cut (~6", but start longer and shorten to your comfort) it shoud look like this:

Now just remove the cowl drain tube:

And stick your new airbox tube on it and secure with a hose clamp:

To connect the airbox to the intake, you could use a number of different methods. Pretty much any method that will take you 3" to 2" will work fine. It could be an adapter and a flexible intake tube, or a TJ intake tube with an adapter (I will be trying that eventually), but I ended up using the hose from a Buick Park Ave, the stock intake, and a PVC adapter.
Of the adapter listed in the required materials, you really only need the outer sleever (center piece in the picture)

That piece fits both the 3" and 2" side and clamps down securely, leaving the result below:

For added security against water, I already had a cowl cover, which has the added bonus of forcing more air into the intake, plus a grate and mesh beneath that as a pre-filter to prevent nuts, leaves, etc. from getting into the airbox.

I have to say, I was originally a little worried about restriction of airflow with only a 1.5" throat, but took it for a spirited drive both on-road and highway and had no issues whatsoever. If anything, she felt more lively. It passes over the engine, which heats the incoming air a bit, but it's pulling air from outside the engine compartment, so it does balance out.
The best part about this mod, though? IT'S FULLY REVERSIBLE! You can swap it back to stock at any time. Hell, you could even just throw it in for trips where you know there's going to be a deep water crossing. Or leave it in all the time and use the old airbox space for onboard air.
Next improvements:
Adding bungs for CCV vent and charcoal cannister vent
Plugging up the box drain holes and adding a duckbill drain vent for further water drainage/protection

 Re: YJ Cowl Intake Writeup (version 2.1)
Excellent work Geoff!
Tonellin- Rausch Creek
- Posts : 313
Join date : 2013-01-08
Location : Medford
 Re: YJ Cowl Intake Writeup (version 2.1)
Nice write-up Geoff!
Andrew Miller- Admin
- Posts : 398
Join date : 2011-12-19
Location : Harvard Ma
Page 1 of 1
Permissions in this forum:
You cannot reply to topics in this forum
 Home
Home