Jake's 99 XJ continuing build
+9
THOOPY3
dongalonga
desertzj
RidingOnLeafs
Tonellin
saxmanclay
Andrew Miller
CrawlingForward
Mark
13 posters
Page 7 of 7
Page 7 of 7 •  1, 2, 3, 4, 5, 6, 7
 Re: Jake's 99 XJ continuing build
Spent a few weeks in Moab, didn't do a ton of wheeling as none of the friends I was with have offroad capable vehicles.
Ran part of Behind the Rocks where we camped for a while, Fins n Things, 7 Mile Rim, Secret Spire/Dellenbaugh Tunnel, Gemini Bridges, Davis Canyon, Elephant Hill, and a bunch of other misc. stuff. Didn't want to get into anything too crazy without a second vehicle.
Unfortunately don't have a ton of pictures, gonna have to raid my friends computer to grab some more.


Moab is awesome.. I discovered that long arms are on my short list for upgrades however, alas for not having a real job anymore/money
More recently.. out with old

In with the new

Broke the battery tray of course (shitty old plastic..) so I have a new fancier one on the way.
Also bent my tie rod and picked up some DW when we ran elephant hill, got some shiny new things on the way from ruffstuff to deal with that.
Ran part of Behind the Rocks where we camped for a while, Fins n Things, 7 Mile Rim, Secret Spire/Dellenbaugh Tunnel, Gemini Bridges, Davis Canyon, Elephant Hill, and a bunch of other misc. stuff. Didn't want to get into anything too crazy without a second vehicle.
Unfortunately don't have a ton of pictures, gonna have to raid my friends computer to grab some more.


Moab is awesome.. I discovered that long arms are on my short list for upgrades however, alas for not having a real job anymore/money
More recently.. out with old
In with the new
Broke the battery tray of course (shitty old plastic..) so I have a new fancier one on the way.
Also bent my tie rod and picked up some DW when we ran elephant hill, got some shiny new things on the way from ruffstuff to deal with that.
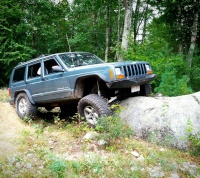
Jake- Rausch Creek
- Posts : 323
Join date : 2013-05-19
Location : Beverly
 Re: Jake's 99 XJ continuing build
New battery box went in this morning. Took a lot of work to get the box and the brackets in the right place, would recommend just getting DPG's bolt in one instead.. Thing is rock solid though so at least there's that.
Old battery tray:
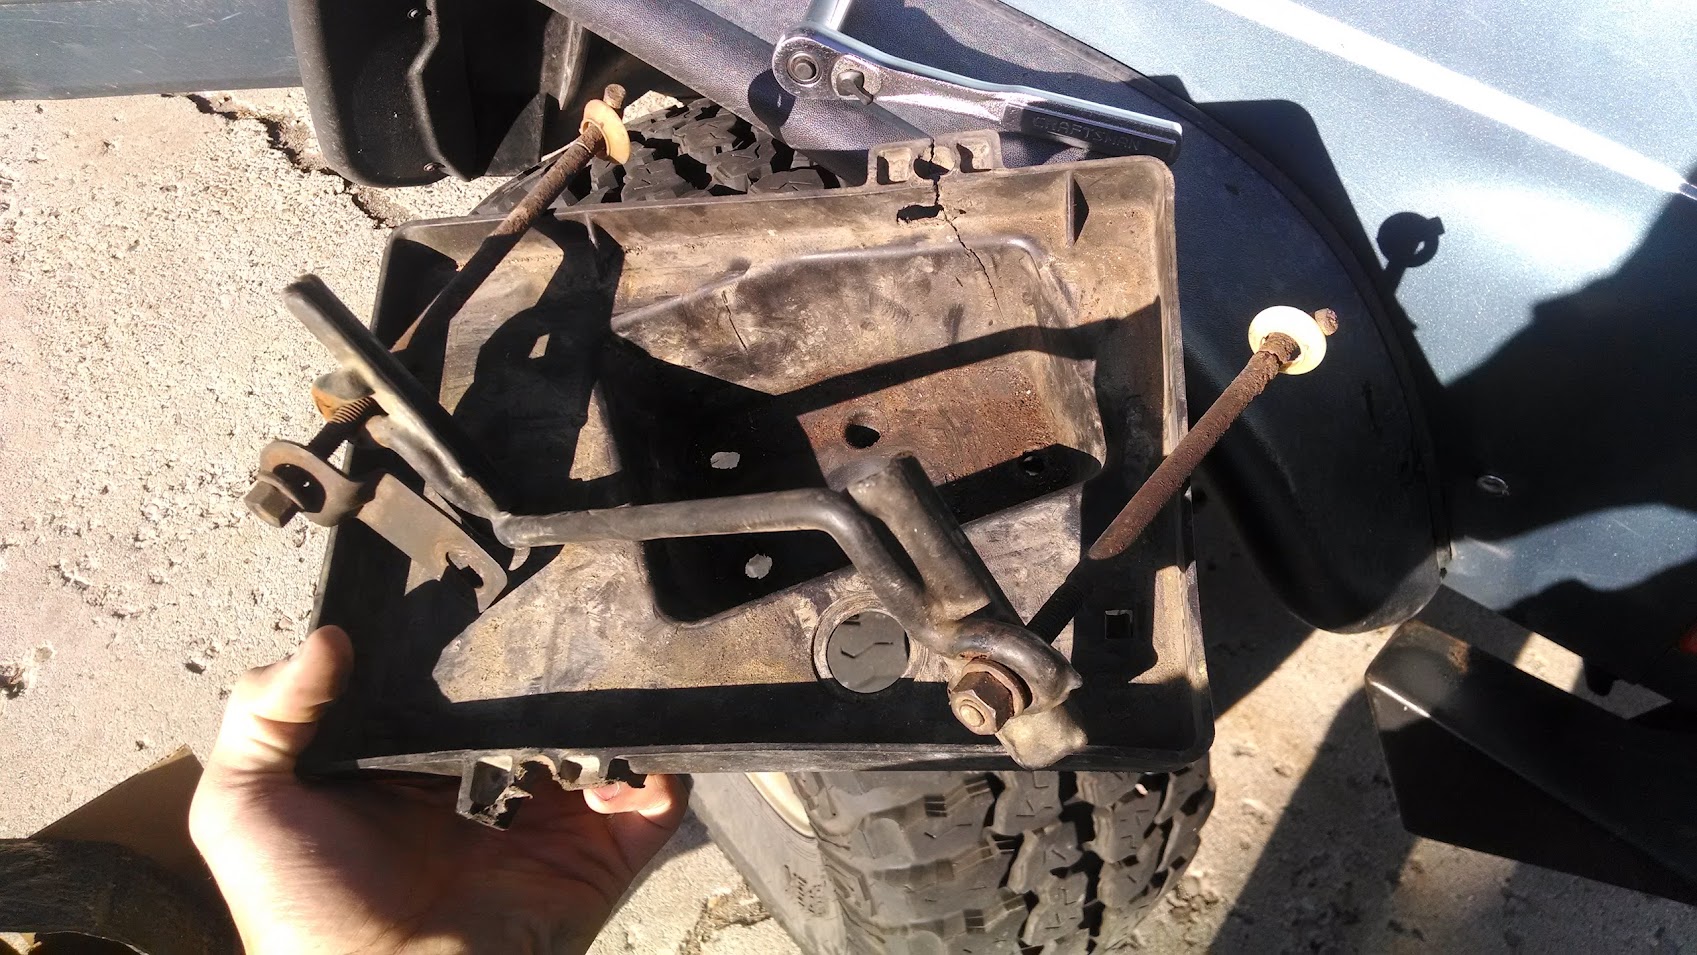
Risers and nuts welded on, cutout and backup washer for the temp sensor in place:

Apparently I forgot how to use a MIG?
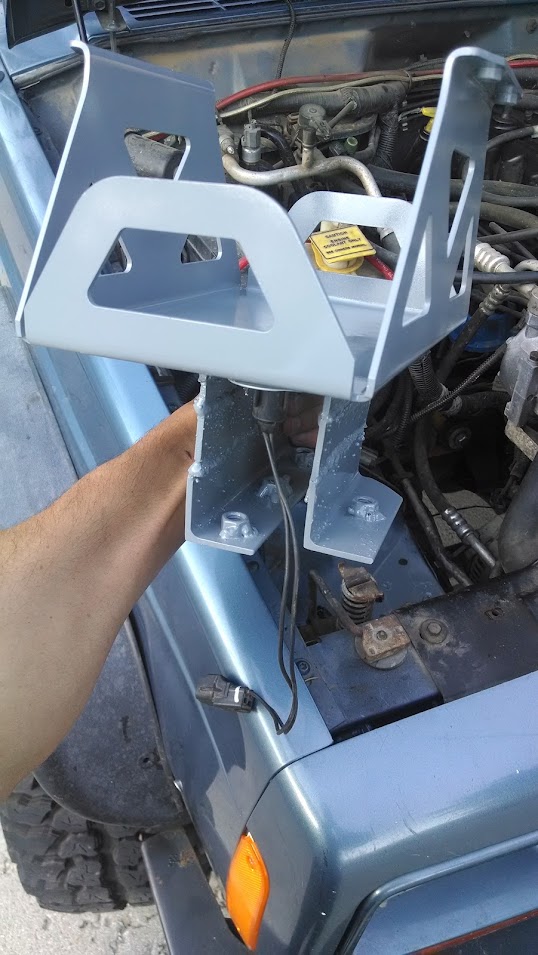


And of course I fucked up the paint on the only visible part while trying to get paint to fill the ruffstuff laser etched logo...
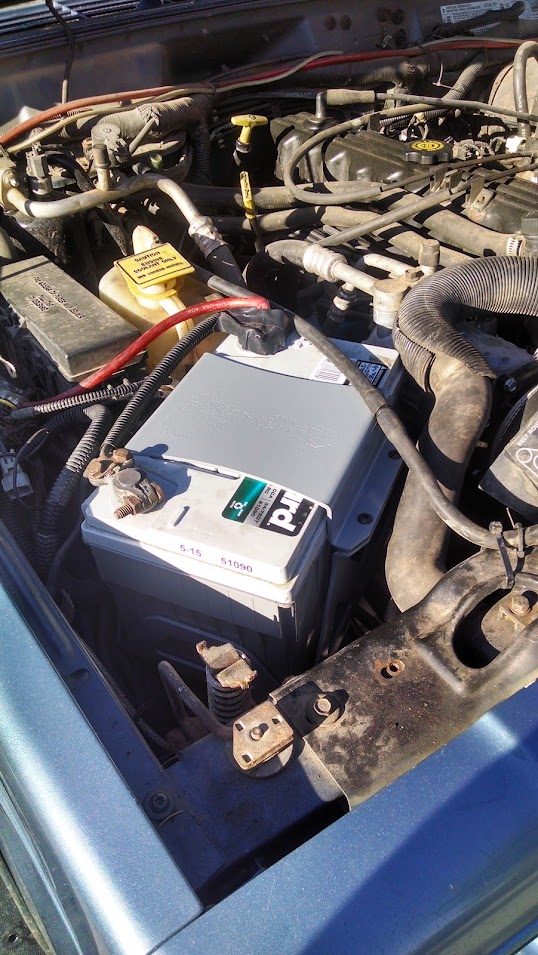
Getting all the new steering parts together has been unnecessarily complicated but I should have the last part in a couple days..
Old battery tray:
Risers and nuts welded on, cutout and backup washer for the temp sensor in place:
Apparently I forgot how to use a MIG?
And of course I fucked up the paint on the only visible part while trying to get paint to fill the ruffstuff laser etched logo...
Getting all the new steering parts together has been unnecessarily complicated but I should have the last part in a couple days..

Jake- Rausch Creek
- Posts : 323
Join date : 2013-05-19
Location : Beverly
 Re: Jake's 99 XJ continuing build
Nice looking battery tray.
dongalonga- Rubicon Trail
- Posts : 1047
Join date : 2012-03-20
Age : 40
Location : Lowell, MA
 Re: Jake's 99 XJ continuing build
Looks good, that battery isn't going anywhere.
Mark- Rubicon Trail
- Posts : 1300
Join date : 2011-12-10
Location : Haverhill, MA
 Re: Jake's 99 XJ continuing build
New vs old, this looks good:

The bad.. got tapered inserts with the steering parts instead of buying a reamer. In retrospect this was kinda dumb as the inserts and 7/8's bit ended up adding up to $40, reamer is ~$65. I assumed all the inserts were the same--they're not, the high angle drag link tre that goes on the pitman arm has a 1" OD.. I think my best option here is to take the pitman arm to a machine shop and have them ream it and just ditch the insert.
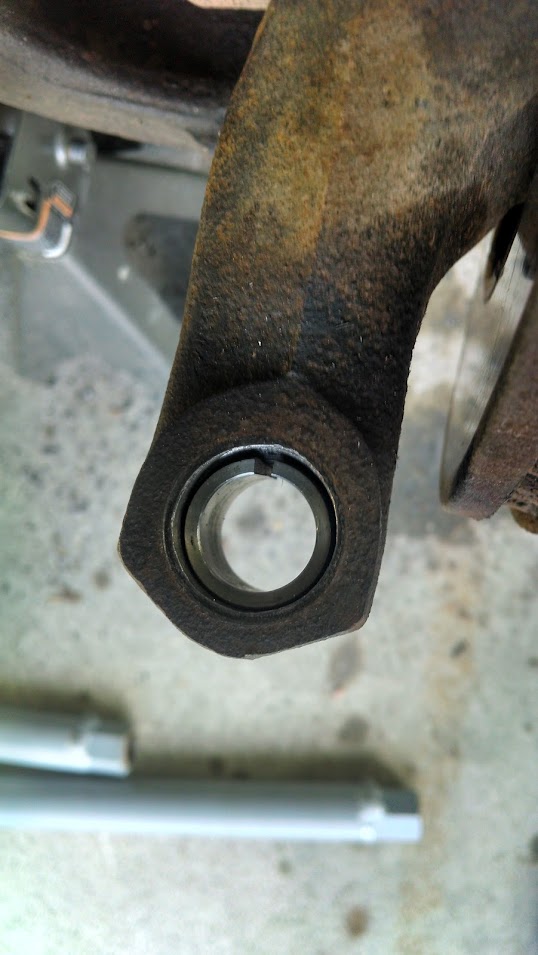
The worse.. due to the shitty chuck on the drill I borrowed I ended up with oversized shitty holes in my steering knuckles.. They may work as the inserts are split so they can expand to compensate.. However I'm not happy at all with how they came out. I have another set of knuckles at home that I may get shipped to me and take them to a machine shop to get reamed.
Inserts are dumb I say, just get the damn reamer
Also I forgot about track bar bolt clearance.. fucking bolt is in the way of the tie rod going to full lock... probably grind it to half height but I'm not sure how much that will get me.
Last edited by Jake on 7/1/2015, 8:10 pm; edited 1 time in total

Jake- Rausch Creek
- Posts : 323
Join date : 2013-05-19
Location : Beverly
 Re: Jake's 99 XJ continuing build
Oversized messed up holes:

On the plus side, autozone rents a sweet pitman arm puller:

Pitman arm hardly put up a fight.
Picked up two new knuckles at the jy and dropped them off with my pitman are and TRE's at a machine shop to have them reamed. This is not the cheap option but I need to be able to drive and I just want this shit done right.
If anyone is curious about tubing strength.. the guy from serious offroad was claiming higher strength in his kit which uses a smaller OD but greater wall thickness. I did some math to show that the OD makes a much bigger difference than wall thickness:
On the plus side, autozone rents a sweet pitman arm puller:
Pitman arm hardly put up a fight.
Picked up two new knuckles at the jy and dropped them off with my pitman are and TRE's at a machine shop to have them reamed. This is not the cheap option but I need to be able to drive and I just want this shit done right.
If anyone is curious about tubing strength.. the guy from serious offroad was claiming higher strength in his kit which uses a smaller OD but greater wall thickness. I did some math to show that the OD makes a much bigger difference than wall thickness:
me wrote:True that the Rufftuff kit requires more work, however unfortunately for me I have more time than money at the moment. Would definitely have ordered the Serious kit if it were the other way around.
As to tubing strength, I was bored (did I mention I have a lot of free time lol) so I did the calcs. Thicker wall != stronger tube in this case. At least in regards to bending, which I would think to be the main cause of failure for a steering application.
Higher moment of inertia = higher resistance to bending. The 1.5"x.25" wall tube is 1.8x as strong in bending as the 1.25"x.281" wall tube

Jake- Rausch Creek
- Posts : 323
Join date : 2013-05-19
Location : Beverly
 Re: Jake's 99 XJ continuing build
We have steering.. Gotta double check my toe but it's been driving fine the past couple days.


Jake- Rausch Creek
- Posts : 323
Join date : 2013-05-19
Location : Beverly
 Re: Jake's 99 XJ continuing build
Lookin good - who makes the steering? Much beefier than stock
Tonellin- Rausch Creek
- Posts : 313
Join date : 2013-01-08
Location : Medford
 Re: Jake's 99 XJ continuing build
This is the kit I went with: http://www.ruffstuffspecialties.com/catalog/YLINK.html. JCR and Serious Offroad sell complete steering setups using 1.25" od tube.

Jake- Rausch Creek
- Posts : 323
Join date : 2013-05-19
Location : Beverly
 Re: Jake's 99 XJ continuing build
Got started working on an EMT conduit roof rack this evening, so far I've only got the hoops bent. I began laying it out last night but I have some details to work out.
Idea is bending conduit and screwing together as much as possible, I think 1" thin wall steel tube will be a pretty good internal sleeve material to join the sections of 1" conduit. Material is cheap but its galvanized so I'd like to do as little welding as possible.
Ghetto 3ds xj model I brought into solidworks + some quick mockup:

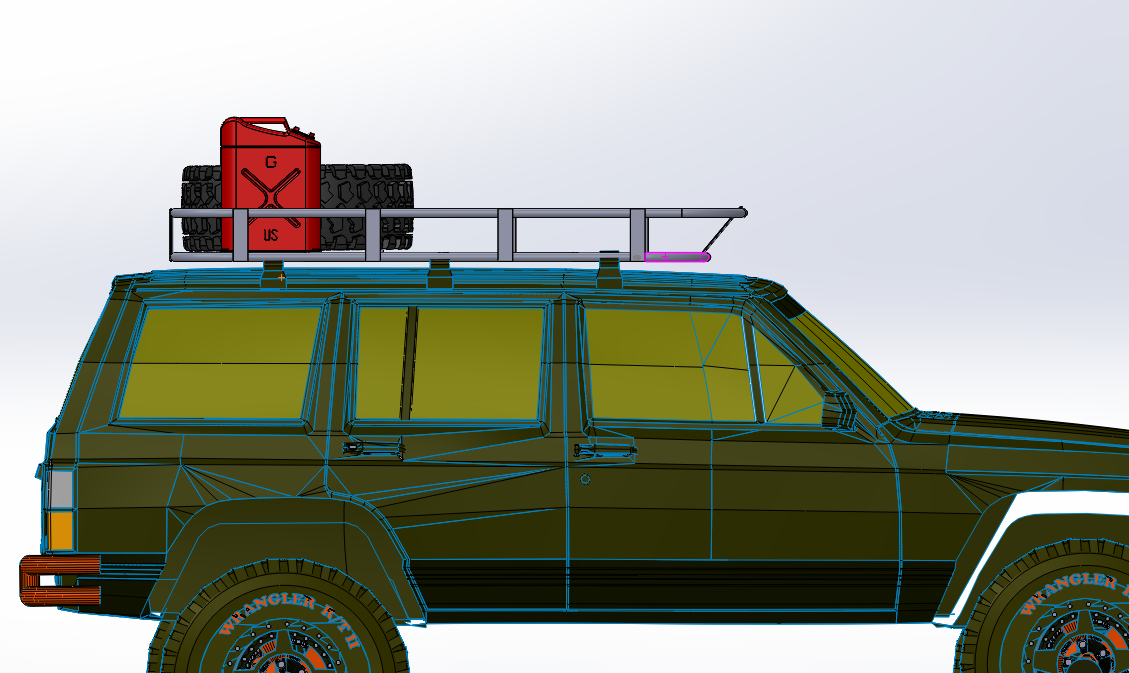

I'm going for a pre-runner style in the front. Not sure if I'll do an LED light bar or go with round lights, but it's wide enough for a 50" light bar. When I was down in Moab I got to see how bright the LED bars are, they're absurd. Those flat plates on the front are subject to change, maybe some curved round tube.
Also the floor setup I'm not sure on. I'm going to put the spare up there until I build my tire carrier bumper. I'd also like to be able to ratchet down jerry cans, coolers etc.
I also need to work out some DIY gutter mounts as the ones you can get from JCR etc. are too pricy.
Thoughts?
Idea is bending conduit and screwing together as much as possible, I think 1" thin wall steel tube will be a pretty good internal sleeve material to join the sections of 1" conduit. Material is cheap but its galvanized so I'd like to do as little welding as possible.
Ghetto 3ds xj model I brought into solidworks + some quick mockup:
I'm going for a pre-runner style in the front. Not sure if I'll do an LED light bar or go with round lights, but it's wide enough for a 50" light bar. When I was down in Moab I got to see how bright the LED bars are, they're absurd. Those flat plates on the front are subject to change, maybe some curved round tube.
Also the floor setup I'm not sure on. I'm going to put the spare up there until I build my tire carrier bumper. I'd also like to be able to ratchet down jerry cans, coolers etc.
I also need to work out some DIY gutter mounts as the ones you can get from JCR etc. are too pricy.
Thoughts?

Jake- Rausch Creek
- Posts : 323
Join date : 2013-05-19
Location : Beverly
 Re: Jake's 99 XJ continuing build
That looks like a solid rack. It's very similar to the one I have on my cherokee. Only the front isn't tilted forward. It's stable, really light, and it has actually been useful.
If you're going to mount your tire up there, make sure you do a mock run and drive with it on the rack strapped down, especially on the highway. When we went camping up in Maine, I actually had to stop, reposition the tire, and then keep driving because it felt so unstable. I think I mounted it more forward towards the middle to fix the problem, but I can't remember. Also, you can mount the tire with an old TJ spare tire carrier. Just bolt it on and then you're good!
If you're going to mount your tire up there, make sure you do a mock run and drive with it on the rack strapped down, especially on the highway. When we went camping up in Maine, I actually had to stop, reposition the tire, and then keep driving because it felt so unstable. I think I mounted it more forward towards the middle to fix the problem, but I can't remember. Also, you can mount the tire with an old TJ spare tire carrier. Just bolt it on and then you're good!

saxmanclay- Mall Crawler
- Posts : 79
Join date : 2011-12-10
Age : 36
Location : Hanson
 Re: Jake's 99 XJ continuing build
Thanks, the idea behind the larger front hoop is to provide mounting/protection for lights if/when I feel the need to add them, should have just thrown in the CAD to begin with but something like this:
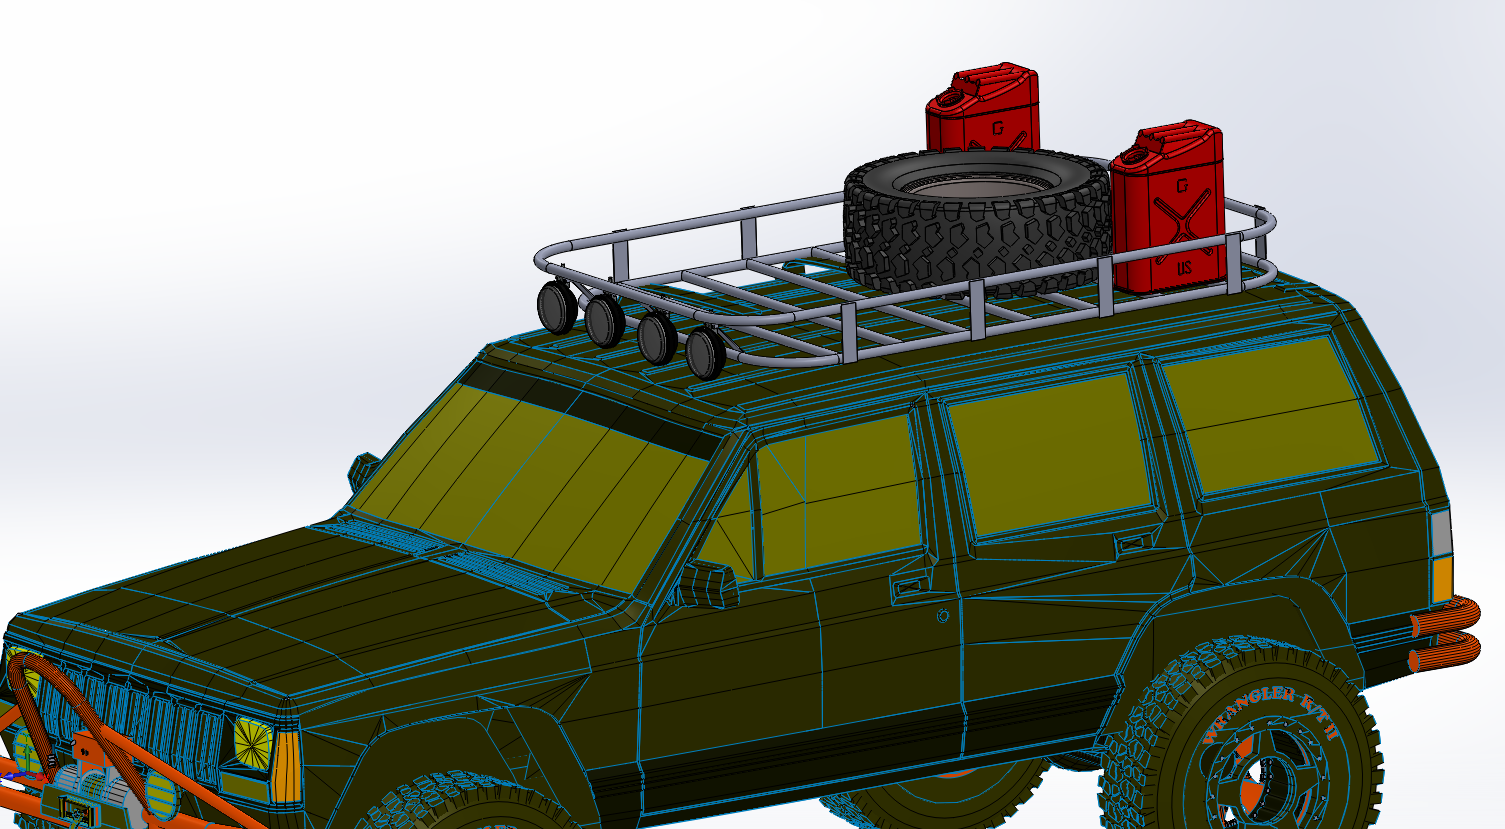
Thanks for the tip on the TJ carrier mount, I'll have to grab one at the JY.
Put some metal together last night, things are moving slowly but I'm happy with how my bends turned out:


Self tappers are fantastic as it turns out.
Thanks for the tip on the TJ carrier mount, I'll have to grab one at the JY.
Put some metal together last night, things are moving slowly but I'm happy with how my bends turned out:
Self tappers are fantastic as it turns out.

Jake- Rausch Creek
- Posts : 323
Join date : 2013-05-19
Location : Beverly
 Re: Jake's 99 XJ continuing build
Trying to decide what to use for the floor, any ideas? Probably end up being a bunch of 3/4 conduit.
Also anyone have good suggestions for inexpensive lighting? I might just leave it without anything for now and pick up an LED light bar down the line. I do need to put some metal on there though and if I end up with round lights I'll want to space the metal accordingly.

Jake- Rausch Creek
- Posts : 323
Join date : 2013-05-19
Location : Beverly
 Re: Jake's 99 XJ continuing build
Finally got it on my roof last night. Still a bit to be done but it's most of the way there.

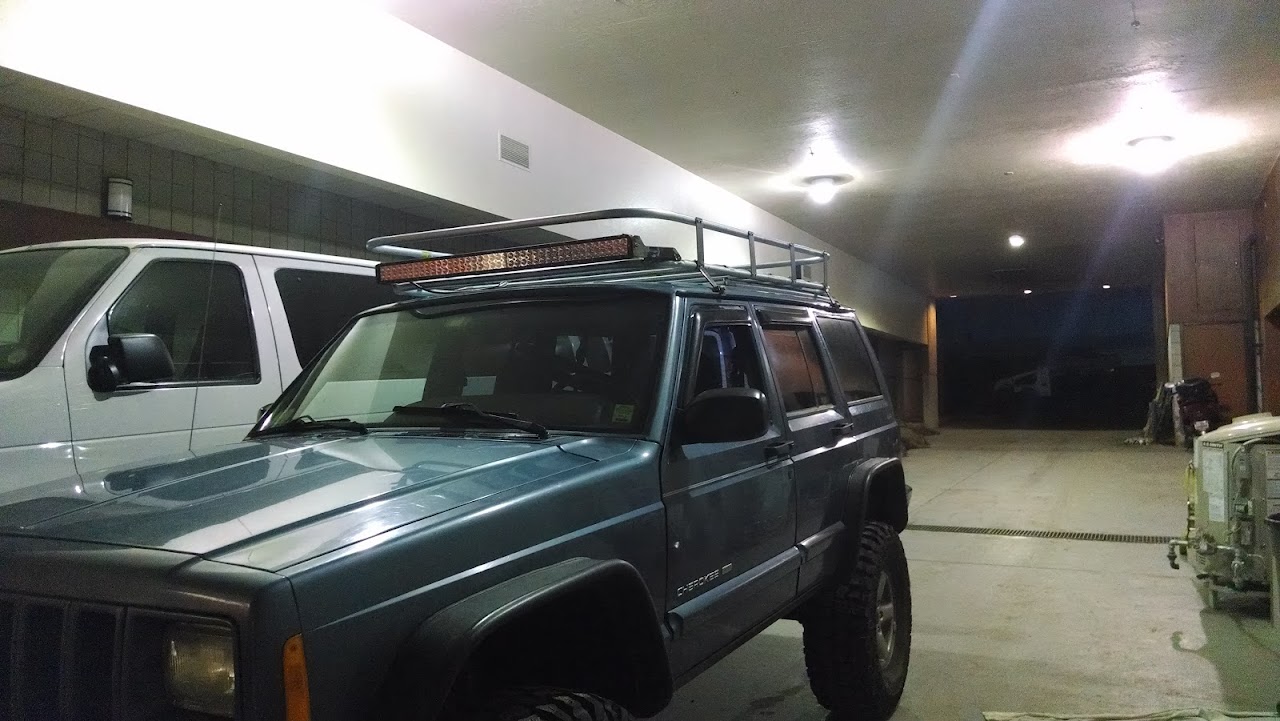
Mega washer stacks because I was too lazy to cut my hardware down last night, will be eliminating those. Also, fancy custom gutter mounts. By fancy I mean ghetto, but the rack is definitely not coming off without destroying the gutters. I would like to have done a total of 6 mounts but I ran out of stock, it does seem plenty strong though. Risers are 1.5x.25 bar stock bent and welded to the uprights on the rack as well as to the conduit. Drilled and tapped for 3/8-16 bolts.

Fancy custom light bar mounts.. would have like to have them a bit higher/centered between the top and bottom of the rack, but alas. Made from 1.5x.125 angle cut, bent and welded.

If I was doing it again I would definitely lower the top hoop of the rack by about an inch.
Any suggestions for a coating? I feel like generic rattle can paint will scrape right off as soon as I throw anything up there.
Total weight I'd estimate at ~50lbs or so. Total cost so far is about $65, not including the light bar obviously. Pretty happy as a comparable rack (albeit constructed with a lot more precision) is like $600 from JCR.
Mega washer stacks because I was too lazy to cut my hardware down last night, will be eliminating those. Also, fancy custom gutter mounts. By fancy I mean ghetto, but the rack is definitely not coming off without destroying the gutters. I would like to have done a total of 6 mounts but I ran out of stock, it does seem plenty strong though. Risers are 1.5x.25 bar stock bent and welded to the uprights on the rack as well as to the conduit. Drilled and tapped for 3/8-16 bolts.
Fancy custom light bar mounts.. would have like to have them a bit higher/centered between the top and bottom of the rack, but alas. Made from 1.5x.125 angle cut, bent and welded.
If I was doing it again I would definitely lower the top hoop of the rack by about an inch.
Any suggestions for a coating? I feel like generic rattle can paint will scrape right off as soon as I throw anything up there.
Total weight I'd estimate at ~50lbs or so. Total cost so far is about $65, not including the light bar obviously. Pretty happy as a comparable rack (albeit constructed with a lot more precision) is like $600 from JCR.

Jake- Rausch Creek
- Posts : 323
Join date : 2013-05-19
Location : Beverly
 Re: Jake's 99 XJ continuing build
Nice work! So those bolts just pinch the metal between the rain gutters? I would throw something with a little bit of substance down like that textured bedliner in a spray can

Tonellin- Rausch Creek
- Posts : 313
Join date : 2013-01-08
Location : Medford
 Re: Jake's 99 XJ continuing build
Yep, just clamps the gutter. I shook the whole jeep by holding the rack, no flex or displacement of the rack relative to the jeep.
Do you have any experience with the rattle can bed liner? I've never used it before but it does seem like it'd be much more durable than ordinary paint-- especially if its anywhere close to the legit bed liner I've seen.
Do you have any experience with the rattle can bed liner? I've never used it before but it does seem like it'd be much more durable than ordinary paint-- especially if its anywhere close to the legit bed liner I've seen.

Jake- Rausch Creek
- Posts : 323
Join date : 2013-05-19
Location : Beverly
 Re: Jake's 99 XJ continuing build
I've used rattle can bed liner a bunch, stuff works great. I've painted bumpers, brush bars, roof bars, and diff covers with it and had great success. I will say you need to make sure the surface you're painting is completely rust free or it starts to show signs of rust again real quick. The bumper I painted with it (about five years ago now) has been sitting exposed to the elements in my parents' back yard for at least two years and at last check was barely showing any signs of rust, and zero flaking/chipping whatsoever.
 Re: Jake's 99 XJ continuing build
Sweet, do you by any chance remember what brand you used?

Jake- Rausch Creek
- Posts : 323
Join date : 2013-05-19
Location : Beverly
 Re: Jake's 99 XJ continuing build
98% done, pretty happy with it. Just have to paint my clamps and cut down my clamp hardware. And figure out how to retrofit the half complete factory fog light harness so I can use the factory switch.
Welded all the uprights and its rock solid now. Finally started making some decent welds to the conduit as well:


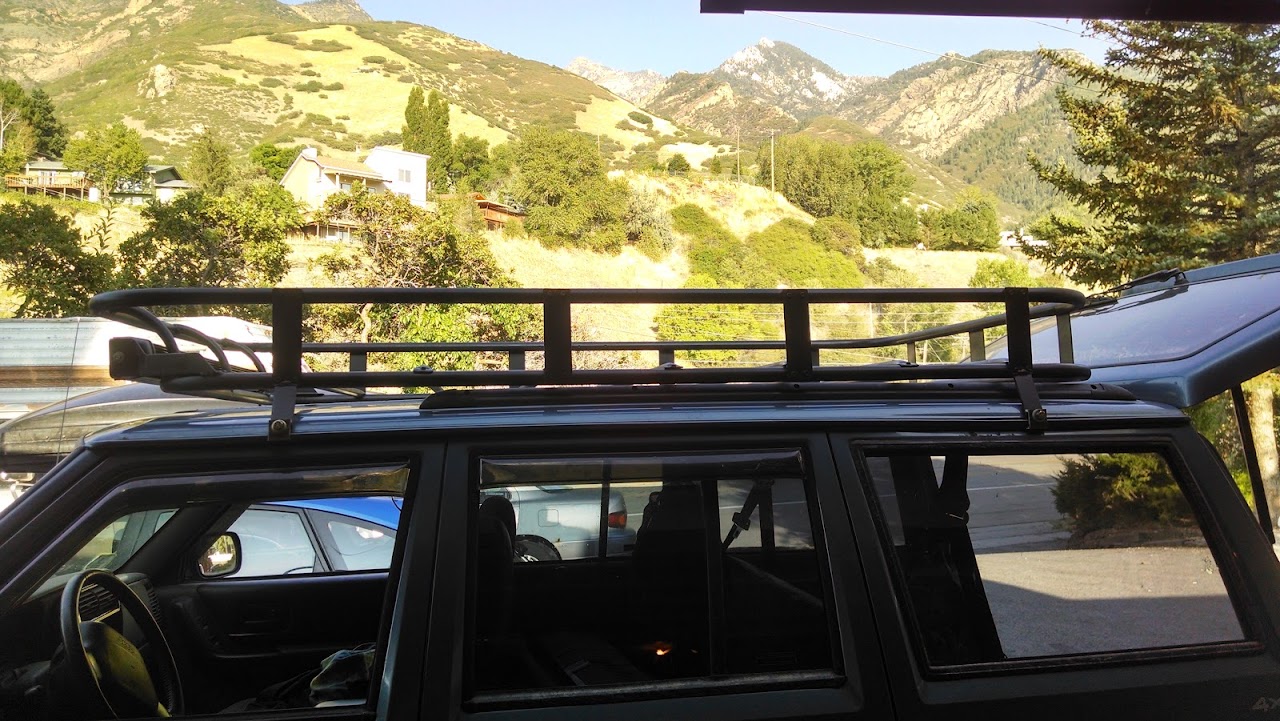
Welded all the uprights and its rock solid now. Finally started making some decent welds to the conduit as well:

Jake- Rausch Creek
- Posts : 323
Join date : 2013-05-19
Location : Beverly
Page 7 of 7 •  1, 2, 3, 4, 5, 6, 7
Page 7 of 7
Permissions in this forum:
You cannot reply to topics in this forum|
|
|

 Home
Home
