
 Portal
TJ's ZJ Build
+6
Mark
THOOPY3
Andrew Miller
Ryan McKee
CrawlingForward
desertzj
10 posters
Page 3 of 5
Page 3 of 5 •  1, 2, 3, 4, 5
 ![]()
Re: TJ's ZJ Build
![]() Jake 2/23/2014, 8:43 pm
Jake 2/23/2014, 8:43 pm
Nice!
Is there a convenient JY donor for that double cardan shaft? Cherokee's are convenient, the front shaft is what you run in the back after installing an SYE. Pretty nice having the same shaft front and back.
Is there a convenient JY donor for that double cardan shaft? Cherokee's are convenient, the front shaft is what you run in the back after installing an SYE. Pretty nice having the same shaft front and back.
Jake- Rausch Creek
- Posts : 323
Join date : 2013-05-19
Location : Beverly
Re: TJ's ZJ Build
![]() desertzj 2/23/2014, 9:31 pm
desertzj 2/23/2014, 9:31 pm
hobhayward wrote:Nice!
Is there a convenient JY donor for that double cardan shaft? Cherokee's are convenient, the front shaft is what you run in the back after installing an SYE. Pretty nice having the same shaft front and back.
hard to say, then again for 80 bucks for all the parts and a friend that knows how to do it, probably worth the money vs getting a jy that could go out who knows when.
desertzj- Rausch Creek
- Posts : 311
Join date : 2013-04-29
Age : 33
Location : Norwood
Re: TJ's ZJ Build
![]() Jake 2/23/2014, 10:03 pm
Jake 2/23/2014, 10:03 pm
Ooh I misinterpreted, bad u joints in the double cardan? For some reason I thought you were swapping a different shaft in.
Not sure if you already have u-joints but I've purchased from this ebay seller a couple times: http://www.ebay.com/itm/NEW-DANA-DRIVESHAFT-U-JOINT-1310-SERIES-NON-GREASEABLE-5-1310X-PAIR-/181323724021?pt=Motors_Car_Truck_Parts_Accessories&vxp=mtr&hash=item2a37bc74f5
Seemed to have the best prices I could find at the time.
You may want to replace the centering ball at the same time, not too hard, but a little different than u-joints. I couldn't find much info on the centering ball before I did it, but I did find this: http://www.flickr.com/photos/lurkzilla/sets/72157623731595964/ which was really helpful, nice to have a step by step pictorial. As to the part number on that, I completely forget but I couldn't find the spicer part, had to use a neapco part which advance auto carries.
Jake- Rausch Creek
- Posts : 323
Join date : 2013-05-19
Location : Beverly
Re: TJ's ZJ Build
![]() Ryan McKee 2/25/2014, 4:24 pm
Ryan McKee 2/25/2014, 4:24 pm
If you get a JY DS and have new joints pressed, take it to Montrose Machine Shop in Wakefield. They're the best locally to press joints. Did my DS for $25, and my front axle shafts for $30.
Ryan McKee- Admin
- Posts : 1242
Join date : 2011-12-09
Location : Reading, MA -

Re: TJ's ZJ Build
![]() Mark 2/26/2014, 6:44 am
Mark 2/26/2014, 6:44 am
Great price for the rebuild kit.
http://www.dennysdriveshaft.com/p1079_jeep_cv_rebuild_kit_1310_series_includes_spicer_211355x_cent.html
http://www.stu-offroad.com/axle/driveshaft/driveshaft-5.htm
Check these sites out,, you can do it yourself.
http://www.dennysdriveshaft.com/p1079_jeep_cv_rebuild_kit_1310_series_includes_spicer_211355x_cent.html
http://www.stu-offroad.com/axle/driveshaft/driveshaft-5.htm
Check these sites out,, you can do it yourself.
Mark- Rubicon Trail
- Posts : 1300
Join date : 2011-12-10
Location : Haverhill, MA
Re: TJ's ZJ Build
![]() CrawlingForward 2/26/2014, 1:23 pm
CrawlingForward 2/26/2014, 1:23 pm
Btw, if it's just u-joints and not the centering ball or double-cardan joint, you can totally do the u-joints yourself. It's not the black magic everyone makes it out to be.
Use the hammer and socket method, not the press. It's easier, faster, and you're not going to end up bending a yoke if it's rusty. Hammer and socket are what the guys at Montrose are going to do anyhow.
Just grab one socket big enough that the yoke can rest on it so the cap can fall into it, and one just *slightly* smaller than the cap to pound on.
Remove the snap rings by tapping a flat-blade screwdriver undernearth them and then using pliers to squeeze them out.
Pound on the one side until the cap pokes through sufficiently on the other side to get a vice-grip on it and twist it out.
Then pound on the other (now without cap) side of the u-joint (I usually use a socket extension for that part) until you can twist that side out.
Voila! U-joint out.
To put back in, remove all the caps (being careful not to jar them too much and disturb the needle bearings. Put one cap in the yoke and slip the cross back in it to keep the needle bearings in place when you pound it.
Hammer the cap until it's still got a little sticking above the yoke, then do the same for the other side, keeping the cross in both caps to keep the needle bearings secure.
One they're both in to just a bit exposed and the cross in both, moving freely, then just alternate whacking on the two sides until they're *just* in far enough to insert the new snap rings. (I sometimes put the snap rings in before they can seat, and then tap on the snap rings till they seat).
Voila! A smooth, easy-moving, brand new u-joint! Plus the satisfaction of having done it yourself, saving money, and knowing you could easily do it on the trail if you needed to.
Much smoother than you're going to get with a vice, and the pounding sudden force on a rusty joint works much better than constant pressure from a vice for breaking that contact point loose.
It's probably easier to understand watching a youtube video, but it really is pretty easy.
Oh, and get greasable. That maintenance-free crap burns out the second you get into water and you'll have to do it all over again.

CrawlingForward- Moab Dessert
- Posts : 822
Join date : 2011-12-09
Age : 38
Location : Flushing, MI -
Re: TJ's ZJ Build
![]() Jake 2/26/2014, 2:04 pm
Jake 2/26/2014, 2:04 pm
Add to that that you should mark the caps/cross so you don't mix the caps up-supposedly they're matched.
And the double cardan is really not too bad. I did mine about 6 months ago with no prior experience, definitely took about 3 times as long as it would take me to do another one though. I went with the vise method, you do need a sizable vise though.
And the double cardan is really not too bad. I did mine about 6 months ago with no prior experience, definitely took about 3 times as long as it would take me to do another one though. I went with the vise method, you do need a sizable vise though.
Jake- Rausch Creek
- Posts : 323
Join date : 2013-05-19
Location : Beverly
Re: TJ's ZJ Build
![]() CrawlingForward 2/26/2014, 2:10 pm
CrawlingForward 2/26/2014, 2:10 pm
hobhayward wrote:Add to that that you should mark the caps/cross so you don't mix the caps up-supposedly they're matched.
Wait...really? I've always just put them back on randomly on the 5 or so I've done.
However, those have mostly been 1310s on the front driveshaft. On the rear driveshaft matching up to the 8.8 there are two different size caps, so you have to make sure you keep track with those. (Damn Ford, screwing everything up)
CrawlingForward- Moab Dessert
- Posts : 822
Join date : 2011-12-09
Age : 38
Location : Flushing, MI -
Re: TJ's ZJ Build
![]() Jake 2/26/2014, 3:18 pm
Jake 2/26/2014, 3:18 pm
Yeah I just looked it up, I guess it's a matter of the lube in the cap. Only matters for non-greasable I guess.
That being said, if you can't access the zerk, you're better off non-greasable because they last much longer than an ungreased greasable joint.
That being said, if you can't access the zerk, you're better off non-greasable because they last much longer than an ungreased greasable joint.
Jake- Rausch Creek
- Posts : 323
Join date : 2013-05-19
Location : Beverly
Re: TJ's ZJ Build
![]() Mark 2/27/2014, 9:26 am
Mark 2/27/2014, 9:26 am
hobhayward wrote:Yeah I just looked it up, I guess it's a matter of the lube in the cap. Only matters for non-greasable I guess.
That being said, if you can't access the zerk, you're better off non-greasable because they last much longer than an ungreased greasable joint.
I agree, my factory front shaft lasted 200k plus miles and after i rebuilt it it did not last 50k,,, and i used genuine spicer parts.
Mark- Rubicon Trail
- Posts : 1300
Join date : 2011-12-10
Location : Haverhill, MA
desertzj- Rausch Creek
- Posts : 311
Join date : 2013-04-29
Age : 33
Location : Norwood
Re: TJ's ZJ Build
![]() desertzj 3/2/2014, 5:59 pm
desertzj 3/2/2014, 5:59 pm
so found a 242 t case at the jy that is behind a 5.2 and same year of production (mines a 95 with a tcase made in 94 and new one is a 94) so it will bolt up to my tranny with no adjustments needed. Thinking about picking that up to swap in (vc is starting to show signs of wear, but not bad since I rolled 200k yesterday).
desertzj- Rausch Creek
- Posts : 311
Join date : 2013-04-29
Age : 33
Location : Norwood
Re: TJ's ZJ Build
![]() Jake 3/2/2014, 9:11 pm
Jake 3/2/2014, 9:11 pm
Nice! How does the 242 compare to the 249? I'm a fan of the 242 cause that's what's in my xj and the full time 4hi makes a huge difference in variable on road conditions. But obviously you're used to awd..
Jake- Rausch Creek
- Posts : 323
Join date : 2013-05-19
Location : Beverly
Re: TJ's ZJ Build
![]() desertzj 3/2/2014, 9:14 pm
desertzj 3/2/2014, 9:14 pm
I love the 249 but the vc goes out (one time replacement type thing) but if it's a dd and you lock the front it's annoying. 249 had a thicker chain and is stronger but hangs down lower. So trade offs all around. I would love a 231 but they're expensivehobhayward wrote:Nice! How does the 242 compare to the 249? I'm a fan of the 242 cause that's what's in my xj and the full time 4hi makes a huge difference in variable on road conditions. But obviously you're used to awd..
desertzj- Rausch Creek
- Posts : 311
Join date : 2013-04-29
Age : 33
Location : Norwood
Re: TJ's ZJ Build
![]() Jake 3/2/2014, 9:29 pm
Jake 3/2/2014, 9:29 pm
Ah yea, with an autolocker I assume you mean? Didn't even think about that.
Jake- Rausch Creek
- Posts : 323
Join date : 2013-05-19
Location : Beverly
Re: TJ's ZJ Build
![]() desertzj 3/2/2014, 9:31 pm
desertzj 3/2/2014, 9:31 pm
Yea. And replacing the vc is about 300 bucks where as a new tcase is usually 150 to 250 depending on where you get ithobhayward wrote:Ah yea, with an autolocker I assume you mean? Didn't even think aboutthat.
desertzj- Rausch Creek
- Posts : 311
Join date : 2013-04-29
Age : 33
Location : Norwood
Re: TJ's ZJ Build
![]() desertzj 3/8/2014, 9:44 pm
desertzj 3/8/2014, 9:44 pm
well found a tcase that hopefully is set up perfectly so i dont have to do the half case swap, we'll see. Was talkin to a jeep buddy the other day and started looking at cost of new ds (thinking about how mine is pretty close to the end of it's length on this lift) and am considering spending the extra 50-100 and ordering a custom DS from carolina DS.
desertzj- Rausch Creek
- Posts : 311
Join date : 2013-04-29
Age : 33
Location : Norwood
Re: TJ's ZJ Build
![]() desertzj 3/18/2014, 5:20 pm
desertzj 3/18/2014, 5:20 pm
So good news on a few accounts
A) got that damn engine shake taken care of. Replaced wires and plugs and it's pretty much gone. Motor mount is still shot so waiting to order those, new DS is on the way (cost me 50 extra to just get a custom made DS so I went for it)
B)talkin to guy about an 8.8. he wants too much for it so going to try and talk him down and get him to weld on the brackets for me
desertzj- Rausch Creek
- Posts : 311
Join date : 2013-04-29
Age : 33
Location : Norwood
Re: TJ's ZJ Build
![]() desertzj 3/20/2014, 5:15 pm
desertzj 3/20/2014, 5:15 pm
well that esclated quickly lol.
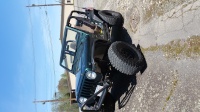
turned out I ended up buying a set of pro comp a/t's 33x12.5 off a guy rims and all with about 40% tread left. Turns out a guy wants to swap my 31 a/t's for his 32 pro comp m/t's straight up (his are brand new) so I said wth why not and said lets make the deal. Figure I can either sell those or if I decide I want those on the nicer rims swap them off and then sell everything else off.
So long story short, if anyone wants some black waggy wheels or some 33" a/t's or 32" m/t's let me know haha
desertzj- Rausch Creek
- Posts : 311
Join date : 2013-04-29
Age : 33
Location : Norwood
Re: TJ's ZJ Build
![]() CrawlingForward 3/21/2014, 12:49 pm
CrawlingForward 3/21/2014, 12:49 pm
Ha ha, love it when those kind of deals happen.
In terms of the motor mounts, have you decided which ones you're getting yet? Rubber vs. polypro? I've heard nothing but praise (except for the price) of Brown Dog Motor Mounts, but I haven't ordered mine yet either.
In terms of the motor mounts, have you decided which ones you're getting yet? Rubber vs. polypro? I've heard nothing but praise (except for the price) of Brown Dog Motor Mounts, but I haven't ordered mine yet either.
CrawlingForward- Moab Dessert
- Posts : 822
Join date : 2011-12-09
Age : 38
Location : Flushing, MI -
Re: TJ's ZJ Build
![]() desertzj 3/21/2014, 6:25 pm
desertzj 3/21/2014, 6:25 pm
CrawlingForward wrote:Ha ha, love it when those kind of deals happen.
In terms of the motor mounts, have you decided which ones you're getting yet? Rubber vs. polypro? I've heard nothing but praise (except for the price) of Brown Dog Motor Mounts, but I haven't ordered mine yet either.
I haven't heard of them I'll have to look into them
edit: they don't make zj...sad day
desertzj- Rausch Creek
- Posts : 311
Join date : 2013-04-29
Age : 33
Location : Norwood
desertzj- Rausch Creek
- Posts : 311
Join date : 2013-04-29
Age : 33
Location : Norwood


desertzj- Rausch Creek
- Posts : 311
Join date : 2013-04-29
Age : 33
Location : Norwood
Re: TJ's ZJ Build
![]() dongalonga 3/28/2014, 3:24 pm
dongalonga 3/28/2014, 3:24 pm
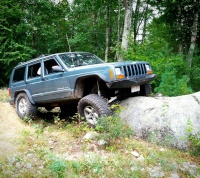
Man they don't give you much room for tires in those wheel wells.

dongalonga- Rubicon Trail
- Posts : 1047
Join date : 2012-03-20
Age : 40
Location : Lowell, MA
Re: TJ's ZJ Build
![]() desertzj 3/28/2014, 3:30 pm
desertzj 3/28/2014, 3:30 pm
trimming is in order. that's for sure. shaun was kind of enough to possibly help me out with that. so more room will be there.
desertzj- Rausch Creek
- Posts : 311
Join date : 2013-04-29
Age : 33
Location : Norwood
Page 3 of 5 • 1, 2, 3, 4, 5 ![]()
Page 3 of 5
Permissions in this forum:
You cannot reply to topics in this forum|
|
|